> ## Documentation Index
> Fetch the complete documentation index at: https://domoinc-openapi-sync-dataflows.mintlify.site/llms.txt
> Use this file to discover all available pages before exploring further.
# Applying CSS to Domo Card Images in the Campaigns App
export const InlineImage = ({src, alt = '', height = '1.6em'}) => {
return  ;
};
## Intro
You can apply CSS styling to cards embedded in the email body of your campaigns. This article describes the process.
To learn more about creating a campaign, see our article on the [Domo Campaigns App](http://domo-support.domo.com/s/article/360042933494).
### Known Limitations
The following are known limitations of this feature.
* Supported components include:
* cards
* You can only add one CSS class per component
* Adding the class tag to the following card fields makes no change to the card's styling:
* Title
* Summary Number
* Description
* Alert
* Comment
* Unsubscribe
* Adding the CSS tag to the fields listed above does not generate an error, but the tag is not added in the HTML node.
## Adding CSS to a Card
1. In the Campaigns app, select a campaign to open it.
2. In the
**Email Body** tab, locate the **Email Body Editor**.
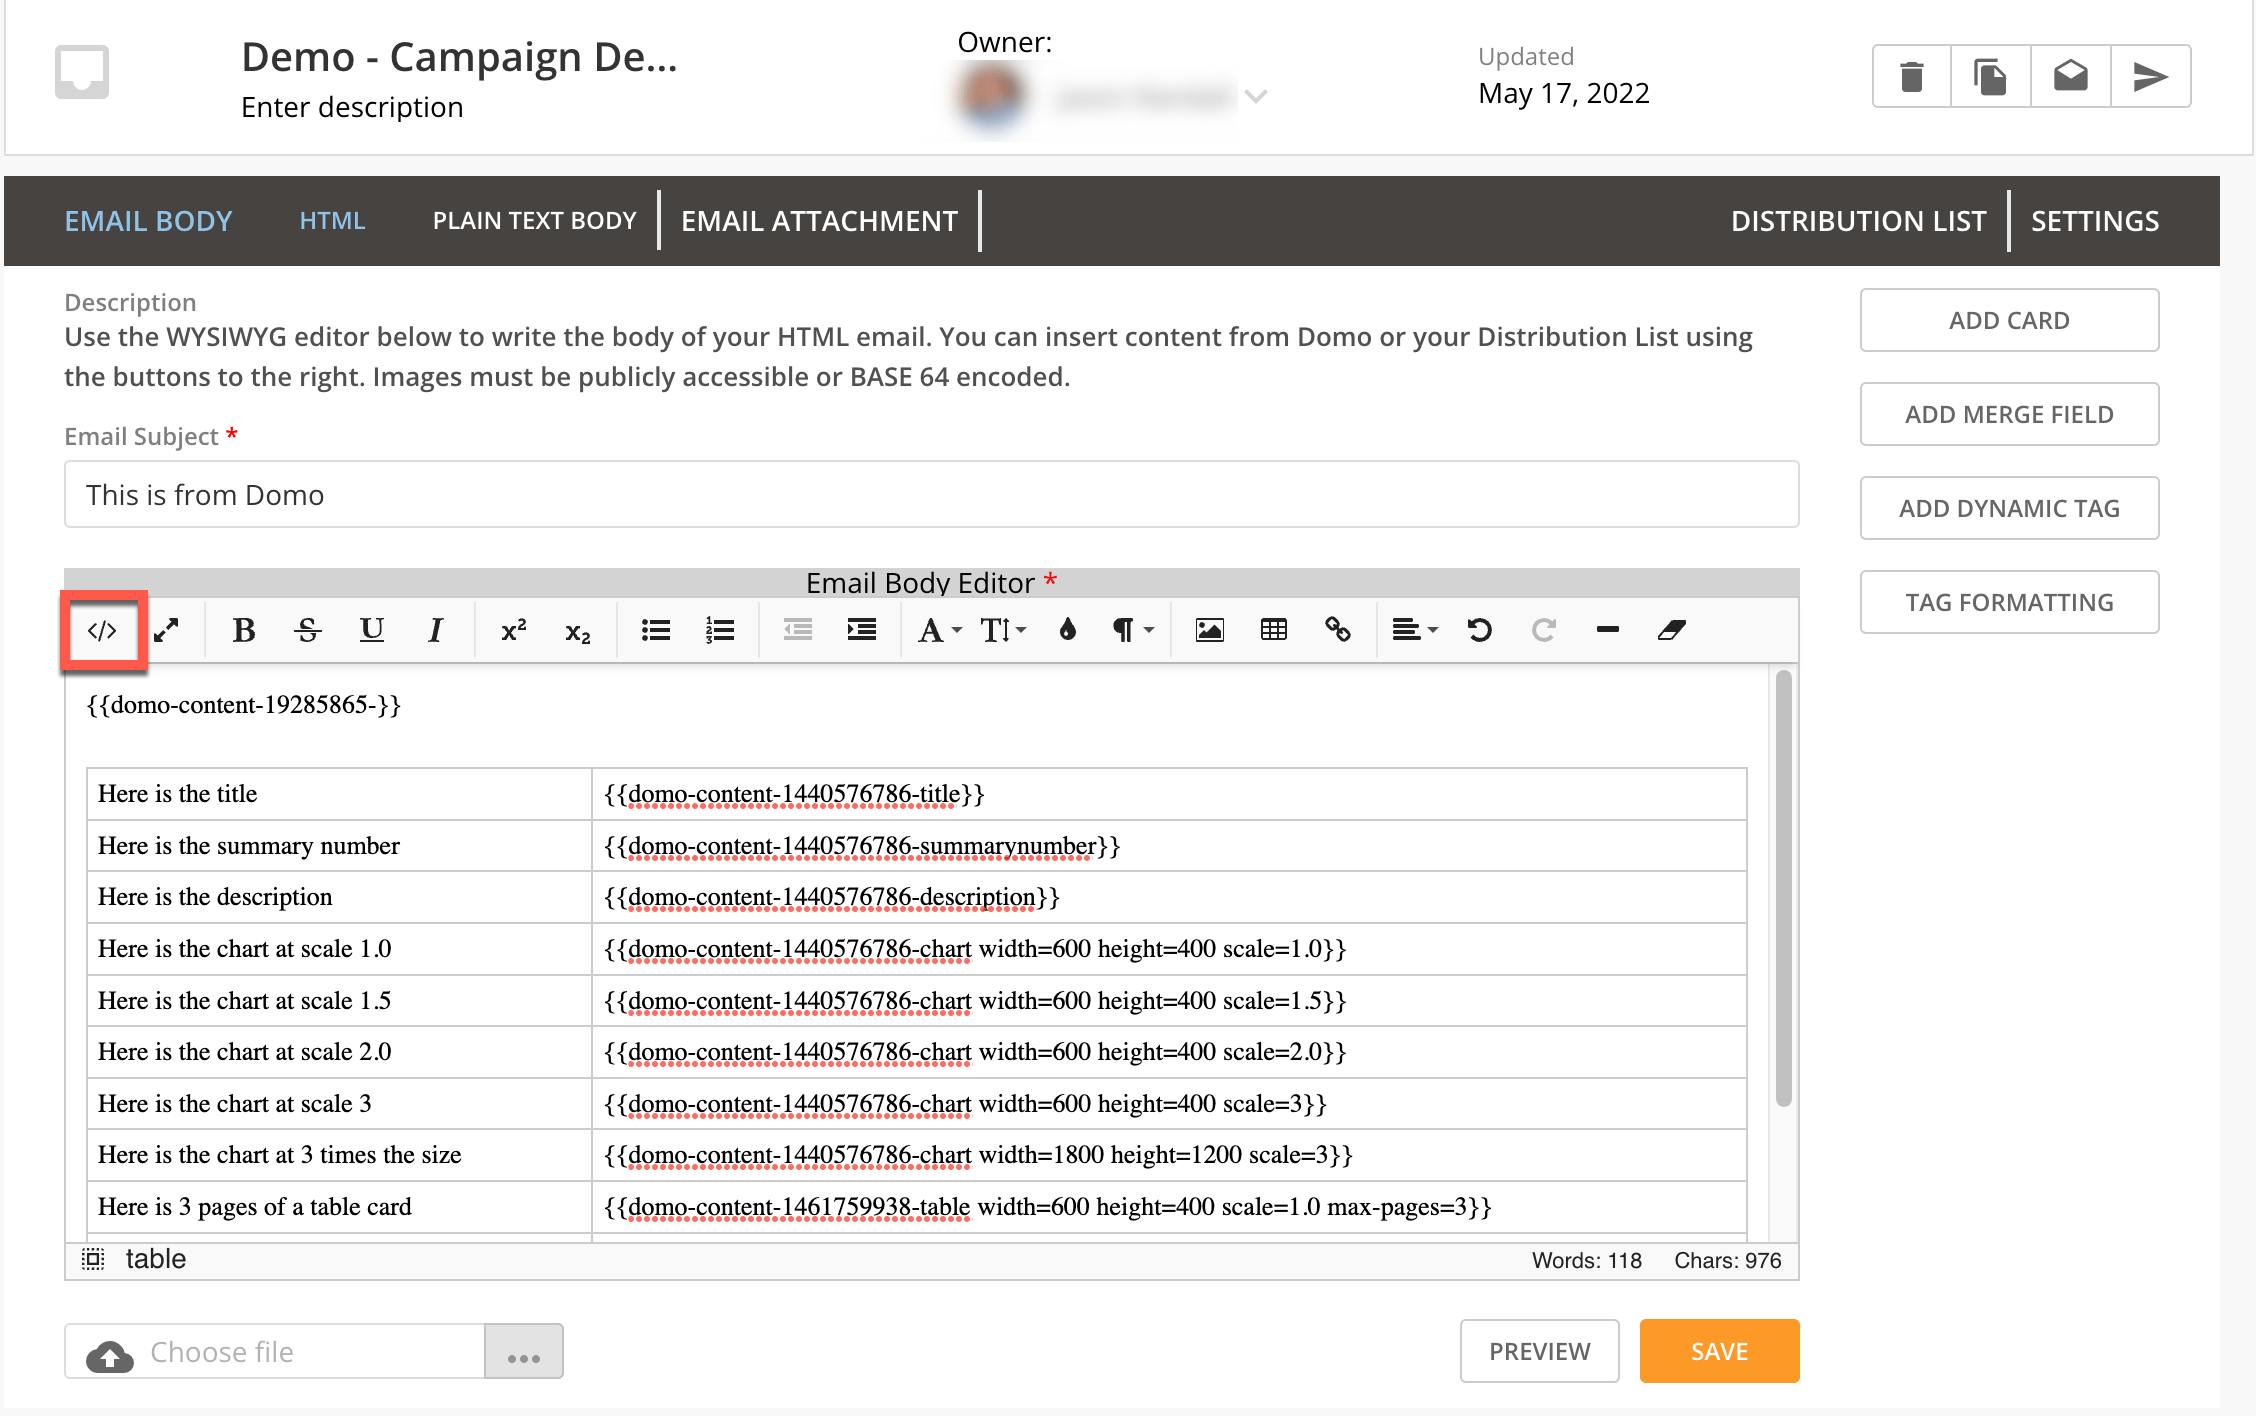
3. Switch to HTML mode by selecting
**Change mode** in the toolbar.
;
};
## Intro
You can apply CSS styling to cards embedded in the email body of your campaigns. This article describes the process.
To learn more about creating a campaign, see our article on the [Domo Campaigns App](http://domo-support.domo.com/s/article/360042933494).
### Known Limitations
The following are known limitations of this feature.
* Supported components include:
* cards
* You can only add one CSS class per component
* Adding the class tag to the following card fields makes no change to the card's styling:
* Title
* Summary Number
* Description
* Alert
* Comment
* Unsubscribe
* Adding the CSS tag to the fields listed above does not generate an error, but the tag is not added in the HTML node.
## Adding CSS to a Card
1. In the Campaigns app, select a campaign to open it.
2. In the
**Email Body** tab, locate the **Email Body Editor**.
3. Switch to HTML mode by selecting
**Change mode** in the toolbar.
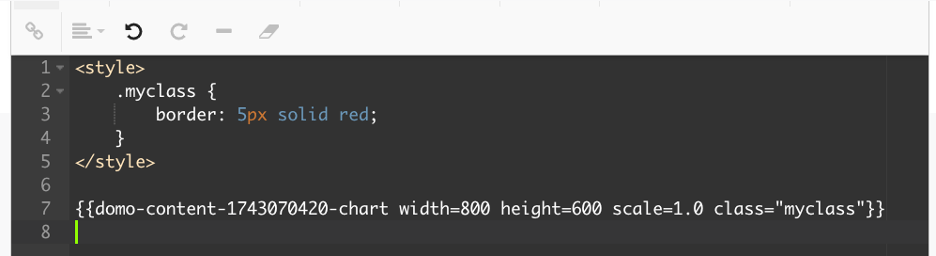
 4. Add an HTML style tag at the top of the editor: \
6. Select
**Add Card** to add a card to the email.
7. Edit the card tag and add a class tag followed by the name of your custom class.
4. Add an HTML style tag at the top of the editor: \
6. Select
**Add Card** to add a card to the email.
7. Edit the card tag and add a class tag followed by the name of your custom class.
 8. Select
**Save** to save your changes.
When the card is rendered, the CSS class is applied to the component.
8. Select
**Save** to save your changes.
When the card is rendered, the CSS class is applied to the component.