> ## Documentation Index
> Fetch the complete documentation index at: https://domoinc-openapi-sync-dataflows.mintlify.site/llms.txt
> Use this file to discover all available pages before exploring further.
# Forms
export const InlineImage = ({src, alt = '', height = '1.6em'}) => {
return  ;
};
**Note:** All functionality described in this article is available to customers in a consumption agreement.
* Forms in App Studio are not available in non-consumption agreements.
* If you are in a non-consumption agreement and Workflows is enabled for your instance, you can use Forms in Workflows.
### Intro
Domo Forms allows you to create, edit, and manage reusable forms inside Domo products like [Workflows](https://domo-support.domo.com/s/article/000005108) and [App Studio](/s/article/000005295).
**Important:** Forms only exist within a single app or a single version of a workflow. You can copy a form from another app or workflow version that you have access to, or use a form multiple times in the same app/same workflow version, but you cannot use the same form across apps, workflows, or workflow versions.
***
### Grants & Permissions
Forms do not require specific grants or permissions. Forms in App Studio apps and workflows are automatically shared with people who can access the app or workflow.
### Forms in App Studio
Forms can only belong to one app.
* You can't use the same form in multiple apps.
* You can use the same form across multiple pages of an app or multiple times on the same page.
* You can copy a form from one app to use in another app.
# Add a Form to an App
Follow these steps to add a form to an app. To learn more about App Studio, see the [overview](/s/article/000005295).
1. Open the App Studio editor and go to **Add actions and elements**.
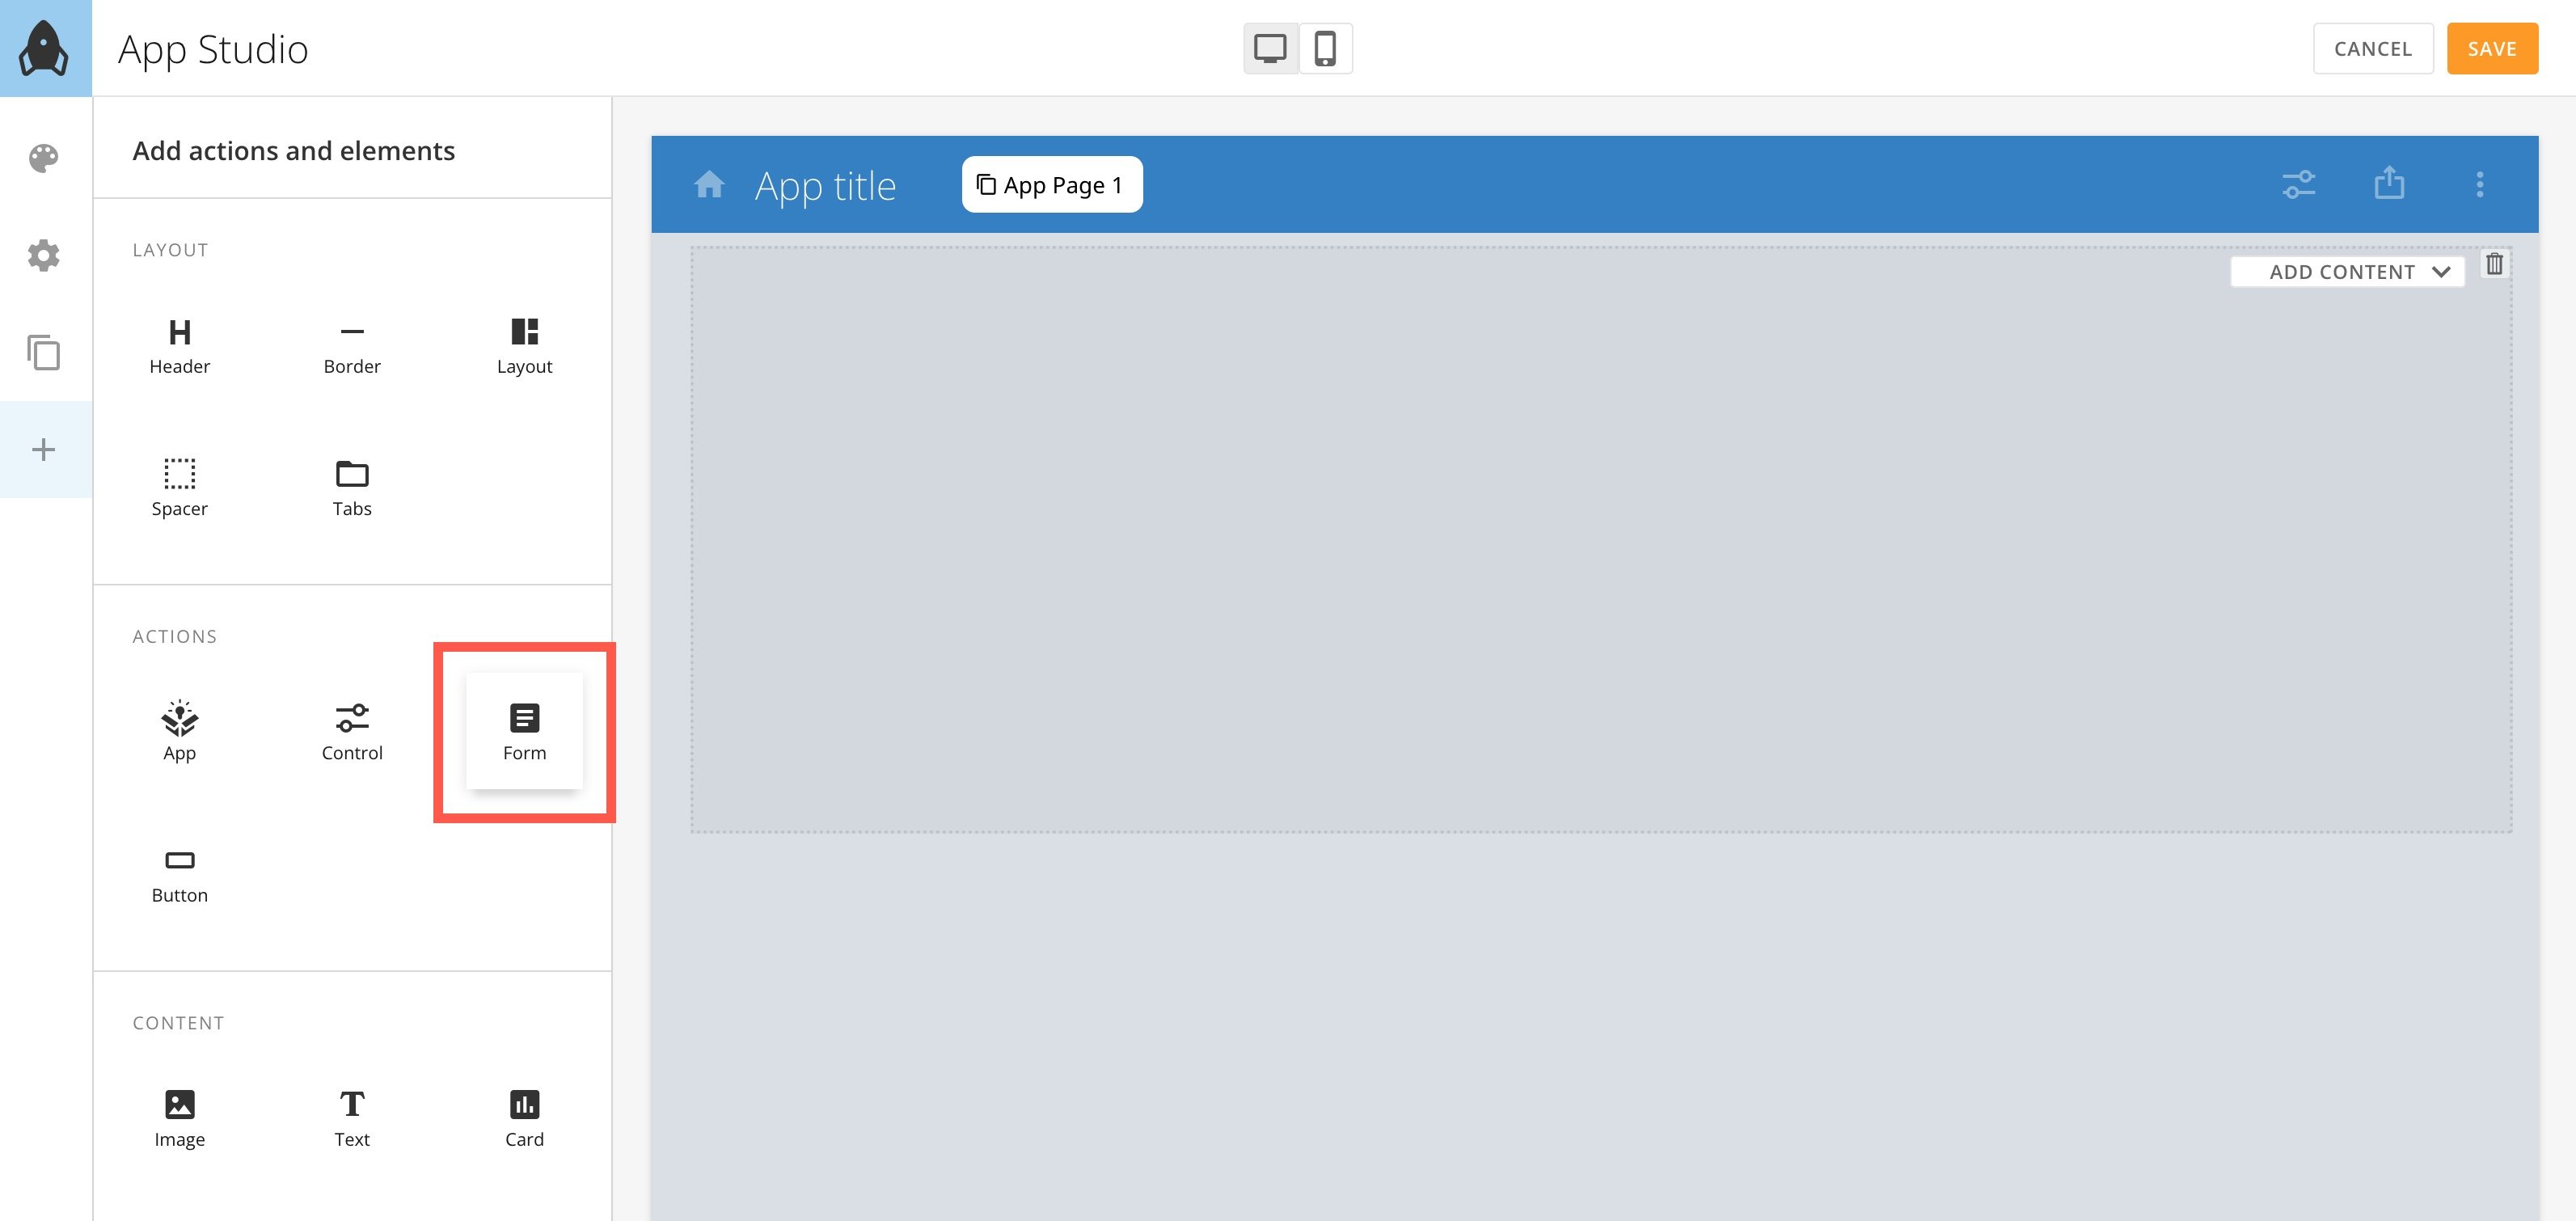
2. Drag a **Form** onto the canvas and select the form.
;
};
**Note:** All functionality described in this article is available to customers in a consumption agreement.
* Forms in App Studio are not available in non-consumption agreements.
* If you are in a non-consumption agreement and Workflows is enabled for your instance, you can use Forms in Workflows.
### Intro
Domo Forms allows you to create, edit, and manage reusable forms inside Domo products like [Workflows](https://domo-support.domo.com/s/article/000005108) and [App Studio](/s/article/000005295).
**Important:** Forms only exist within a single app or a single version of a workflow. You can copy a form from another app or workflow version that you have access to, or use a form multiple times in the same app/same workflow version, but you cannot use the same form across apps, workflows, or workflow versions.
***
### Grants & Permissions
Forms do not require specific grants or permissions. Forms in App Studio apps and workflows are automatically shared with people who can access the app or workflow.
### Forms in App Studio
Forms can only belong to one app.
* You can't use the same form in multiple apps.
* You can use the same form across multiple pages of an app or multiple times on the same page.
* You can copy a form from one app to use in another app.
# Add a Form to an App
Follow these steps to add a form to an app. To learn more about App Studio, see the [overview](/s/article/000005295).
1. Open the App Studio editor and go to **Add actions and elements**.
2. Drag a **Form** onto the canvas and select the form.
 The **Add a form** modal displays.
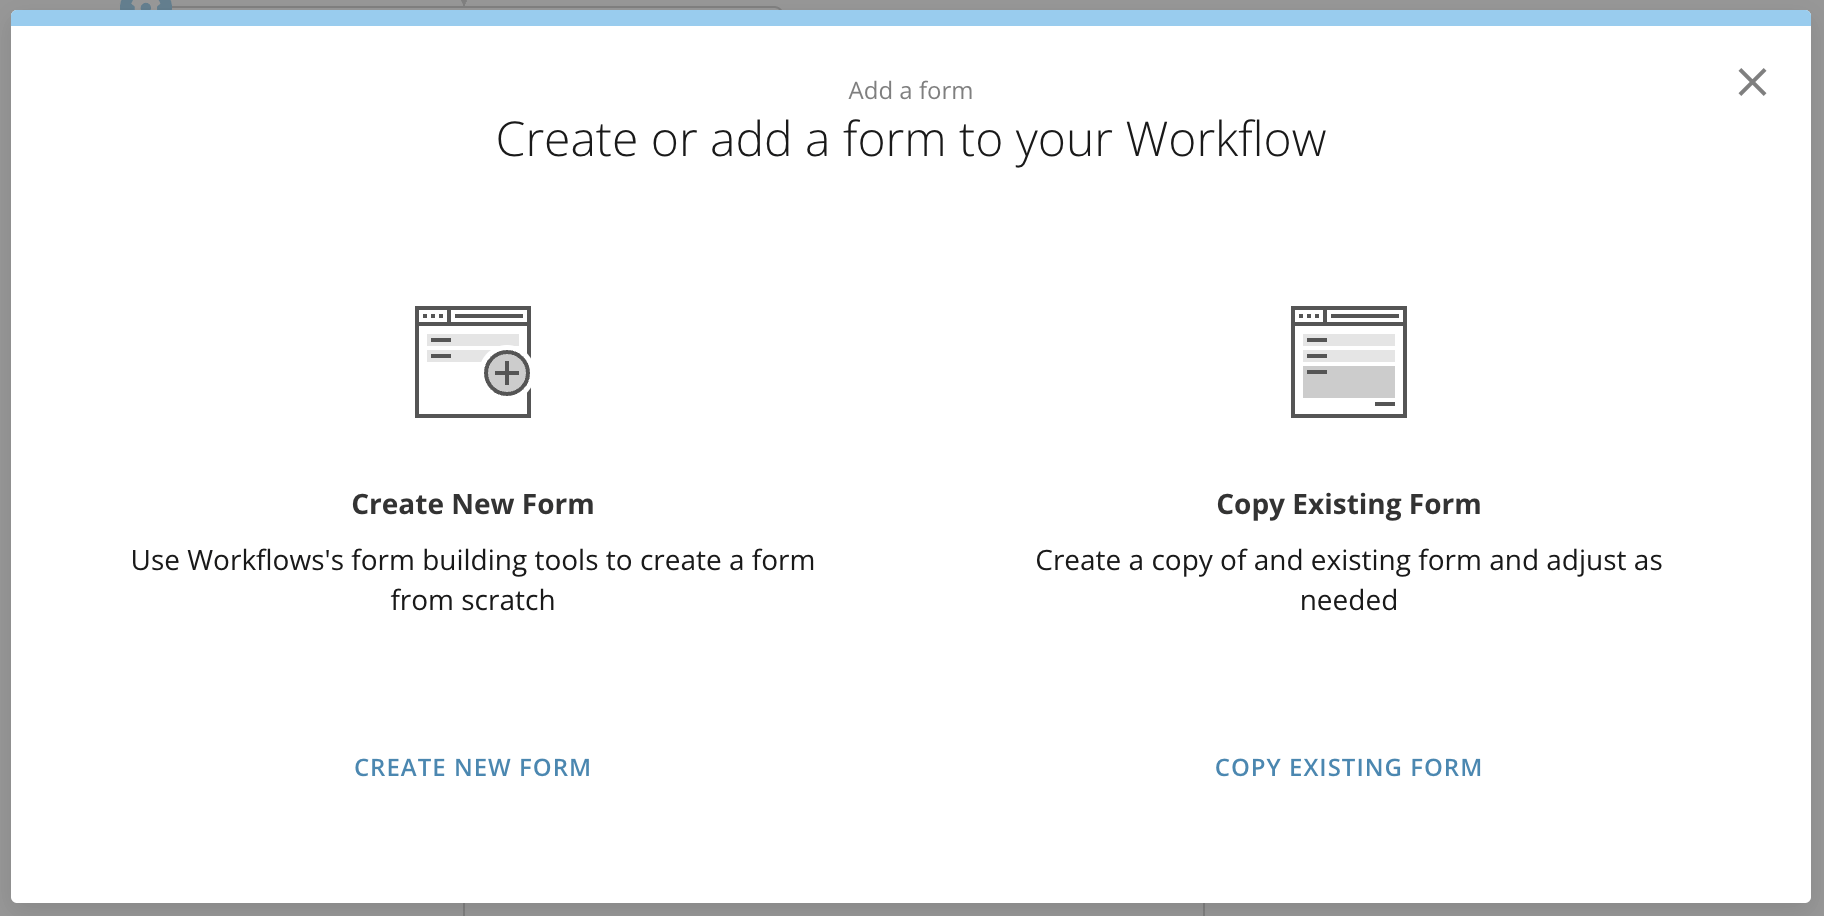 3. Choose one of the following:
* **Create New Form —** Opens the [form editor](#form_edit_modal).
* **Copy Existing Form —** Allows you to search for an existing form by name.
* If the form is already in use in this app, you can choose to reuse it. New responses are written to the existing response DataSet. (The word "Copy" is added to the form name.)
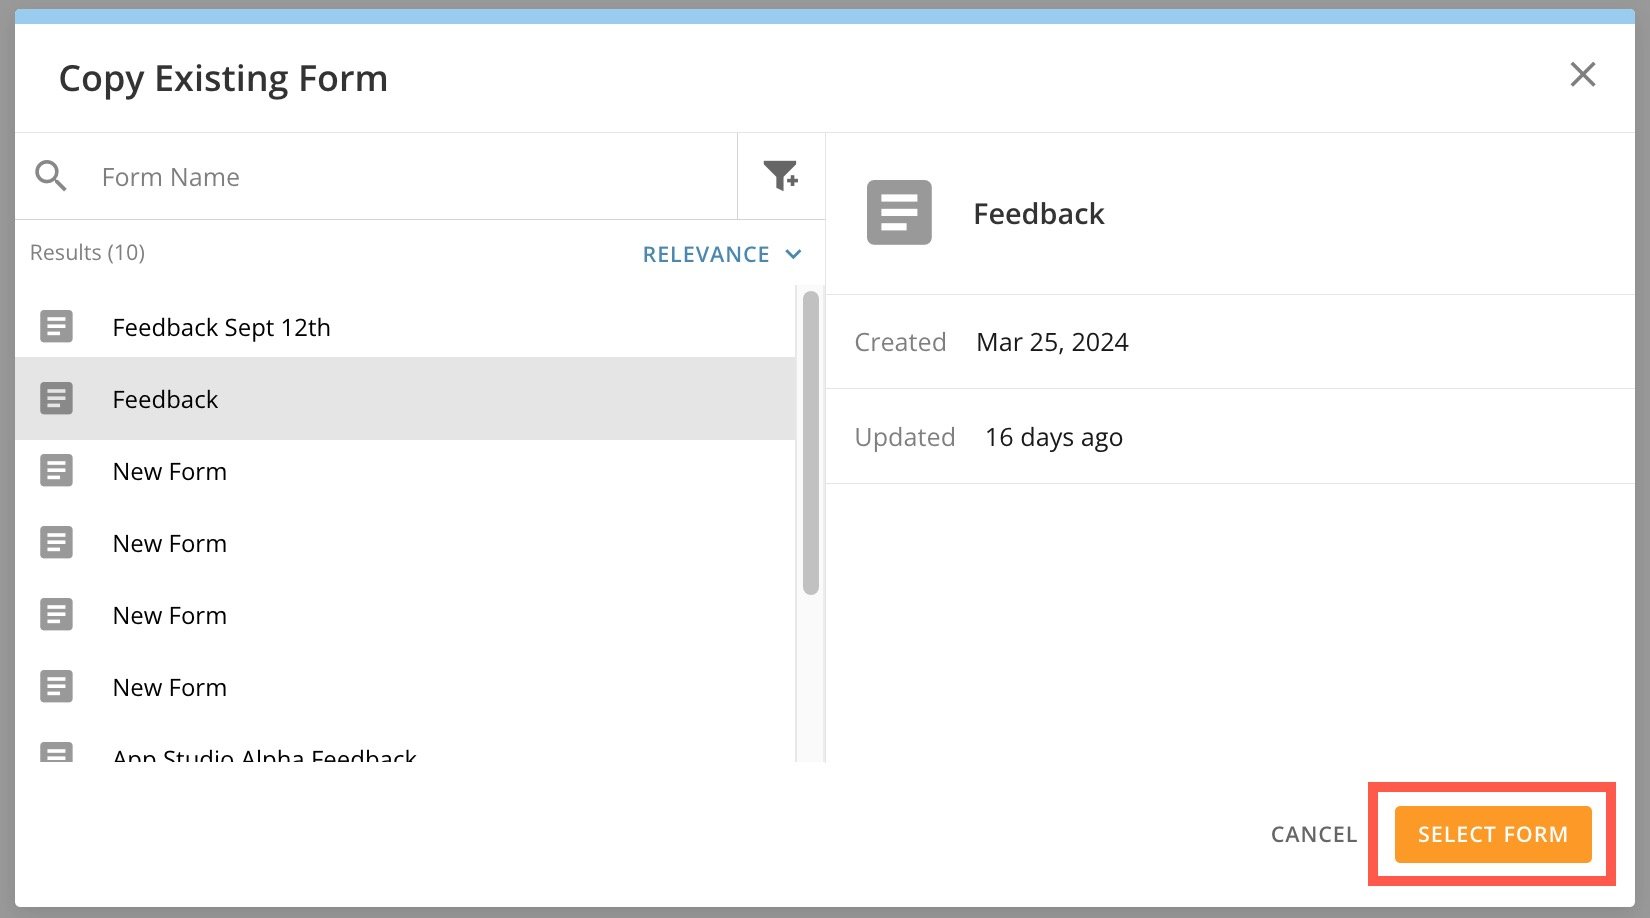
* If the existing form is not in use in this app, you can duplicate it. A new DataSet is created to receive responses from this copy of the form. Learn more about [forms in App Studio](#forms_in_app_studio).\
After locating and reviewing the form, choose **Select Form** to display the form on the App Studio page.
3. Choose one of the following:
* **Create New Form —** Opens the [form editor](#form_edit_modal).
* **Copy Existing Form —** Allows you to search for an existing form by name.
* If the form is already in use in this app, you can choose to reuse it. New responses are written to the existing response DataSet. (The word "Copy" is added to the form name.)
* If the existing form is not in use in this app, you can duplicate it. A new DataSet is created to receive responses from this copy of the form. Learn more about [forms in App Studio](#forms_in_app_studio).\
After locating and reviewing the form, choose **Select Form** to display the form on the App Studio page.
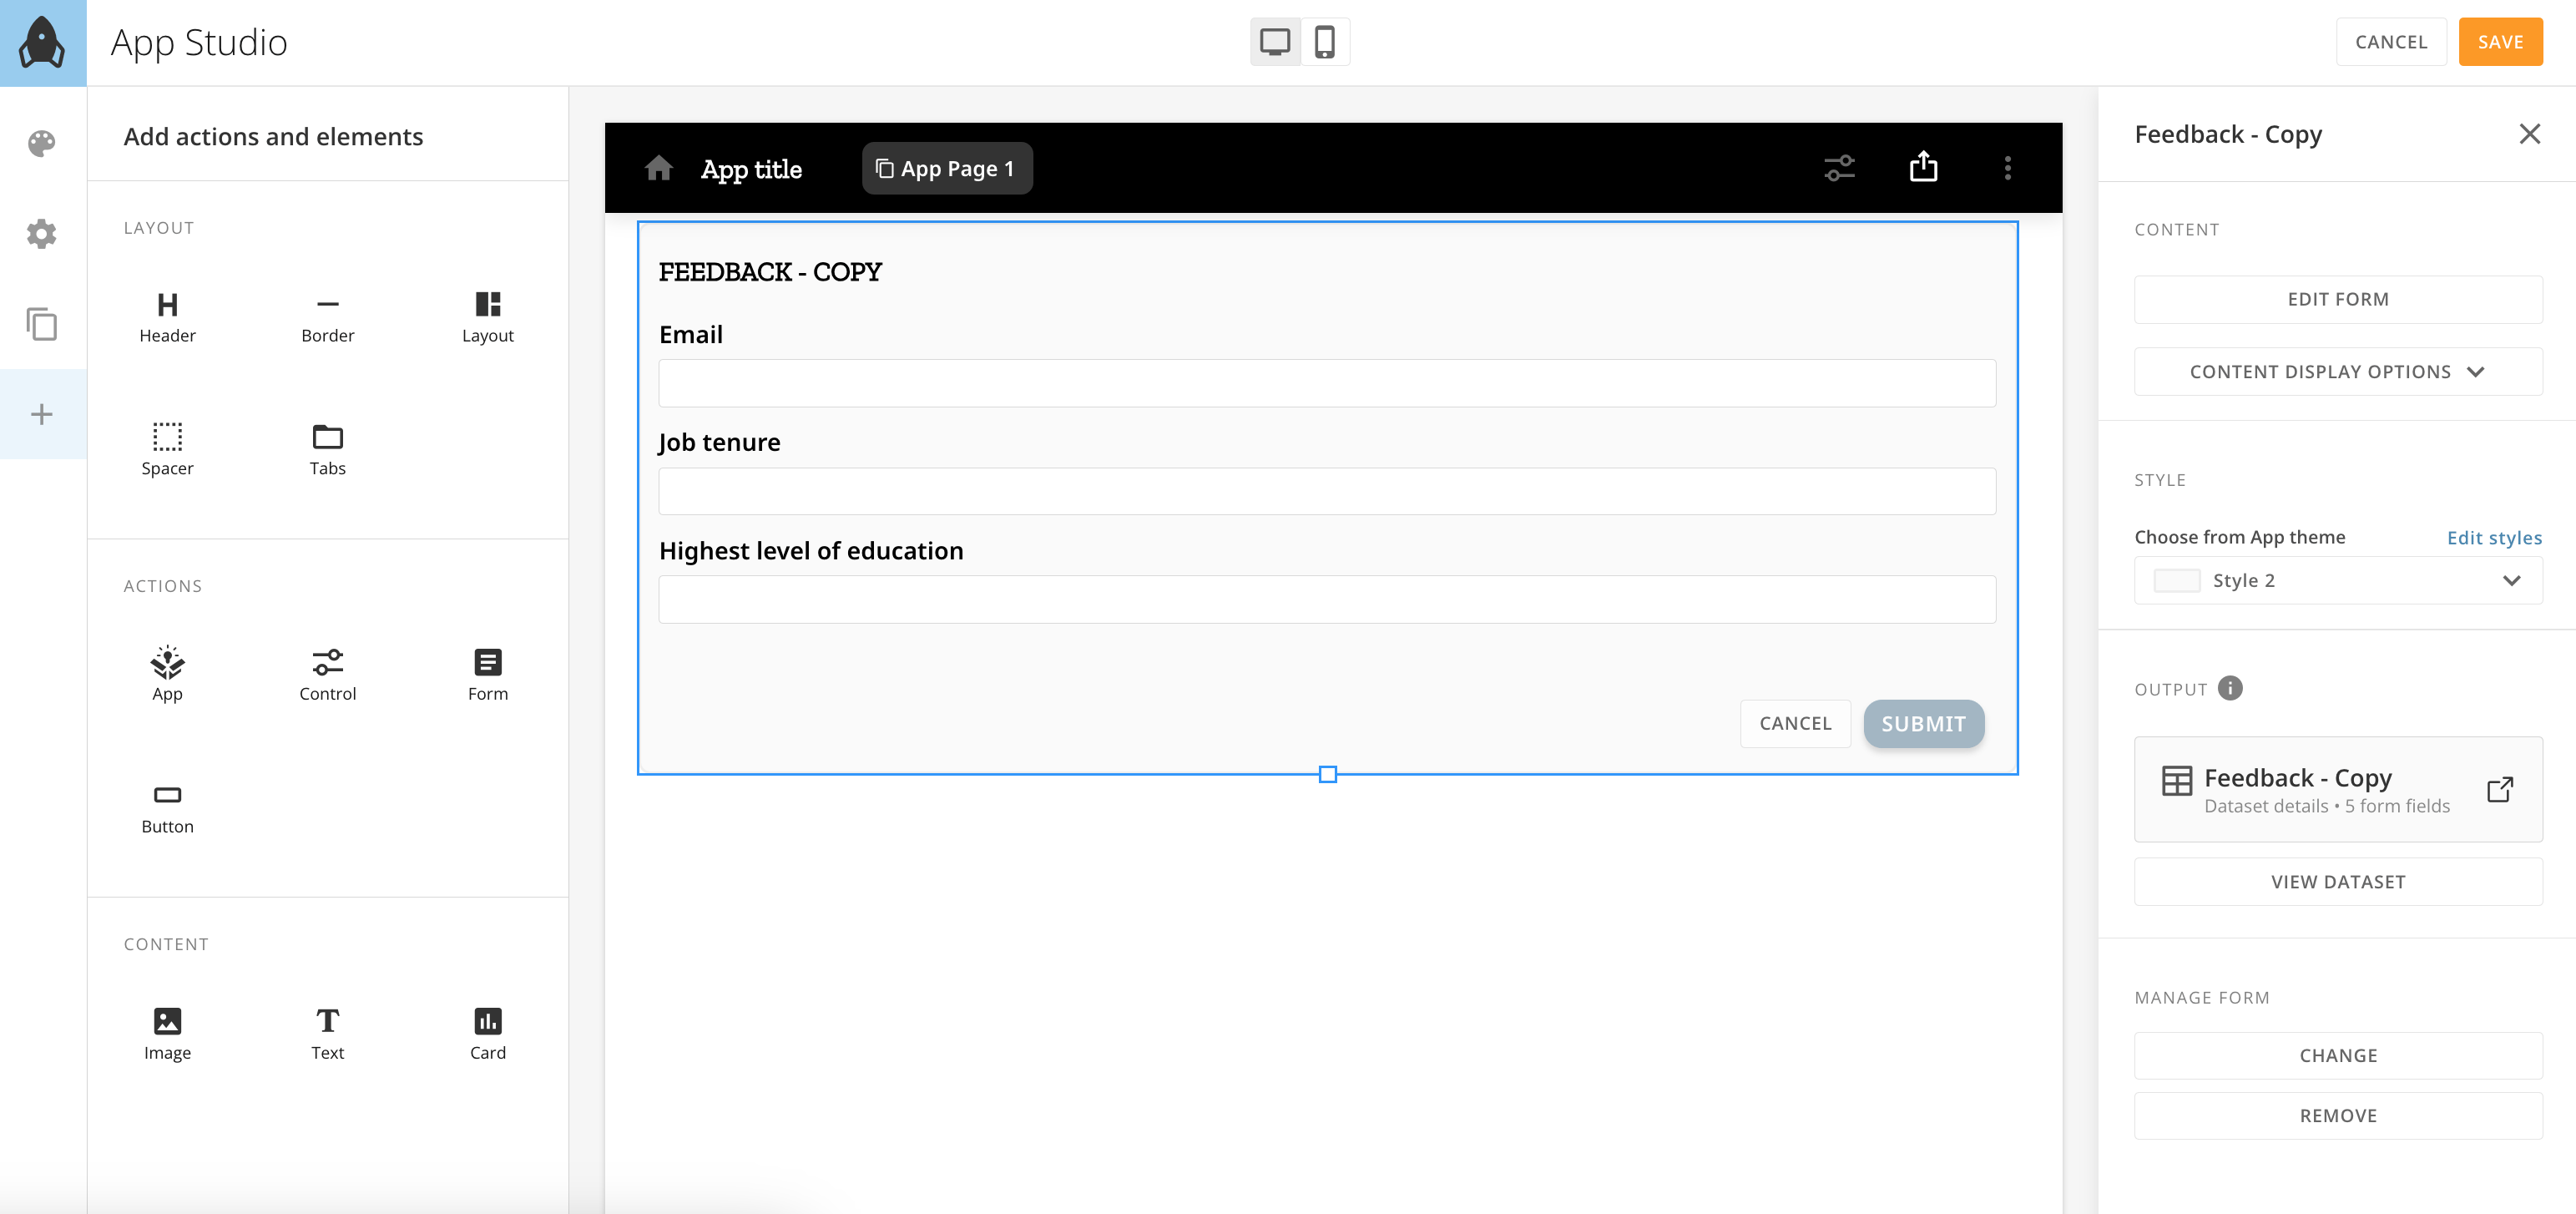
 Select the form to open the configuration panel to the right of the page. See [Edit a Form in App Studio](#edit_form_in_an_app) to learn how to customize the form copy.
 # Edit a Form in App Studio
Open the App Studio editor and select the form you want to edit.
The form configuration panel displays to the right of the form.
# Edit a Form in App Studio
Open the App Studio editor and select the form you want to edit.
The form configuration panel displays to the right of the form.
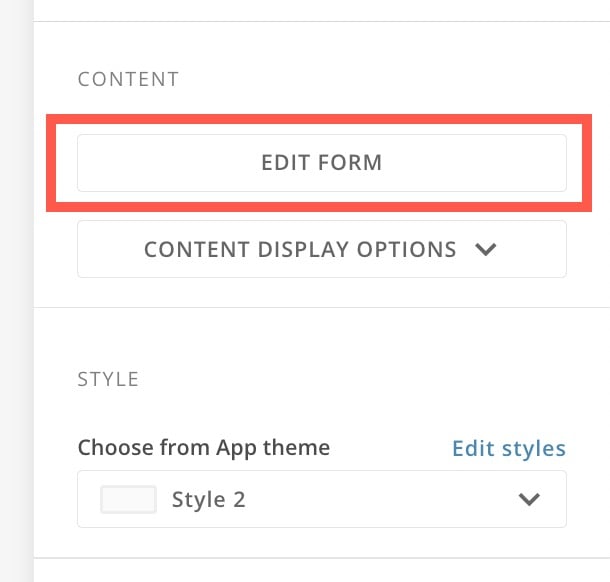
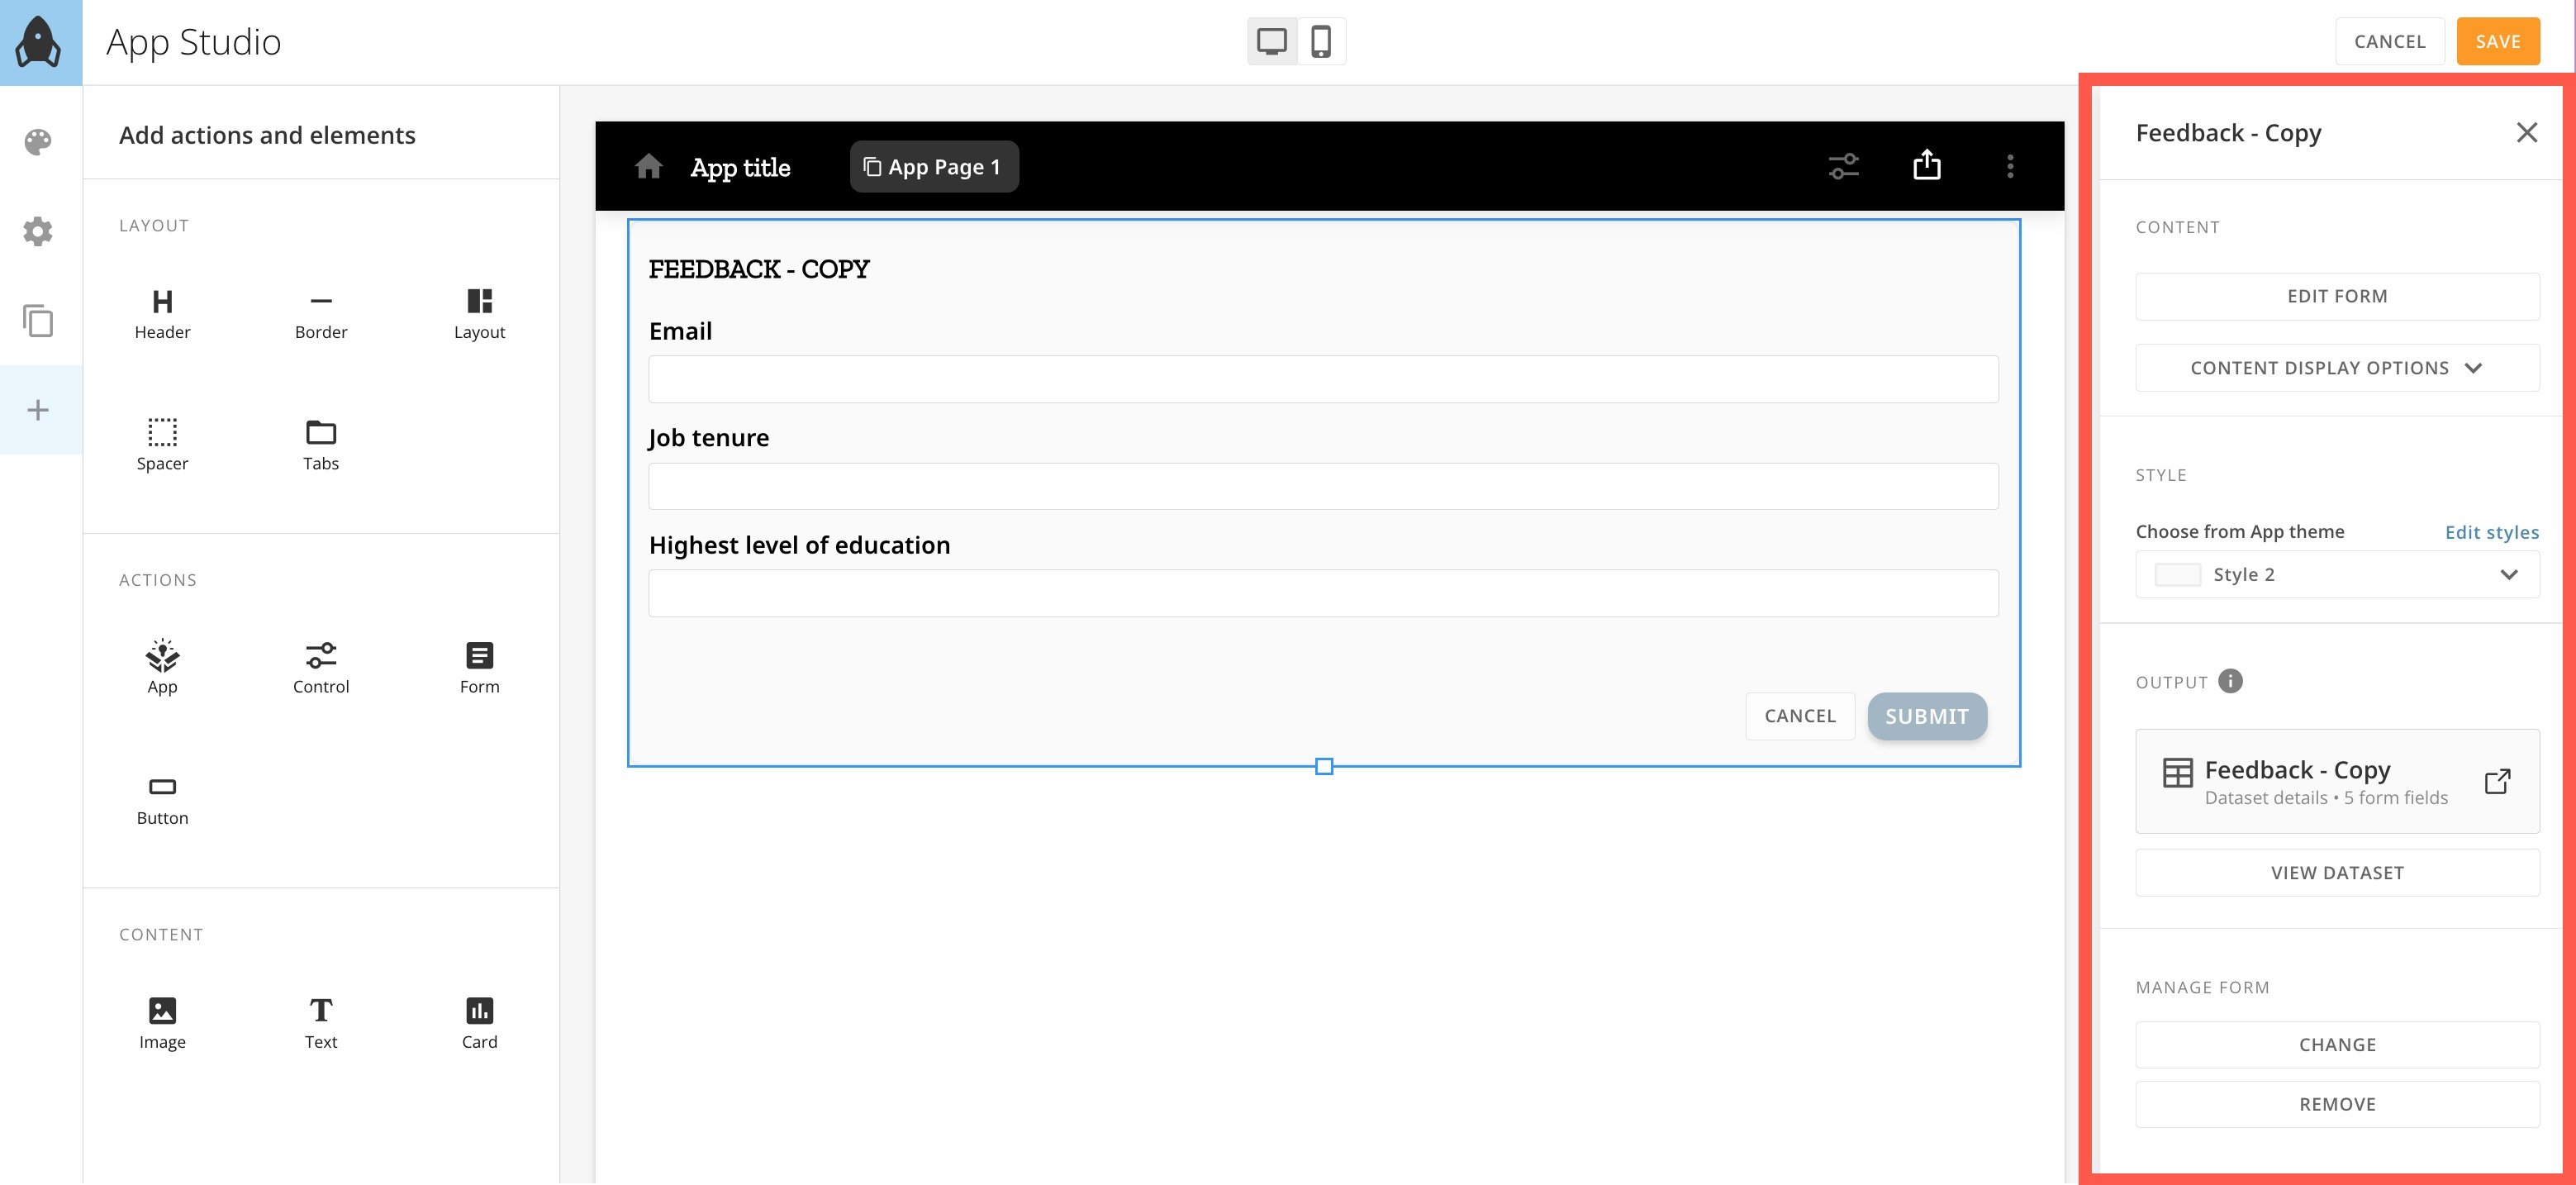 In the configuration panel, select **Edit Form** to open the [form editor](#form_editor).
 #### Configure Form Settings
The App Studio form configuration panel allows you to make changes to the following settings.
#### Form Display
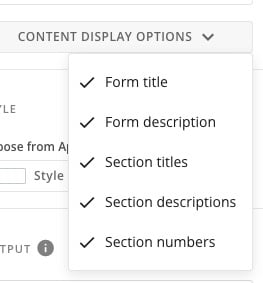
Selecting **Content Display Options** allows you to show/hide any of the following elements (all elements are shown by default):
* Form title
* Form description
* Section titles
* Section descriptions
* Section numbers
#### Configure Form Settings
The App Studio form configuration panel allows you to make changes to the following settings.
#### Form Display
Selecting **Content Display Options** allows you to show/hide any of the following elements (all elements are shown by default):
* Form title
* Form description
* Section titles
* Section descriptions
* Section numbers
 ##### Form Style
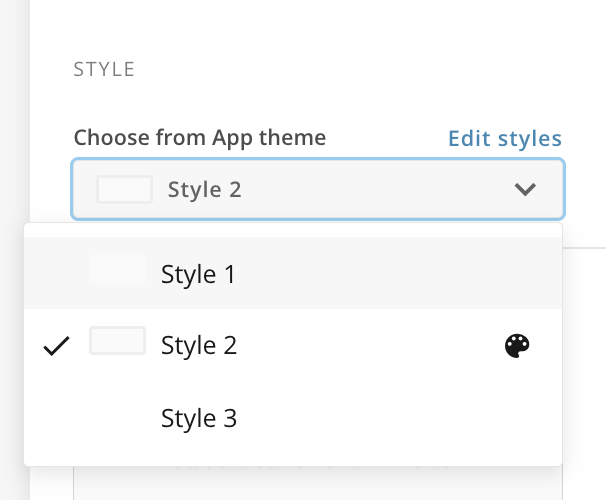
Under **Style**, choose the form style from your configured App Studio styles. Learn about [App Studio themes and styles](/s/article/000005543).
##### Form Style
Under **Style**, choose the form style from your configured App Studio styles. Learn about [App Studio themes and styles](/s/article/000005543).
 #### View Output DataSet
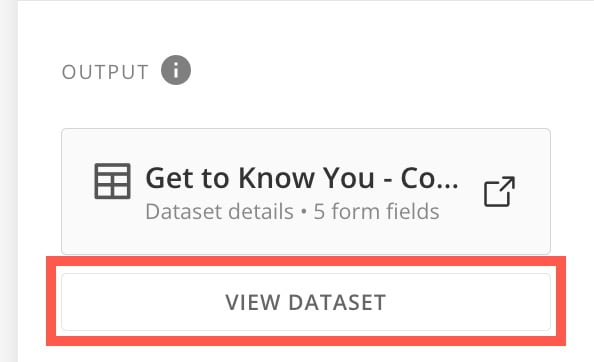
In the configuration panel under **Output**, select **View DataSet** to view the form response DataSet.
#### View Output DataSet
In the configuration panel under **Output**, select **View DataSet** to view the form response DataSet.
 #### Change/Remove a Form
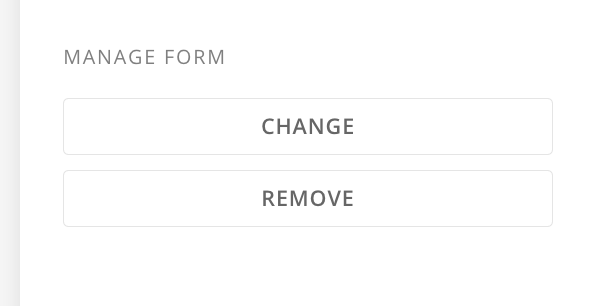
In the configuration panel under **Manage Form**, select **Change** to choose a different form for this app page or **Remove** to replace the form with another element.
#### Change/Remove a Form
In the configuration panel under **Manage Form**, select **Change** to choose a different form for this app page or **Remove** to replace the form with another element.
 **Important:** If the form doesn't exist elsewhere in the app, removing it deletes the form entirely. **This action is not reversible.**
If the form you are removing is a copy, the original is not removed.
### Forms in Workflows
When configuring a form User Task in Workflows, you can create a new form or copy an existing one from the **Mapping** tab of the Workflows configuration panel. Learn more about User Tasks in the [Workflows documentation](https://domo-support.domo.com/s/topic/0TO5w000000ZkAMGA0/workflows?language=en_US).
# Add a Form to a Workflow
Follow these steps to add a form to a workflow.
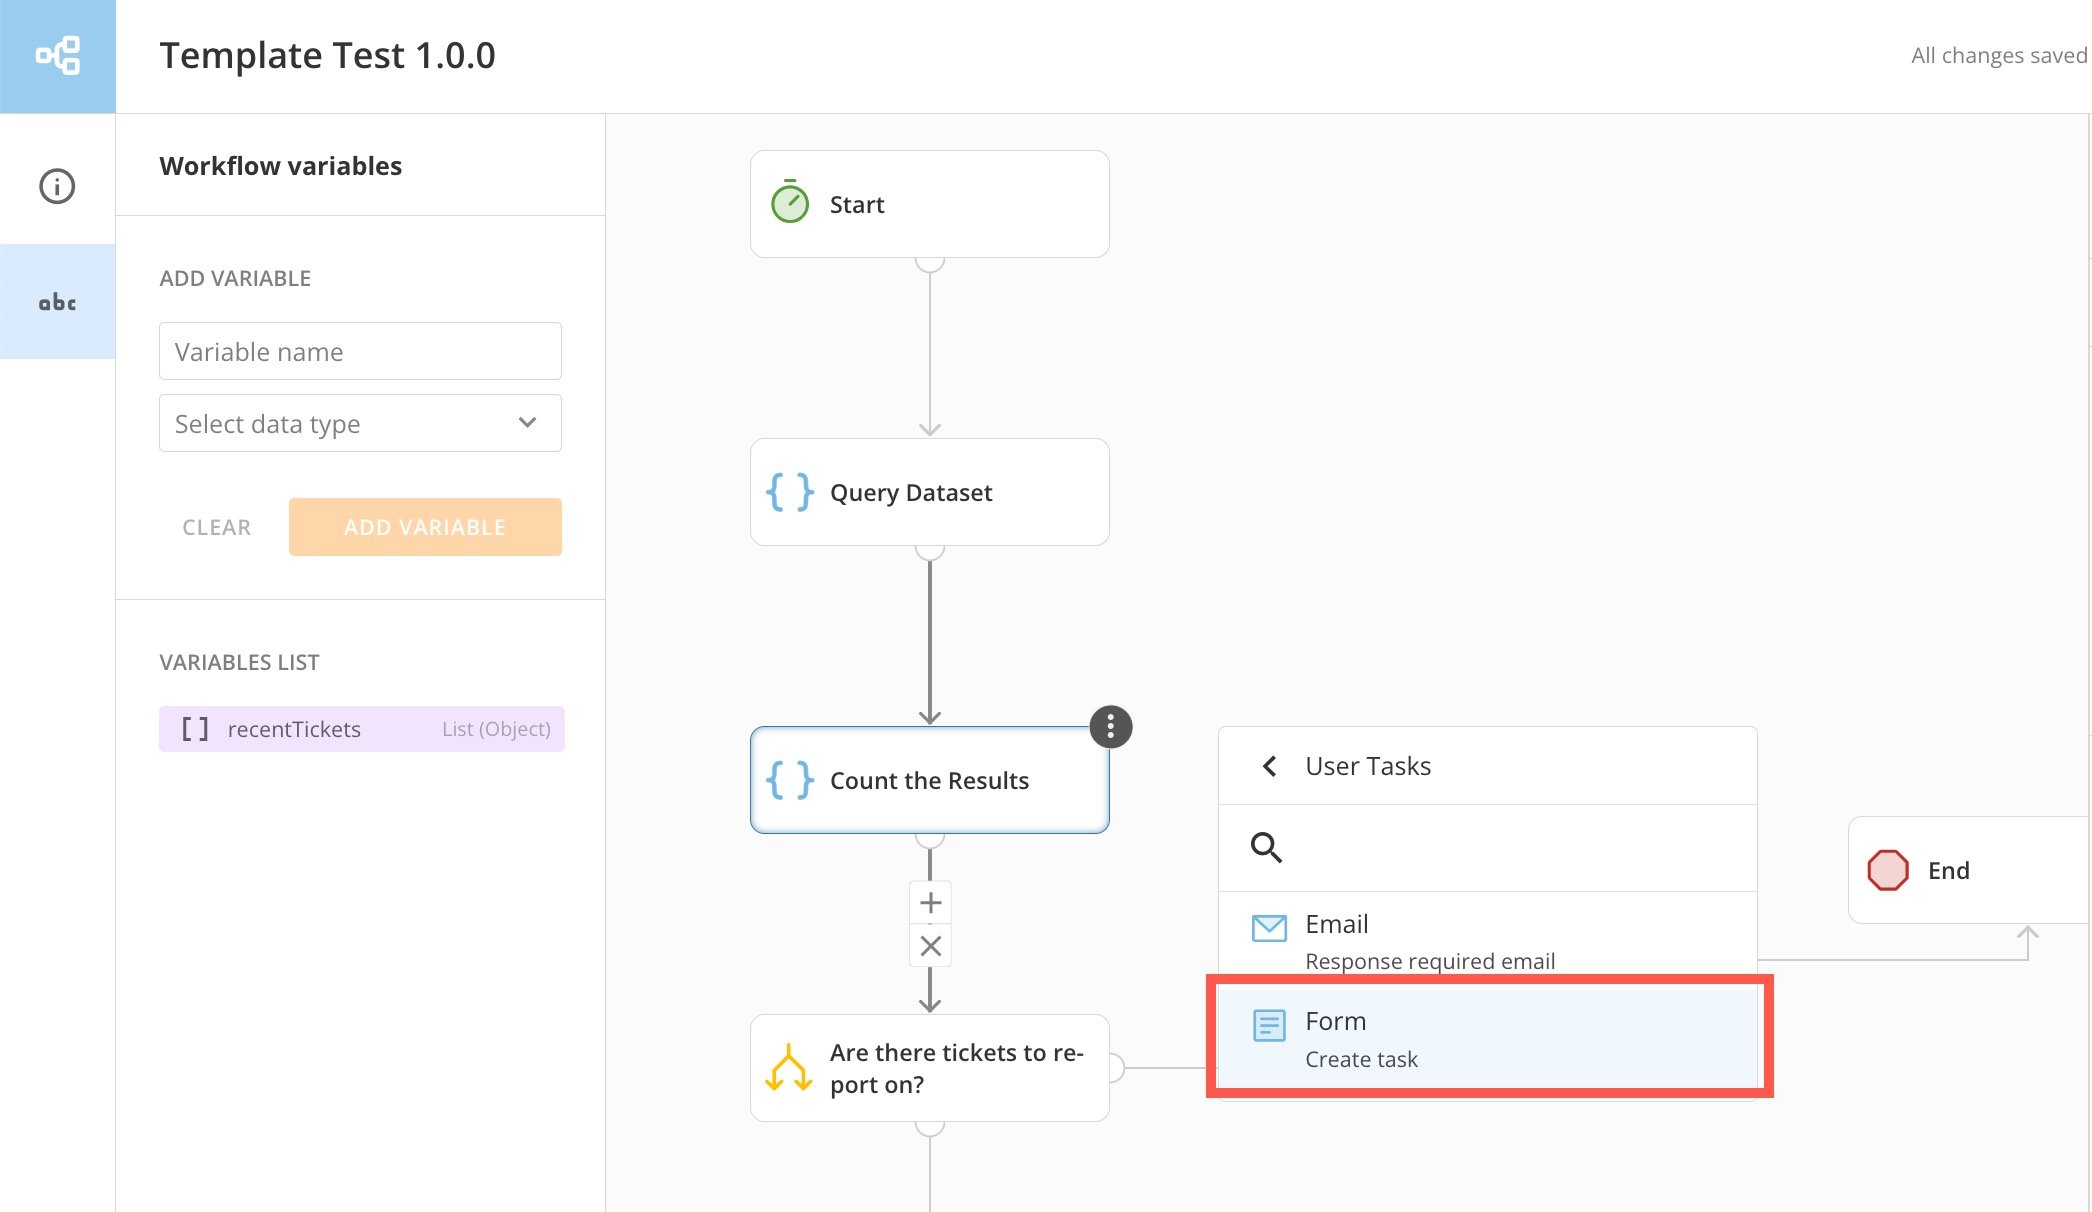
1. Select the shape to which you are adding a form.
2. Select **More** (three vertical dots icon) to open the action menu.
3. Select **User Tasks** > **Forms**.
**Important:** If the form doesn't exist elsewhere in the app, removing it deletes the form entirely. **This action is not reversible.**
If the form you are removing is a copy, the original is not removed.
### Forms in Workflows
When configuring a form User Task in Workflows, you can create a new form or copy an existing one from the **Mapping** tab of the Workflows configuration panel. Learn more about User Tasks in the [Workflows documentation](https://domo-support.domo.com/s/topic/0TO5w000000ZkAMGA0/workflows?language=en_US).
# Add a Form to a Workflow
Follow these steps to add a form to a workflow.
1. Select the shape to which you are adding a form.
2. Select **More** (three vertical dots icon) to open the action menu.
3. Select **User Tasks** > **Forms**.
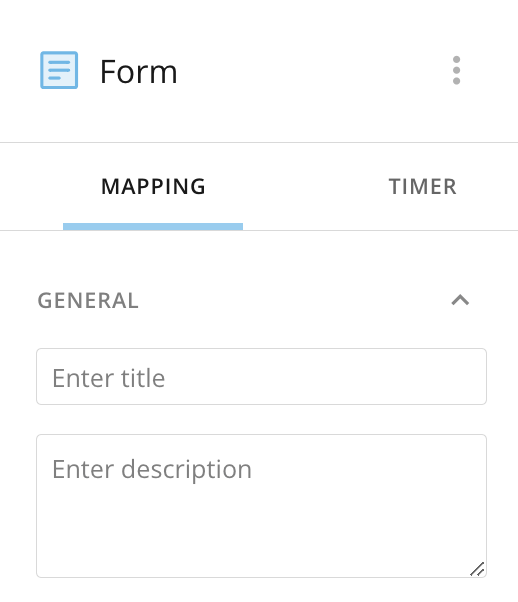
 4. In the **Mapping** tab of the configuration panel to the right of the canvas, enter a task title and description.
 5. In the panel under **Form**, select a queue for the task.
6. Assign the task to someone. Map the field to a Person variable already in the form, or add a custom value.
5. In the panel under **Form**, select a queue for the task.
6. Assign the task to someone. Map the field to a Person variable already in the form, or add a custom value.
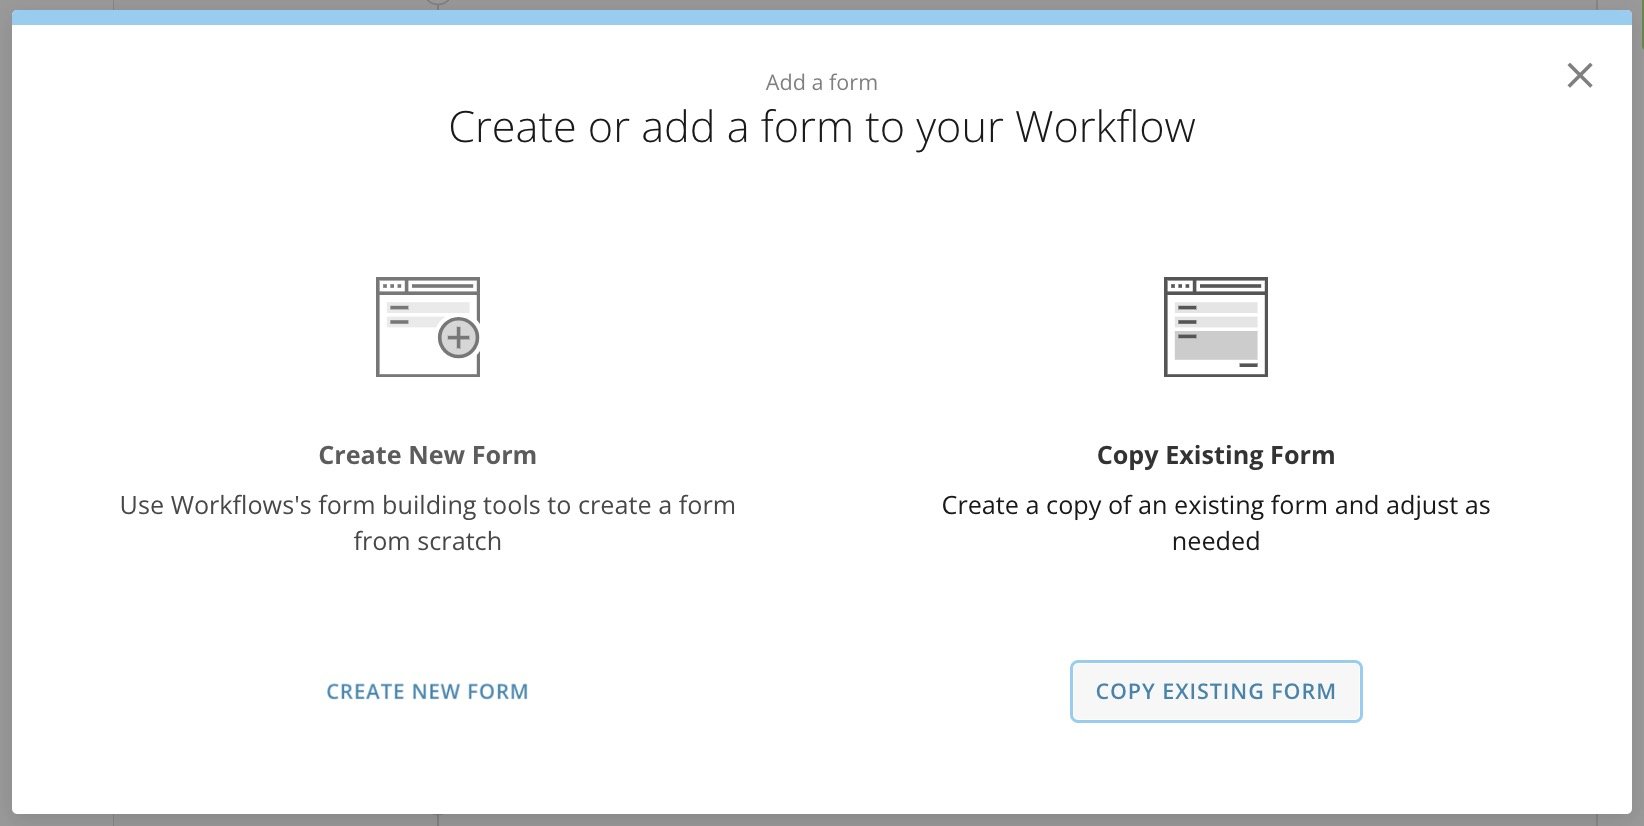
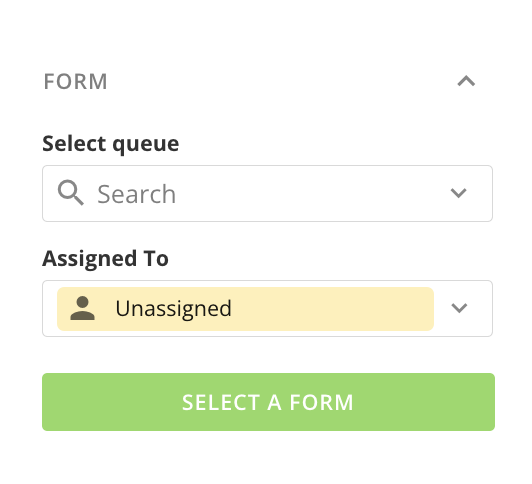 7. Choose **Select Form** and select one of the following:
* **Create New Form —** Opens the [form editor](#form_editor).
* **Copy Existing Form —** Allows you to search for an existing form by name and copy it to edit and use in this workflow version. The form is added as an input to the User Task and the form outputs are added as output parameters to the User Task.
7. Choose **Select Form** and select one of the following:
* **Create New Form —** Opens the [form editor](#form_editor).
* **Copy Existing Form —** Allows you to search for an existing form by name and copy it to edit and use in this workflow version. The form is added as an input to the User Task and the form outputs are added as output parameters to the User Task.
 ### Create With the Form Editor
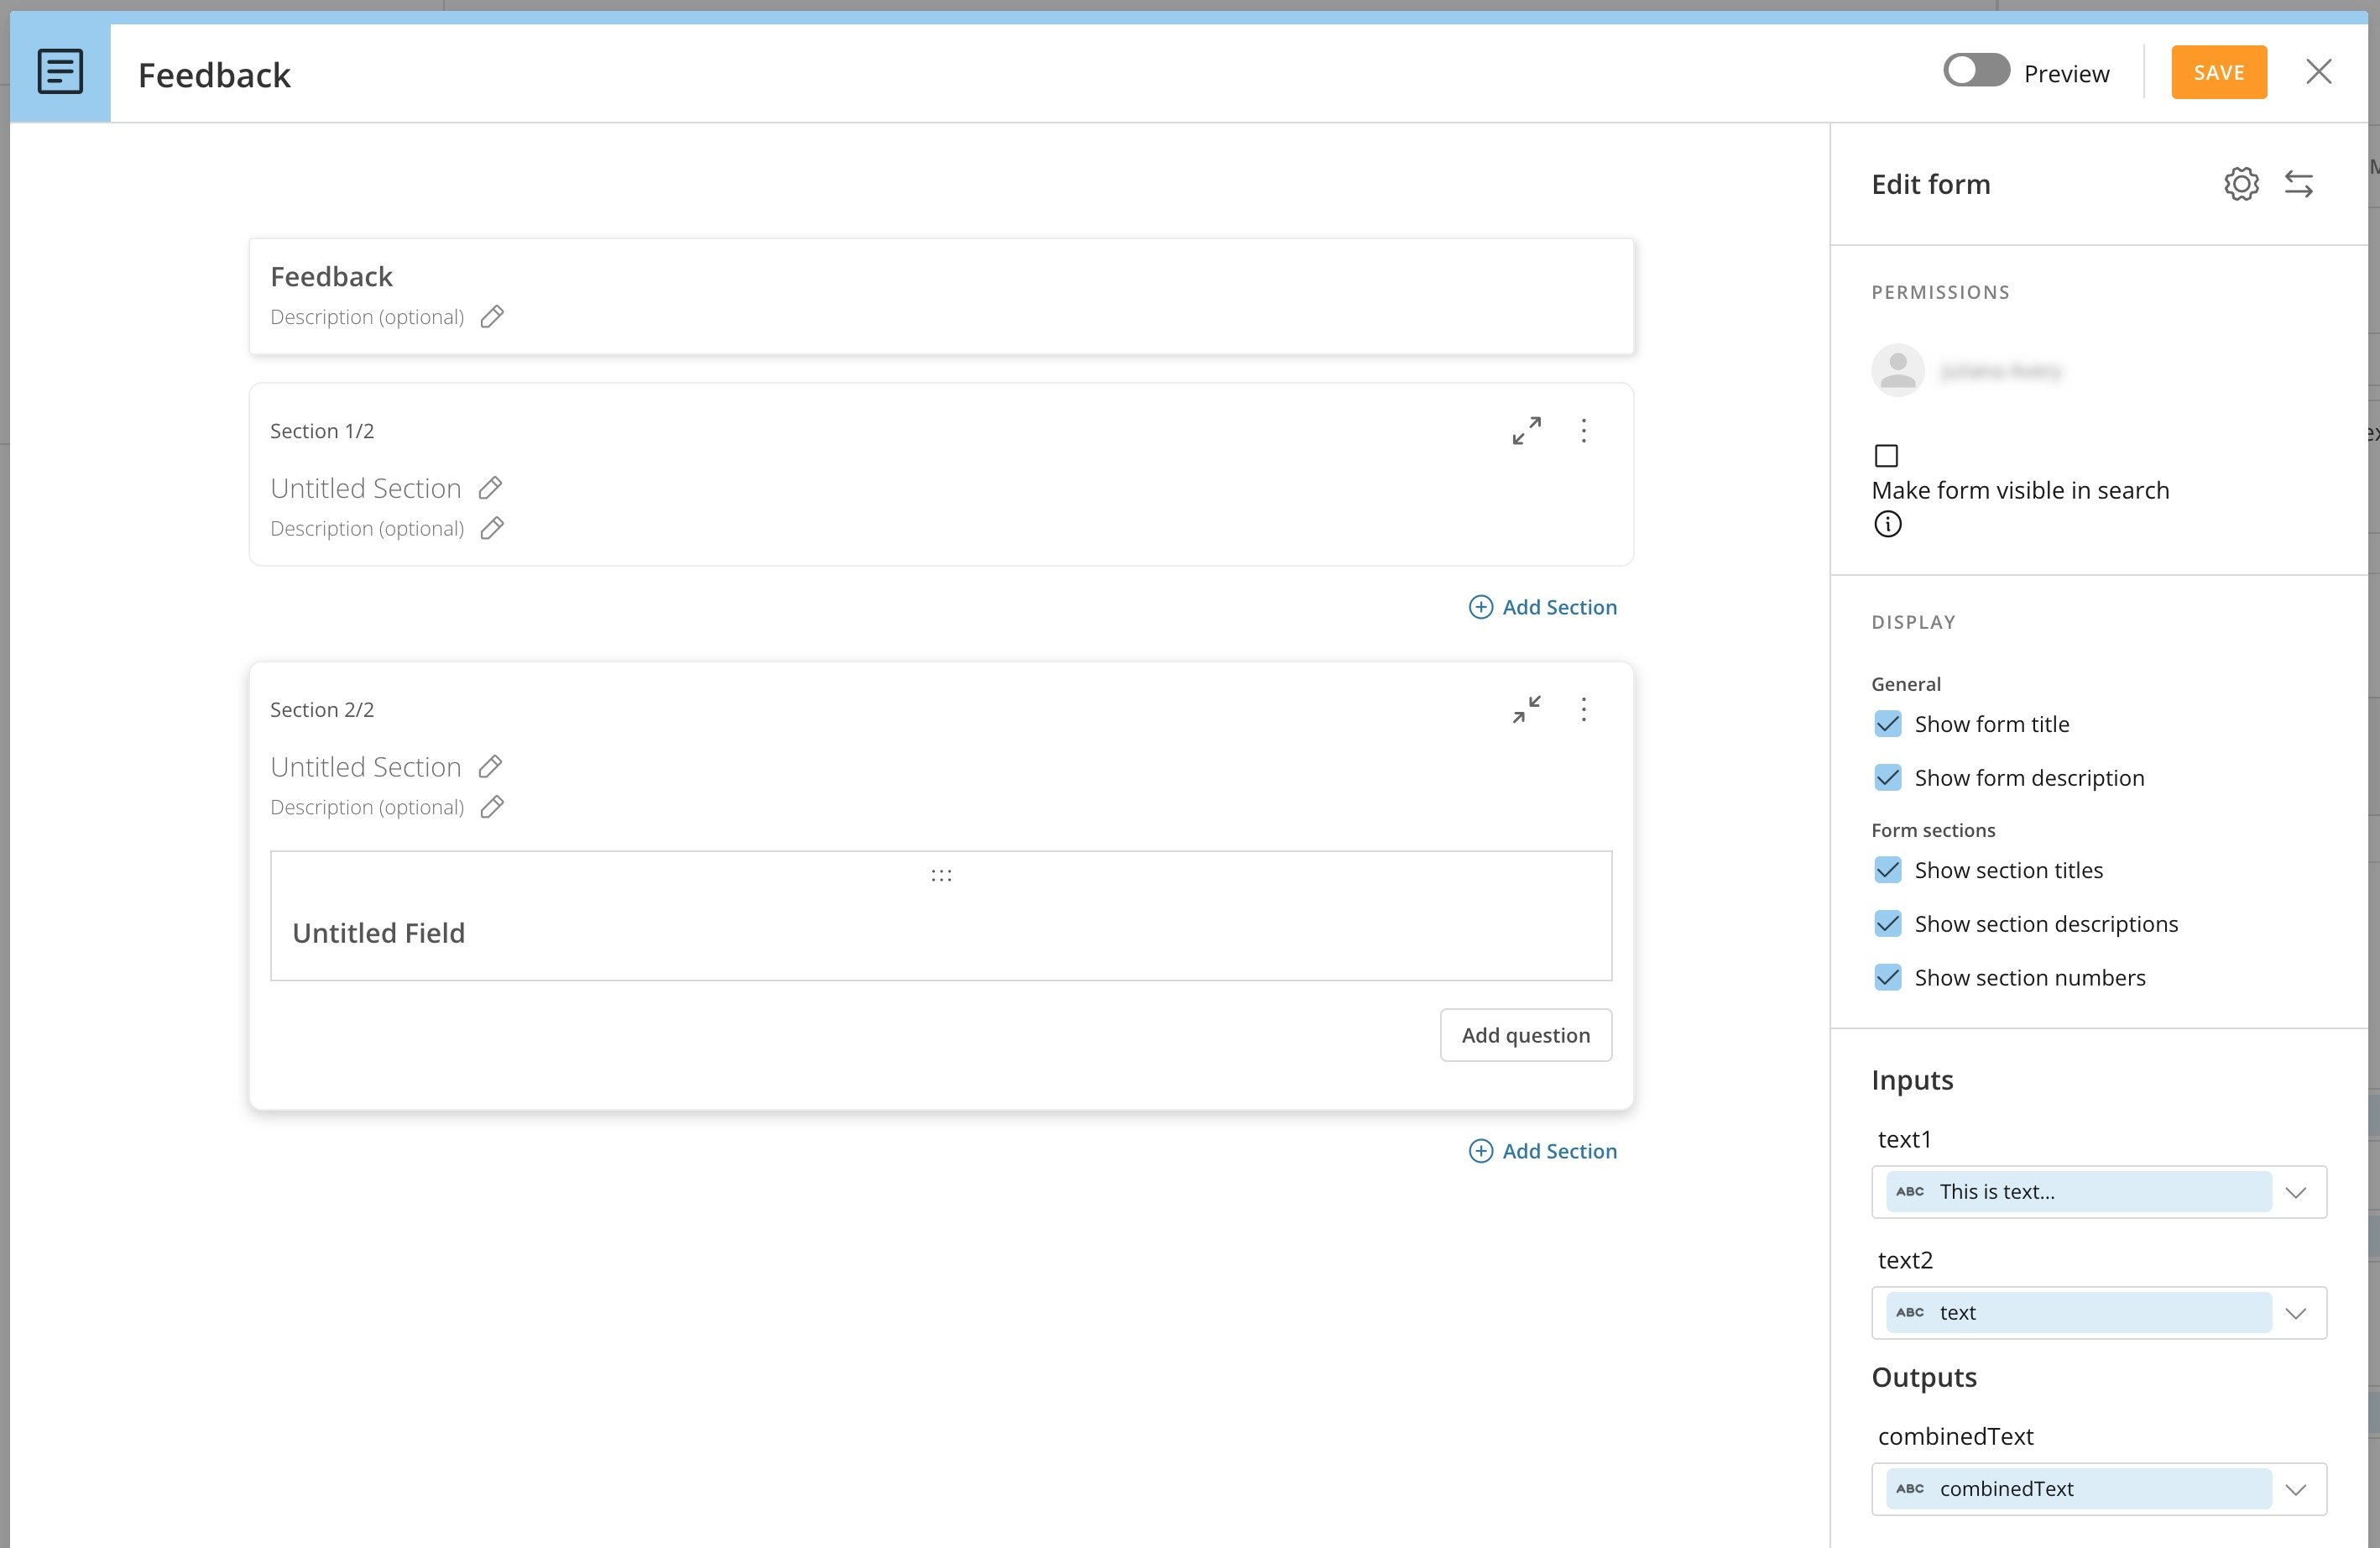
In the form editor, you can build and configure forms with questions, labels, and parameters. There's no limit to the number of questions and sections your form can have.
### Create With the Form Editor
In the form editor, you can build and configure forms with questions, labels, and parameters. There's no limit to the number of questions and sections your form can have.
 **Validation**
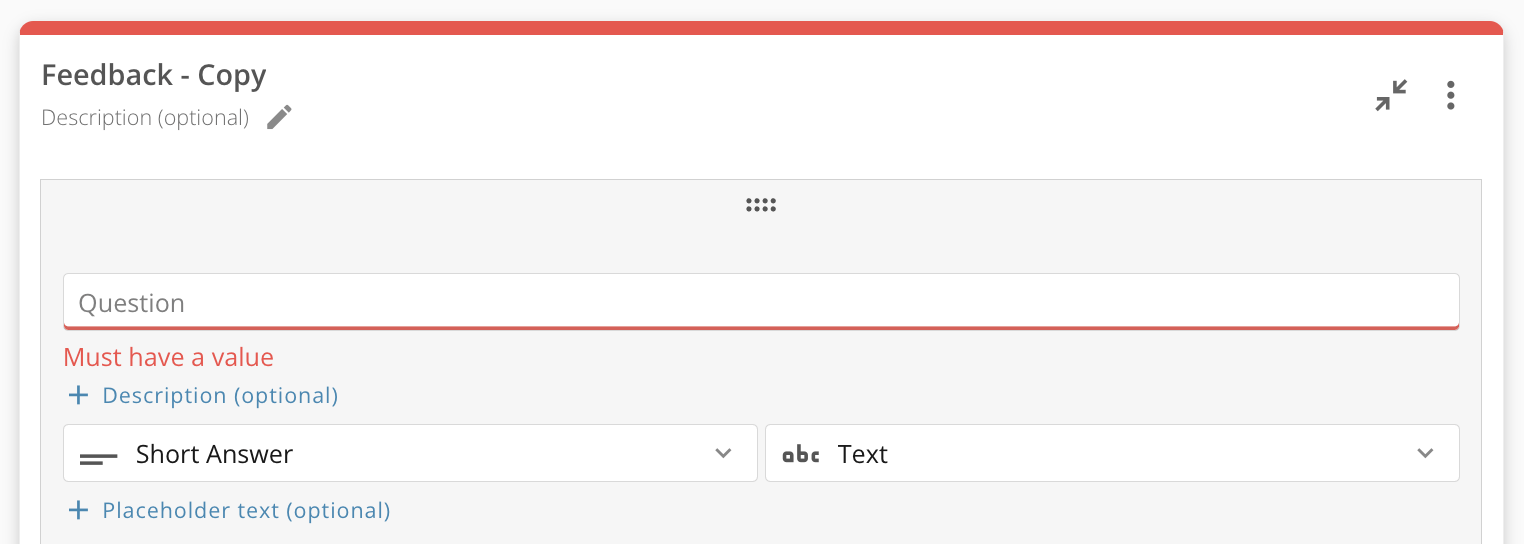
As you create forms, required configurations are highlighted in the form in red to help you identify missing details. You cannot save or publish a form until you have completed all required configurations.
**Validation**
As you create forms, required configurations are highlighted in the form in red to help you identify missing details. You cannot save or publish a form until you have completed all required configurations.
 **Note:** Save your changes before closing the form editor. Any unsaved changes are lost when the editor closes.
# Configure Form Appearance
The right configuration panel in the form editor provides different options for [apps](#configure_form_apps) and workflows. Choose the appropriate section below.
#### Configure Form — Apps
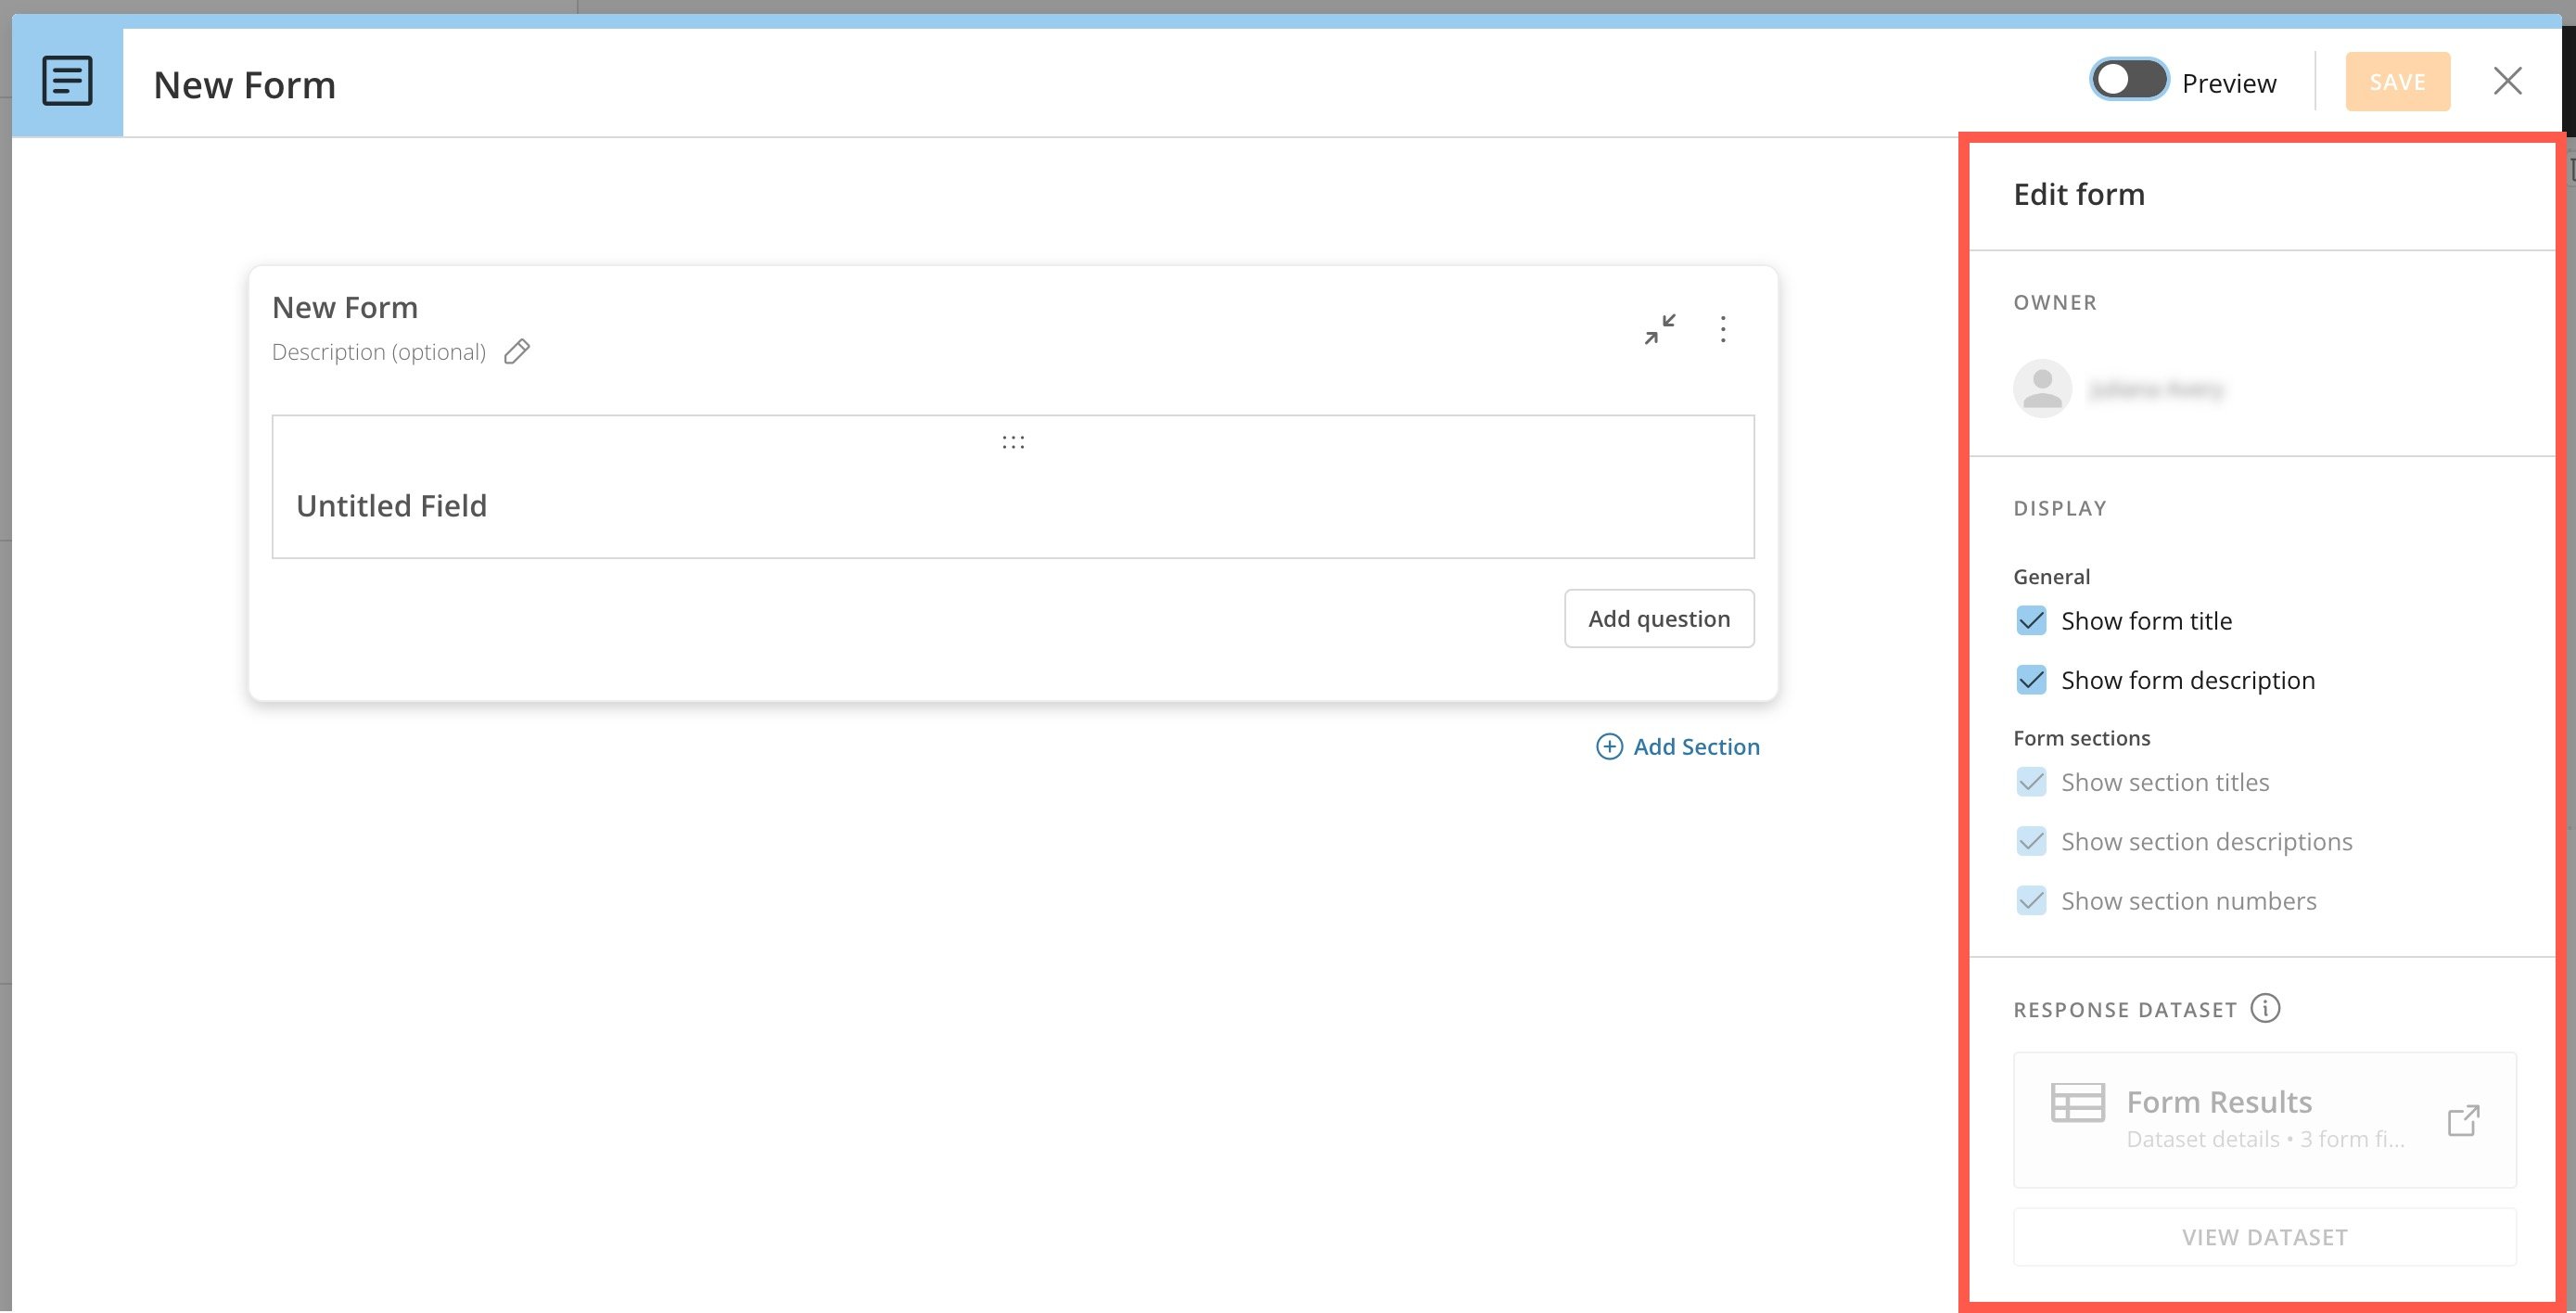
In the form configuration panel for apps, you can hide the form title and description, as well as section titles, descriptions, and numbers from form users.
Under **Response DataSet**, you can open the DataSet where your form responses are recorded.
**Note:** Save your changes before closing the form editor. Any unsaved changes are lost when the editor closes.
# Configure Form Appearance
The right configuration panel in the form editor provides different options for [apps](#configure_form_apps) and workflows. Choose the appropriate section below.
#### Configure Form — Apps
In the form configuration panel for apps, you can hide the form title and description, as well as section titles, descriptions, and numbers from form users.
Under **Response DataSet**, you can open the DataSet where your form responses are recorded.
 #### Configure Form — Workflows
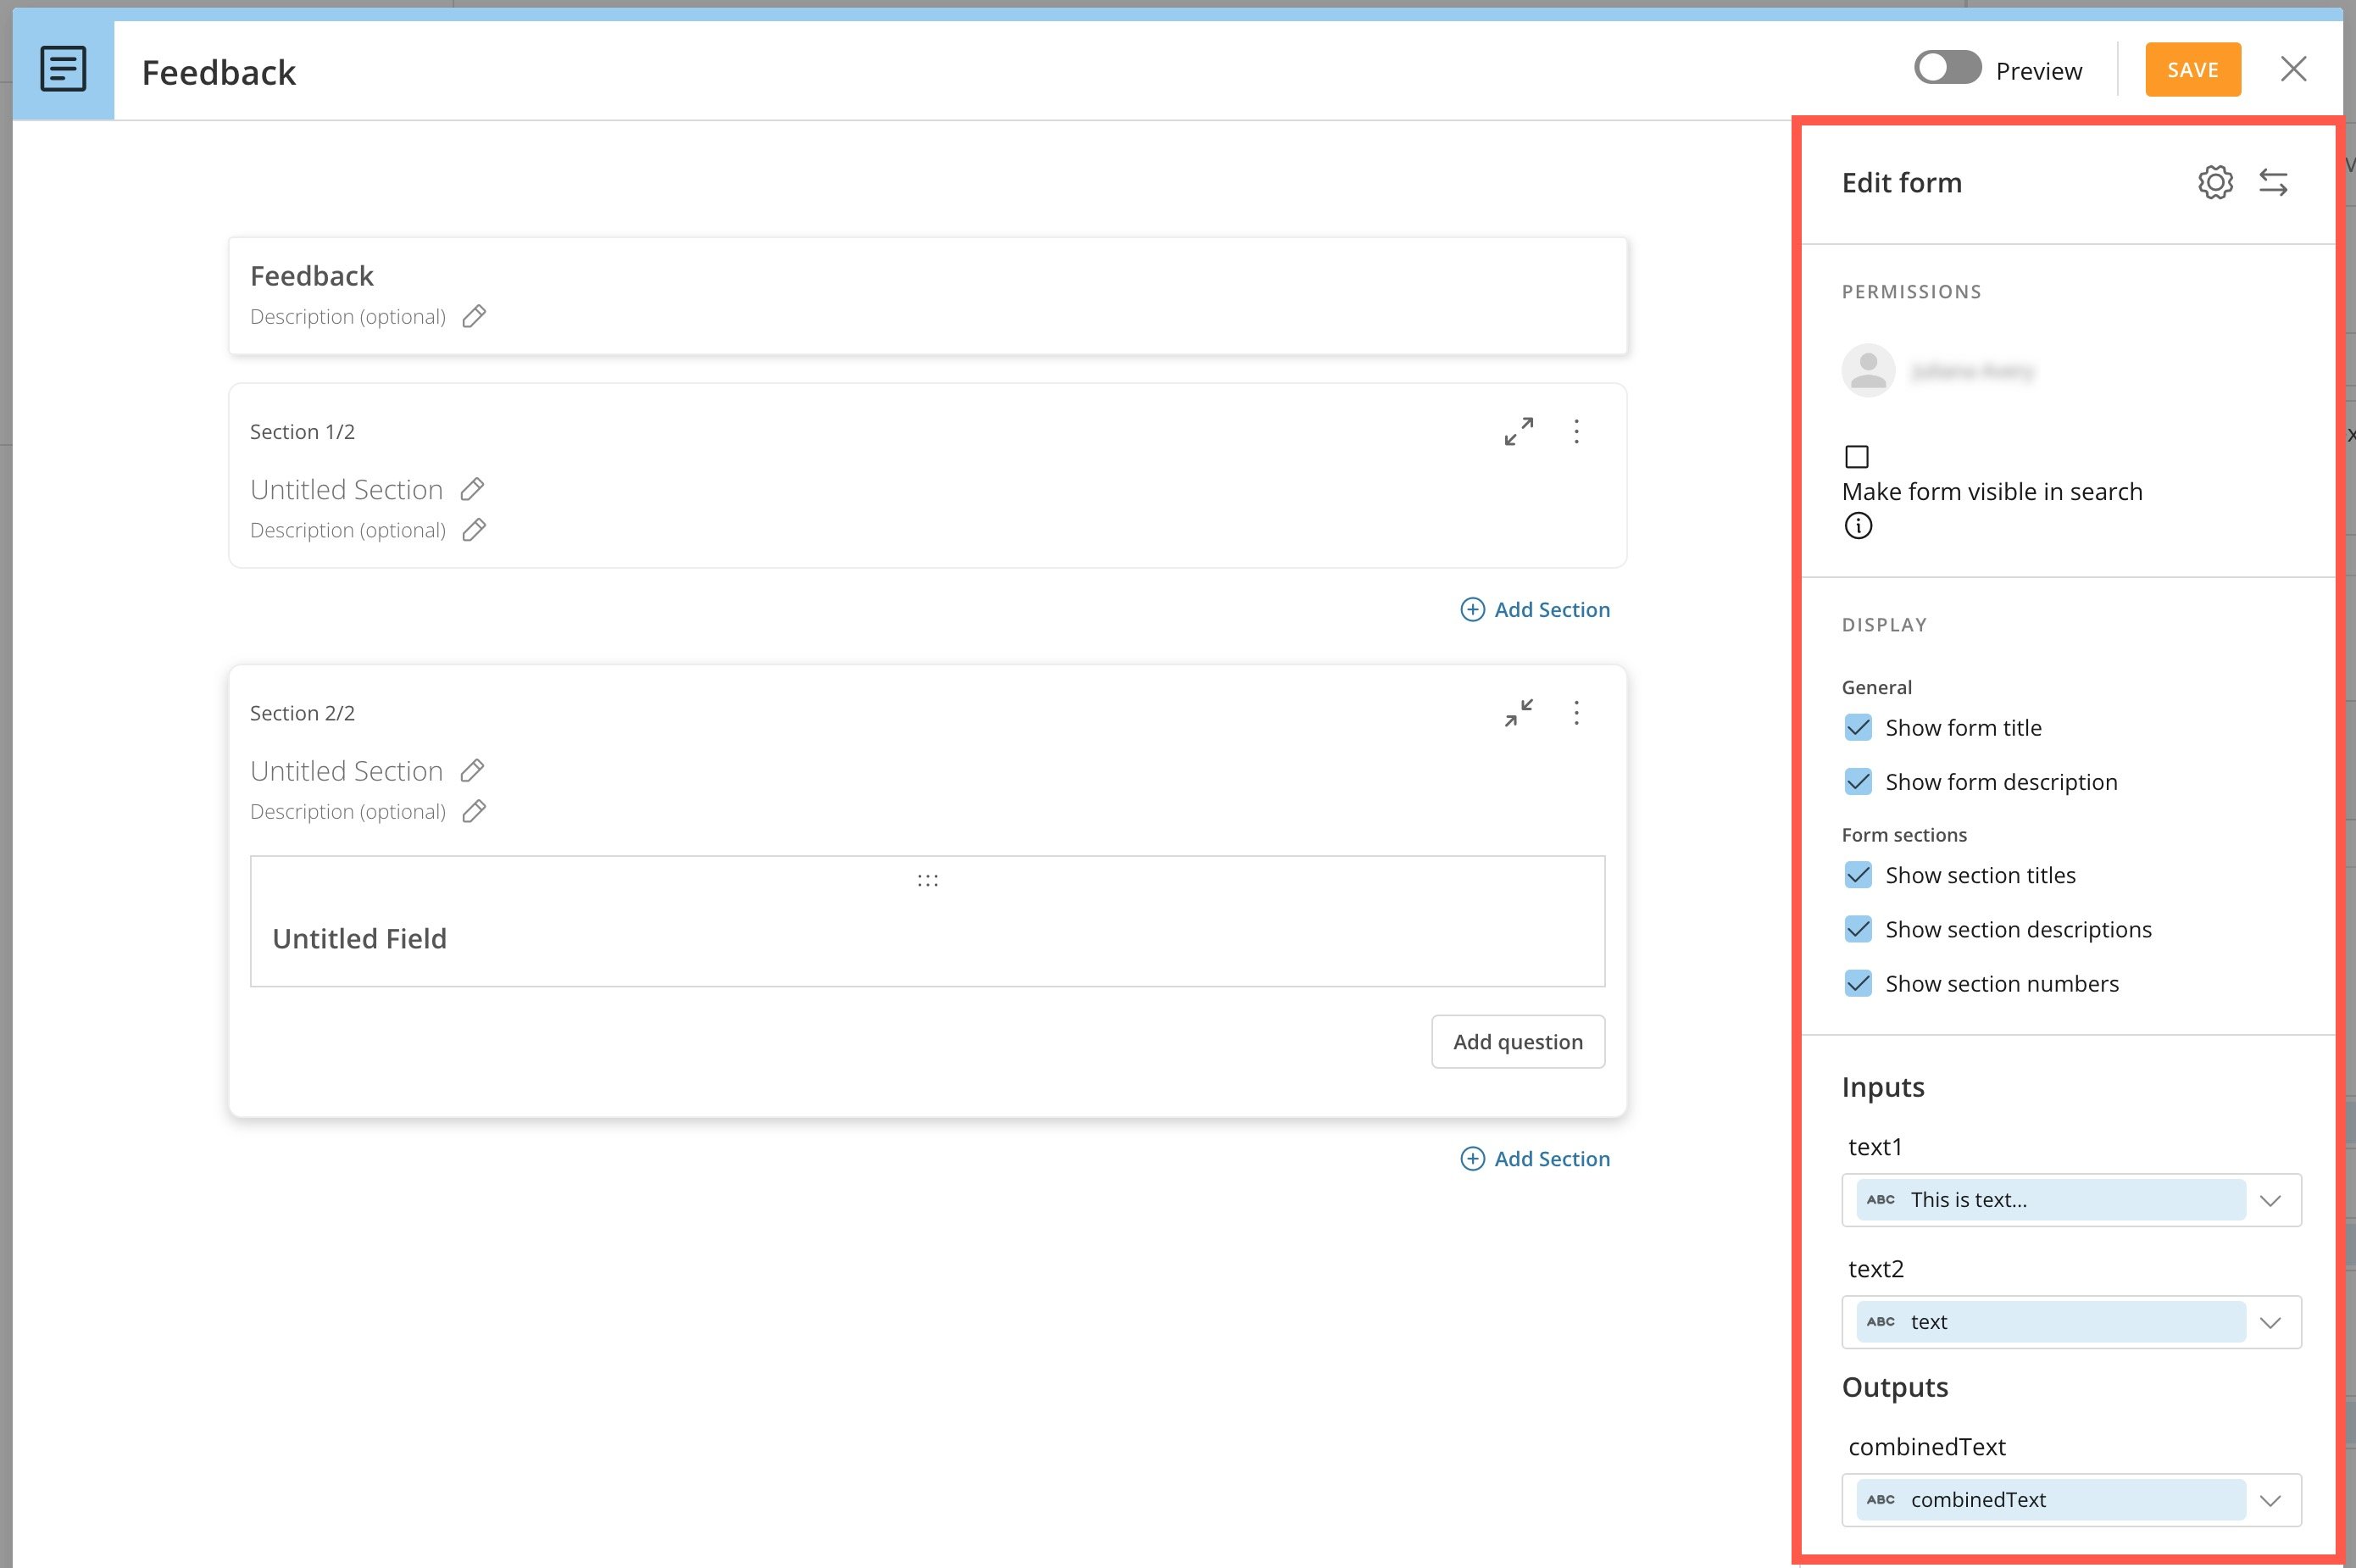
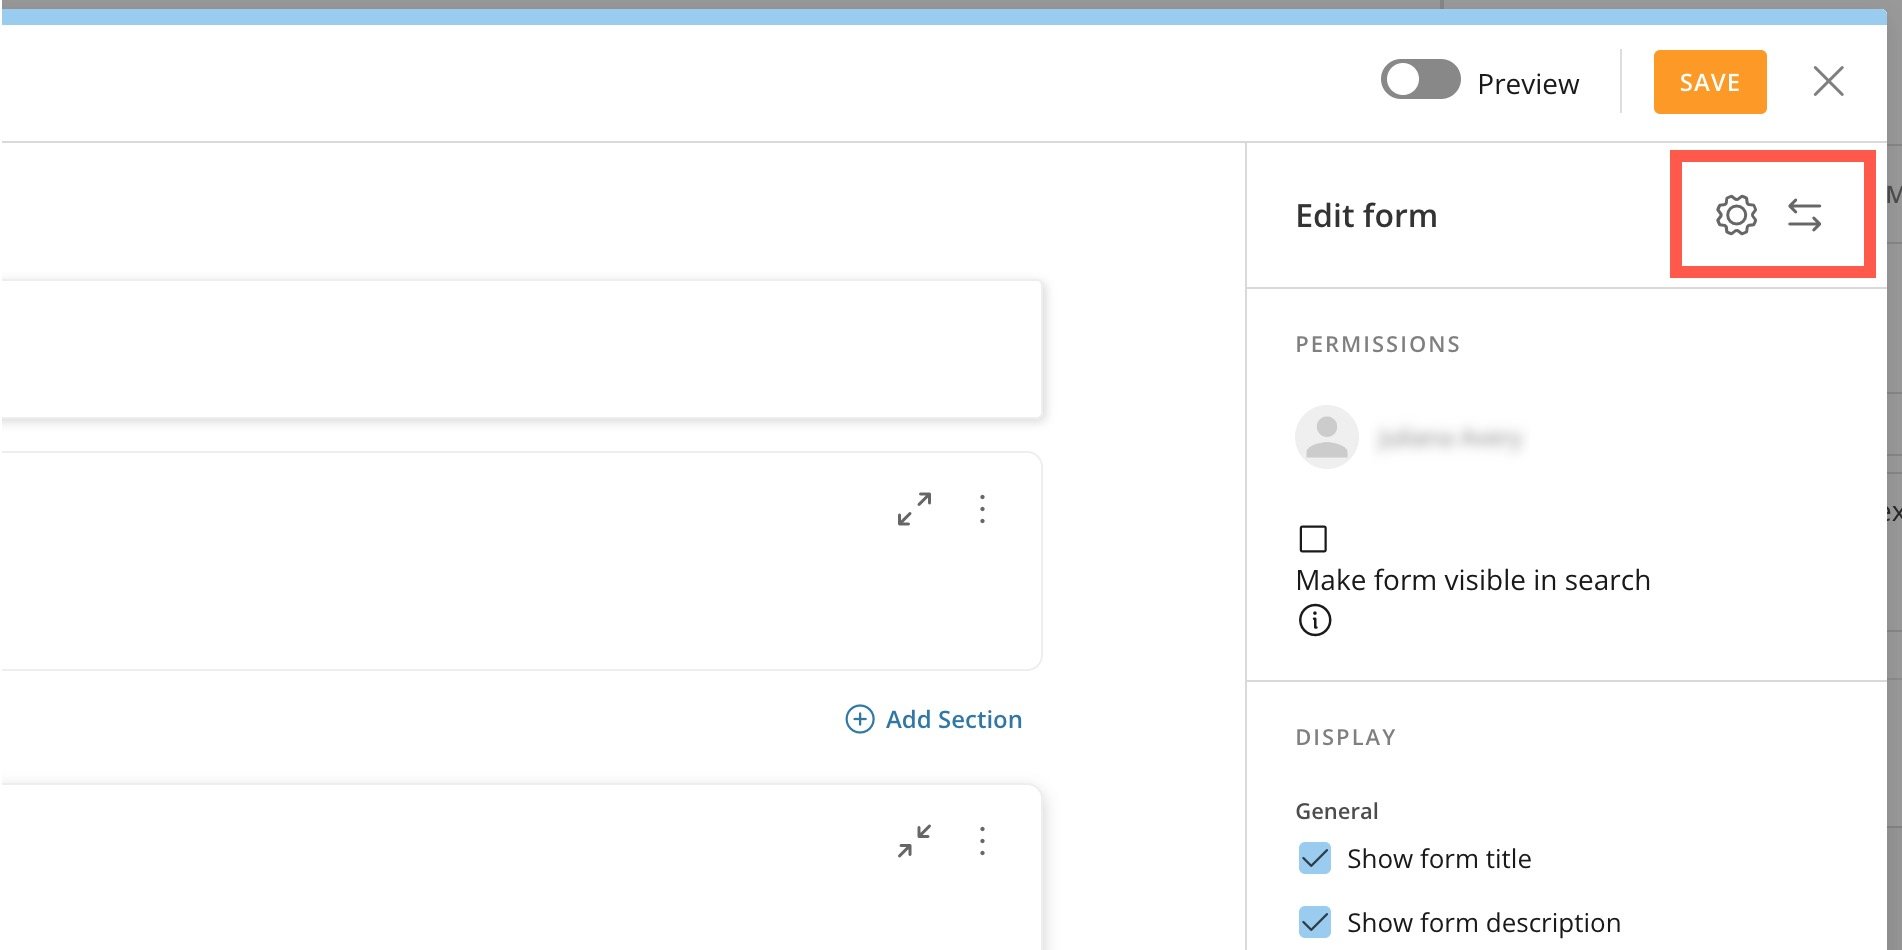
In the form configuration panel for Workflows, there are two controls— **Form Settings** and **View inputs/outputs**. Learn about these [controls](#form_controls_workflows) below.
You can hide the form title and description, as well as section titles, descriptions, and numbers from form users.
**Make form visible in search —** When you check this box, you can find this form when searching for forms from other workflow versions.
In the **Inputs** and **Outputs** sections of the panel, map form parameters to variables in your workflow or add custom variables.
#### Configure Form — Workflows
In the form configuration panel for Workflows, there are two controls— **Form Settings** and **View inputs/outputs**. Learn about these [controls](#form_controls_workflows) below.
You can hide the form title and description, as well as section titles, descriptions, and numbers from form users.
**Make form visible in search —** When you check this box, you can find this form when searching for forms from other workflow versions.
In the **Inputs** and **Outputs** sections of the panel, map form parameters to variables in your workflow or add custom variables.
 # Configure Form Sections
To learn about adding questions to a form, see [Configure Questions](#configure_questions) below.
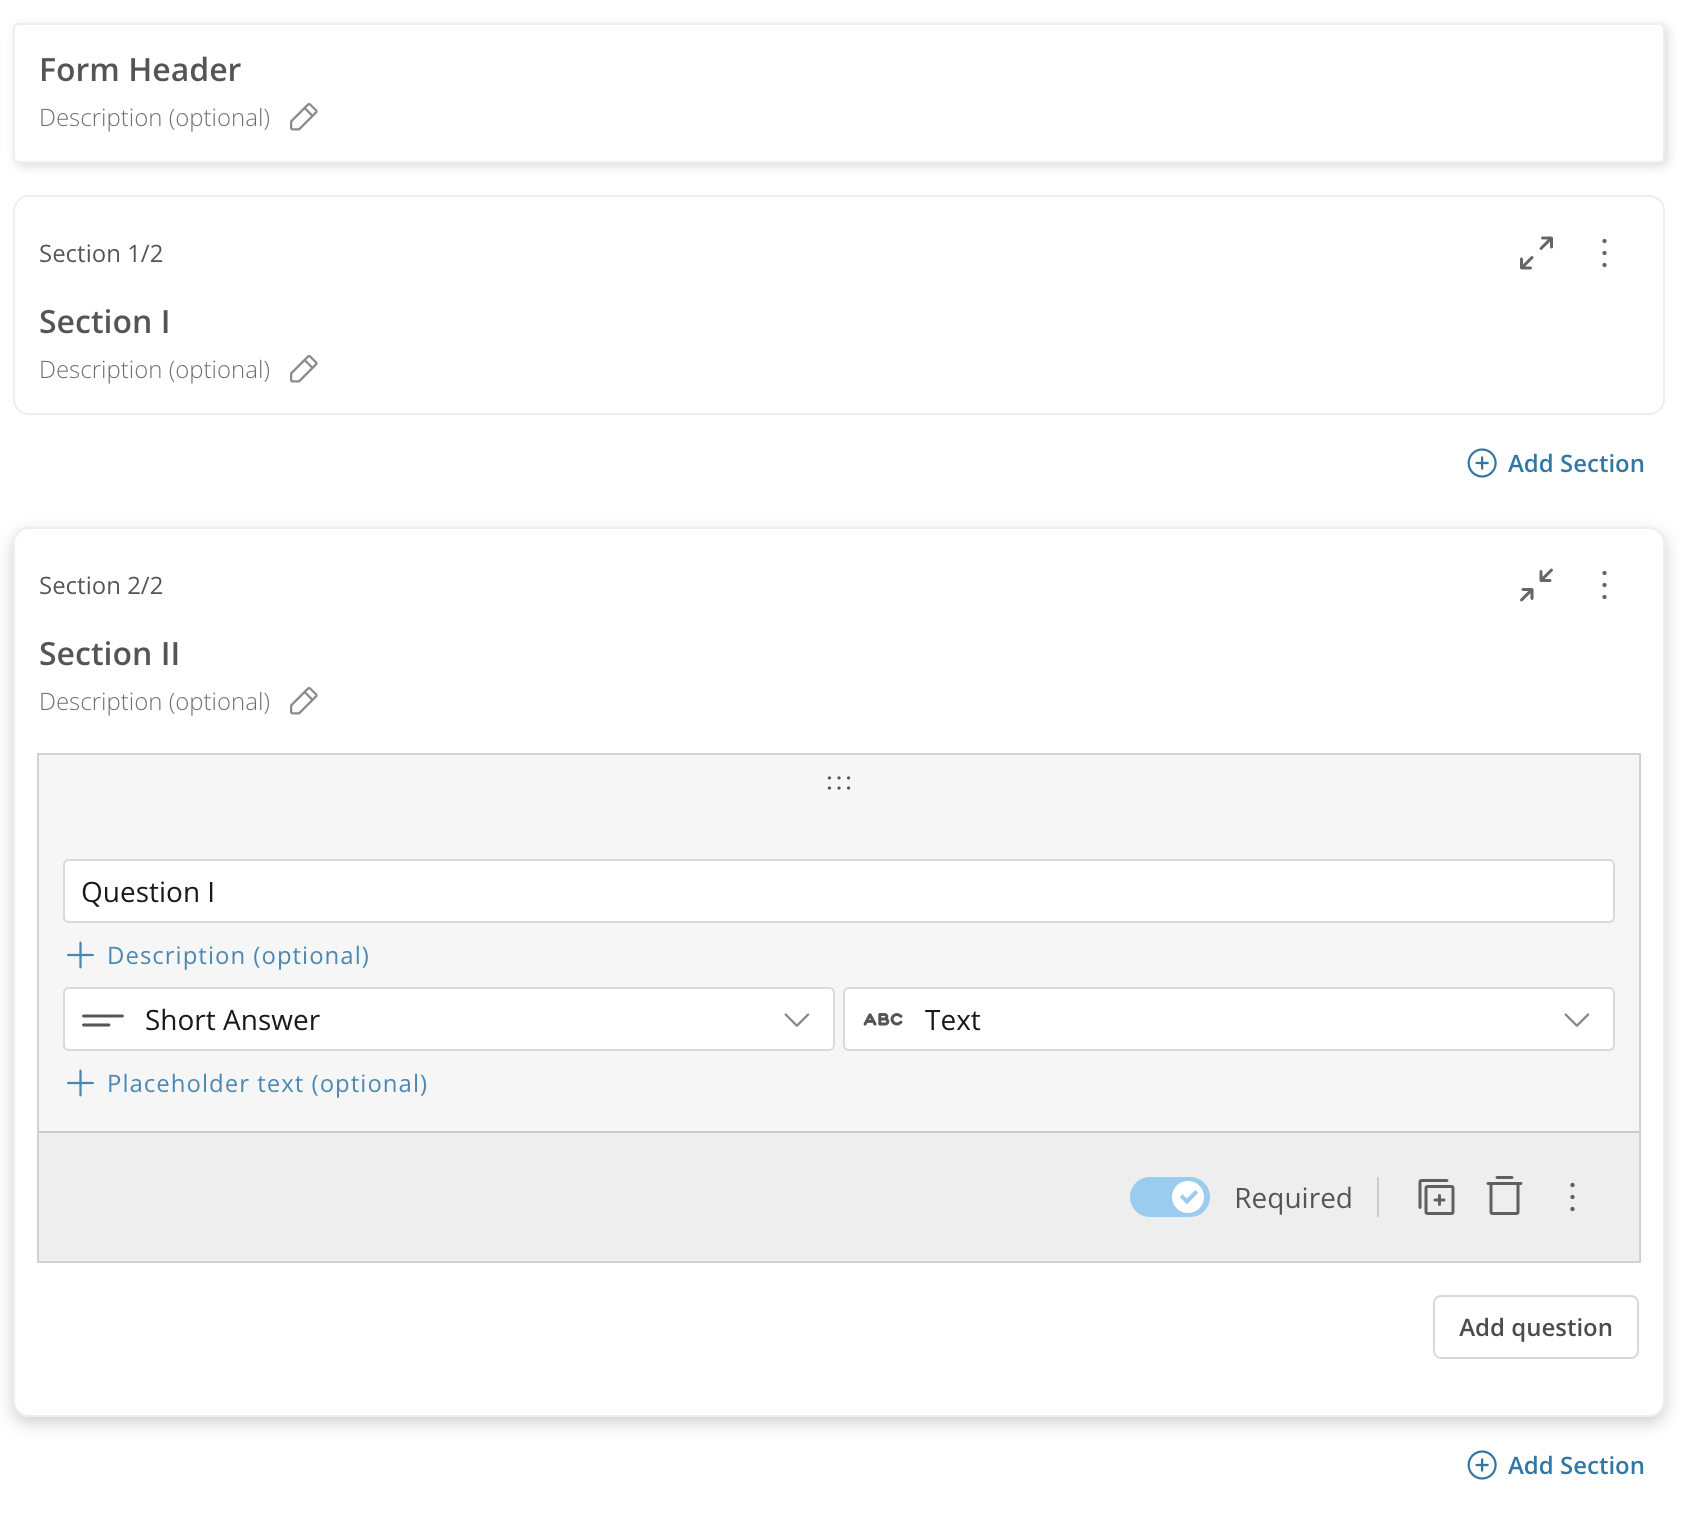
* Your form is made up of sections with any number of questions per section. Each section is a different page in the form, so three sections display as a three-page form.
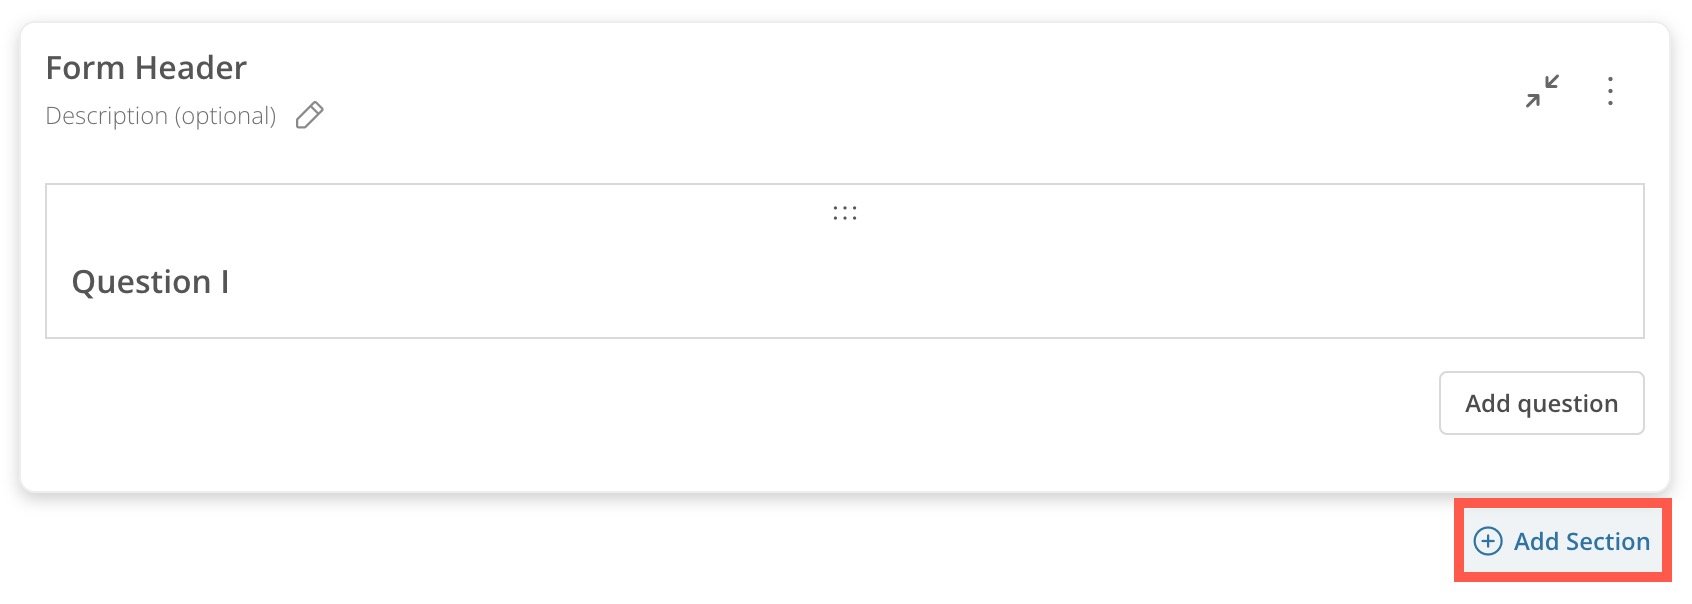
* After you add a second section to a form, the form heading (containing the form name and description) and the first section are visually separated from each other and from the following sections.
# Configure Form Sections
To learn about adding questions to a form, see [Configure Questions](#configure_questions) below.
* Your form is made up of sections with any number of questions per section. Each section is a different page in the form, so three sections display as a three-page form.
* After you add a second section to a form, the form heading (containing the form name and description) and the first section are visually separated from each other and from the following sections.
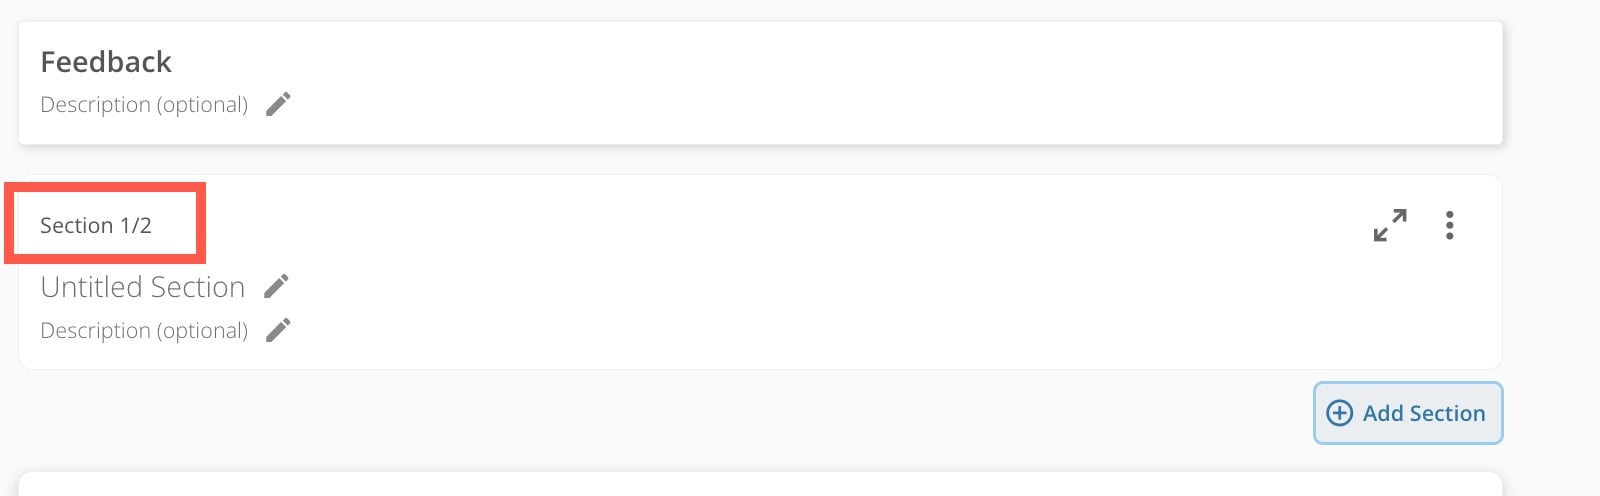
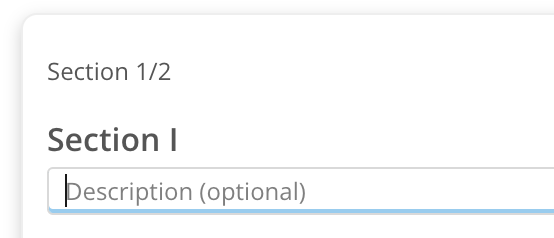
 * Each section displays a section count—the current section number out of the total number of sections. In this image, the section is the first of two sections/pages.
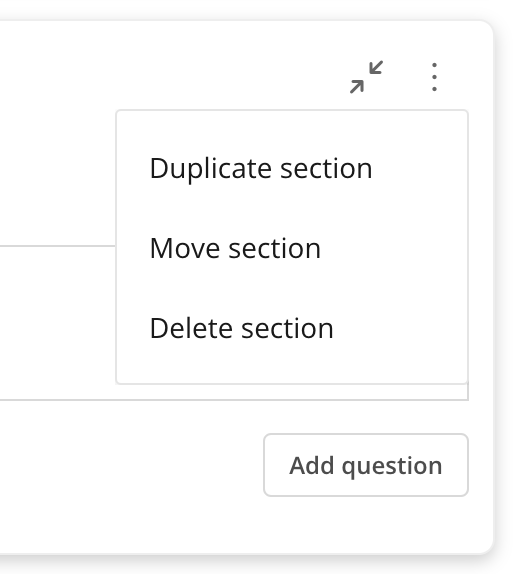
 * Use the section **More** (three vertical dots icon) menu to perform the following actions:
* **Duplicate section** **—** Copies the section and places it directly below itself.
* **Move section** **—** Allows you to move the section with drag-and-drop.
* **Delete section** **—** Removes the section from the form.
You cannot move or delete a section if there is only one section in the form, because a form must have at least one section.
* Use the section **More** (three vertical dots icon) menu to perform the following actions:
* **Duplicate section** **—** Copies the section and places it directly below itself.
* **Move section** **—** Allows you to move the section with drag-and-drop.
* **Delete section** **—** Removes the section from the form.
You cannot move or delete a section if there is only one section in the form, because a form must have at least one section.
 * You can add a title and optional description for each section.
 * Select **+ Add Section** to create a new section.
 # Configure Questions
In this section, learn how to [add](#add_a_question), [format](#question_type), [reorder](#reorder_questions), [duplicate](#duplicate_question), and [delete](#delete_question) questions.
#### Add a Question
Select **Add question** at the bottom of the current section to add a new question to the section. There is no limit to the number of questions you can add to a section (form page).
# Configure Questions
In this section, learn how to [add](#add_a_question), [format](#question_type), [reorder](#reorder_questions), [duplicate](#duplicate_question), and [delete](#delete_question) questions.
#### Add a Question
Select **Add question** at the bottom of the current section to add a new question to the section. There is no limit to the number of questions you can add to a section (form page).
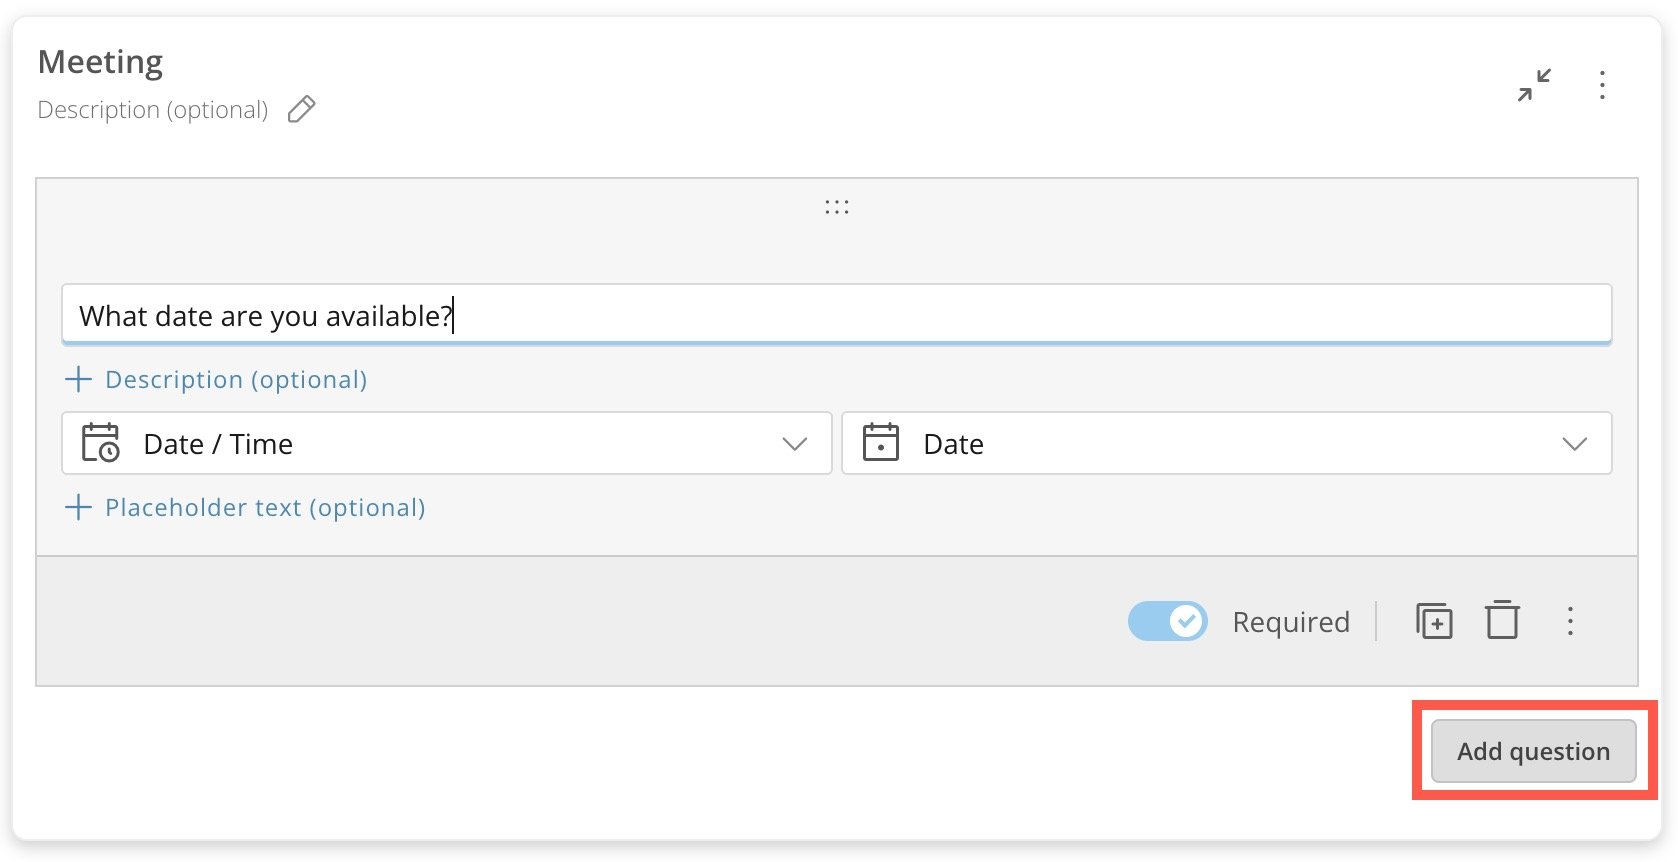 For each question, enter the question text and choose a question type and data type.
You can also optionally add a question description and placeholder text in the question field.
In this example, the placeholder text says "Please enter your name."
For each question, enter the question text and choose a question type and data type.
You can also optionally add a question description and placeholder text in the question field.
In this example, the placeholder text says "Please enter your name."
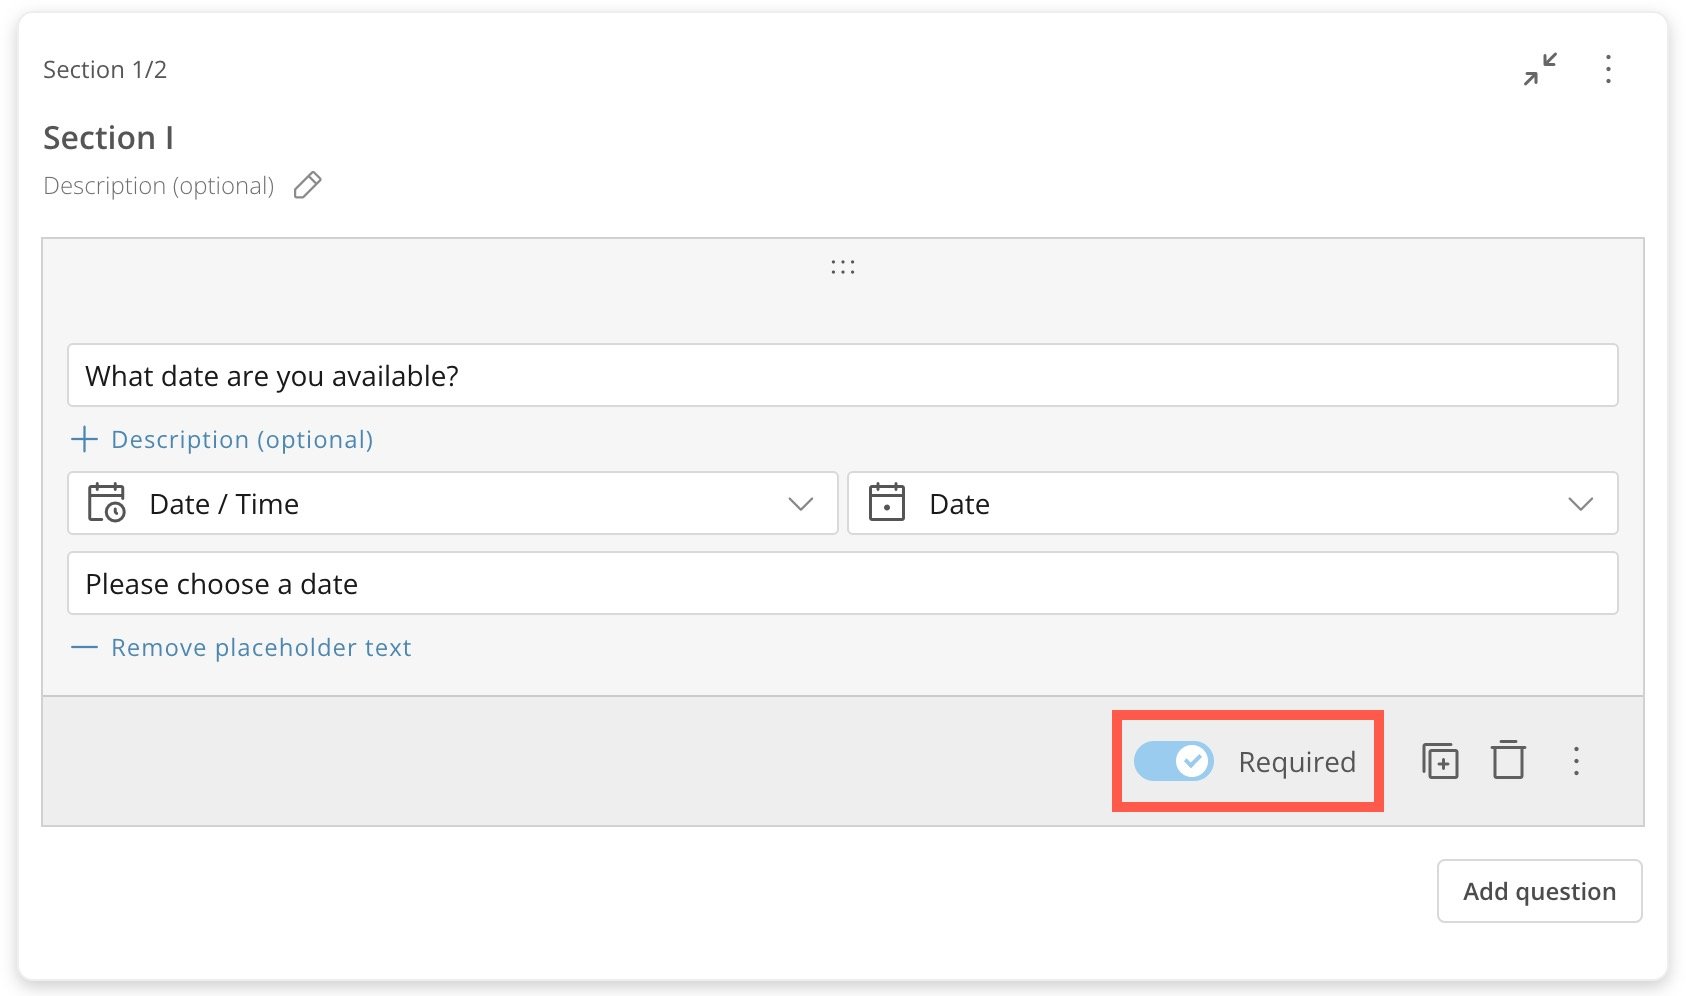
 **Required questions:** The **Required** toggle allows you to make a question required for form users. By default, all questions are required. If a question is marked required, form users must enter a value before submitting the form.
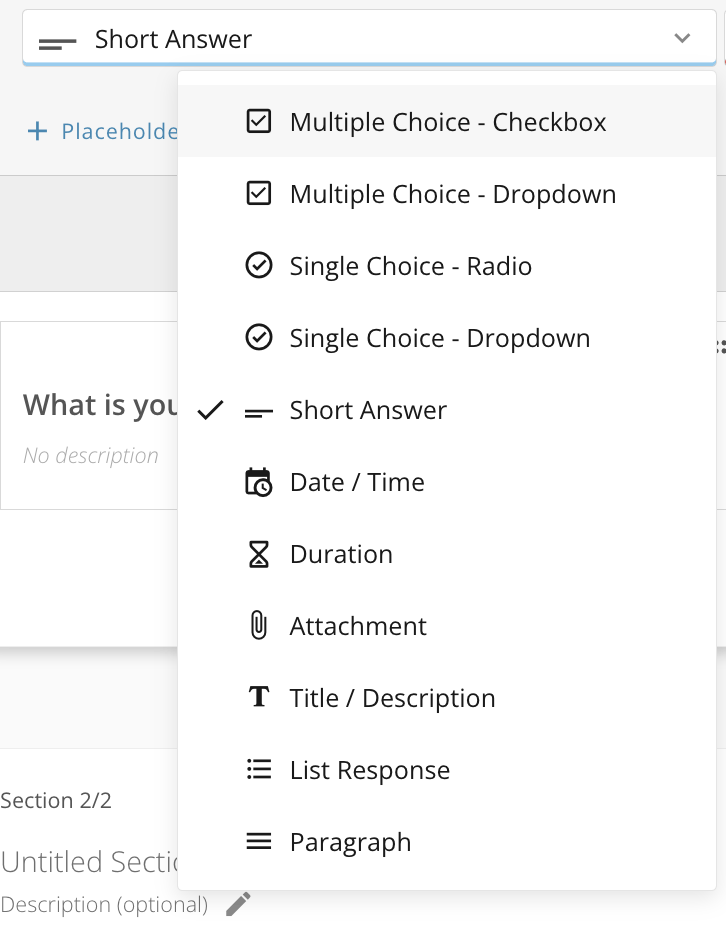
 #### Choose a Question Type
For each question, choose a question type from the dropdown. The question type determines how the form displays to users.
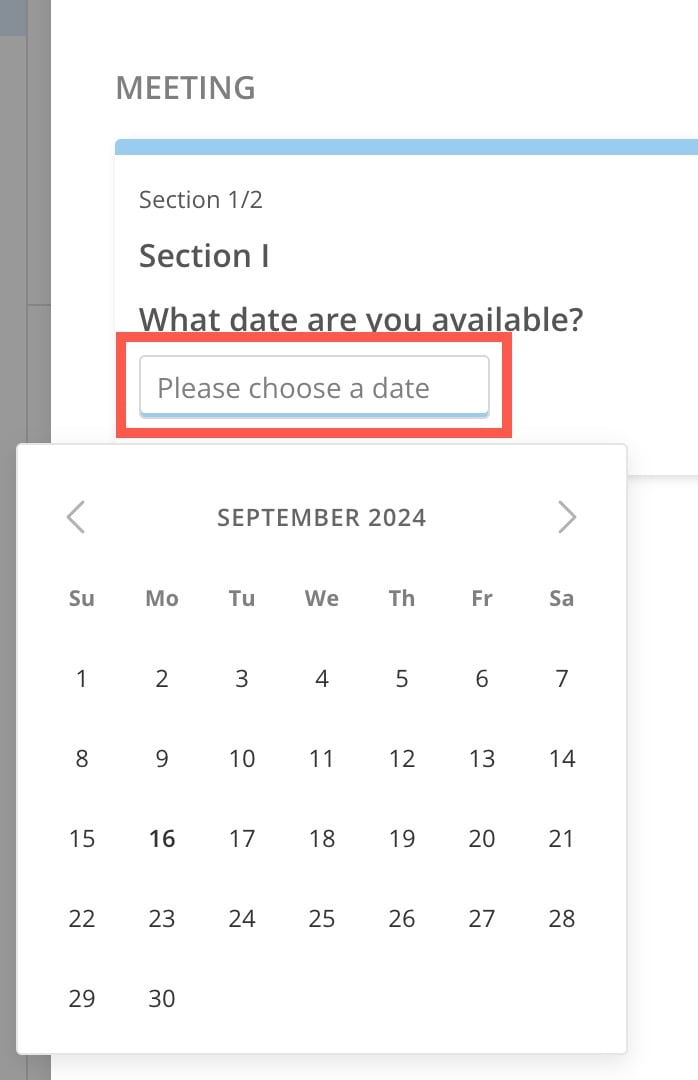
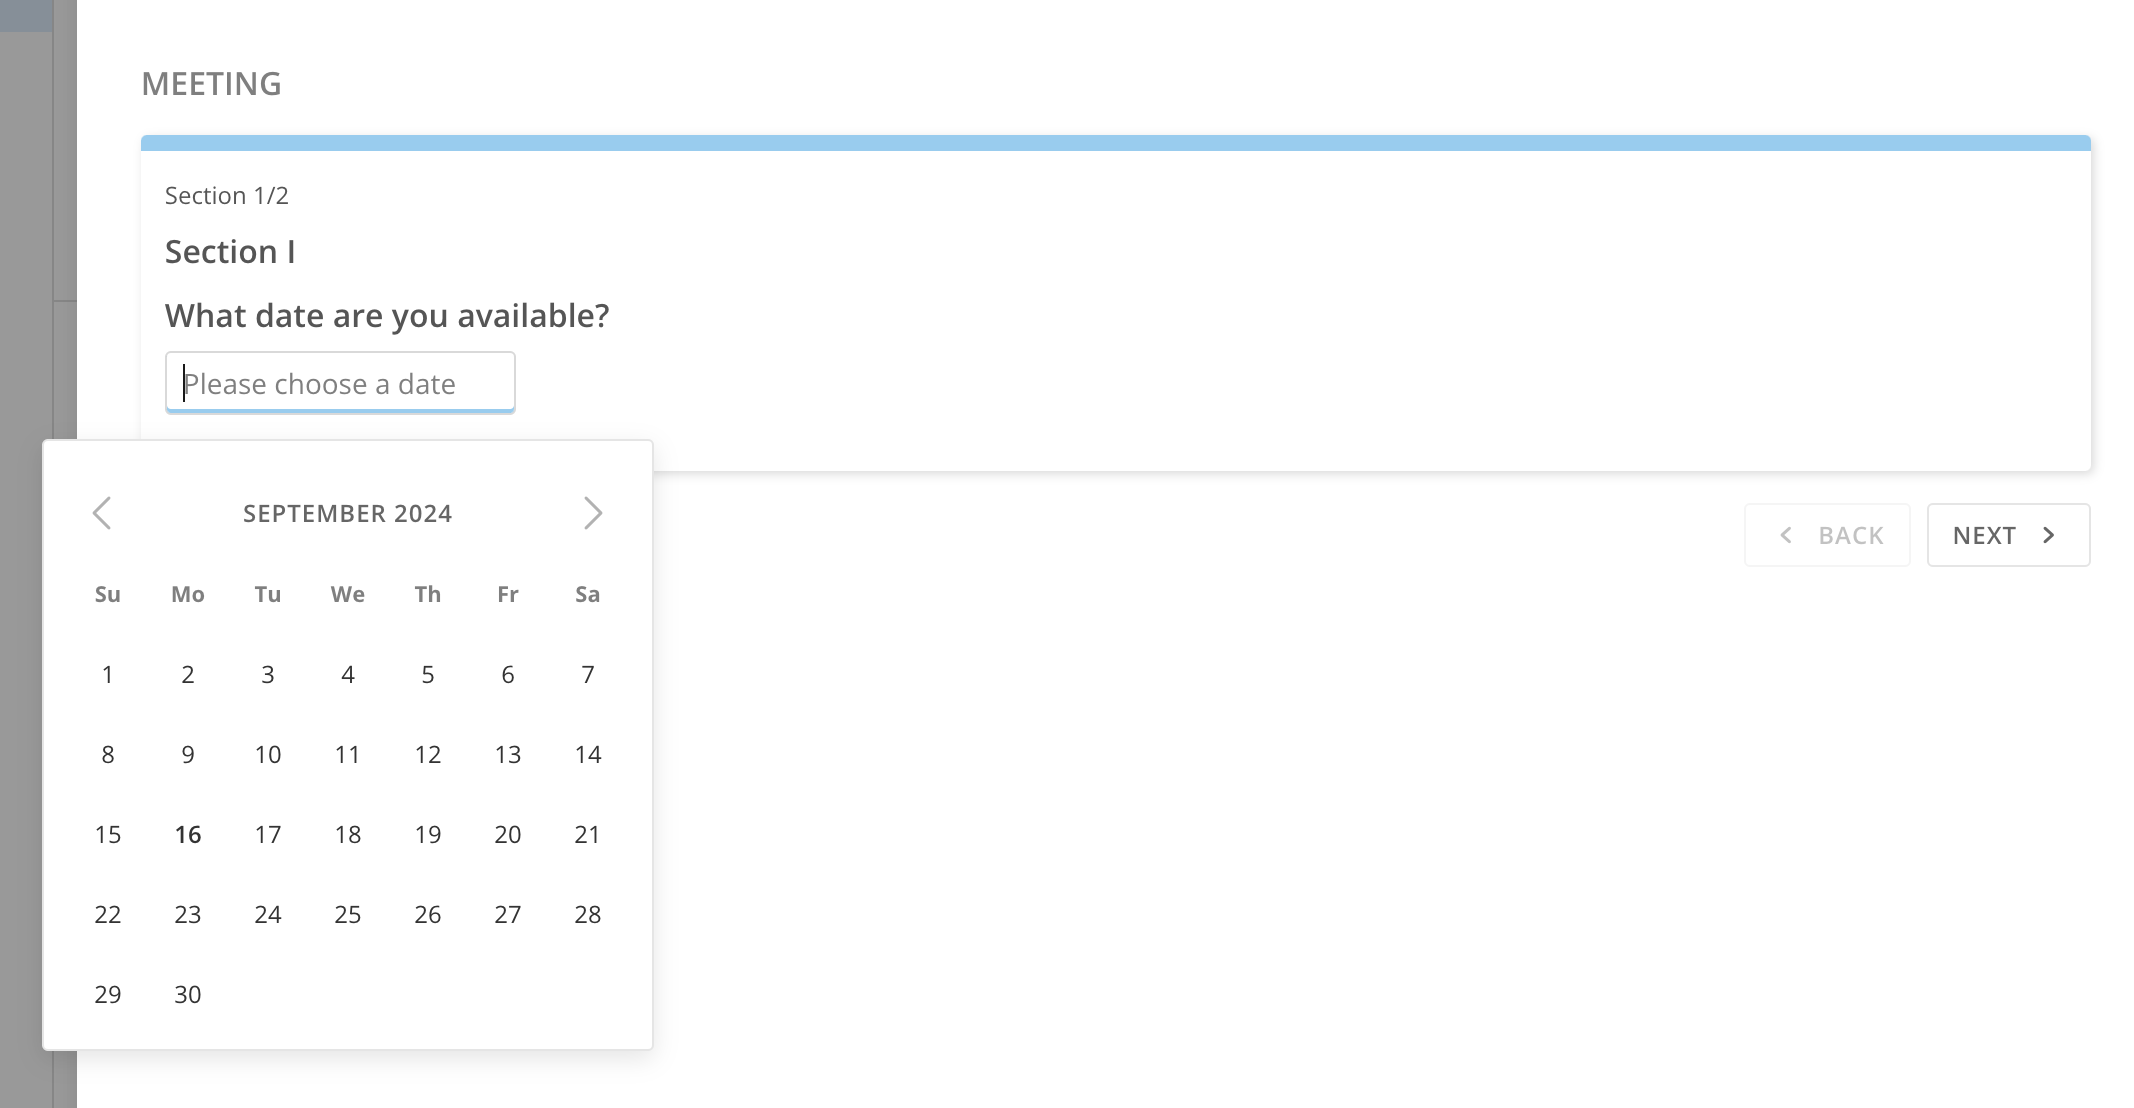
For example, a **Short Answer** type gives the user a simple text field, while a **Date/Time** type gives users a date and time picker.
#### Choose a Question Type
For each question, choose a question type from the dropdown. The question type determines how the form displays to users.
For example, a **Short Answer** type gives the user a simple text field, while a **Date/Time** type gives users a date and time picker.
 The available question types include:
* Multiple Choice
* Checkbox
* Dropdown
* Single Choice
* Radio
* Dropdown
* Short Answer
* Date/Time
* Duration
* Attachment
* Title/Description
* List Response
* Paragraph
The available question types include:
* Multiple Choice
* Checkbox
* Dropdown
* Single Choice
* Radio
* Dropdown
* Short Answer
* Date/Time
* Duration
* Attachment
* Title/Description
* List Response
* Paragraph
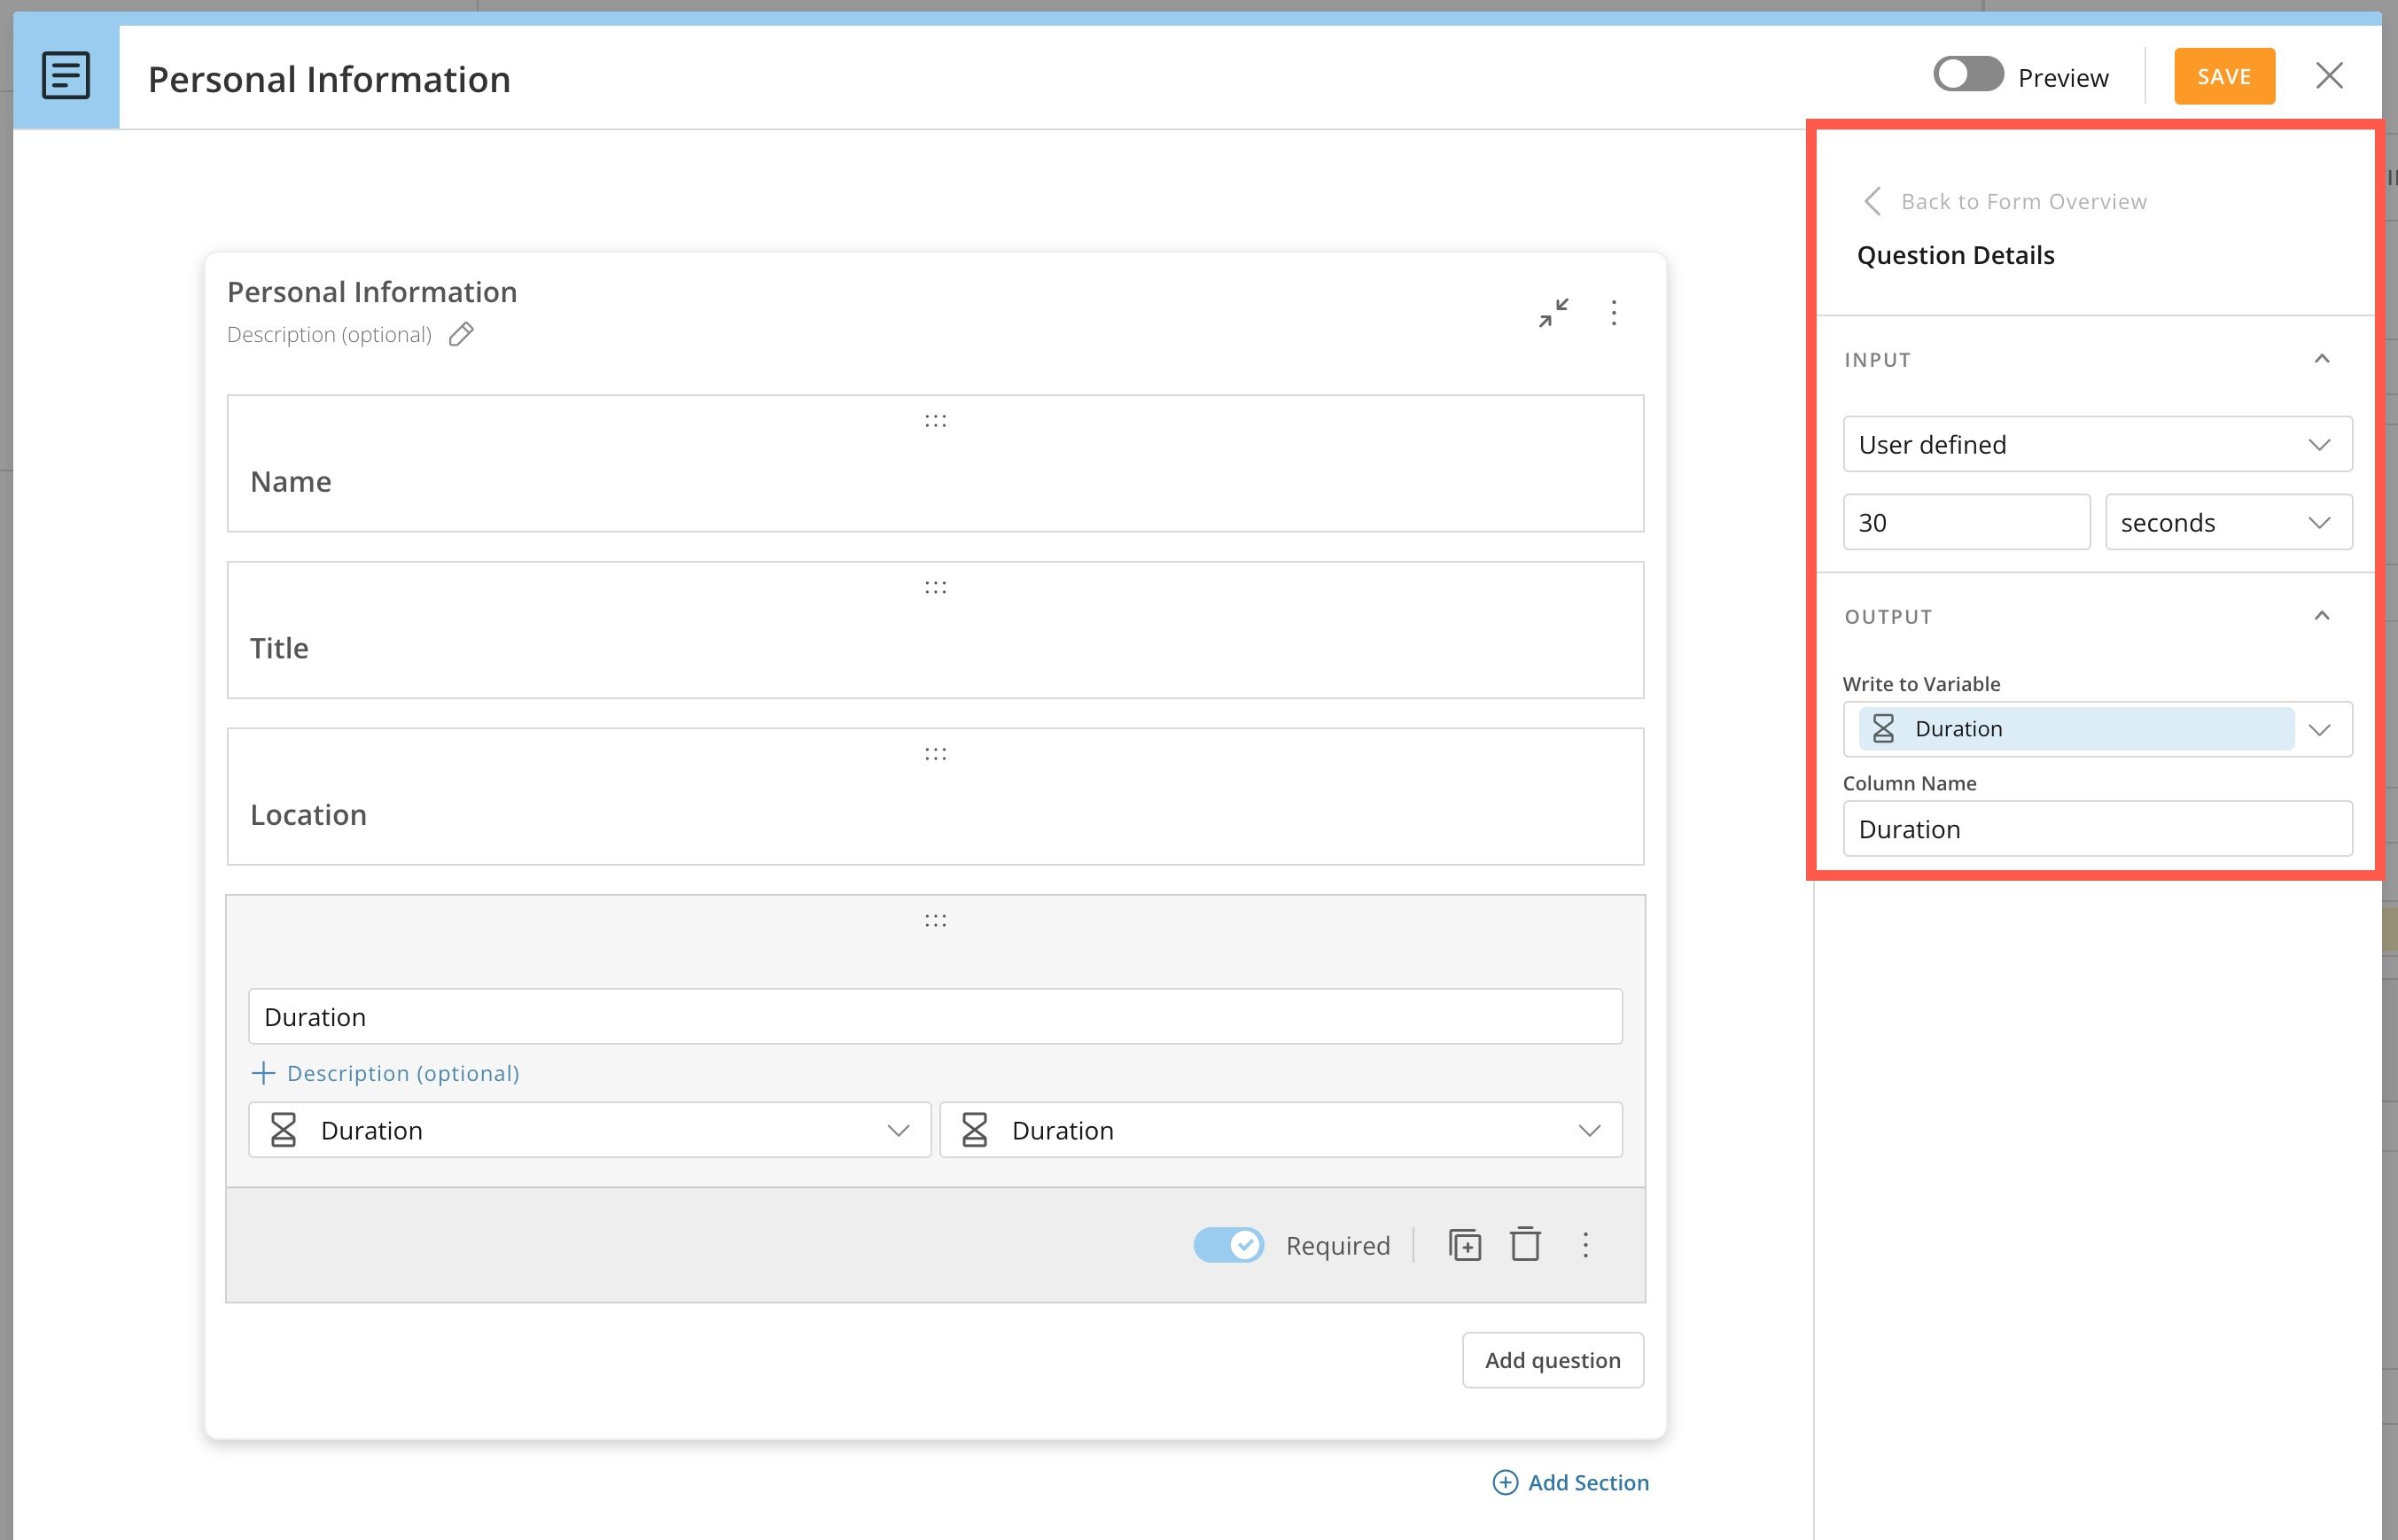
 When you select a question type, advanced question settings display in the configuration panel. These settings vary depending on the question type.
In the following example, a question with a **Duration** type allows you to configure a default interval of 30 seconds and give the output column a name of `Duration.`
When you select a question type, advanced question settings display in the configuration panel. These settings vary depending on the question type.
In the following example, a question with a **Duration** type allows you to configure a default interval of 30 seconds and give the output column a name of `Duration.`
 ##### Define List Options
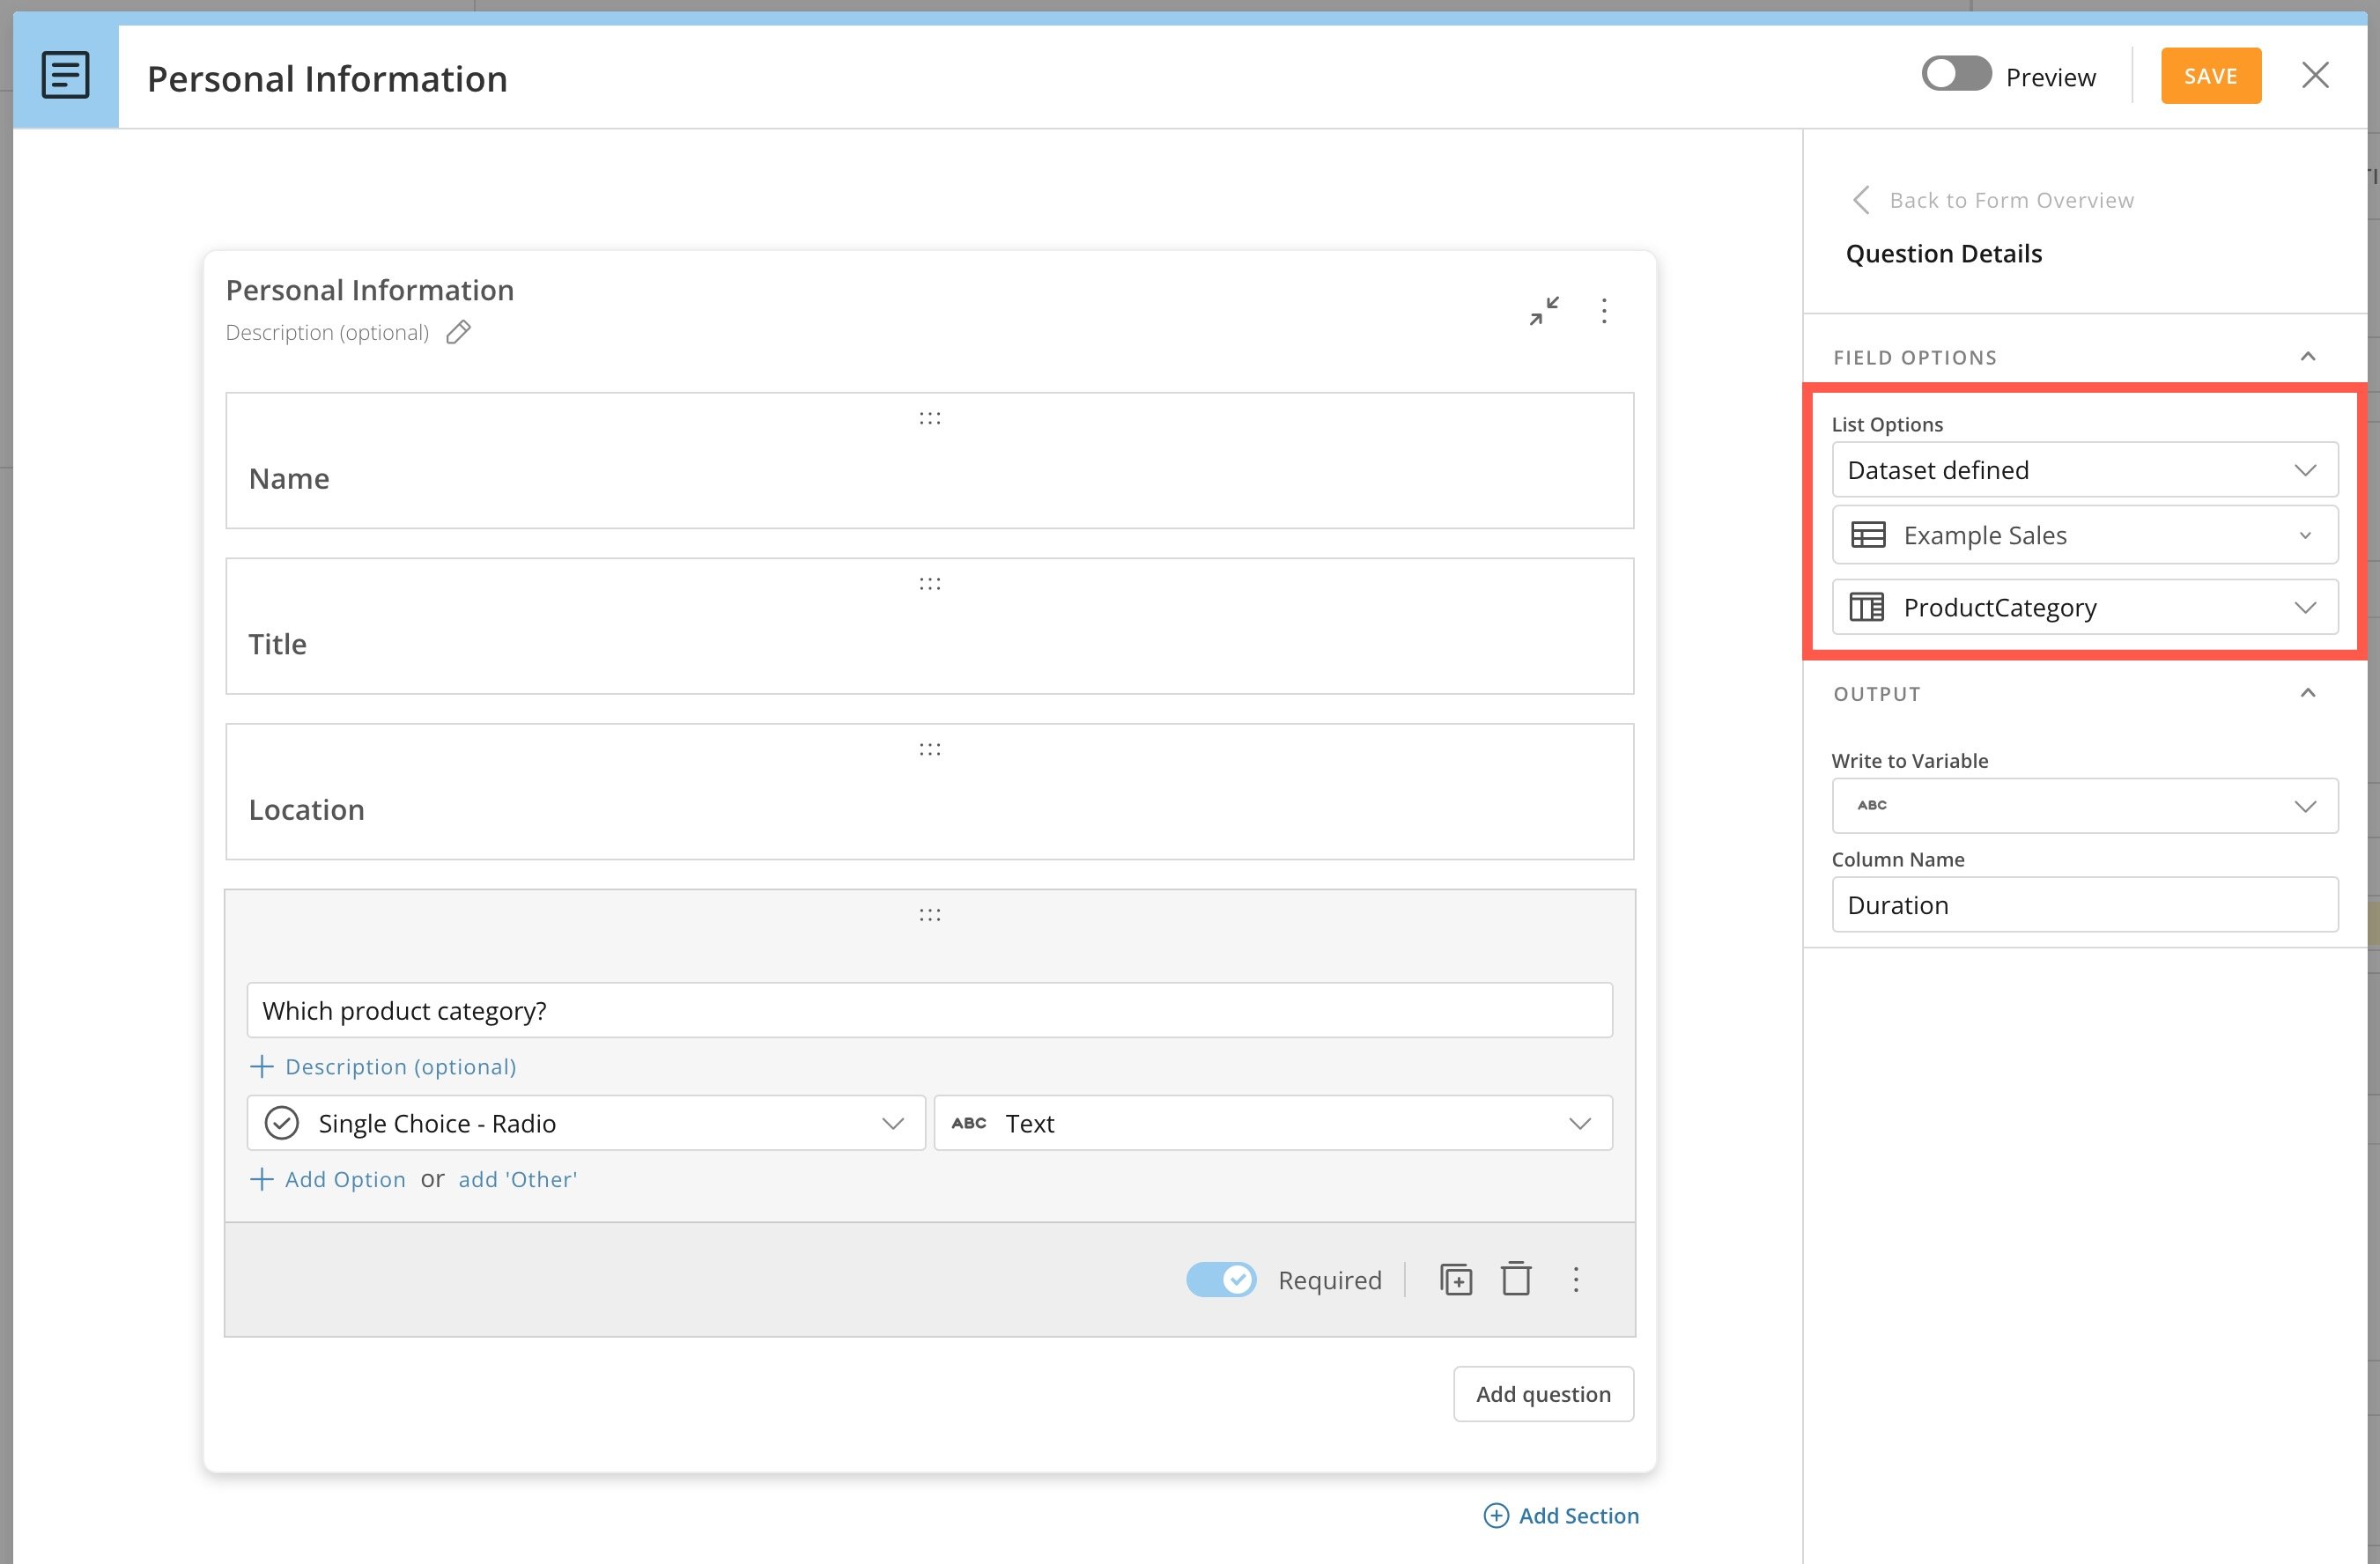
For Single Choice and Multiple Choice question types, you can either define the options manually or with a DataSet. In forms in workflows, you can also define the list options with variables.
In the **List Options** dropdown, select **Dataset defined**. Then choose a DataSet and a column within that DataSet.
##### Define List Options
For Single Choice and Multiple Choice question types, you can either define the options manually or with a DataSet. In forms in workflows, you can also define the list options with variables.
In the **List Options** dropdown, select **Dataset defined**. Then choose a DataSet and a column within that DataSet.
 In Workflows, you can also choose **Variable defined** list options.
When you choose to use external mapping, if you select **View** **input/outputs**, you can see that the Inputs/Outputs Catalog contains a third option: **Use External Values**.
Learn more about [Inputs/Outputs Catalog](#inputs_outputs_catalog) below.
**Cascading Filters**
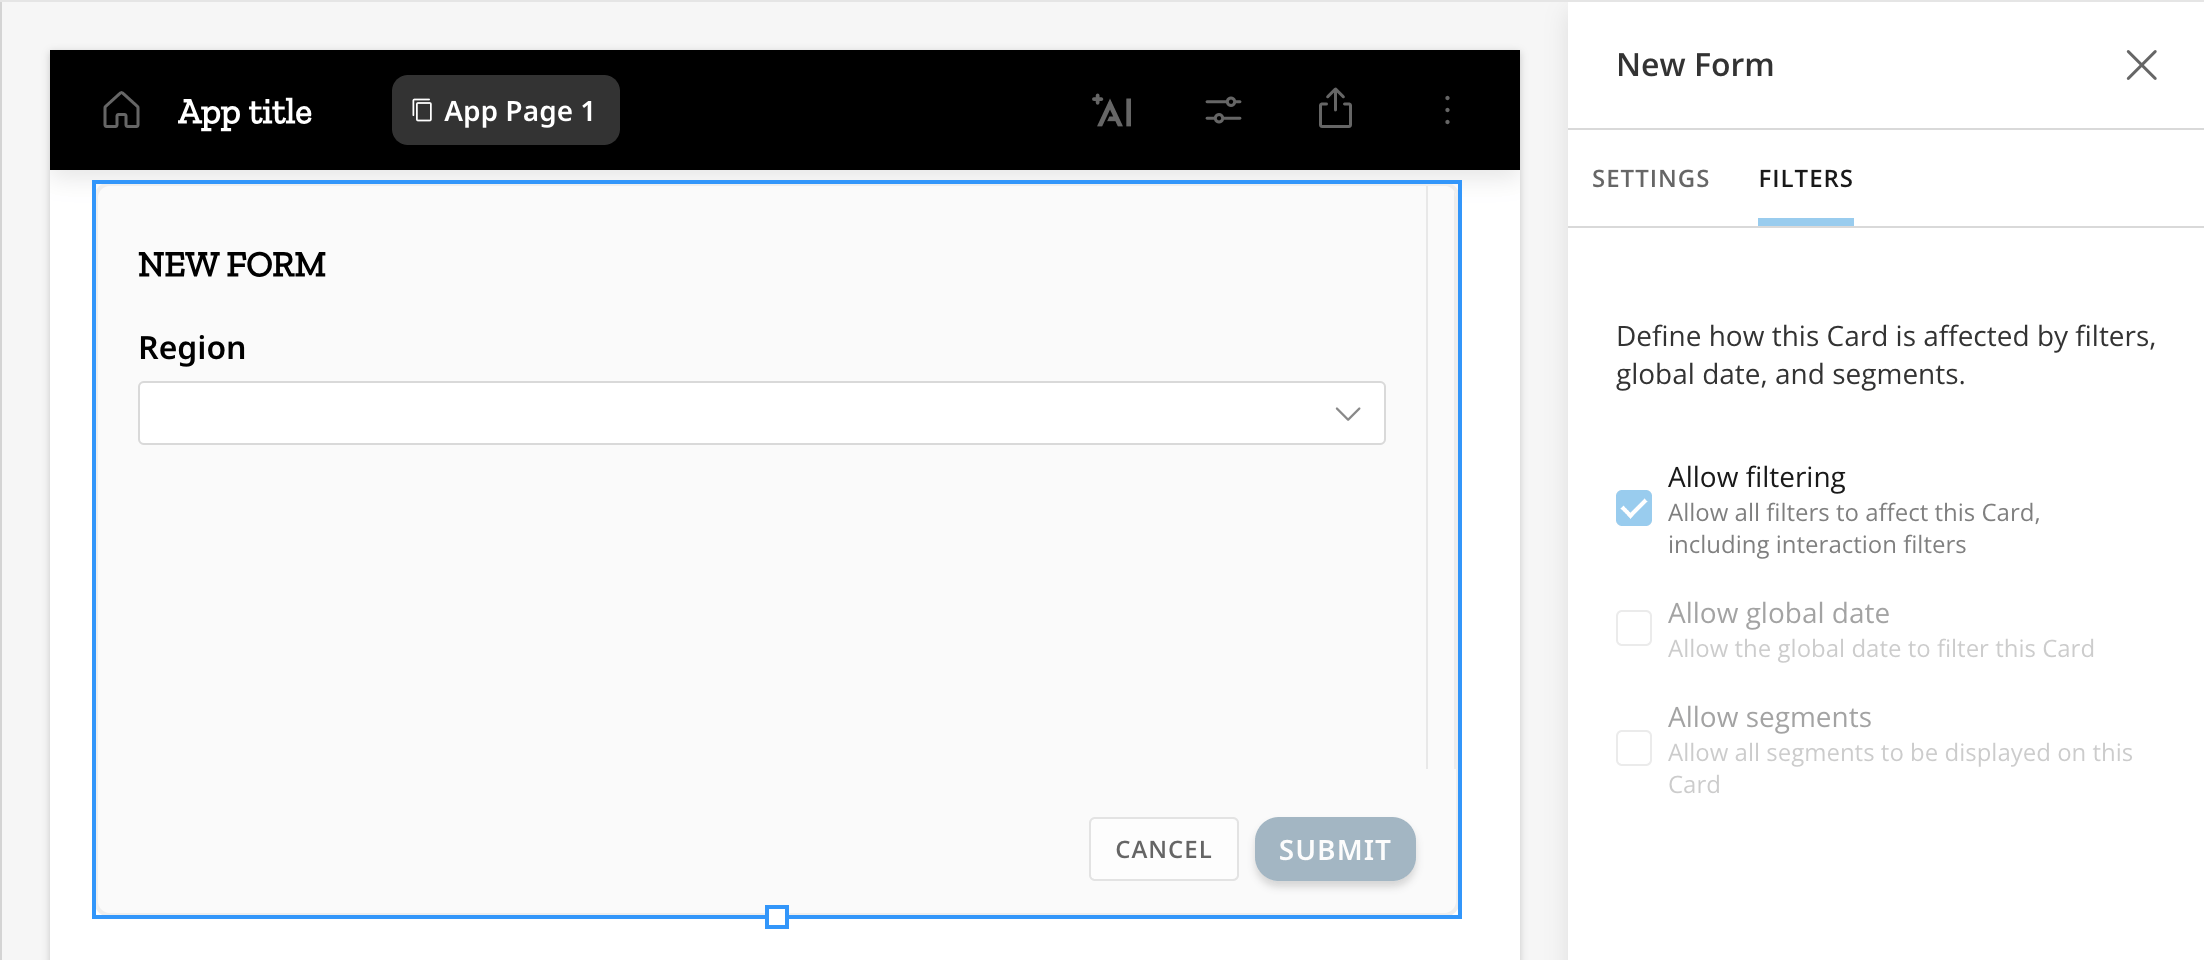
You can configure your form in an app to be affected by filters on the app page, including interaction filters. To allow this cascading filtering, add a form to your app. After configuring your form and exiting the form editor, select the form to open the right configuration panel and go to the **Filters** tab. Check the box labeled **Allow filtering**. Now, any forms in use on the app page affect your form, as long as the data corresponds.
In Workflows, you can also choose **Variable defined** list options.
When you choose to use external mapping, if you select **View** **input/outputs**, you can see that the Inputs/Outputs Catalog contains a third option: **Use External Values**.
Learn more about [Inputs/Outputs Catalog](#inputs_outputs_catalog) below.
**Cascading Filters**
You can configure your form in an app to be affected by filters on the app page, including interaction filters. To allow this cascading filtering, add a form to your app. After configuring your form and exiting the form editor, select the form to open the right configuration panel and go to the **Filters** tab. Check the box labeled **Allow filtering**. Now, any forms in use on the app page affect your form, as long as the data corresponds.
 #### Assign a Data Type
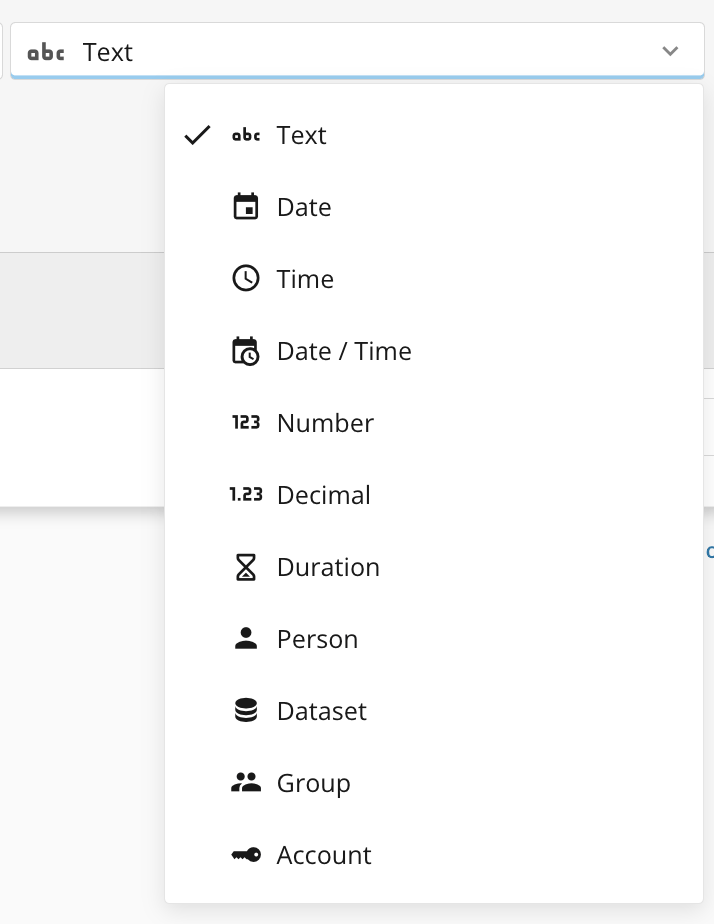
After choosing a question type, select a data type. The **Data Type** dropdown filters the accepted data types for your selected question type.
The possible data types are listed below. Not all data types are available for each question type.
* Text
* Date
* Time
* Date/Time
* Number
* Decimal
* Duration
* Person
* Dataset
* Group
* Account
#### Assign a Data Type
After choosing a question type, select a data type. The **Data Type** dropdown filters the accepted data types for your selected question type.
The possible data types are listed below. Not all data types are available for each question type.
* Text
* Date
* Time
* Date/Time
* Number
* Decimal
* Duration
* Person
* Dataset
* Group
* Account
 ##### Access Attachments Uploaded Through Forms
Attachments are stored and accessible via the File ID in the form response DataSet. You can use the File ID to access the file via API.
```json theme={"dark"}
{domo instance name}/api/data/v1/data-files/{fileId}
```
You can use the API to create a table with a link to download the files using a calculated field:
```
CONCAT('Download file')
```
#### Reorder Questions
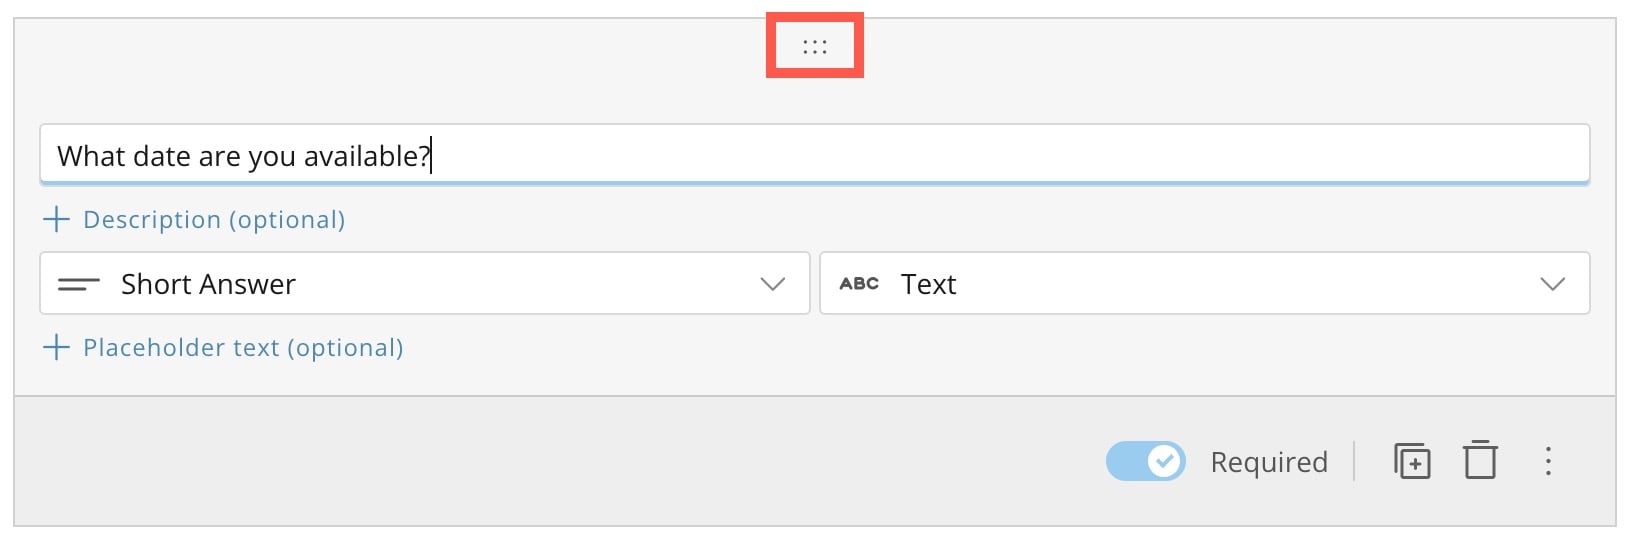
Use the handles to drag questions and reorder them within their section. You cannot drag questions between sections.
##### Access Attachments Uploaded Through Forms
Attachments are stored and accessible via the File ID in the form response DataSet. You can use the File ID to access the file via API.
```json theme={"dark"}
{domo instance name}/api/data/v1/data-files/{fileId}
```
You can use the API to create a table with a link to download the files using a calculated field:
```
CONCAT('Download file')
```
#### Reorder Questions
Use the handles to drag questions and reorder them within their section. You cannot drag questions between sections.
 #### Duplicate a Question
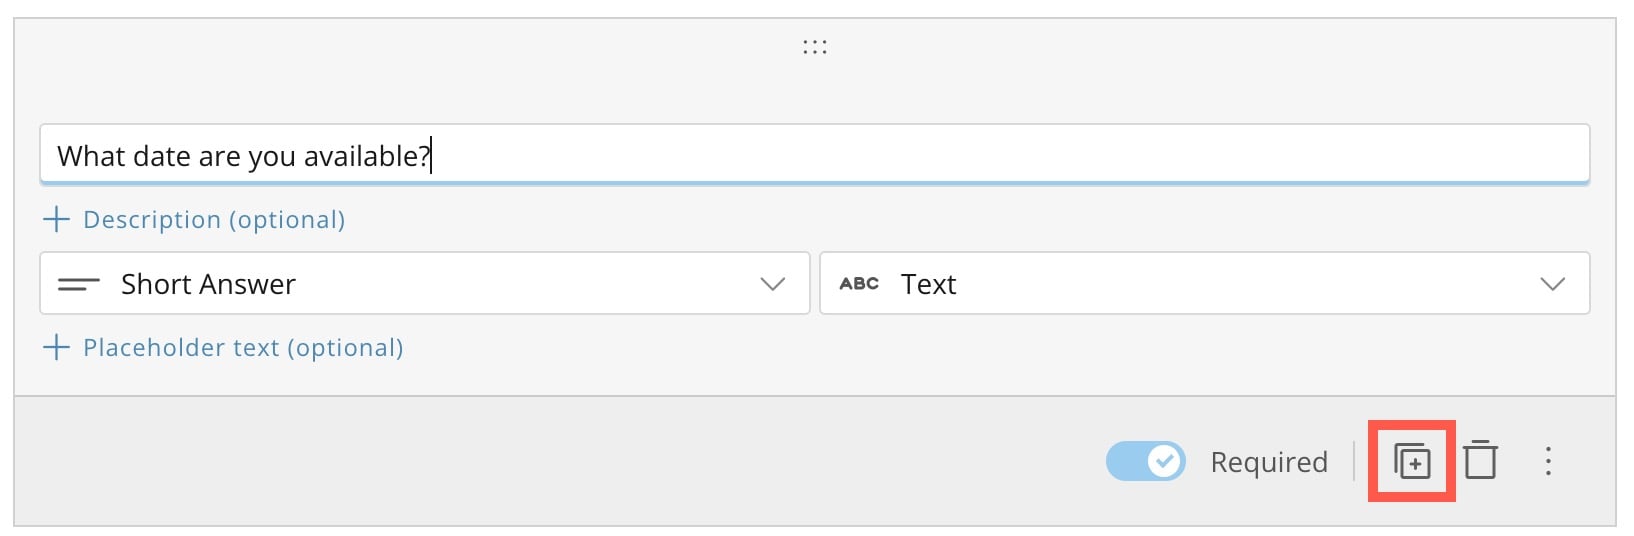
Selecting **Duplicate** places a copy of the question directly below the original question in the same section.
#### Duplicate a Question
Selecting **Duplicate** places a copy of the question directly below the original question in the same section.
 #### Delete a Question
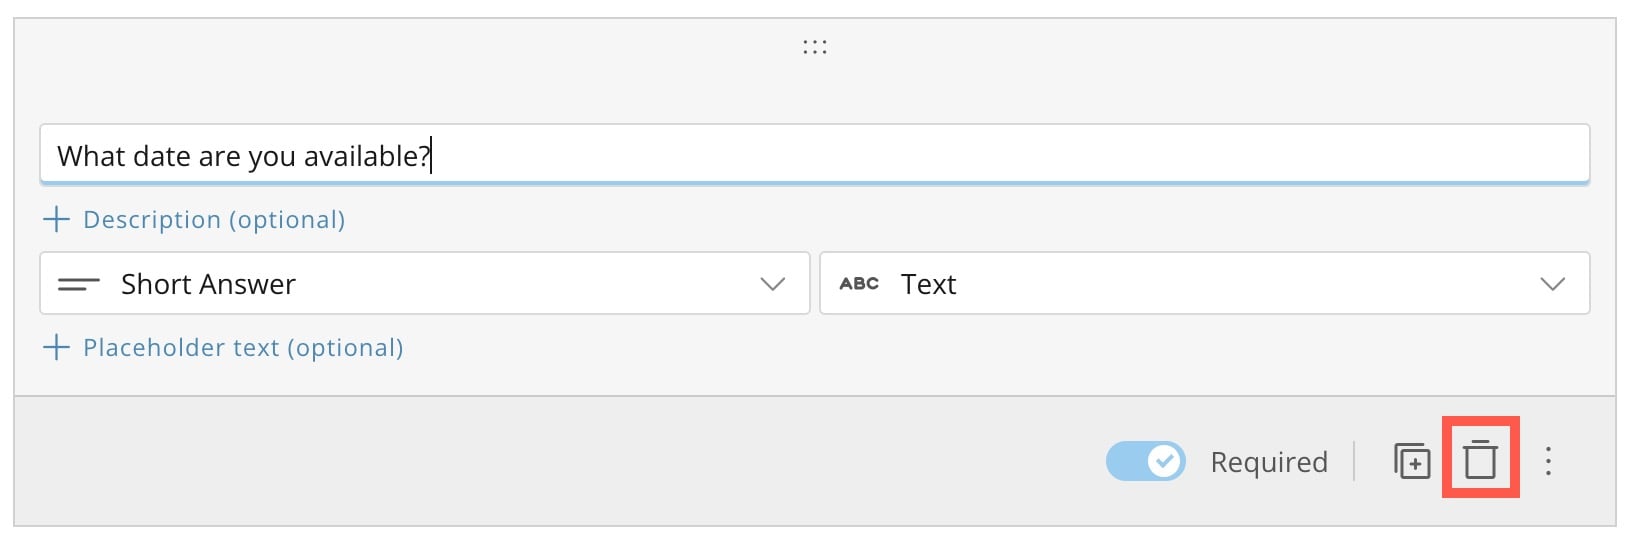
Selecting **Delete** removes a question from the form. Deleted questions are not retrievable.
#### Delete a Question
Selecting **Delete** removes a question from the form. Deleted questions are not retrievable.
 #### Advanced Settings - Workflows
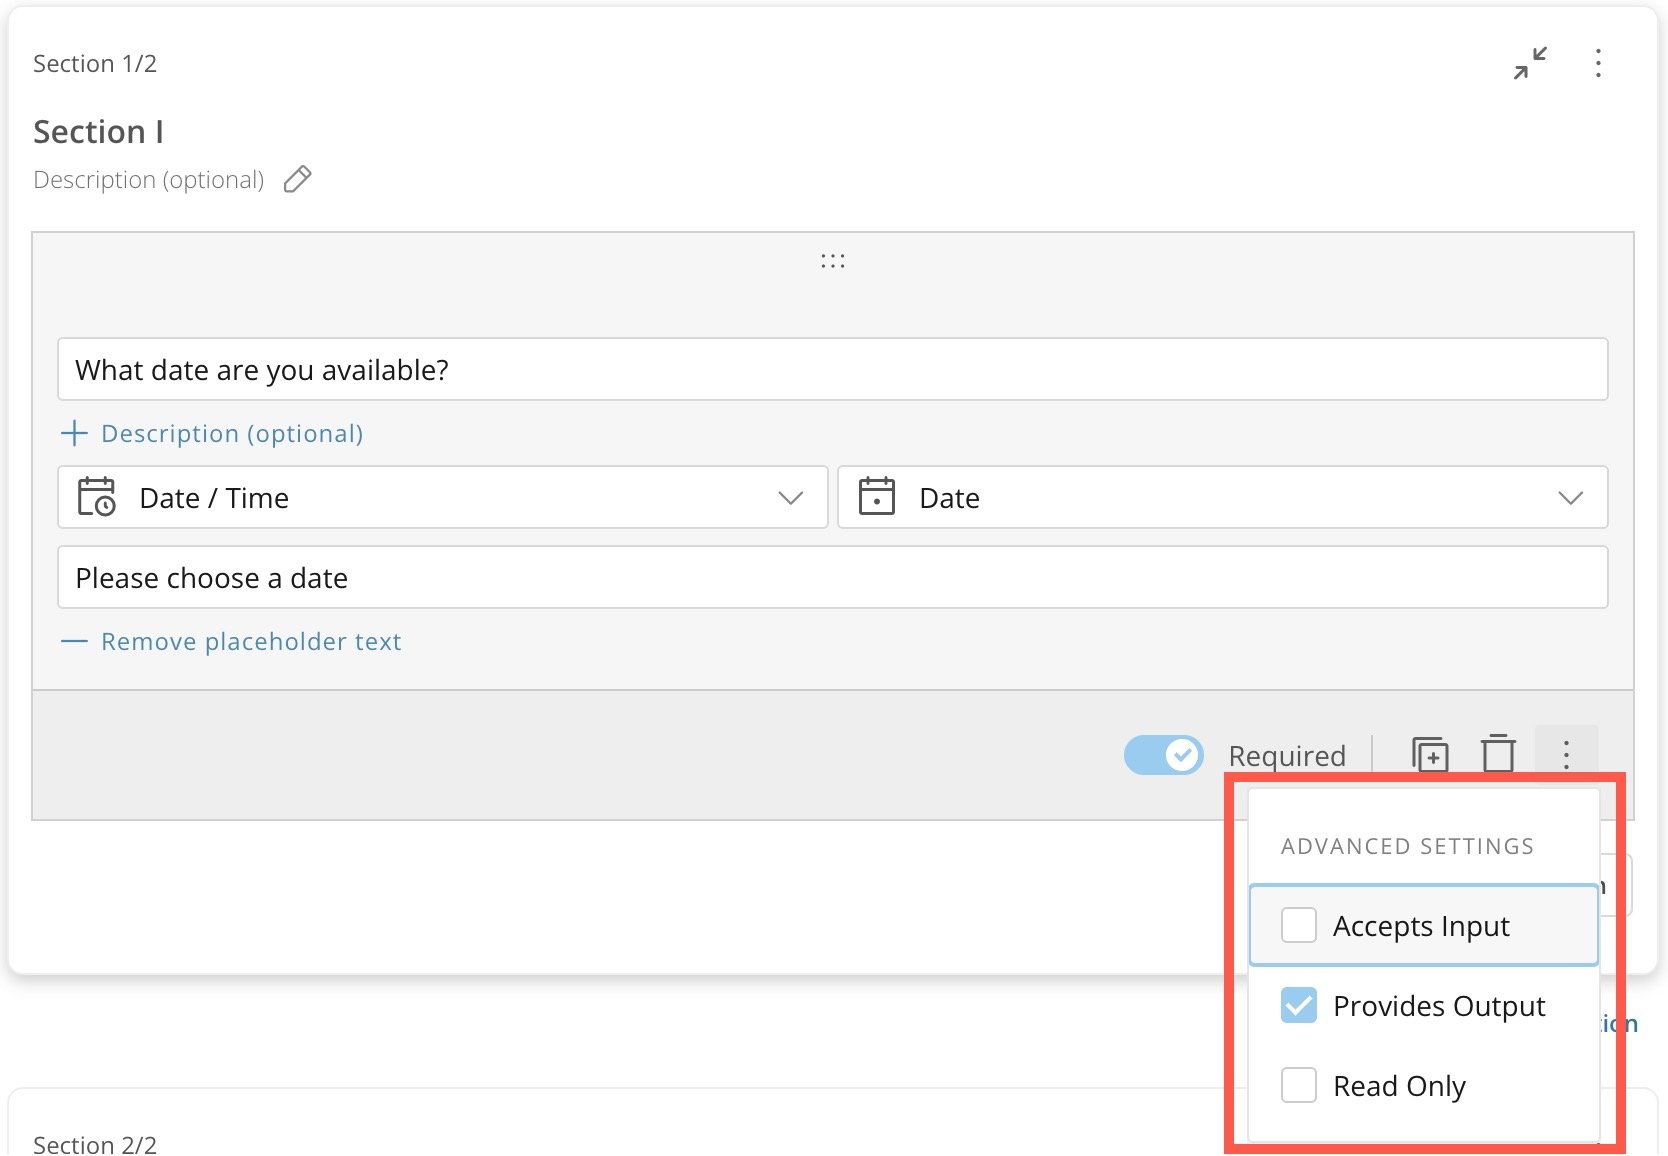
In Workflows, questions have advanced settings, which you can reach through the **action** **menu** (three vertical dots icon) at the bottom of the question. When you select this menu, the following options display:
* **Accepts Input —** Makes the question an input parameter of the form. The integrating system must provide a data value or values to populate the field when it renders. You must also mark the field as accepting input in the [Inputs/Outputs Catalog](#inputs_outputs_catalog).
* **Provides Output** **—** Makes the question an output parameter of the form. The integrating system receives the data value or values entered into the field after form submission. You must also mark the field as providing output in the [Inputs/Outputs Catalog](#inputs_outputs_catalog).
* **Read Only** **—** Prevents the question from accepting data entered by the form user. You should use this option if you do not want users to change the value displayed in the question.
#### Advanced Settings - Workflows
In Workflows, questions have advanced settings, which you can reach through the **action** **menu** (three vertical dots icon) at the bottom of the question. When you select this menu, the following options display:
* **Accepts Input —** Makes the question an input parameter of the form. The integrating system must provide a data value or values to populate the field when it renders. You must also mark the field as accepting input in the [Inputs/Outputs Catalog](#inputs_outputs_catalog).
* **Provides Output** **—** Makes the question an output parameter of the form. The integrating system receives the data value or values entered into the field after form submission. You must also mark the field as providing output in the [Inputs/Outputs Catalog](#inputs_outputs_catalog).
* **Read Only** **—** Prevents the question from accepting data entered by the form user. You should use this option if you do not want users to change the value displayed in the question.
 ### Form Controls — Workflows
There are two controls at the top of the form configuration panel in Workflows: **Form Settings** and **View** i **nputs/outputs**. Learn about these controls below.
### Form Controls — Workflows
There are two controls at the top of the form configuration panel in Workflows: **Form Settings** and **View** i **nputs/outputs**. Learn about these controls below.
 # Form Settings — Task Identifiers
When you select **Form Settings**, the Form Settings modal displays.
1. In the modal, toggle the switch to turn on Task Identifiers. Task Identifiers help [Task Center](/s/article/000005172) users find and retrieve specific tasks in the Task List.
# Form Settings — Task Identifiers
When you select **Form Settings**, the Form Settings modal displays.
1. In the modal, toggle the switch to turn on Task Identifiers. Task Identifiers help [Task Center](/s/article/000005172) users find and retrieve specific tasks in the Task List.
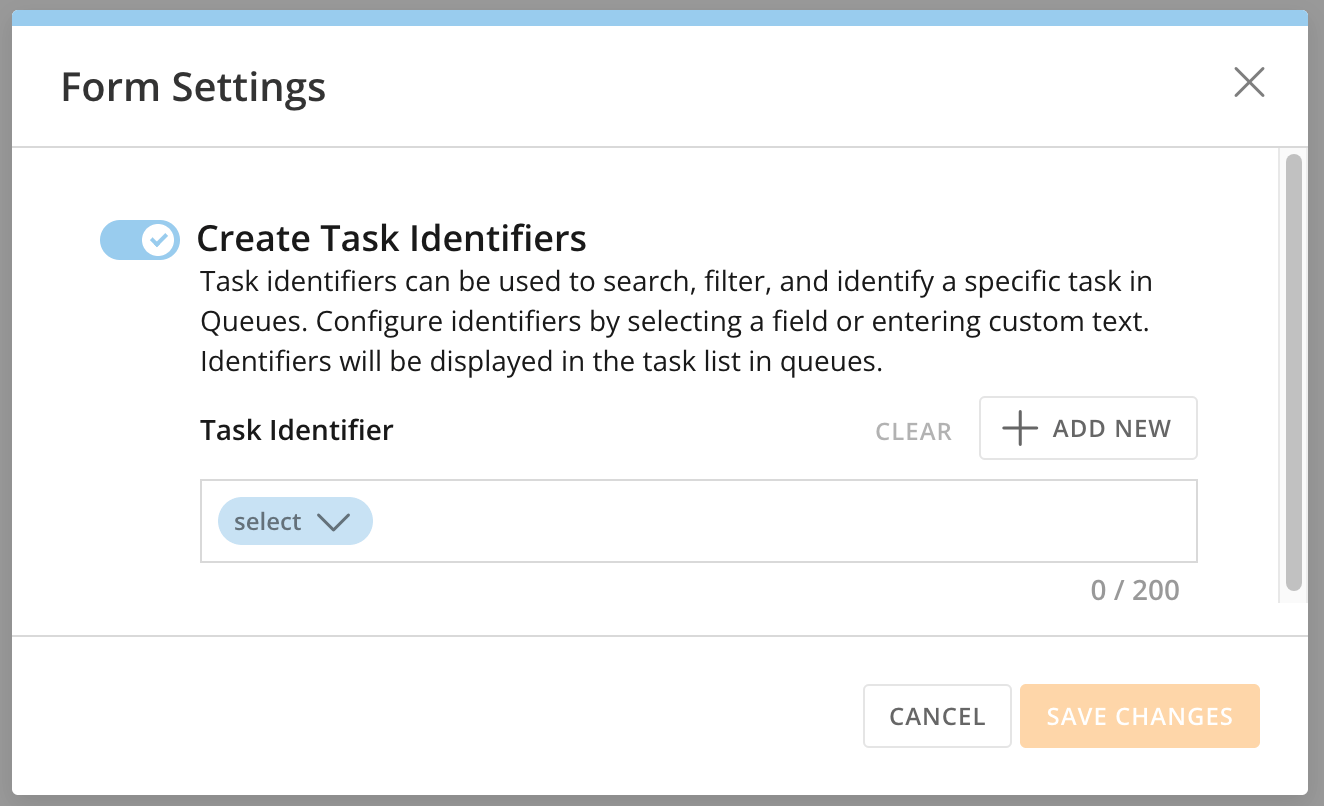 There are two ways to add new Task Identifiers: choosing variables from the form or entering plain text.
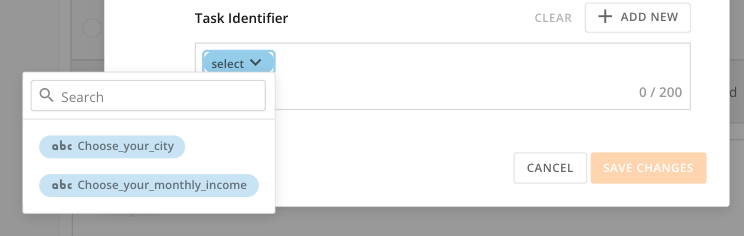
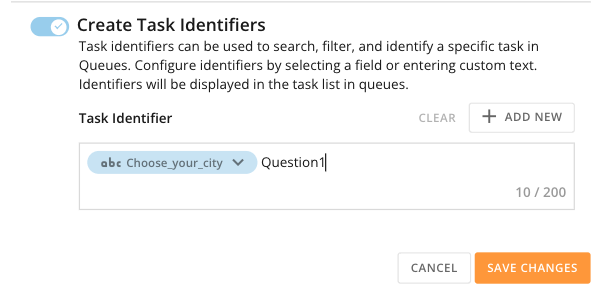
2. Enter one or more task identifiers: select **+ Add New** to select a variable from the form or enter custom text. You can add as many Task Identifiers of either kind, within the 200-character limit.
There are two ways to add new Task Identifiers: choosing variables from the form or entering plain text.
2. Enter one or more task identifiers: select **+ Add New** to select a variable from the form or enter custom text. You can add as many Task Identifiers of either kind, within the 200-character limit.
 3. Save your changes.
4. (Optional) Go to Task Center and confirm that the task displays with the chosen identifiers.
**Notes:**
* Deleting a variable from a form can affect Task Identifiers. If a variable is deleted from a form, make sure the Task Identifier is also updated.
* Only four identifiers are currently supported and can be displayed in a task.
* Identifiers are restricted to certain question types, and not all questions/items in a form can be used as Task Identifiers.
The supported question types are:
* Short answer
* Date
* Duration
* Title/Description
* Single Choice
* Multiple Choice
# Inputs/Outputs Catalog
In your Workflows form, selecting **View** i **nputs/outputs** opens the **Inputs/Outputs Catalo** **g** modal, which contains the form's contract (or designated inputs and outputs).
The modal has two tabs: **Inputs/Outputs** and **Uncatalogued**.
3. Save your changes.
4. (Optional) Go to Task Center and confirm that the task displays with the chosen identifiers.
**Notes:**
* Deleting a variable from a form can affect Task Identifiers. If a variable is deleted from a form, make sure the Task Identifier is also updated.
* Only four identifiers are currently supported and can be displayed in a task.
* Identifiers are restricted to certain question types, and not all questions/items in a form can be used as Task Identifiers.
The supported question types are:
* Short answer
* Date
* Duration
* Title/Description
* Single Choice
* Multiple Choice
# Inputs/Outputs Catalog
In your Workflows form, selecting **View** i **nputs/outputs** opens the **Inputs/Outputs Catalo** **g** modal, which contains the form's contract (or designated inputs and outputs).
The modal has two tabs: **Inputs/Outputs** and **Uncatalogued**.
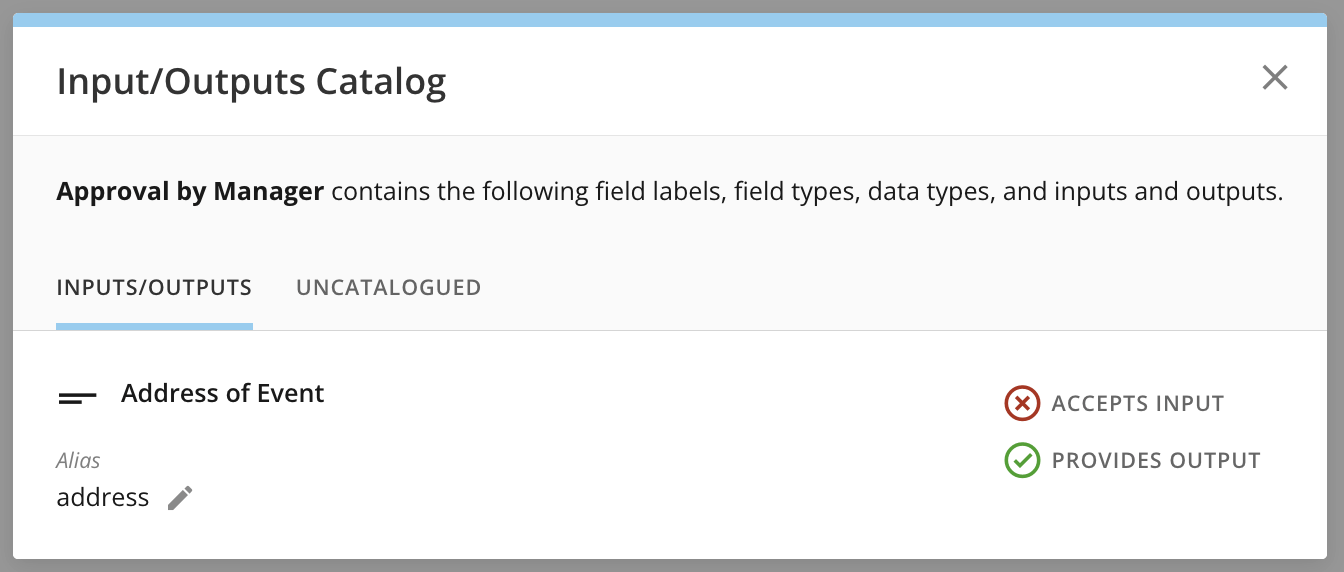 The **Inputs/Outputs** tab displays each question in the form as a separate item.
The field name and alias display on the left side of the catalog. You can edit the alias here in the catalog. (To edit the field name, you must close the modal and return to the form.)
**What is an alias?**
The alias is used as a parameter inside the workflow or queue. You can edit the alias here in the catalog, and map the parameter to its data type in the form settings under **Parameters** in the form configuration panel.
The **Inputs/Outputs** tab displays each question in the form as a separate item.
The field name and alias display on the left side of the catalog. You can edit the alias here in the catalog. (To edit the field name, you must close the modal and return to the form.)
**What is an alias?**
The alias is used as a parameter inside the workflow or queue. You can edit the alias here in the catalog, and map the parameter to its data type in the form settings under **Parameters** in the form configuration panel.
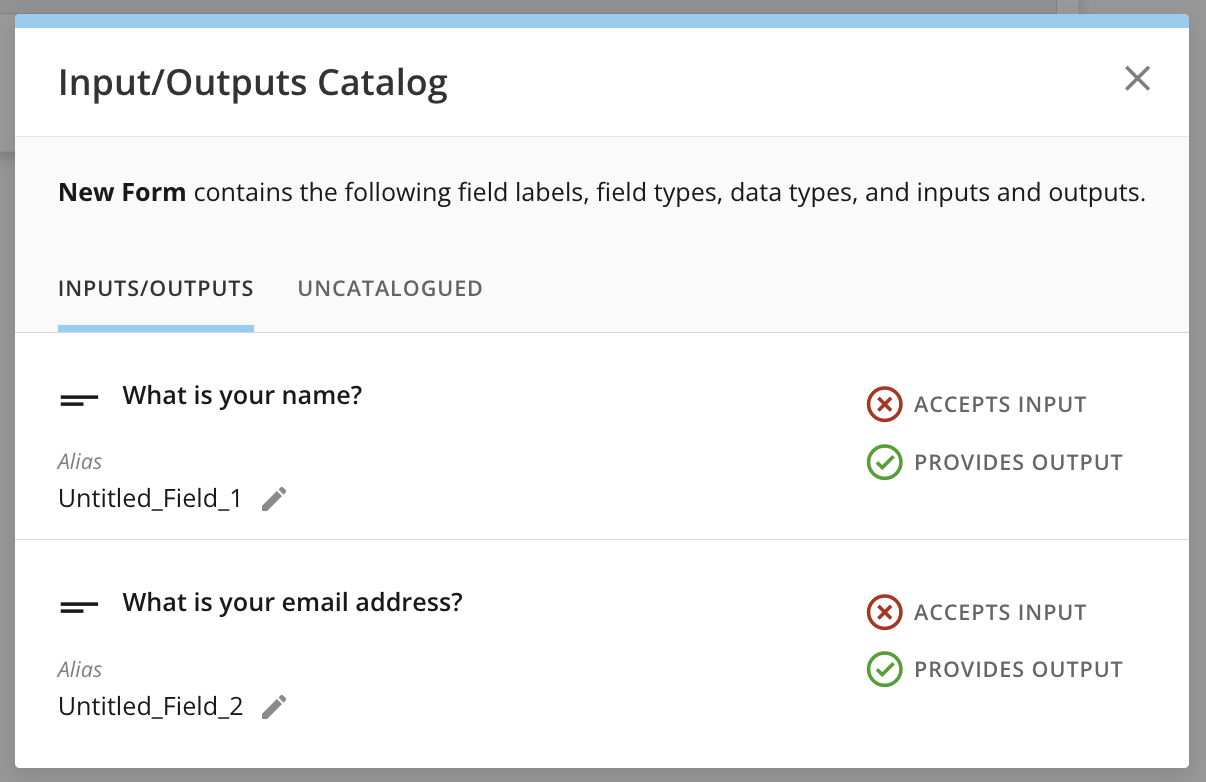 #### Contract
The input/output contract displays on the right side of the catalog.
Fields in the contract are designated as accepting input and/or providing output:
* **Inputs —** An input field requires the integrating system to pass a mapping or value to the form. This is to pre-populate the field with the mapping or value data when the form renders to an end user.
* **Outputs —** An output field passes the data in the field to the integrating system. When you create a form, you must determine what data the form requires as input and what data the form provides as output.
A green checkmark means that the field is a parameter in the form contract.
A red X means that the field is not a parameter in the form contract.
You can change a field's designation by selecting either of these icons.
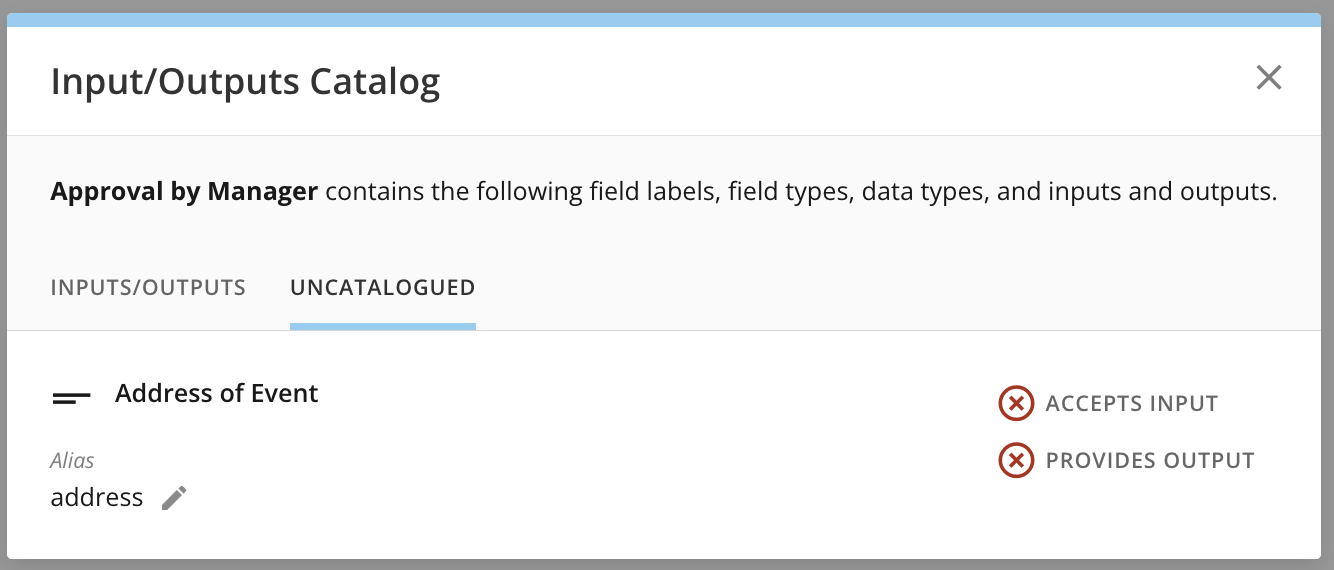
Fields without any designation are moved to the **Uncatalogued** tab. You can go to that tab and select either icon to move the field back to the **Inputs** / **Outputs** tab.
#### Contract
The input/output contract displays on the right side of the catalog.
Fields in the contract are designated as accepting input and/or providing output:
* **Inputs —** An input field requires the integrating system to pass a mapping or value to the form. This is to pre-populate the field with the mapping or value data when the form renders to an end user.
* **Outputs —** An output field passes the data in the field to the integrating system. When you create a form, you must determine what data the form requires as input and what data the form provides as output.
A green checkmark means that the field is a parameter in the form contract.
A red X means that the field is not a parameter in the form contract.
You can change a field's designation by selecting either of these icons.
Fields without any designation are moved to the **Uncatalogued** tab. You can go to that tab and select either icon to move the field back to the **Inputs** / **Outputs** tab.
 If using external mapping, the catalog contains a third option— **Use External Values.**
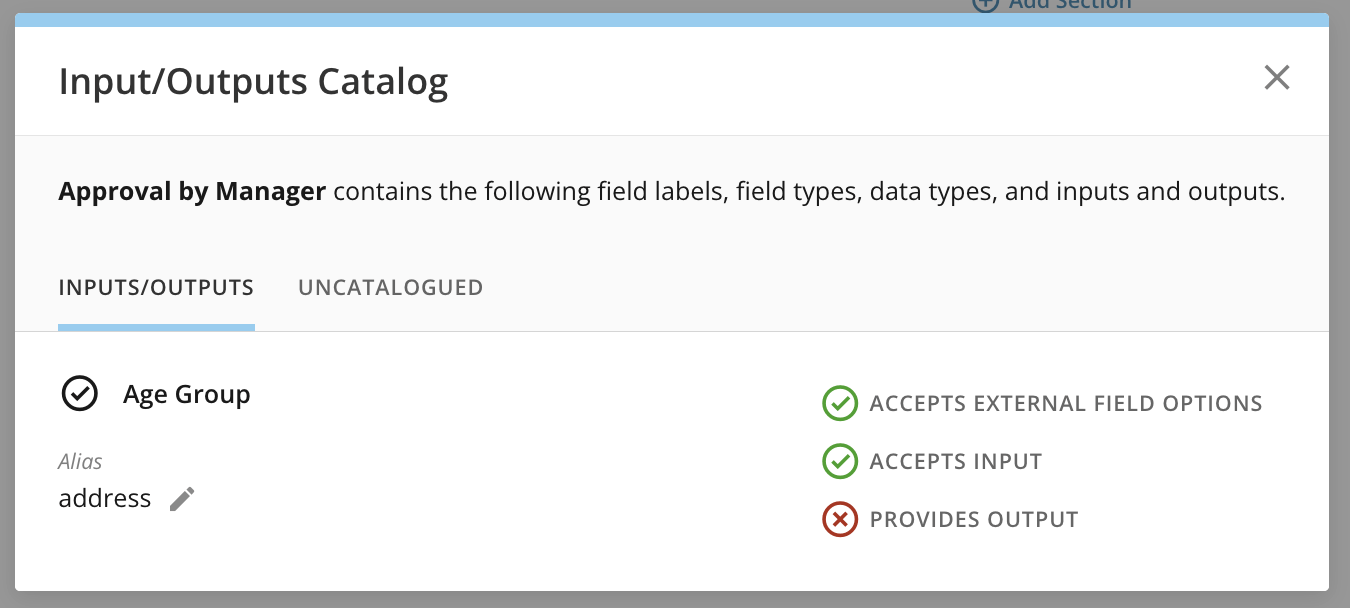 When you enable **Accepts Input** for these question types, a mapping is required to have one or more values (depending on the field type) pre-selected when the form renders to an end user.
You can use the Preview feature to see how the form behaves at runtime.
When you enable **Accepts Input** for these question types, a mapping is required to have one or more values (depending on the field type) pre-selected when the form renders to an end user.
You can use the Preview feature to see how the form behaves at runtime.