> ## Documentation Index
> Fetch the complete documentation index at: https://domoinc-openapi-sync-dataflows.mintlify.site/llms.txt
> Use this file to discover all available pages before exploring further.
# Enterprise Data Copy
export const InlineImage = ({src, alt = '', height = '1.6em'}) => {
return  ;
};
## Intro
Enterprise Data Copy is the flexible tool you need to copy data in bulk across instances. This tool is unique because you can either list the DataSets you want to copy in a DataSet, or you can use Filters to include a dynamic list of DataSets that meet specific criteria.
Enterprise Data Copy is part of the Governance Toolkit. To enable the Toolkit, reach out to your Account Executive (AE).
***
## Required Grants
To access the Governance Toolkit, a user needs one of two grants enabled for their role: Create Custom Pipeline Processes or Administer Custom Pipeline Processes. By default, the Administer Custom Pipeline Process grant is enabled for users with the Admin role.
* **Create Custom Pipeline Processes —** Allows a user to create, update, share, and delete jobs. The user can only view jobs that they create or jobs that have been shared with them.
* **Edit DataSet —** Allows a user to create, edit, and delete DataSets to which they have access.
To learn more about custom roles and grants, see [Managing Custom Roles.](/s/article/360043438973)
## Access Enterprise Data Copy
Follow these steps to access the Governance Toolkit and Enterprise Data Copy:
1. In the navigation header, go to **More** > **Admin.**
The Admin Settings display.
2. In the **Governance** menu, select **Toolkit.**
The Toolkit opens.
3. In either the **Your Tools** or **Available Tools** list, select **Enterprise Data Copy**.
;
};
## Intro
Enterprise Data Copy is the flexible tool you need to copy data in bulk across instances. This tool is unique because you can either list the DataSets you want to copy in a DataSet, or you can use Filters to include a dynamic list of DataSets that meet specific criteria.
Enterprise Data Copy is part of the Governance Toolkit. To enable the Toolkit, reach out to your Account Executive (AE).
***
## Required Grants
To access the Governance Toolkit, a user needs one of two grants enabled for their role: Create Custom Pipeline Processes or Administer Custom Pipeline Processes. By default, the Administer Custom Pipeline Process grant is enabled for users with the Admin role.
* **Create Custom Pipeline Processes —** Allows a user to create, update, share, and delete jobs. The user can only view jobs that they create or jobs that have been shared with them.
* **Edit DataSet —** Allows a user to create, edit, and delete DataSets to which they have access.
To learn more about custom roles and grants, see [Managing Custom Roles.](/s/article/360043438973)
## Access Enterprise Data Copy
Follow these steps to access the Governance Toolkit and Enterprise Data Copy:
1. In the navigation header, go to **More** > **Admin.**
The Admin Settings display.
2. In the **Governance** menu, select **Toolkit.**
The Toolkit opens.
3. In either the **Your Tools** or **Available Tools** list, select **Enterprise Data Copy**.
 **Note:** If the **Toolkit** option does not display in the **Governance** menu, make sure your user role has the required grants. You may need to enable the Toolkit by reaching out to your AE.
## Add a Domo Access Token Account
You need to create a Domo Access Token account to connect to another instance and pull a report. There are two options for creating this account: with an access token or with a username and password. You only need to complete one.
1. In the navigation header, go to **Data.**
2. From the left side rail, select
**Accounts**.
The **Accounts Integration** page displays.
3. Select **+ Add Account**.
**Note:** If the **Toolkit** option does not display in the **Governance** menu, make sure your user role has the required grants. You may need to enable the Toolkit by reaching out to your AE.
## Add a Domo Access Token Account
You need to create a Domo Access Token account to connect to another instance and pull a report. There are two options for creating this account: with an access token or with a username and password. You only need to complete one.
1. In the navigation header, go to **Data.**
2. From the left side rail, select
**Accounts**.
The **Accounts Integration** page displays.
3. Select **+ Add Account**.
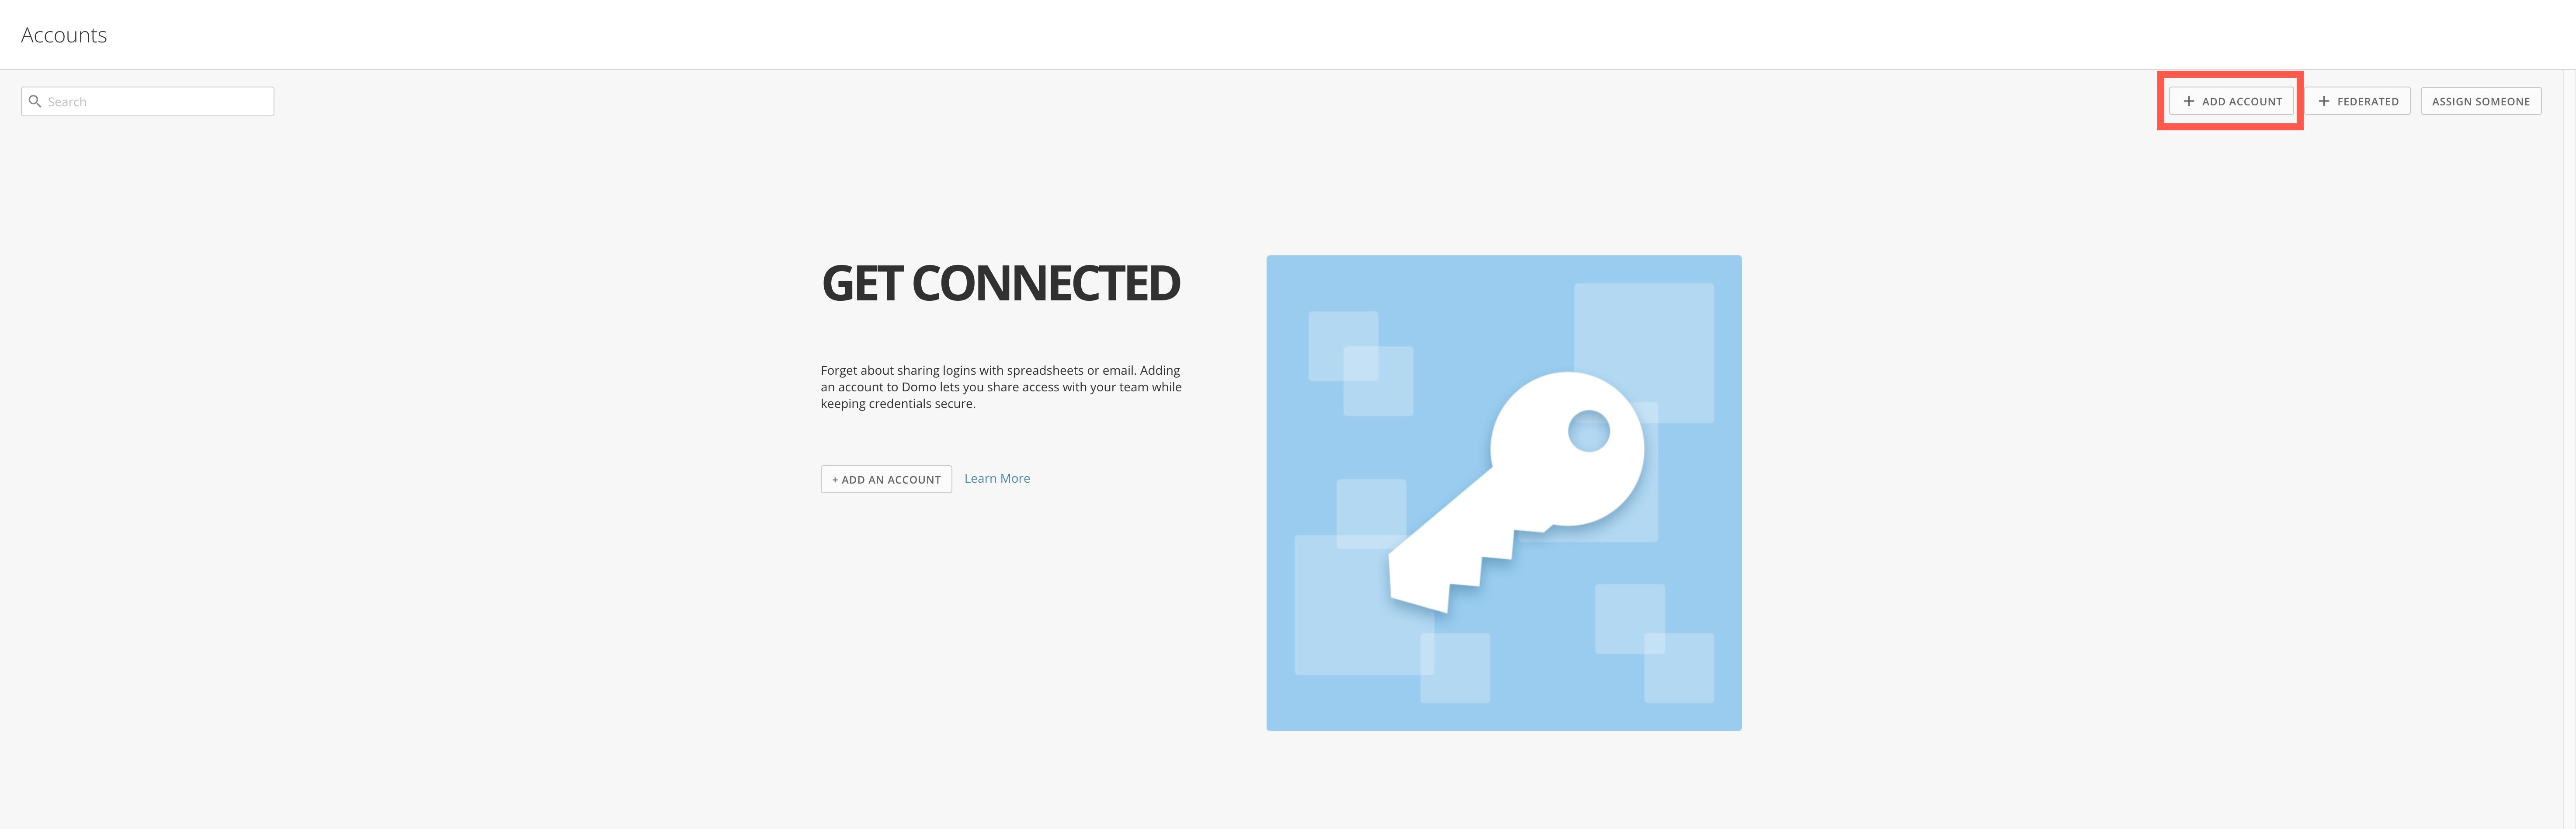 The **Add Account** modal displays.
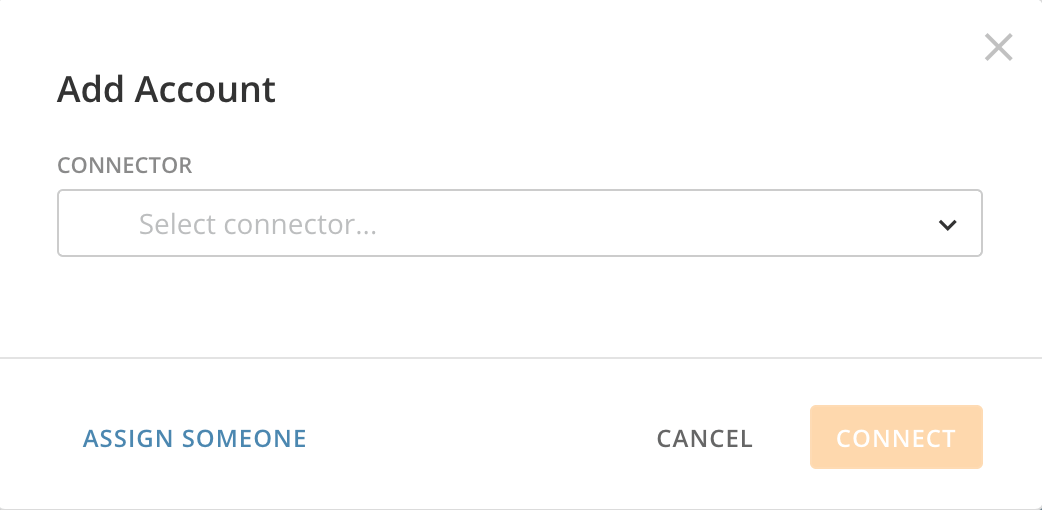 4. From the **Connector** menu, search for and select **Domo Access Token**. Two options display for creating an account. You only need to complete one.
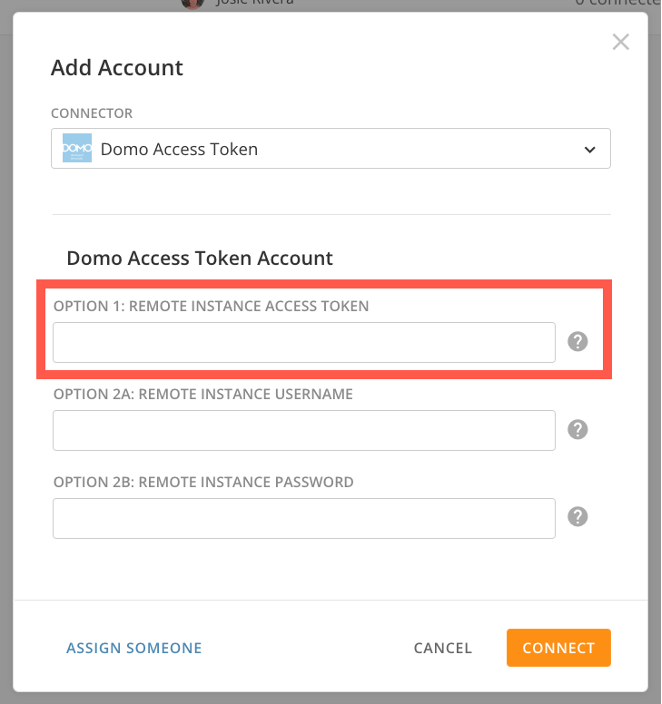
* **Option 1 —** With an access token. To generate an access token, follow the steps in the section below (see [Generate Access Token](#generate_access_token) ). Then, return to this task and paste the token into the **Option 1: Remote Instance Access Token** field in the **Add Account** modal.
4. From the **Connector** menu, search for and select **Domo Access Token**. Two options display for creating an account. You only need to complete one.
* **Option 1 —** With an access token. To generate an access token, follow the steps in the section below (see [Generate Access Token](#generate_access_token) ). Then, return to this task and paste the token into the **Option 1: Remote Instance Access Token** field in the **Add Account** modal.
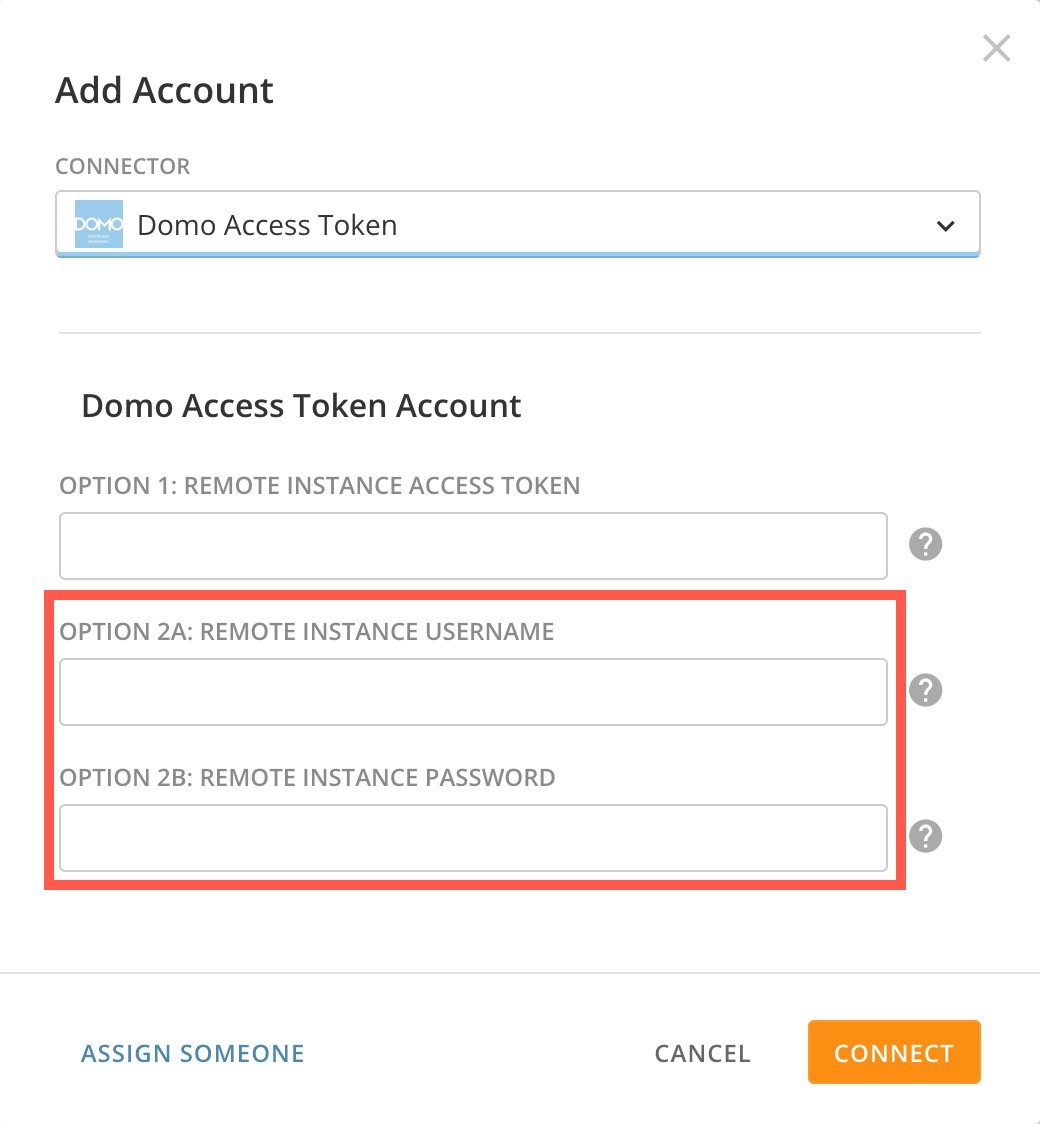
 * **Option 2 —** With the same username and password used for the target Domo instance. Paste the username into the **Option 2A: Remote Instance Username** field and paste the password into the **Option 2B: Remote Instance Password** field.
 5. Select **Connect**.
You have successfully created a Domo Access Token account.
### Generate Access Token
Follow these steps to generate an access token:
1. In the Domo navigation header, select **More** > **Admin**.
The Admin Settings display.
2. In the **Authentication** menu of the Admin Settings, select **Access tokens**.
The **Manage access tokens** page displays.
3. Select **+ Generate access token**.
5. Select **Connect**.
You have successfully created a Domo Access Token account.
### Generate Access Token
Follow these steps to generate an access token:
1. In the Domo navigation header, select **More** > **Admin**.
The Admin Settings display.
2. In the **Authentication** menu of the Admin Settings, select **Access tokens**.
The **Manage access tokens** page displays.
3. Select **+ Generate access token**.
 4. Enter a description in the **Access token description** field.
 5. Search for and select a user for whom you are generating the access token.
6. Select an expiration interval in the **Expire after** list.
7. Select **Generate**.
8. Copy the code to use.
**Important:** Be sure to copy your access token. When you navigate away from the page, you won't be able to view it again.
If you are creating a Domo Access Token account, [return to that workflow](#domo_access_token) to finish the setup process.
## Create a Job
1. In Enterprise Data Copy, select **+ New Job**.
The **Job Details** tab opens.
5. Search for and select a user for whom you are generating the access token.
6. Select an expiration interval in the **Expire after** list.
7. Select **Generate**.
8. Copy the code to use.
**Important:** Be sure to copy your access token. When you navigate away from the page, you won't be able to view it again.
If you are creating a Domo Access Token account, [return to that workflow](#domo_access_token) to finish the setup process.
## Create a Job
1. In Enterprise Data Copy, select **+ New Job**.
The **Job Details** tab opens.
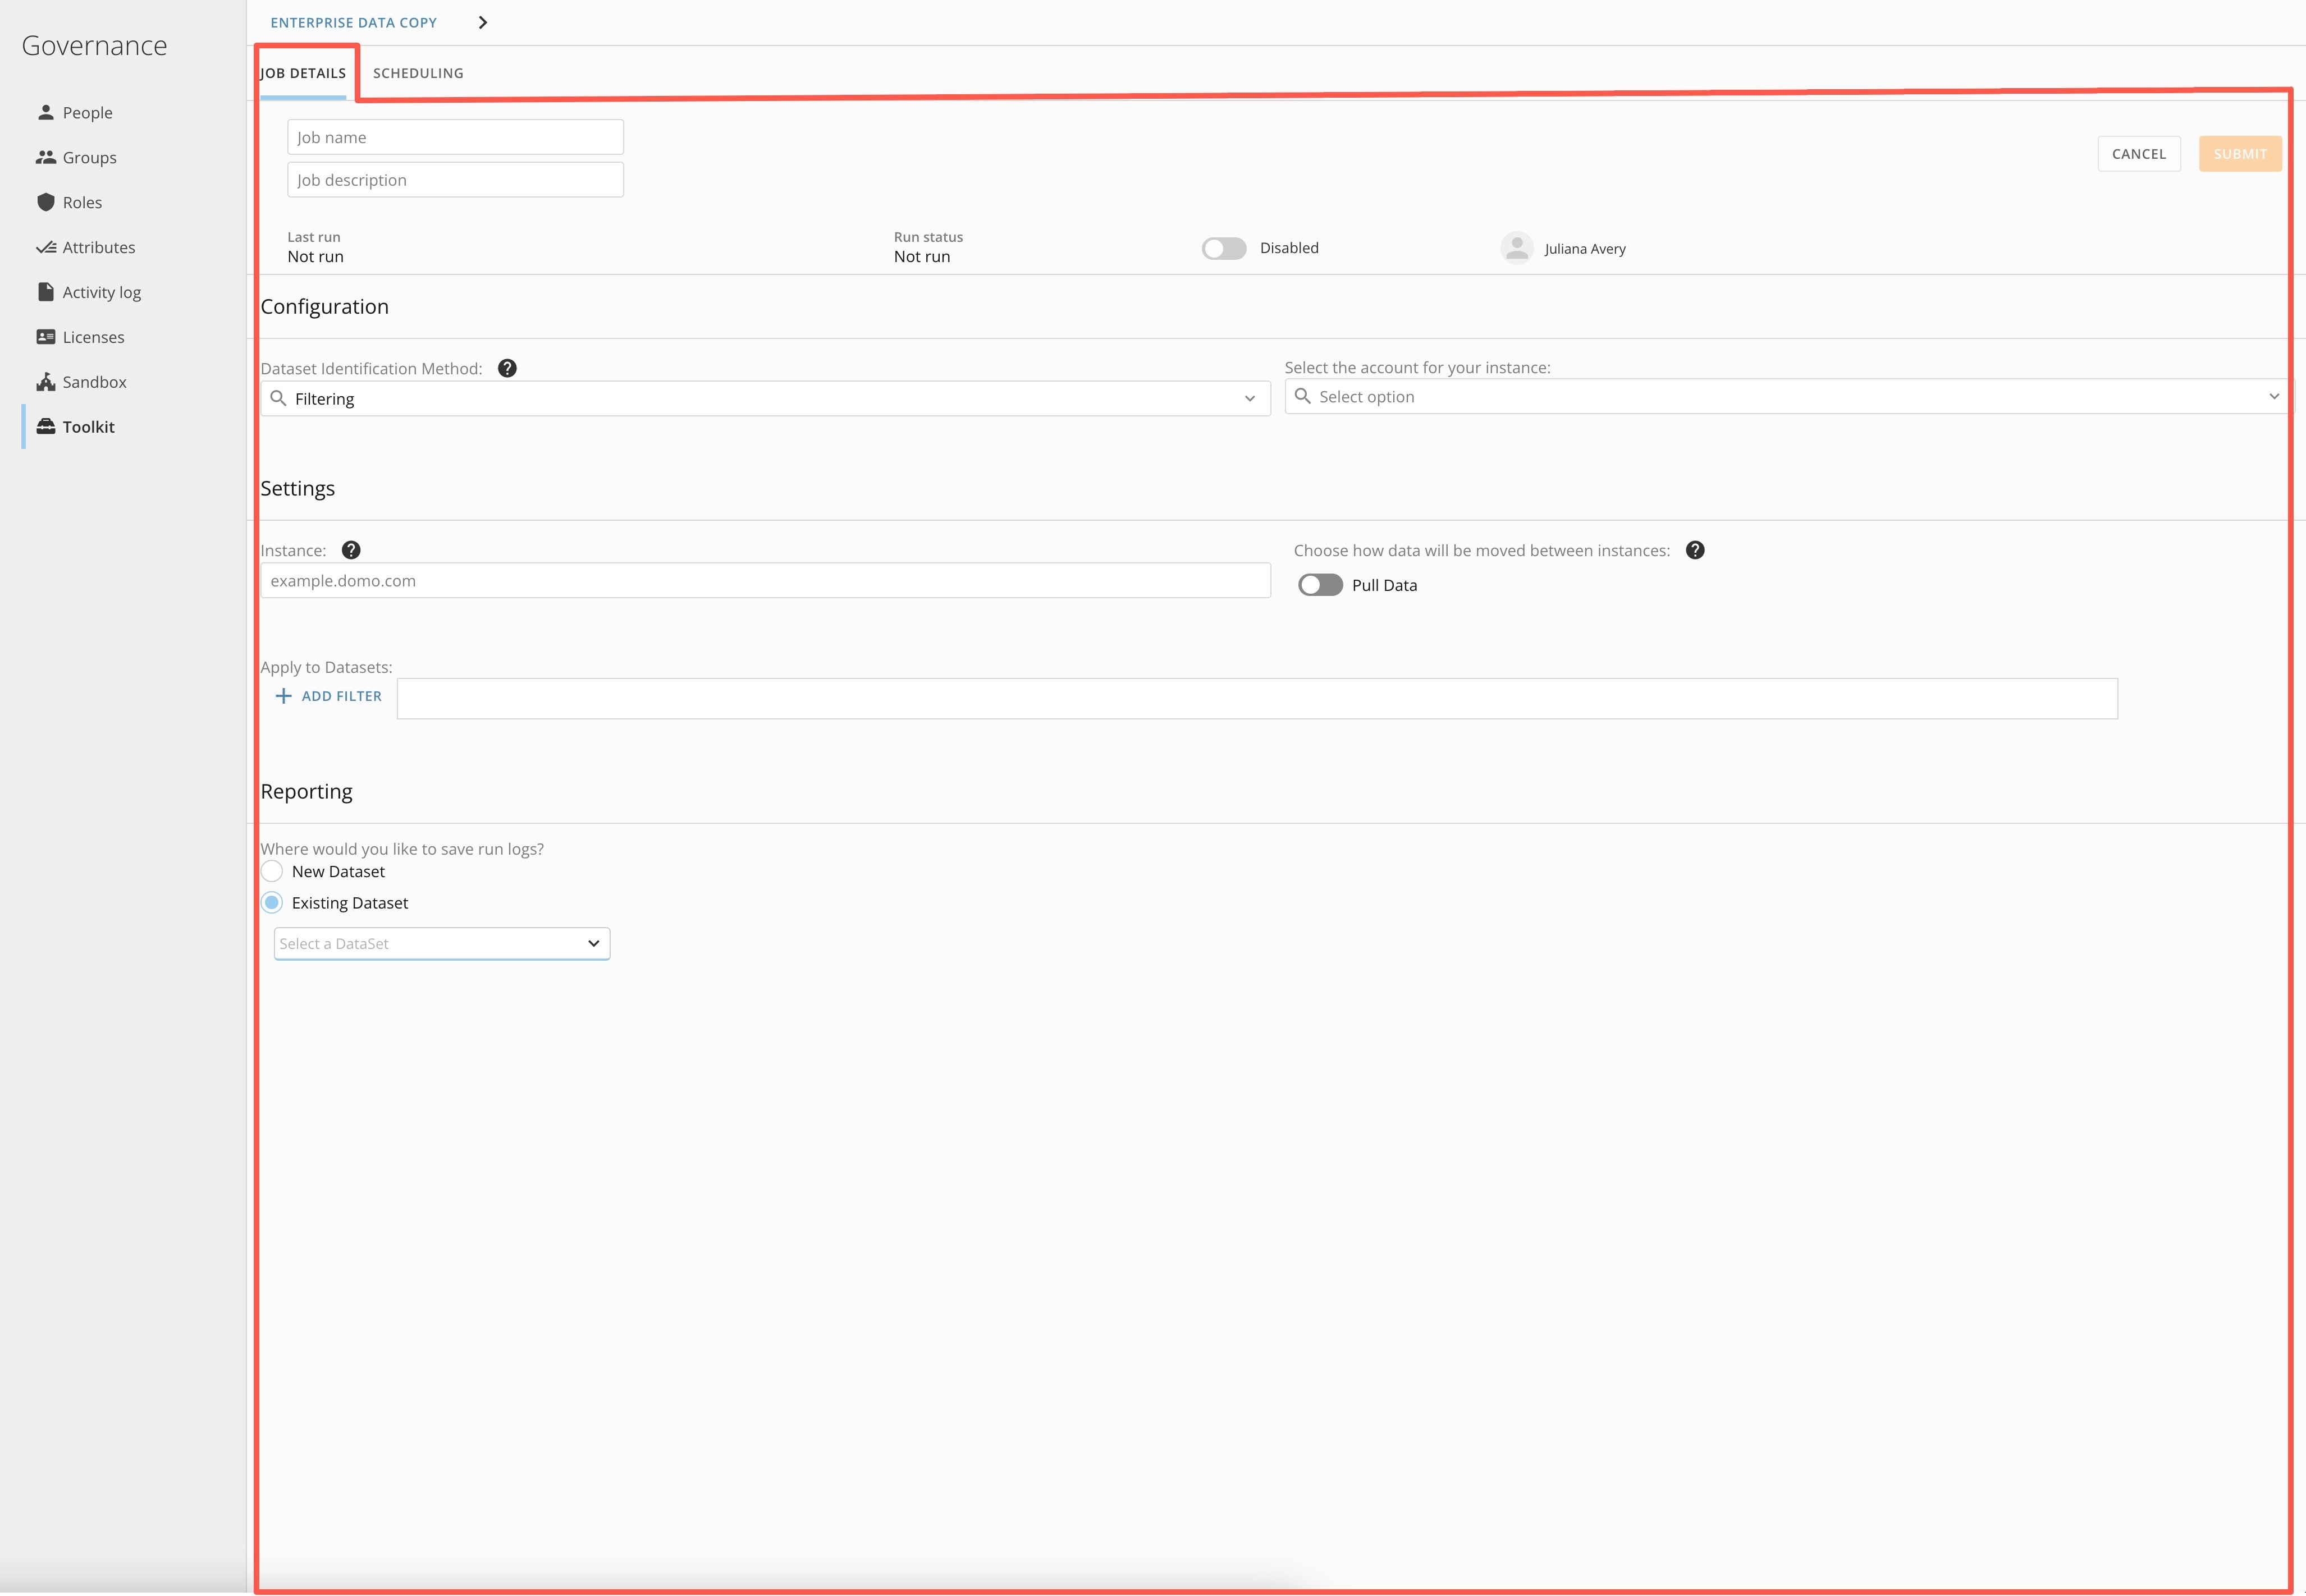 2. Provide the following information:
* Job Name (required)
* Job Description (optional)
3. In the **Configuration** section of the **Job Details** tab, provide the following:
* Select a DataSet identification method. The options are **Filtering** and **Configuration DataSet**.
* **Filtering** allows you to filter to a subset of DataSets to use.
2. Provide the following information:
* Job Name (required)
* Job Description (optional)
3. In the **Configuration** section of the **Job Details** tab, provide the following:
* Select a DataSet identification method. The options are **Filtering** and **Configuration DataSet**.
* **Filtering** allows you to filter to a subset of DataSets to use.
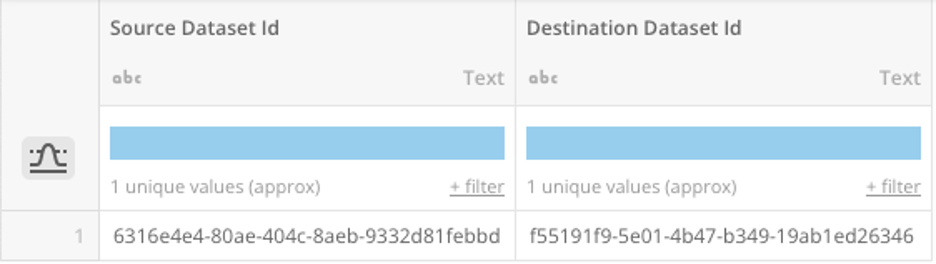
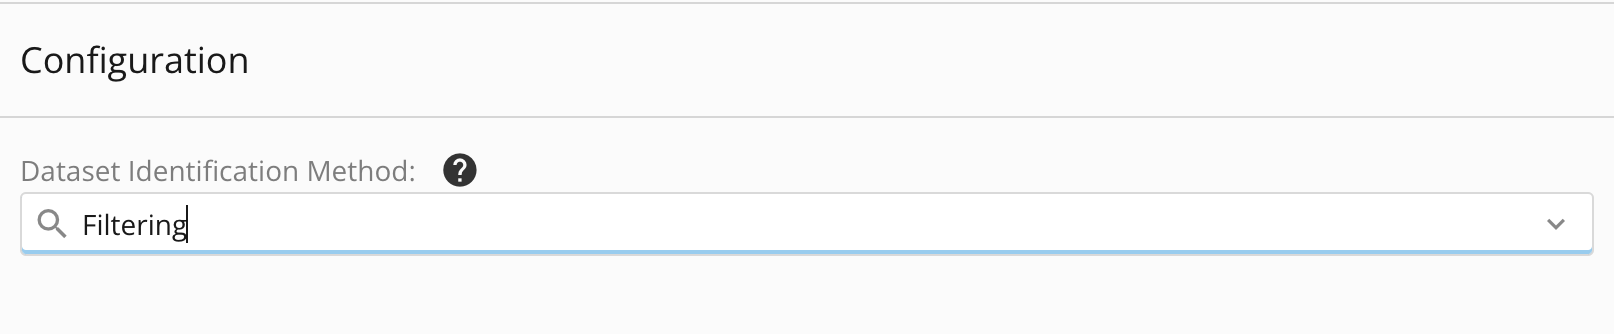 * A **Configuration DataSet** allows you to provide a DataSet with the DataSet IDs of DataSets you want to copy. If none is provided, the system creates a new DataSet with the same name. An example configuration DataSet displays below.
 * Select the account for your instance. You must create this account prior to creating a job.
4. In the **Settings** section, provide the following:
* Enter the URL for the instance that you are pulling data from or pushing data to. The URL must be in this format: *mydomain*. [domo.com](http://domo.com). You must include " [domo.com](http://domo.com)" at the end of the URL.
* Choose whether to push data from the current instance or pull the data from the instance configured on the job back to the current instance.
If **Pull Data** is enabled, it gathers all the DataSets that meet the criteria from the configured instance and uploads them to the instance the job is saved in.
If **Push Data** is enabled, the job gathers all the DataSets that meet the criteria from the current instance and upload them to the instance configured on the job.
Pull is the default setting. Toggle the switch to change to push.
* Select the account for your instance. You must create this account prior to creating a job.
4. In the **Settings** section, provide the following:
* Enter the URL for the instance that you are pulling data from or pushing data to. The URL must be in this format: *mydomain*. [domo.com](http://domo.com). You must include " [domo.com](http://domo.com)" at the end of the URL.
* Choose whether to push data from the current instance or pull the data from the instance configured on the job back to the current instance.
If **Pull Data** is enabled, it gathers all the DataSets that meet the criteria from the configured instance and uploads them to the instance the job is saved in.
If **Push Data** is enabled, the job gathers all the DataSets that meet the criteria from the current instance and upload them to the instance configured on the job.
Pull is the default setting. Toggle the switch to change to push.
 5. (Conditional) In the **Settings** section, you must provide information depending on the DataSet identification method.
* **Filtering —** In the **Apply to DataSets** field, select **+ Add Filter** and add a Filter.
1. **Search —** A value search for the DataSet name.
Any DataSet name containing that value is copied.
2. **Type —** The type of the DataSets you want to copy.
3. **Tag —** The name(s) of the tags of the DataSets you want to copy. You may combine these options, but only one value per option is allowed.
* **Configuration DataSet —** Using a configuration DataSet allows you to select which DataSet to upload the data to.
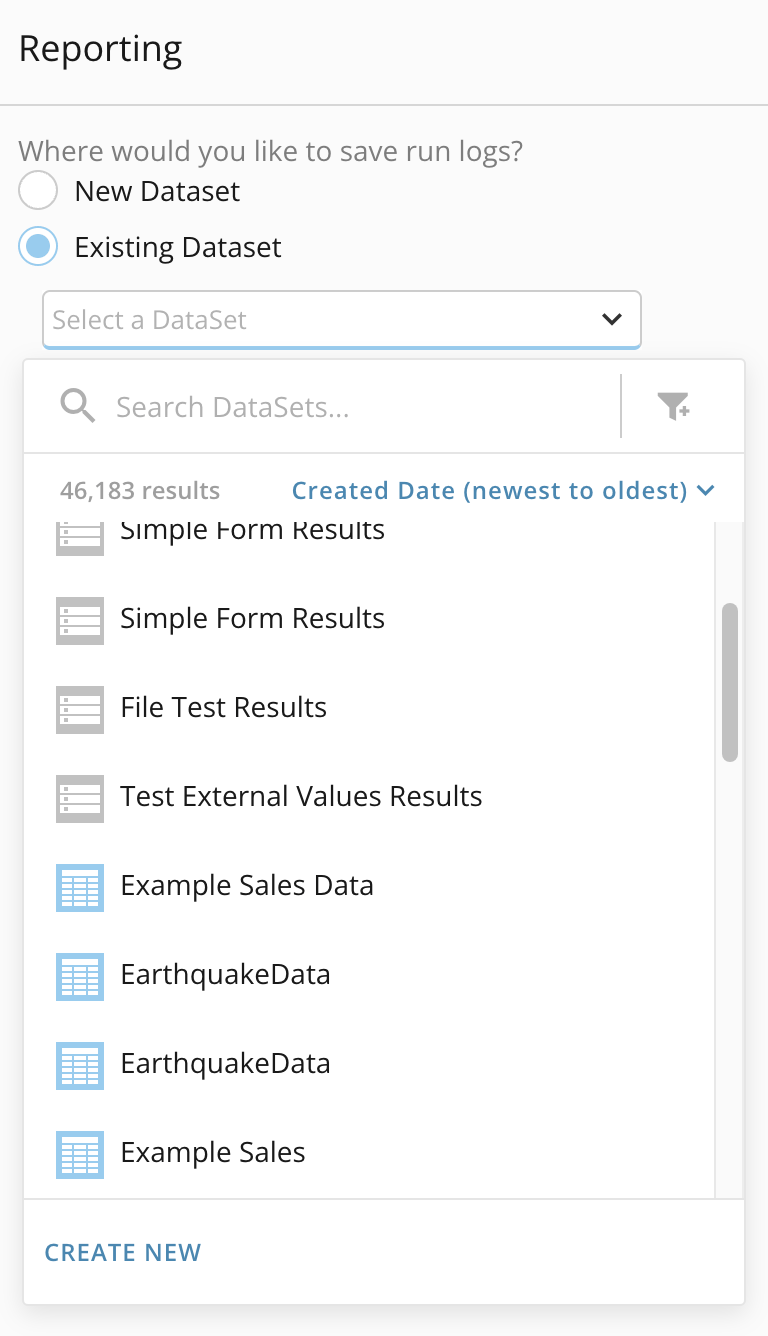
6. In the **Reporting** section, choose whether to save the run logs to a new DataSet or an existing DataSet.
* **New DataSet —** Enter a name for the DataSet in the **New Dataset name:** field. This option creates a new DataSet in your Domo instance. All runs of the job write logging to the new DataSet.
* **Existing DataSet —** Click into the list and search for and select an existing DataSet to which to save your run logs. This option allows you to combine multiple Enterprise Data Copy job runs into a single logging DataSet. This must be a DataSet created by the Enterprise Data Copy tool. The existing DataSet must already contain rows of data.
5. (Conditional) In the **Settings** section, you must provide information depending on the DataSet identification method.
* **Filtering —** In the **Apply to DataSets** field, select **+ Add Filter** and add a Filter.
1. **Search —** A value search for the DataSet name.
Any DataSet name containing that value is copied.
2. **Type —** The type of the DataSets you want to copy.
3. **Tag —** The name(s) of the tags of the DataSets you want to copy. You may combine these options, but only one value per option is allowed.
* **Configuration DataSet —** Using a configuration DataSet allows you to select which DataSet to upload the data to.
6. In the **Reporting** section, choose whether to save the run logs to a new DataSet or an existing DataSet.
* **New DataSet —** Enter a name for the DataSet in the **New Dataset name:** field. This option creates a new DataSet in your Domo instance. All runs of the job write logging to the new DataSet.
* **Existing DataSet —** Click into the list and search for and select an existing DataSet to which to save your run logs. This option allows you to combine multiple Enterprise Data Copy job runs into a single logging DataSet. This must be a DataSet created by the Enterprise Data Copy tool. The existing DataSet must already contain rows of data.
 7. Select **Submit** to save the new job or **Cancel** to return to the Enterprise Data Copy page without creating the job.
The new job displays in the job list on the main Enterprise Data Copy page.
7. Select **Submit** to save the new job or **Cancel** to return to the Enterprise Data Copy page without creating the job.
The new job displays in the job list on the main Enterprise Data Copy page.