> ## Documentation Index
> Fetch the complete documentation index at: https://domoinc-openapi-sync-dataflows.mintlify.site/llms.txt
> Use this file to discover all available pages before exploring further.
# > Domo on Amazon Redshift (RECOMMENDED)
export const InlineImage = ({src, alt = '', height = '1.6em'}) => {
return  ;
};
# Intro
With Cloud Amplifier, you can power your Domo instance using Amazon Redshift. After setup is complete, you can begin using virtual tables that read from Redshift to create cards, set up Alerts, or serve as inputs in Magic ETL DataFlows.
This guide is written for users who are familiar with Redshift and provides the steps for registering Redshift with Cloud Amplifier as well as some common troubleshooting techniques. To learn more about Cloud Amplifier, see the [overview](https://domo-support.domo.com/s/article/4412849158167).
;
};
# Intro
With Cloud Amplifier, you can power your Domo instance using Amazon Redshift. After setup is complete, you can begin using virtual tables that read from Redshift to create cards, set up Alerts, or serve as inputs in Magic ETL DataFlows.
This guide is written for users who are familiar with Redshift and provides the steps for registering Redshift with Cloud Amplifier as well as some common troubleshooting techniques. To learn more about Cloud Amplifier, see the [overview](https://domo-support.domo.com/s/article/4412849158167).
 ***
# Prerequisites
Before configuring the Redshift–Cloud Amplifier connection, we recommend that you complete the following:
* Create a Redshift service user — We recommend creating a new Redshift user specifically for this integration. Any account with "Usage" and "Select" privileges for the schemas and tables, respectively, can be used, but a service user is typically best practice.
* The service user must have "Usage" privileges for the schemas that you want to read from in Redshift.
* The service user must have "Select" privileges on the tables that you want to read from in Redshift.
* The service user must have "Select" privileges on the
**svv\_table\_info** system view.
* See
[how to grant a user/role](https://docs.aws.amazon.com/redshift/latest/dg/r_GRANT.html)"Usage" or "Select" privileges on a schema or table, respectively.
* Create a Domo service account — We recommend creating a new Domo account specifically for this integration. The account role must have the Manage Cloud Accounts and Manage DataSet grants enabled. To learn more about roles and grants, see
[Managing Custom Roles](/s/article/360043438973).
#### Allowlisting IP Addresses
Before you can connect to a Redshift database, you must place on an allowlist a number of IP addresses on your database server on the port you want to connect to. See our documentation for a full list of [IP addresses](/s/article/360043630093).
# Setup
Follow these steps to configure Read access and begin referencing Redshift tables from within Domo using Cloud Amplifier:
1. Log into your Domo service account.
2. In the navigation header, select
**Data**. The Data Center displays.
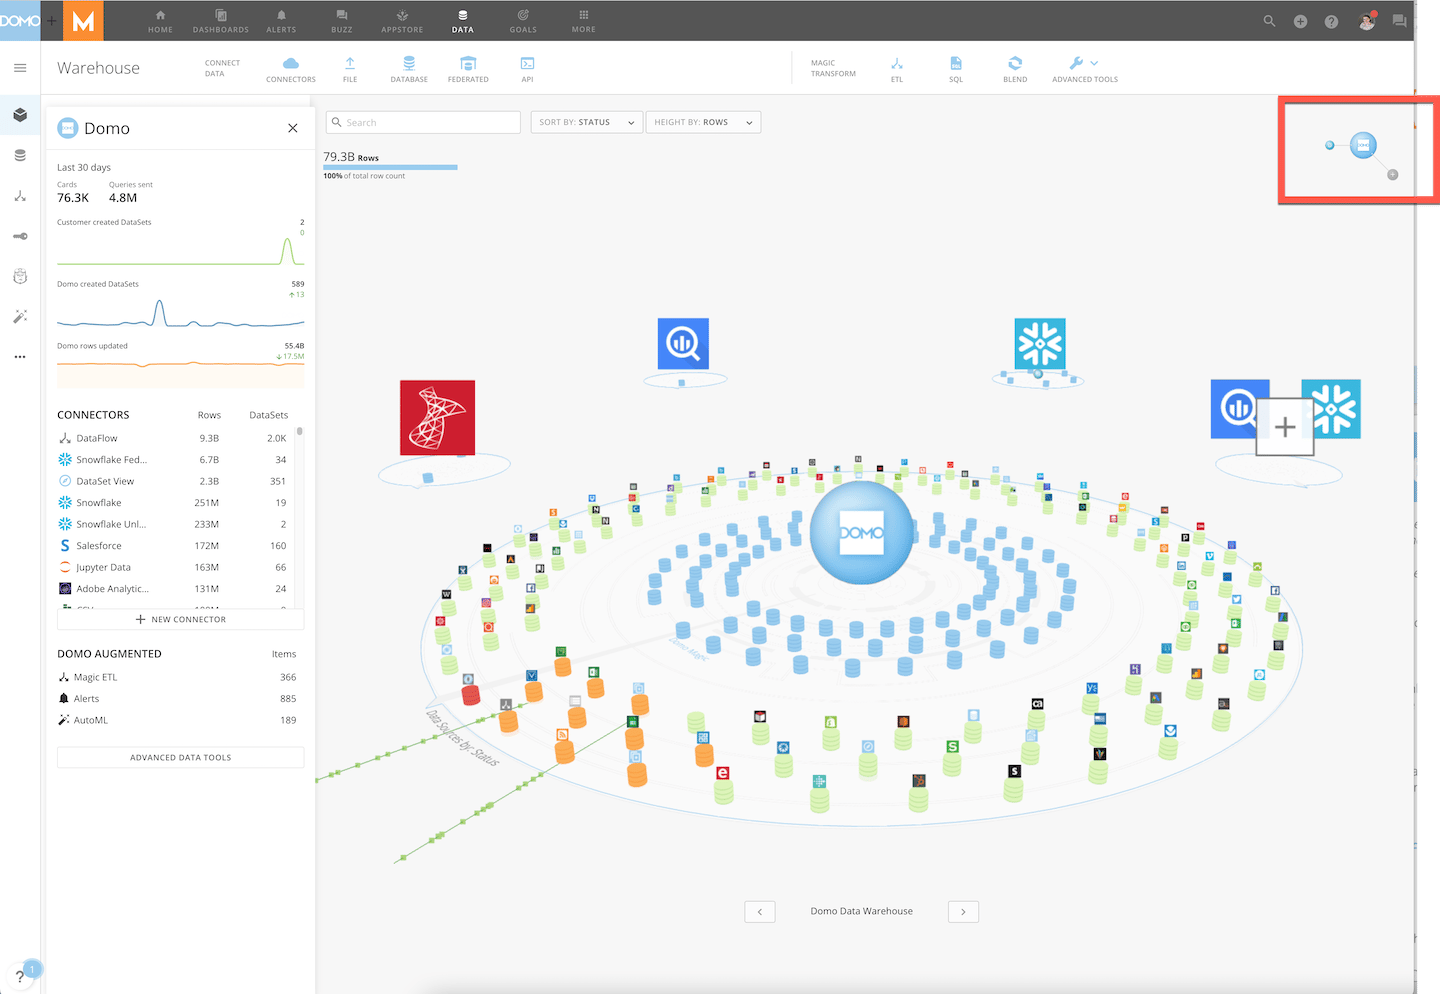
3. If you are not already there, use the left side rail to go to the
**Data Warehouse**.
4. In the main area of the screen, select the molecule to bring it into focus.
***
# Prerequisites
Before configuring the Redshift–Cloud Amplifier connection, we recommend that you complete the following:
* Create a Redshift service user — We recommend creating a new Redshift user specifically for this integration. Any account with "Usage" and "Select" privileges for the schemas and tables, respectively, can be used, but a service user is typically best practice.
* The service user must have "Usage" privileges for the schemas that you want to read from in Redshift.
* The service user must have "Select" privileges on the tables that you want to read from in Redshift.
* The service user must have "Select" privileges on the
**svv\_table\_info** system view.
* See
[how to grant a user/role](https://docs.aws.amazon.com/redshift/latest/dg/r_GRANT.html)"Usage" or "Select" privileges on a schema or table, respectively.
* Create a Domo service account — We recommend creating a new Domo account specifically for this integration. The account role must have the Manage Cloud Accounts and Manage DataSet grants enabled. To learn more about roles and grants, see
[Managing Custom Roles](/s/article/360043438973).
#### Allowlisting IP Addresses
Before you can connect to a Redshift database, you must place on an allowlist a number of IP addresses on your database server on the port you want to connect to. See our documentation for a full list of [IP addresses](/s/article/360043630093).
# Setup
Follow these steps to configure Read access and begin referencing Redshift tables from within Domo using Cloud Amplifier:
1. Log into your Domo service account.
2. In the navigation header, select
**Data**. The Data Center displays.
3. If you are not already there, use the left side rail to go to the
**Data Warehouse**.
4. In the main area of the screen, select the molecule to bring it into focus.
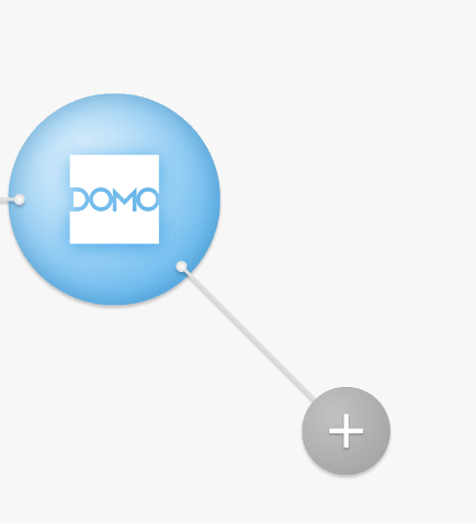 5. Select
**** **Add New Cloud**.
The add new integration modal displays.
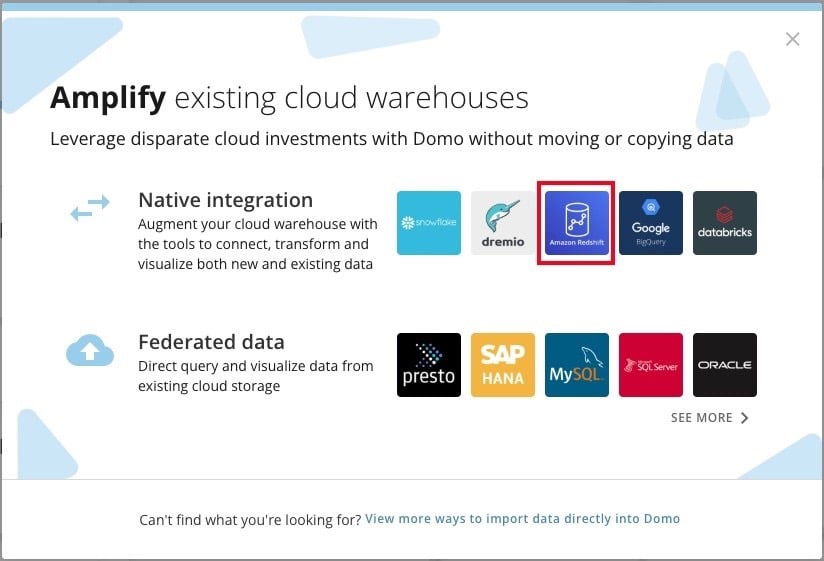
6. From the
**Native integration** menu, select **Redshift.**
5. Select
**** **Add New Cloud**.
The add new integration modal displays.
6. From the
**Native integration** menu, select **Redshift.**
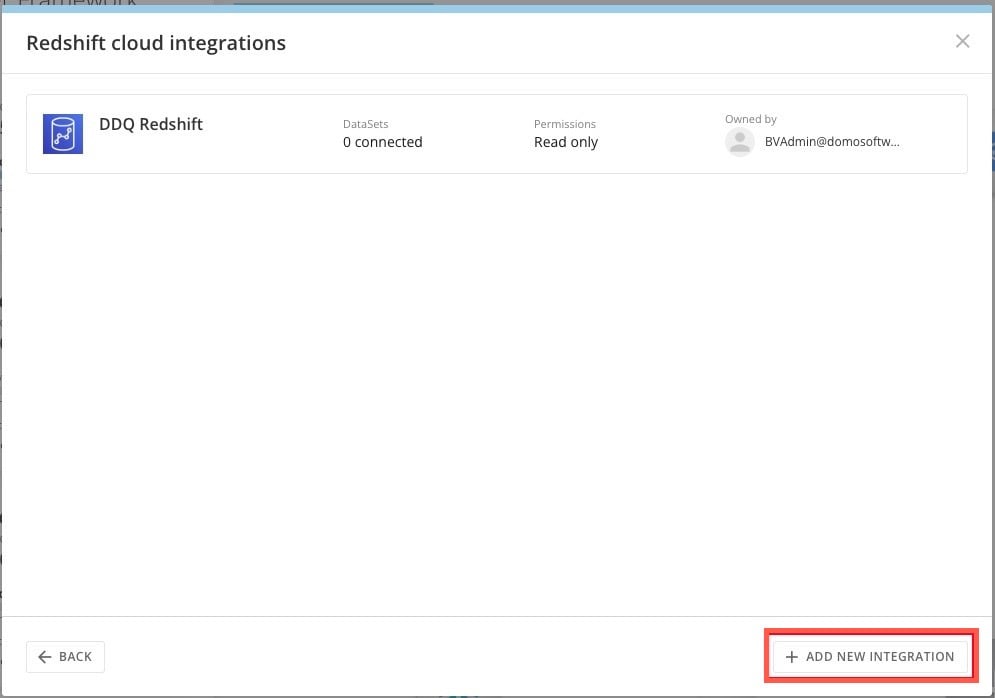
 7. Select
**+ Add New Integration**.
7. Select
**+ Add New Integration**.
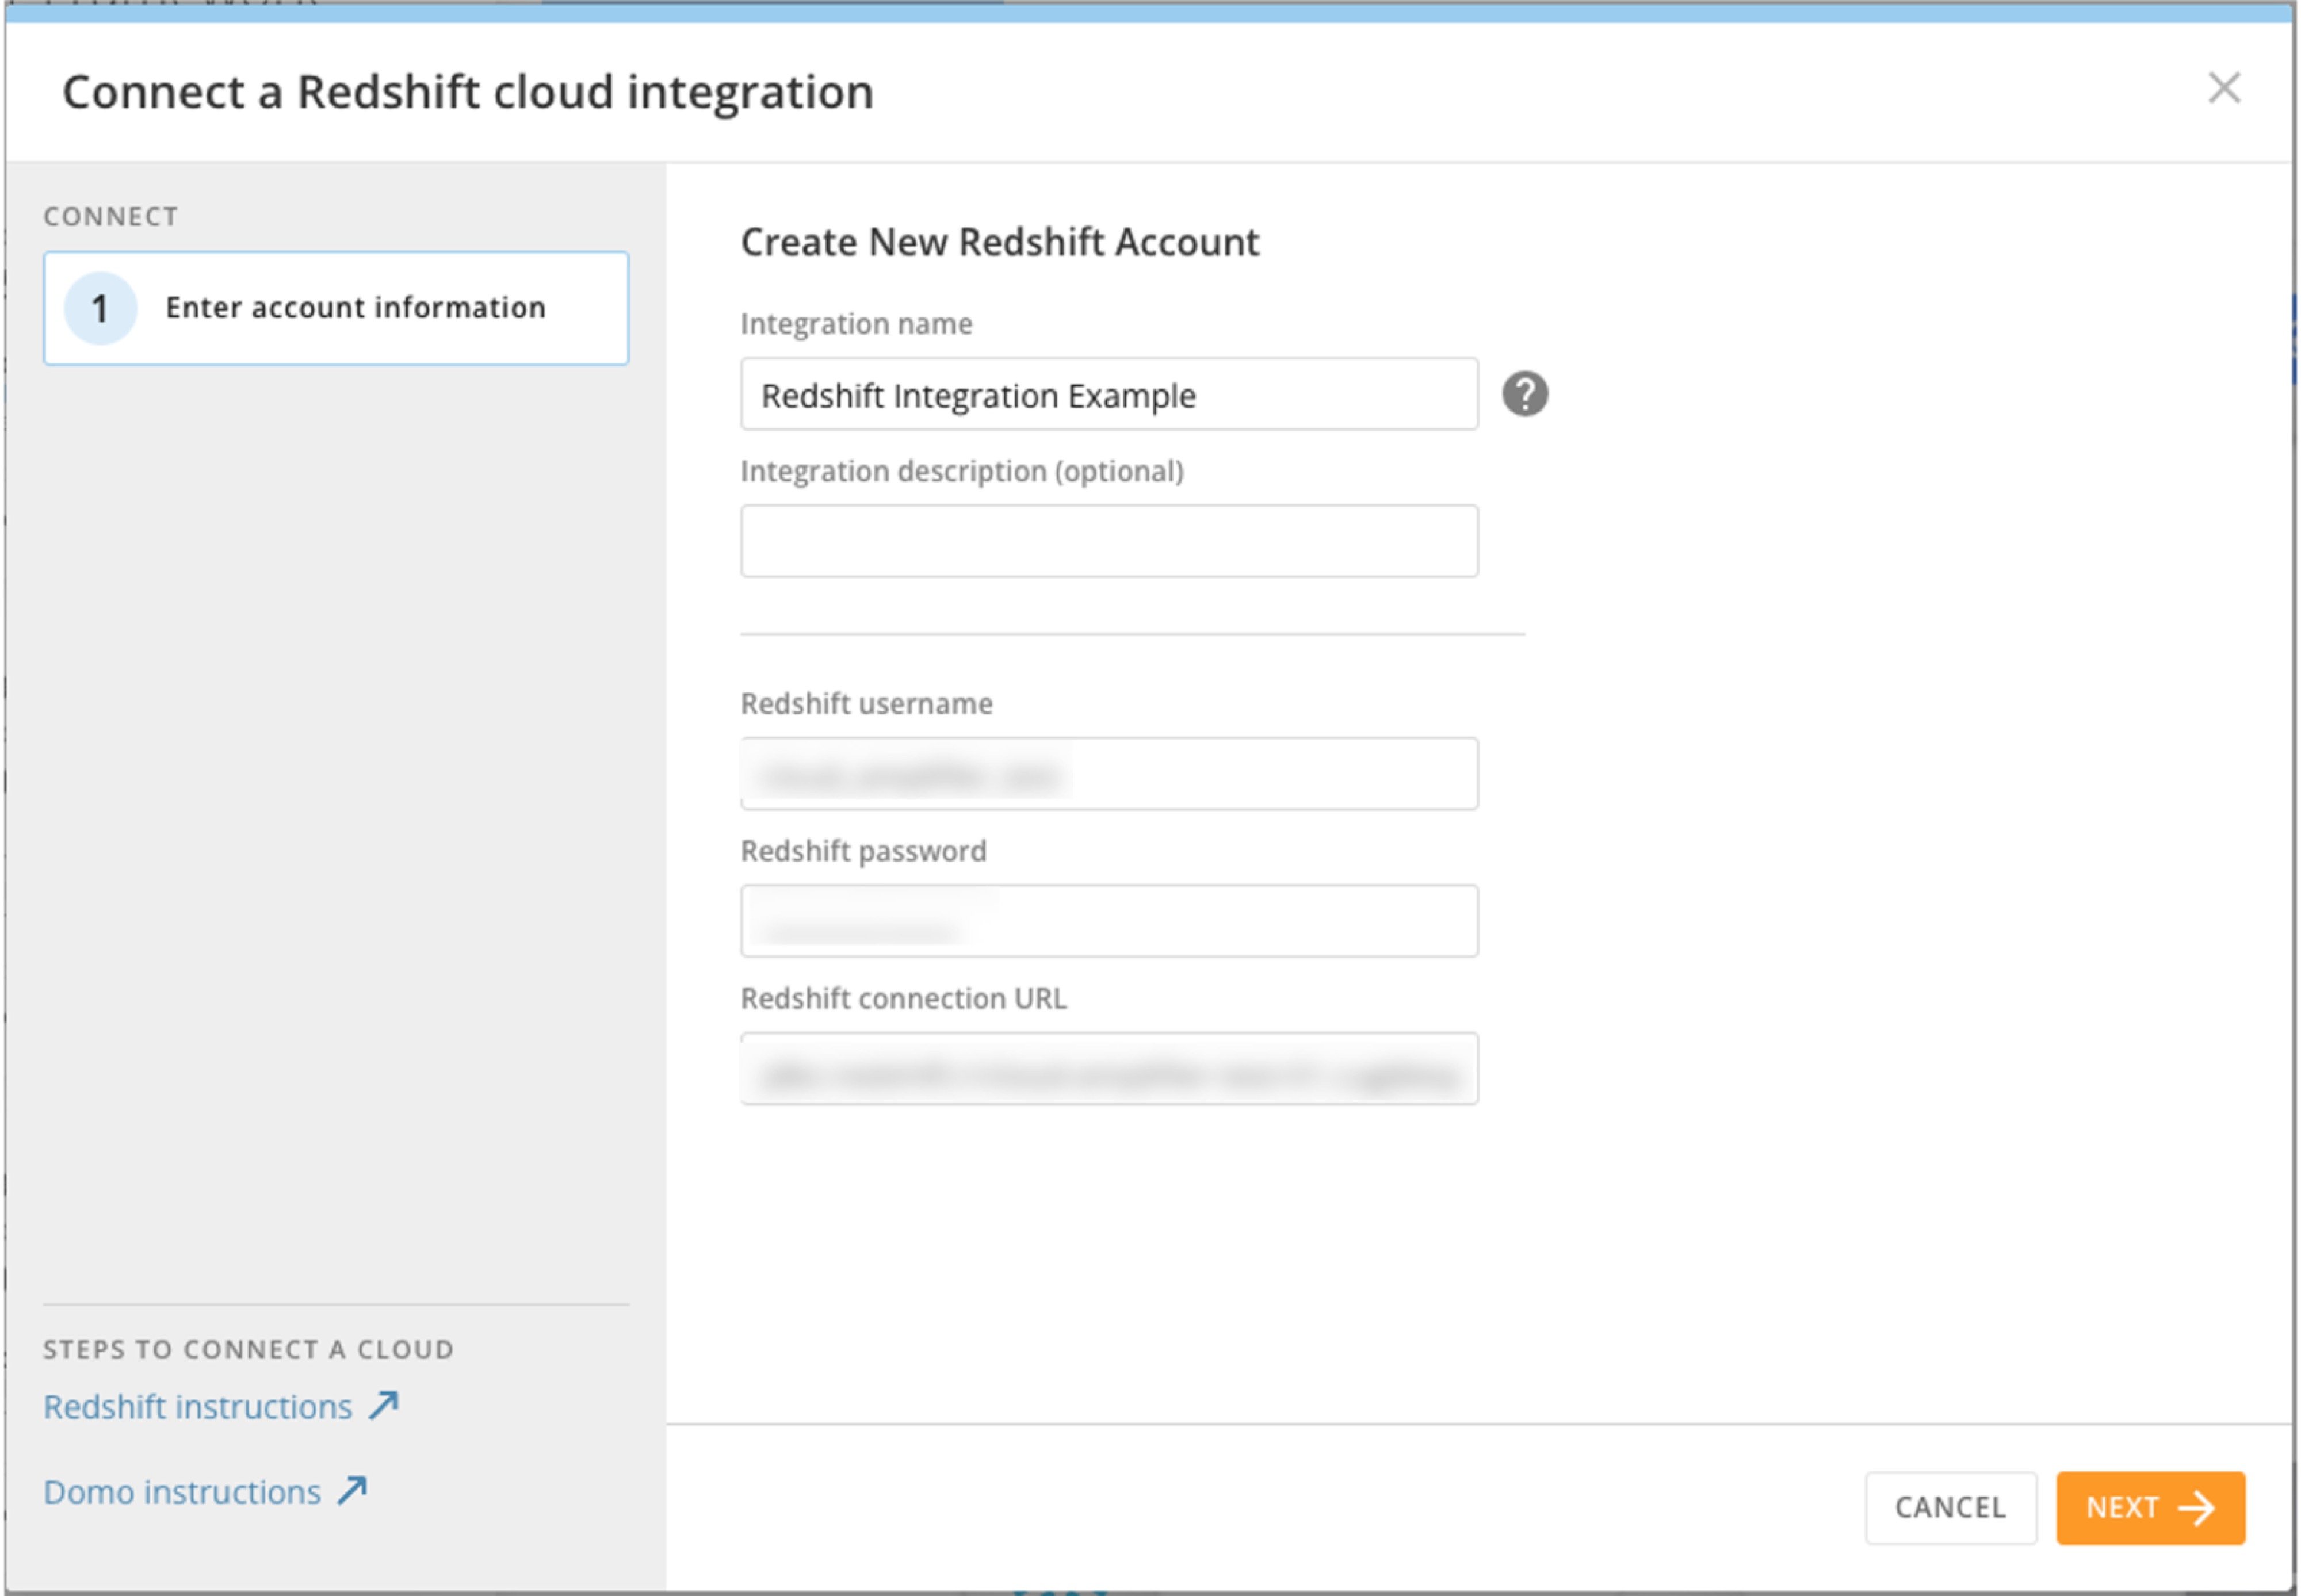
 8. Enter the following Redshift setup information:
* **Integration name —**
A unique name to help you identify the integration in Domo.
* (Optional)
**Integration description —** A description of the integration.
* **Redshift username**
* **Redshift password**
* **Redshift connection URL —**
This is the JDBC URL for the given database cluster that you are connecting to.
8. Enter the following Redshift setup information:
* **Integration name —**
A unique name to help you identify the integration in Domo.
* (Optional)
**Integration description —** A description of the integration.
* **Redshift username**
* **Redshift password**
* **Redshift connection URL —**
This is the JDBC URL for the given database cluster that you are connecting to.
 9. Select
**Next**. Your Read configuration is now complete.
9. Select
**Next**. Your Read configuration is now complete.
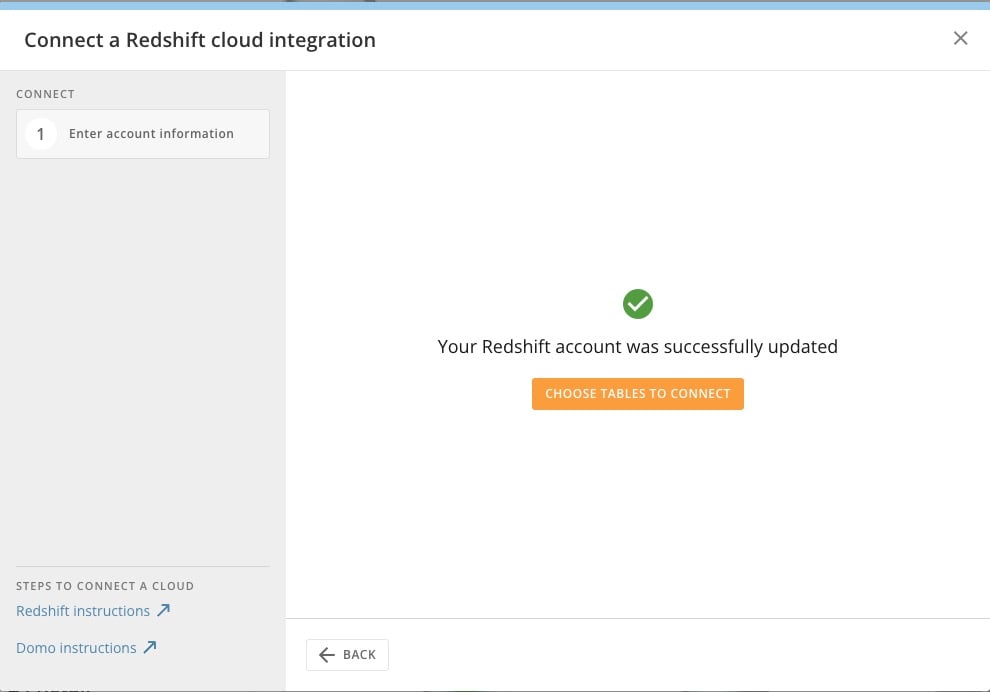 10. (Optional) Select
**Choose Tables to Connect** to create DataSets in Domo. Navigate to the tables you want to use by selecting the appropriate Amazon database > schema > tables.
10. (Optional) Select
**Choose Tables to Connect** to create DataSets in Domo. Navigate to the tables you want to use by selecting the appropriate Amazon database > schema > tables.
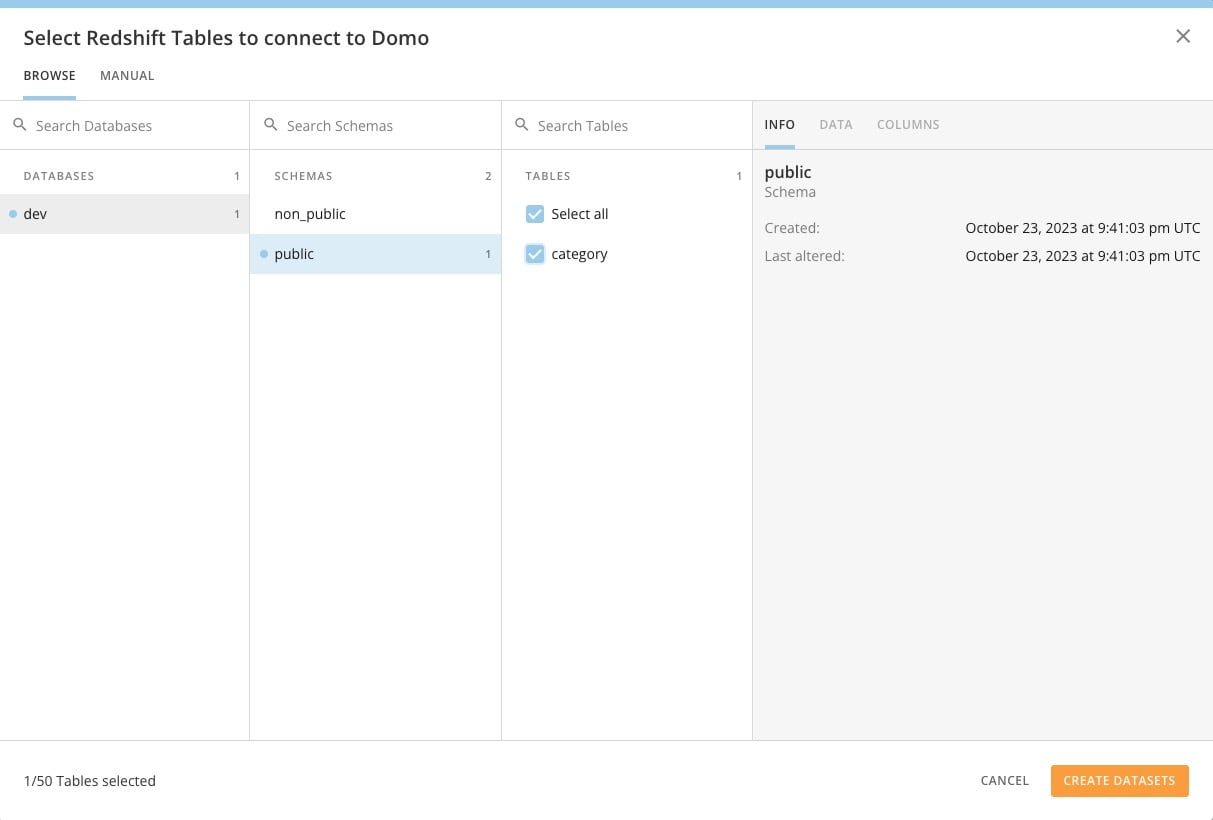 11. Select
**Create DataSets**.
# Use Redshift-sourced DataSets
When you use Redshift-sourced DataSets in a DataFlow, the data is queried live from Redshift at the time the flow is executed.
11. Select
**Create DataSets**.
# Use Redshift-sourced DataSets
When you use Redshift-sourced DataSets in a DataFlow, the data is queried live from Redshift at the time the flow is executed.