> ## Documentation Index
> Fetch the complete documentation index at: https://domoinc-openapi-sync-dataflows.mintlify.site/llms.txt
> Use this file to discover all available pages before exploring further.

# Google Sheets Service Connector

## Intro

Google Spreadsheets is a Web-based application that enables you to create, update, modify spreadsheets and share the data live online. To learn more about the Google Sheets API, see ([https://developers.google.com/sheets/api/guides/concepts](https://developers.google.com/sheets/api/guides/concepts "https://developers.google.com/sheets/api/guides/concepts") ).

You can connect to your Google Sheets account in the Data Center. This topic discusses the fields and menus that are specific to the Google Sheets connector user interface. To add DataSets, set update schedules, and edit DataSet information, see [Adding a DataSet Using a Connector](https://domo-support.domo.com/s/article/360042926274?language=en_US "Adding a DataSet Using a Connector").

## Prerequisites

To connect to your Google Sheets account and create a DataSet, you must have the Service Token JSON key.

To generate a Google Sheets service account JSON key, do the following:

1. Log into Google Cloud Console using [https://console.cloud.google.com/](https://console.cloud.google.com/ "https://console.cloud.google.com/").

2. Select the project.

   <Frame>
     <img src="https://mintcdn.com/domoinc-openapi-sync-dataflows/Ii_OEK7nN-EzkrX1/images/kb/ka0Vq0000007POH-00N5w00000Ri7BU-0EMVq000001P4hN.jpg?fit=max&auto=format&n=Ii_OEK7nN-EzkrX1&q=85&s=633caea15340f8f5c2fd4e2e30d2c821" style={{ width: 366, height: 90 }} width="585" height="144" data-path="images/kb/ka0Vq0000007POH-00N5w00000Ri7BU-0EMVq000001P4hN.jpg" />
   </Frame>

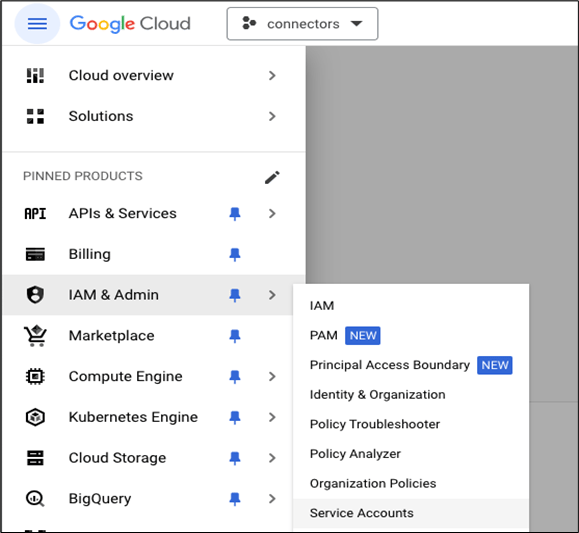
3. On the left pane select **IAM & Admin** > **Service Accounts**.
   <Frame>
     <img src="https://mintcdn.com/domoinc-openapi-sync-dataflows/Ii_OEK7nN-EzkrX1/images/kb/ka0Vq0000007POH-00N5w00000Ri7BU-0EMVq000001OxzH.jpg?fit=max&auto=format&n=Ii_OEK7nN-EzkrX1&q=85&s=d4397d3d3b4ea8157413150a9d6e4071" style={{ width: 367, height: 338 }} width="579" height="533" data-path="images/kb/ka0Vq0000007POH-00N5w00000Ri7BU-0EMVq000001OxzH.jpg" />
   </Frame>

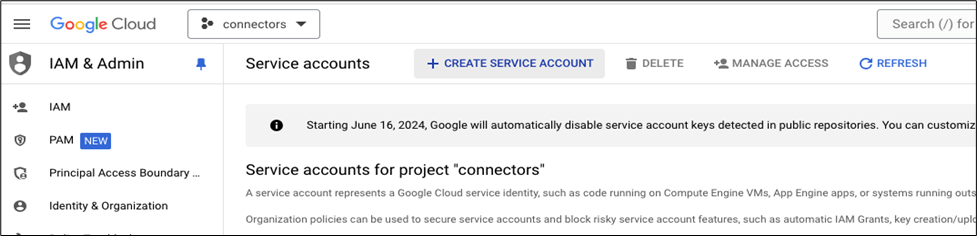
4. Click **+ CREATE SERVICE ACCOUNT**.
   <Frame>
     <img src="https://mintcdn.com/domoinc-openapi-sync-dataflows/Ii_OEK7nN-EzkrX1/images/kb/ka0Vq0000007POH-00N5w00000Ri7BU-0EMVq000001P4np.jpg?fit=max&auto=format&n=Ii_OEK7nN-EzkrX1&q=85&s=ce7136d54264abfd4f01c0b48cba982a" style={{ width: 667, height: 161 }} width="977" height="236" data-path="images/kb/ka0Vq0000007POH-00N5w00000Ri7BU-0EMVq000001P4np.jpg" />
   </Frame>

5. Under **Service account details**, enter the service account name and click **CREATE AND CONTINUE**.

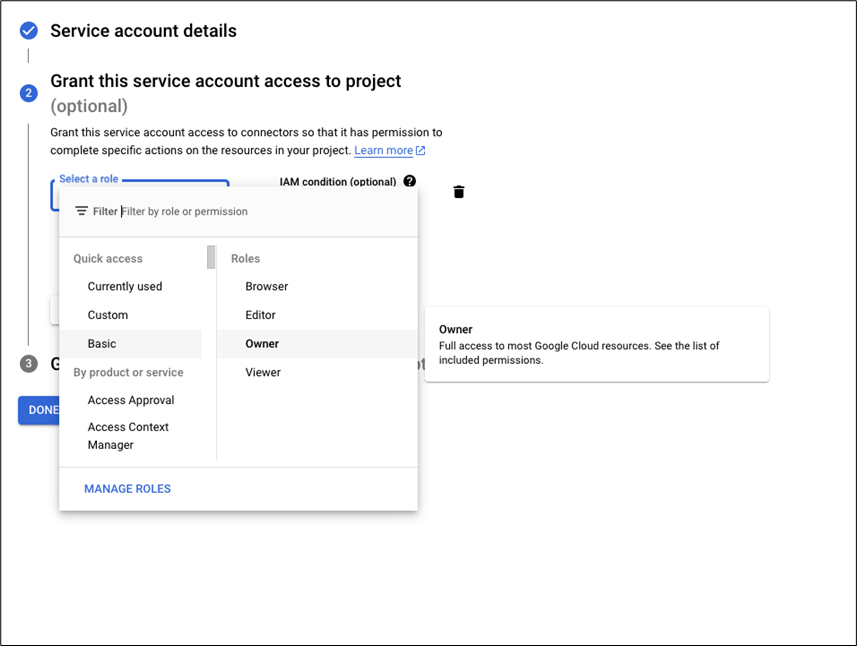
6. From the **Select a role** filter, under Quick Access select **Basic** > **Owner** and click **CONTINUE**.
   <Frame>
     <img src="https://mintcdn.com/domoinc-openapi-sync-dataflows/Ii_OEK7nN-EzkrX1/images/kb/ka0Vq0000007POH-00N5w00000Ri7BU-0EMVq000001P5Yb.jpg?fit=max&auto=format&n=Ii_OEK7nN-EzkrX1&q=85&s=677c01454425092dbefb306261d935c7" style={{ width: 670, height: 505 }} width="857" height="646" data-path="images/kb/ka0Vq0000007POH-00N5w00000Ri7BU-0EMVq000001P5Yb.jpg" />
   </Frame>

7. Click **Done**.

8. On the left pane select **IAM & Admin** > **Service Accounts** and click the service account created.

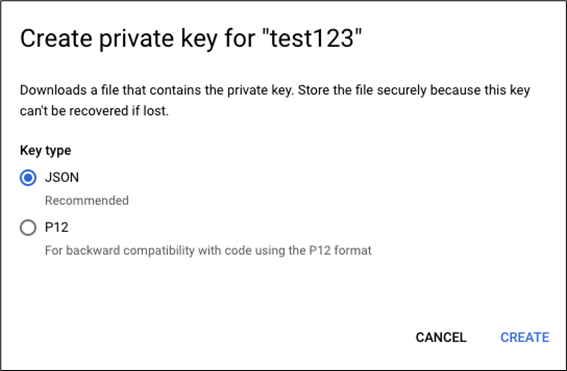
9. Click **Keys** > **Add Key** > **Create new key**. A pop-up window opens.
   <Frame>
     <img src="https://mintcdn.com/domoinc-openapi-sync-dataflows/Ii_OEK7nN-EzkrX1/images/kb/ka0Vq0000007POH-00N5w00000Ri7BU-0EMVq000001P5f3.jpg?fit=max&auto=format&n=Ii_OEK7nN-EzkrX1&q=85&s=8d9f66aa5a22b7dba90b01b9b02c9f66" style={{ width: 348, height: 228 }} width="567" height="371" data-path="images/kb/ka0Vq0000007POH-00N5w00000Ri7BU-0EMVq000001P5f3.jpg" />
   </Frame>

10. Select the Key type as JSON and click **Create**.

11. The JSON file containing the JSON key downloads automatically.

12. Save the downloaded file.

## Enabling Google Sheets API

To enable the Google Sheets API, perform the following steps:

1. Navigate to the GCP Console.

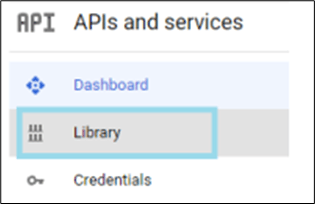
2. On the left pane, under **APIs and services**, select **Library**.
   <Frame>
     <img src="https://mintcdn.com/domoinc-openapi-sync-dataflows/Ii_OEK7nN-EzkrX1/images/kb/ka0Vq0000007POH-00N5w00000Ri7BU-0EMVq000001U8UD.jpg?fit=max&auto=format&n=Ii_OEK7nN-EzkrX1&q=85&s=6f2a19ec6876fc248e56be5fd0b779b3" style={{ width: 178, height: 115 }} width="315" height="204" data-path="images/kb/ka0Vq0000007POH-00N5w00000Ri7BU-0EMVq000001U8UD.jpg" />
   </Frame>

3. Search and click the Google Sheets API.

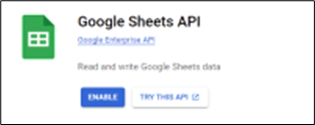
4. On the top of the page, click **Enable**.
   <Frame>
     <img src="https://mintcdn.com/domoinc-openapi-sync-dataflows/Ii_OEK7nN-EzkrX1/images/kb/ka0Vq0000007POH-00N5w00000Ri7BU-0EMVq000001U8Vp.jpg?fit=max&auto=format&n=Ii_OEK7nN-EzkrX1&q=85&s=74b75ef503c2dd56005219aff8925101" style={{ width: 227, height: 90 }} width="315" height="125" data-path="images/kb/ka0Vq0000007POH-00N5w00000Ri7BU-0EMVq000001U8Vp.jpg" />
   </Frame>

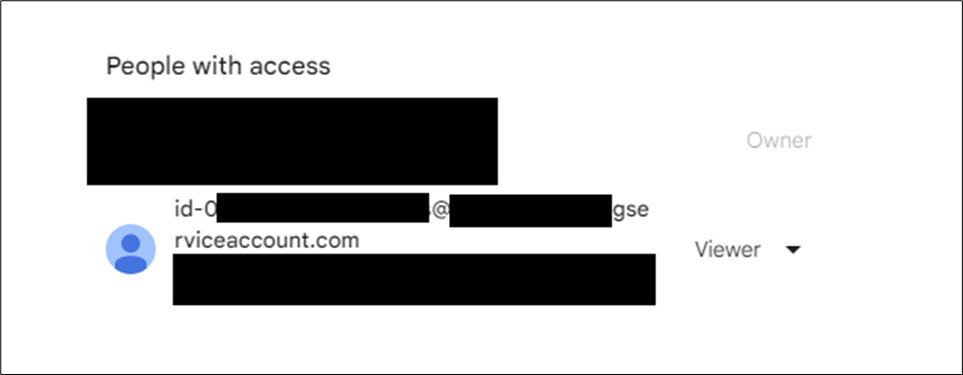
**Note**: The Google service account's email address must be added as a Google Sheet Viewer.
<Frame>
  <img src="https://mintcdn.com/domoinc-openapi-sync-dataflows/Ii_OEK7nN-EzkrX1/images/kb/ka0Vq0000007POH-00N5w00000Ri7BU-0EMVq000001U8Z3.jpg?fit=max&auto=format&n=Ii_OEK7nN-EzkrX1&q=85&s=56ded51f892f8270ac400e9aaf887213" style={{ width: 529, height: 206 }} width="963" height="375" data-path="images/kb/ka0Vq0000007POH-00N5w00000Ri7BU-0EMVq000001U8Z3.jpg" />
</Frame>

## Connecting to Your Google Sheets Account

This section enumerates the options in the **Credentials** and **Details** panes in the Google Sheets Connector page. The components of the other panes in this page, **Scheduling** and **Name & Describe Your DataSet**, are universal across most connector types and are discussed in great detail in [Adding a DataSet Using a Connector](https://domo-support.domo.com/s/article/360042926274?language=en_US "Adding a DataSet Using a Connector").

## Credentials Pane

This pane contains fields for entering credentials to connect to your Google Sheets account. The following table describes what is needed for each field:

<table border="1" cellpadding="1" cellspacing="1" data-aura-rendered-by="33:195;a">
  <thead>
    <tr>
      <th colspan="1" rowspan="1">
        <p>
          <span class="s1"> Field </span>
        </p>
      </th>

      <th colspan="1" rowspan="1">
        <p>
          <span class="s1"> Description </span>
        </p>
      </th>
    </tr>
  </thead>

  <tbody>
    <tr>
      <td colspan="1" rowspan="1">
        <p> Service Token JSON </p>
      </td>

      <td colspan="1" rowspan="1">
        <p> Copy and paste the complete contents of the.json file, generated from your Google API Console. </p>
      </td>
    </tr>
  </tbody>
</table>

Once you have entered valid Google Sheets credentials, you can use the same account any time to create a new Google Sheets DataSet. You can manage connector accounts in the **Accounts** tab in the Data Center. For more information about this tab, see [Manage Connector/Adapter Accounts](https://domo-support.domo.com/s/article/360042926054?language=en_US "Manage Connector/Adapter Accounts").

## Details Pane

<table border="1" cellpadding="1" cellspacing="1" data-aura-rendered-by="33:195;a">
  <thead>
    <tr>
      <th colspan="1" rowspan="1">
        <p> Menu </p>
      </th>

      <th colspan="1" rowspan="1">
        <p> Description </p>
      </th>
    </tr>
  </thead>

  <tbody>
    <tr>
      <td colspan="1" rowspan="1">
        {" "}

        File Selection{" "}
      </td>

      <td colspan="1" rowspan="1">
        {" "}

        The Spreadsheet ID is selected from the drop-down list.{" "}
      </td>
    </tr>

    <tr>
      <td colspan="1" rowspan="1">
        {" "}

        Spreadsheet ID{" "}
      </td>

      <td colspan="1" rowspan="1">
        {" "}

        Enter the Spreadsheet ID. The Spreadsheet ID is the last string of characters in the URL of your spreadsheet. For
        example, in the URL,

        <a href="https://docs.google.com/spreadsheets/d/12wVPoRgSLYcD1CBHpN4dpQiPHRNqV7azwGF4JbKoXaw/edit#gid=0," target="_blank" title="https://docs.google.com/spreadsheets/d/12wVPoRgSLYcD1CBHpN4dpQiPHRNqV7azwGF4JbKoXaw/edit#gid=0,">
          {" "}

          [https://docs.google.com/spreadsheets/d/12wVPoRgSLYcD1CBHpN4dpQiPHRNqV7azwGF4JbKoXaw/edit#gid=0,\{](https://docs.google.com/spreadsheets/d/12wVPoRgSLYcD1CBHpN4dpQiPHRNqV7azwGF4JbKoXaw/edit#gid=0,\{)" "}
        </a>

        the spreadsheet ID is,
        <b> 12wVPoRgSLYcD1CBHpN4dpQiPHRNqV7azwGF4JbKoXaw
        </b>.{" "}
      </td>
    </tr>

    <tr>
      <td colspan="1" rowspan="1">
        {" "}

        Worksheet Name{" "}
      </td>

      <td colspan="1" rowspan="1">
        {" "}

        Select the worksheet name from the drop-down list.{" "}
      </td>
    </tr>

    <tr>
      <td colspan="1" rowspan="1">
        {" "}

        Spreadsheet Layout{" "}
      </td>

      <td colspan="1" rowspan="1">
        {" "}

        Select the spreadsheet layout from the drop-down list.{" "}
      </td>
    </tr>

    <tr>
      <td colspan="1" rowspan="1">
        {" "}

        Manually Enter Cell Ranges{" "}
      </td>

      <td colspan="1" rowspan="1">
        {" "}

        Select this checkbox, if you want to manually enter the cell range.{" "}
      </td>
    </tr>

    <tr>
      <td colspan="1" rowspan="1">
        {" "}

        Column Header Cell Range{" "}
      </td>

      <td colspan="1" rowspan="1">
        {" "}

        Specify the cell range for the header column(For example, A1:N1).{" "}
      </td>
    </tr>

    <tr>
      <td colspan="1" rowspan="1">
        {" "}

        Column Data Cell Range{" "}
      </td>

      <td colspan="1" rowspan="1">
        {" "}

        Specify the cell range for the data columns (Optional, for example, A2:N27).{" "}
      </td>
    </tr>

    <tr>
      <td colspan="1" rowspan="1">
        {" "}

        Row Header Cell Range{" "}
      </td>

      <td colspan="1" rowspan="1">
        {" "}

        Specify the cell range for the header row (For example, A1:A27).{" "}
      </td>
    </tr>

    <tr>
      <td colspan="1" rowspan="1">
        {" "}

        Row Data Cell Range{" "}
      </td>

      <td colspan="1" rowspan="1">
        {" "}

        Specify the cell range for the data rows (Optional, for example, B1:N27).{" "}
      </td>
    </tr>

    <tr>
      <td colspan="1" rowspan="1">
        {" "}

        Date Format{" "}
      </td>

      <td colspan="1" rowspan="1">
        <p> Select the date format from the drop-down list. </p>
        <p> There are two date formats: </p>

        <ul>
          <li> Month Day Year (MMDDYYYY) </li>
          <li> Day Month Year (DDMMYYYY) </li>
        </ul>

        <p />
      </td>
    </tr>
  </tbody>
</table>

## Other Panes

For information about the remaining sections of the connector interface, including how to configure scheduling, retry, and update options, see [Adding a DataSet Using a Connector](https://domo-support.domo.com/s/article/360042926274?language=en_US "Adding a DataSet Using a Connector").
