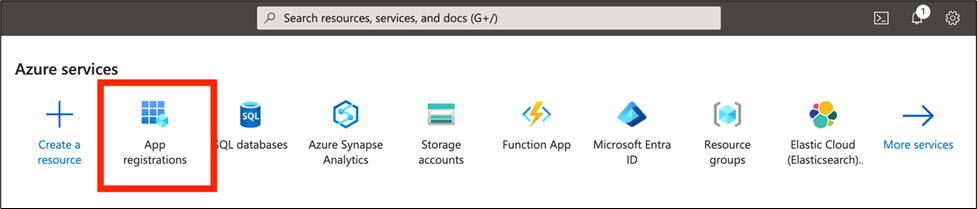
 3. In the App registrations window, click
**+ New registration** and enter the details.
3. In the App registrations window, click
**+ New registration** and enter the details.
 4. In the Register an application window, do the following:
1. In the **Name** field enter, **Dynamics365BusinessCentral**.
2. Under **Supported account types**, select the **Accounts in any organizational directory (Any Microsoft Entra ID tenant - Multitenant) and personal Microsoft accounts (e.g. Skype, Xbox)** radio button.
3. From the **Redirect URI (optional)** drop-down, select **Web** and add enter the URL as [https://oauth.domo.com/api/data/v1/oauth/providers/dynamics-365-business-central/exchange.](https://oauth.domo.com/api/data/v1/oauth/providers/dynamics-365-business-central/exchange)
4. Click the **Register** button.
The registered app details appears along with the **Application (client) ID** and the **Directory (tenant) ID**, when you select the Overview section.
4. In the Register an application window, do the following:
1. In the **Name** field enter, **Dynamics365BusinessCentral**.
2. Under **Supported account types**, select the **Accounts in any organizational directory (Any Microsoft Entra ID tenant - Multitenant) and personal Microsoft accounts (e.g. Skype, Xbox)** radio button.
3. From the **Redirect URI (optional)** drop-down, select **Web** and add enter the URL as [https://oauth.domo.com/api/data/v1/oauth/providers/dynamics-365-business-central/exchange.](https://oauth.domo.com/api/data/v1/oauth/providers/dynamics-365-business-central/exchange)
4. Click the **Register** button.
The registered app details appears along with the **Application (client) ID** and the **Directory (tenant) ID**, when you select the Overview section.
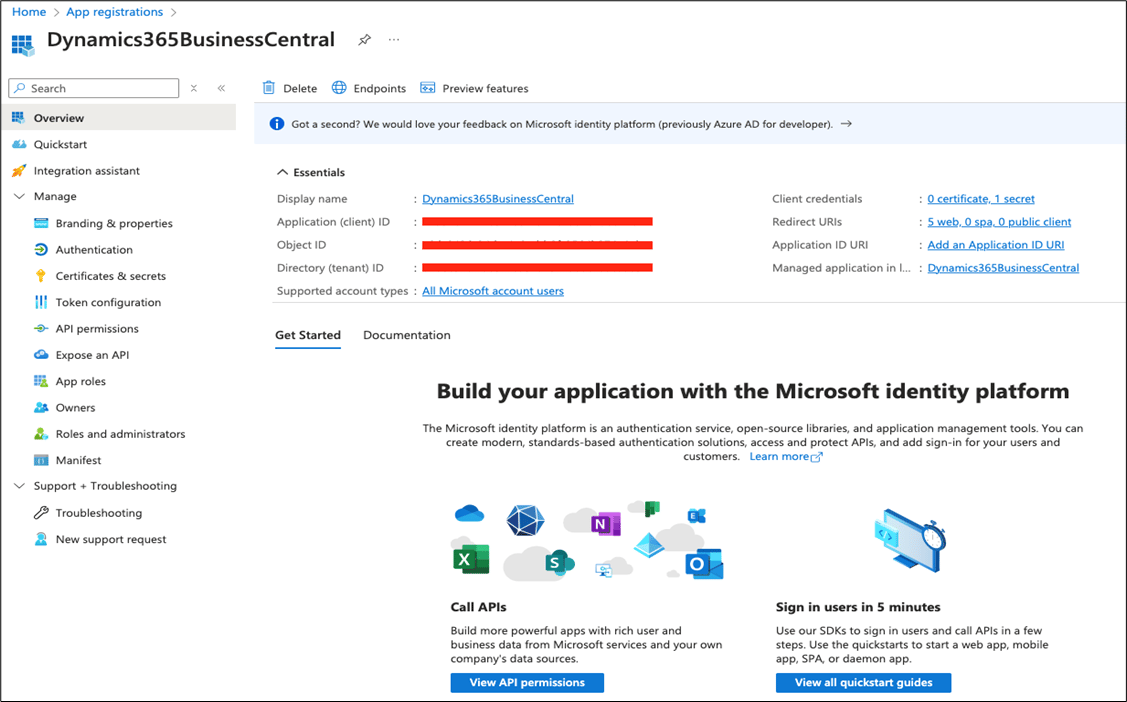 5. On the left pane, click **Manage** > **Certificates & secrets** > **Client secrets** > **+ New client secret**.
The **Add a client secret** window opens.
6. Enter the Description as
**Domo Client Secret**, and from the drop-down list, select **Expires to 24 months**.
7. Click
**Add**.
8. A new client secret gets created. Ensure to record the secret
**Value**.
5. On the left pane, click **Manage** > **Certificates & secrets** > **Client secrets** > **+ New client secret**.
The **Add a client secret** window opens.
6. Enter the Description as
**Domo Client Secret**, and from the drop-down list, select **Expires to 24 months**.
7. Click
**Add**.
8. A new client secret gets created. Ensure to record the secret
**Value**.
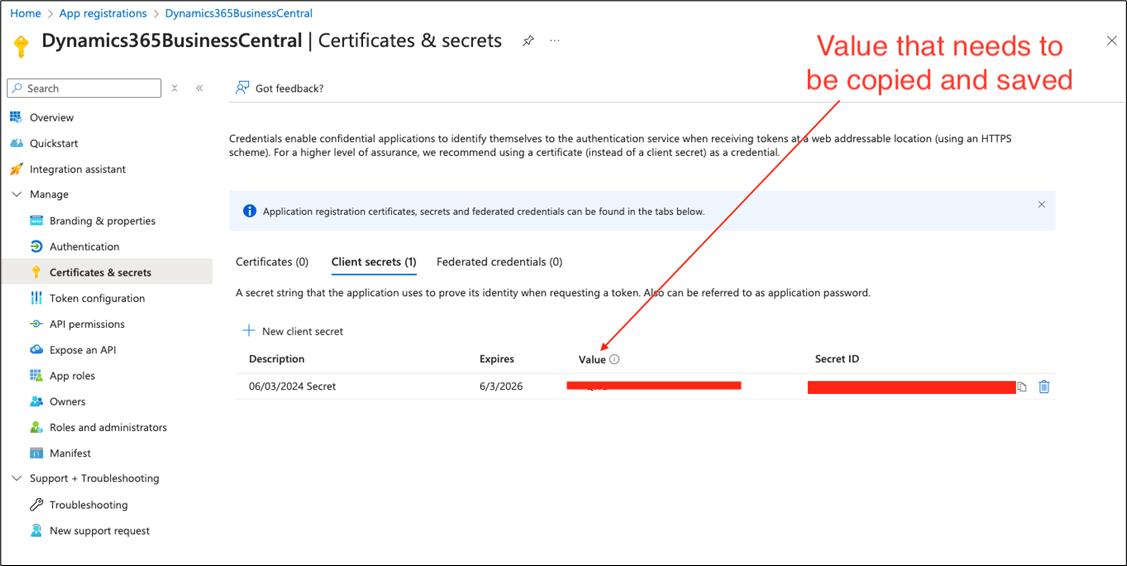 9. Make a note of the Application (client) ID, Directory (tenant) ID and the Client secrets Value.
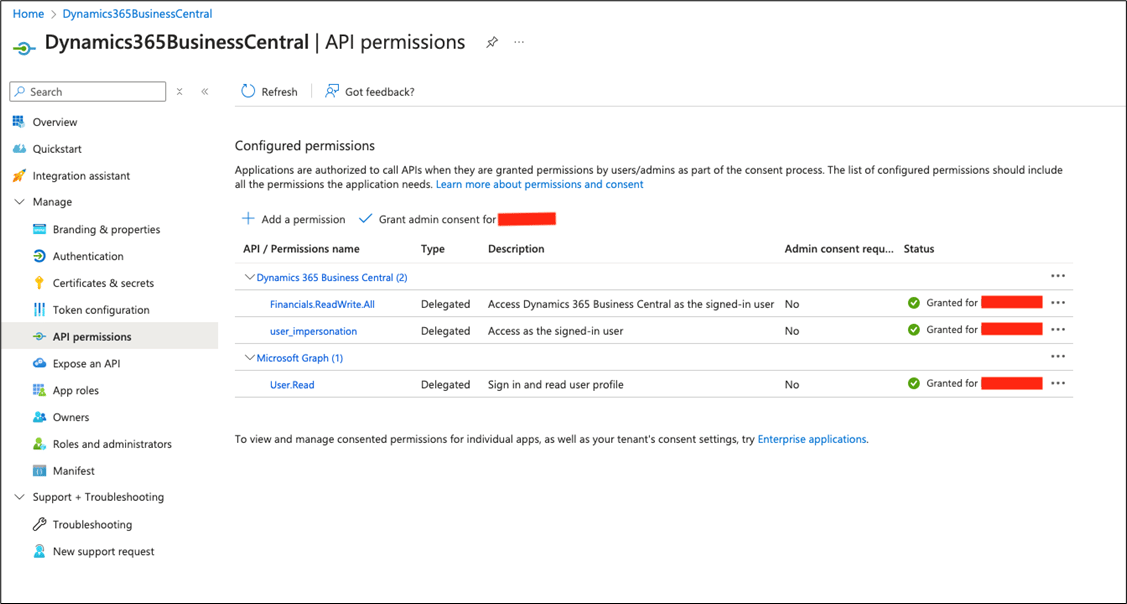
10. On the left pane, click
**Manage** > **API permissions** > **+ Add a permission**.
9. Make a note of the Application (client) ID, Directory (tenant) ID and the Client secrets Value.
10. On the left pane, click
**Manage** > **API permissions** > **+ Add a permission**.
 11. Log in to the customer D365FO and navigate to,
**System Administration** > **Setup** > **Microsoft Entra ID applications**.
12. Click **New**, and provide the ClientID from the Azure portal obtained from the Azure Active Directory applications form, and click **Save**.
The Dynamics 365 Business Central registration process in the Azure Portal is successfully completed.
## Connecting to Your Dynamics 365 Business Central Account
This section enumerates the options in the **Credentials** and **Details** panes in the Dynamics 365 Business Central Connector page. The components of the other panes in this page, **Scheduling** and **Name & Describe Your DataSet**, are universal across most connector types and are discussed in great detail in [Adding a DataSet Using a Data Connector](https://domo-support.domo.com/s/article/360042926274?language=en_US "Adding a DataSet Using a Data Connector").
## Credentials Pane
This pane contains fields for entering credentials to connect to your Dynamics 365 Business Central account. The following table describes what is needed for each field:
11. Log in to the customer D365FO and navigate to,
**System Administration** > **Setup** > **Microsoft Entra ID applications**.
12. Click **New**, and provide the ClientID from the Azure portal obtained from the Azure Active Directory applications form, and click **Save**.
The Dynamics 365 Business Central registration process in the Azure Portal is successfully completed.
## Connecting to Your Dynamics 365 Business Central Account
This section enumerates the options in the **Credentials** and **Details** panes in the Dynamics 365 Business Central Connector page. The components of the other panes in this page, **Scheduling** and **Name & Describe Your DataSet**, are universal across most connector types and are discussed in great detail in [Adding a DataSet Using a Data Connector](https://domo-support.domo.com/s/article/360042926274?language=en_US "Adding a DataSet Using a Data Connector").
## Credentials Pane
This pane contains fields for entering credentials to connect to your Dynamics 365 Business Central account. The following table describes what is needed for each field:
Field | Description |
|---|---|
Microsoft Entra ID | Enter the Microsoft Entra ID. |
Client ID | Navigate to portal.azure.com > Azure Active directory > App registrations . Find and click the web app. The Application ID from the web app is the client id. |
Client Secret | Navigate to portal.azure.com > Azure Active directory > App registrations . Find and click the web app. Go to settings > Keys, and create the client secret. |
Menu | Description |
|---|---|
| Entities | Select the entity to retrieve data. |