> ## Documentation Index
> Fetch the complete documentation index at: https://domoinc-openapi-sync-dataflows.mintlify.site/llms.txt
> Use this file to discover all available pages before exploring further.

# Manage AI Models and Projects

export const InlineImage = ({src, alt = '', height = '1.6em'}) => {
  return <img noZoom src={src} alt={alt} style={{
    display: 'inline',
    verticalAlign: 'start',
    height: height,
    margin: '0'
  }} />;
};

### Intro

AI Models and AI Projects are the places to store and manage models in Domo. You can store models of different types—like large language models (LLMs) and data science and machine learning (DSML) models—and from various internal and external sources, including Domo Jupyter Workspaces, OpenAI, and Hugging Face.

AI Models lets you review the details of your AI models in Domo and compare their performance. From this storage space, you can deploy your AI models to different parts of Domo, including Magic ETL, where the AI Model Inference tile uses your models to transform data. Learn more about the [AI Model Inference tile](https://domo-support.domo.com/s/article/000005741?language=en_US#ai_model_inference_tile).

AI Projects allows you to create new projects that contain existing models. A project is a collection of models that allows you to compare and contrast different models and quickly visualize different model metrics.

**Tip:** Before adding a model to a project, the model must be added to your Domo instance. Learn how to [add a model](#add_a_model) below.

***

### Required Grants

To access AI Models and AI Projects, both of the following grants must be enabled for your role:

* **Create AI Service Models —** Allows you to create new models and edit, deploy, and delete models you can access.
* (Admin-only) **Manage AI Services —** Allows you to create, edit, deploy, and delete all models and projects in AI Models.

Learn about adding grants to [custom roles](/s/article/360043438973).

### Access AI Models and AI Projects

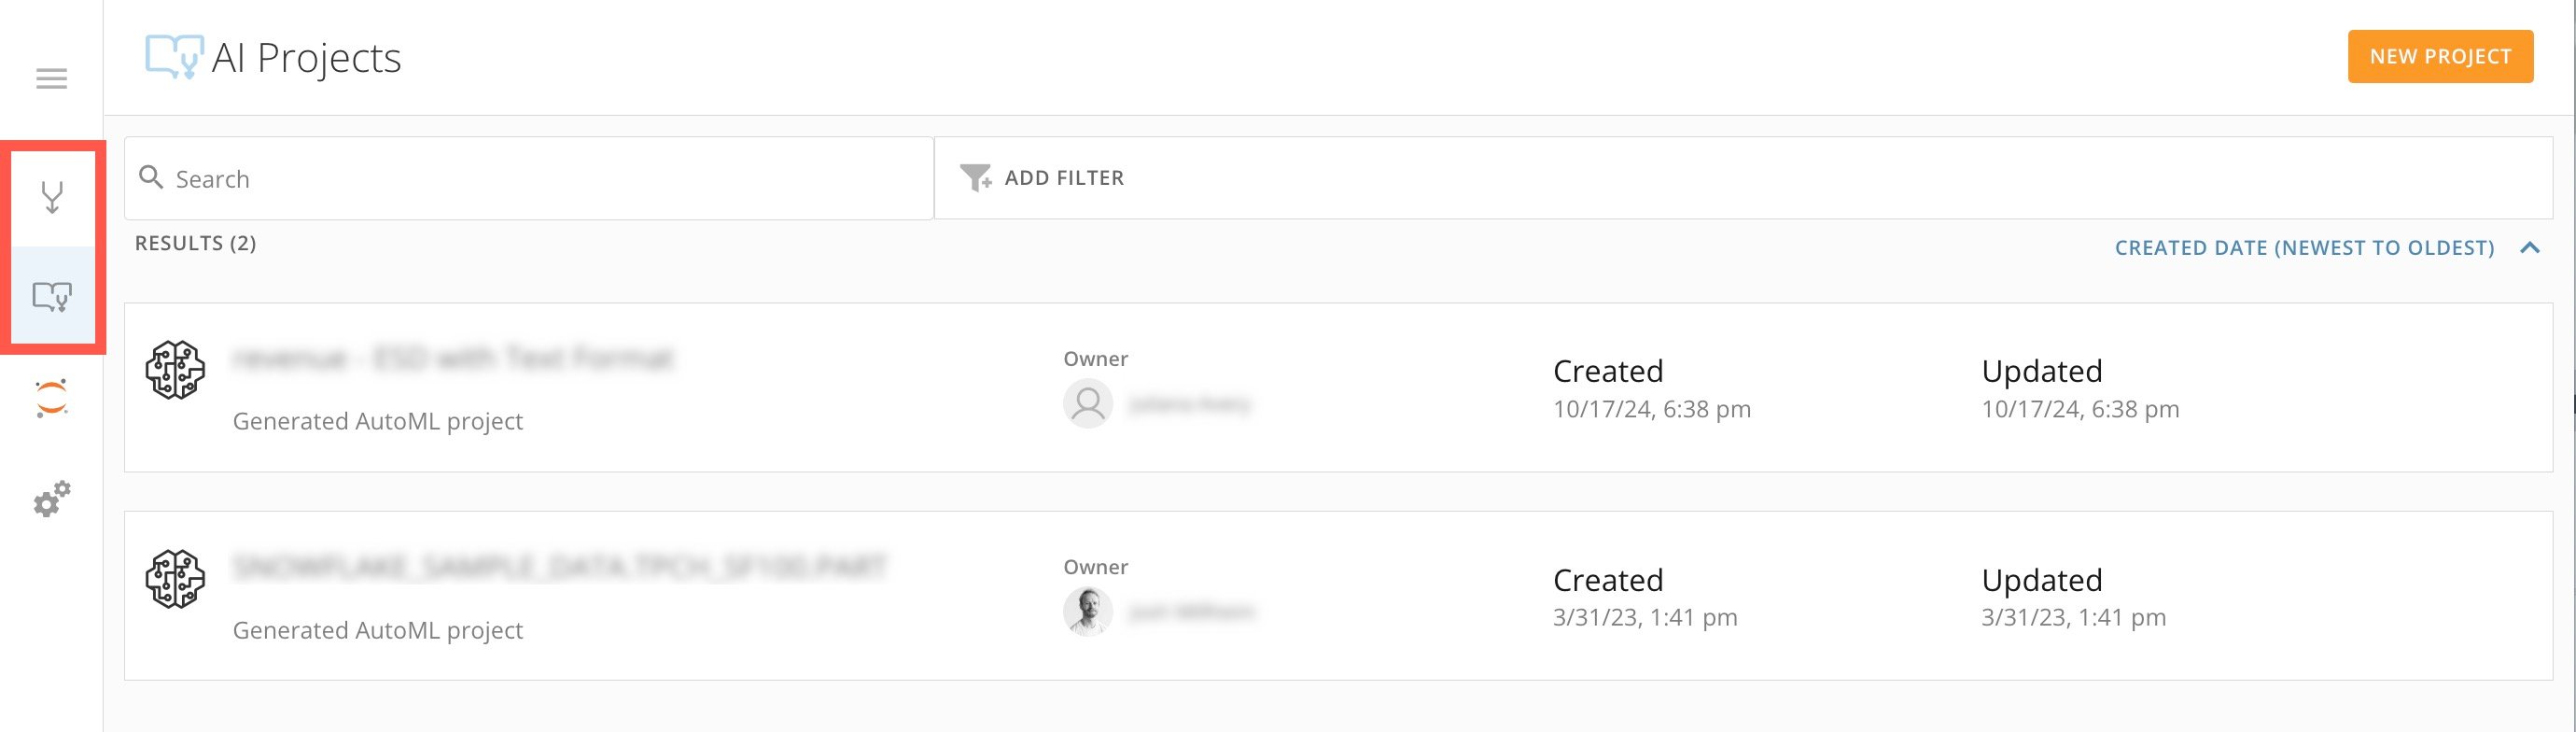
From the Domo navigation, select **More** > **Domo AI** to open the Domo AI interface.

Use the left navigation to go <InlineImage src="/images/kb/ka0Vq00000051Y9-00N5w00000Ri7BU-0EMVq000004UAPR.jpg" /> **AI Models** or <InlineImage src="/images/kb/ka0Vq00000051Y9-00N5w00000Ri7BU-0EMVq000003ypxB.jpg" /> **AI Projects**.

<Frame>
  <img alt="access ai models and projects.jpg" src="https://mintcdn.com/domoinc-openapi-sync-dataflows/bxEAfEU9KvmS3YRs/images/kb/ka0Vq00000051Y9-00N5w00000Ri7BU-0EMVq000004U6Dm.jpg?fit=max&auto=format&n=bxEAfEU9KvmS3YRs&q=85&s=faddec8b7680260ca5031641f281afd2" style={{width: 898, height: 255}} width="2760" height="784" data-path="images/kb/ka0Vq00000051Y9-00N5w00000Ri7BU-0EMVq000004U6Dm.jpg" />
</Frame>

### Add a Model

You can add models to AI Models using Domo's internal tools or third-party sources.

<Tip>
  **Tip:** Learn how to [add a model created in Domo Jupyter Workspaces](https://domo-support.domo.com/s/article/000005291?language=en_US).
</Tip>

# Add a Third-Party Model

<Note>
  **Note:** You or your organization must have a Domo account for the third-party source to add one of their models. Learn how to set up an [account](https://domo-support.domo.com/s/article/360042926054?language=en_US).
</Note>

Follow these steps to add a model from a third-party source:

1. [Access AI Models](#access_ai_models_and_projects).
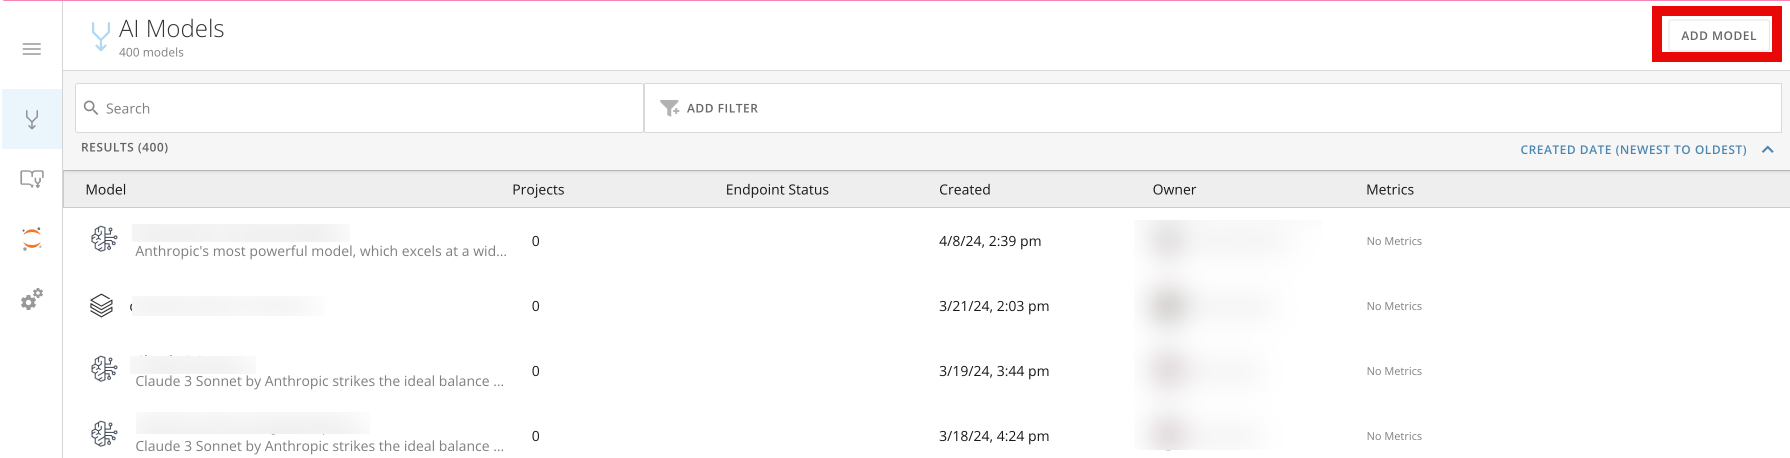
2. On the **AI Models** page, select **Add Model**.

   <Frame>
     <img alt="Models 2.png" src="https://mintcdn.com/domoinc-openapi-sync-dataflows/bxEAfEU9KvmS3YRs/images/kb/ka0Vq00000051Y9-00N5w00000Ri7BU-0EMVq000000jgG1.jpg?fit=max&auto=format&n=bxEAfEU9KvmS3YRs&q=85&s=4b8be366bc0e38e9f7170028580786d8" style={{width: 899, height: 230}} width="1790" height="458" data-path="images/kb/ka0Vq00000051Y9-00N5w00000Ri7BU-0EMVq000000jgG1.jpg" />
   </Frame>

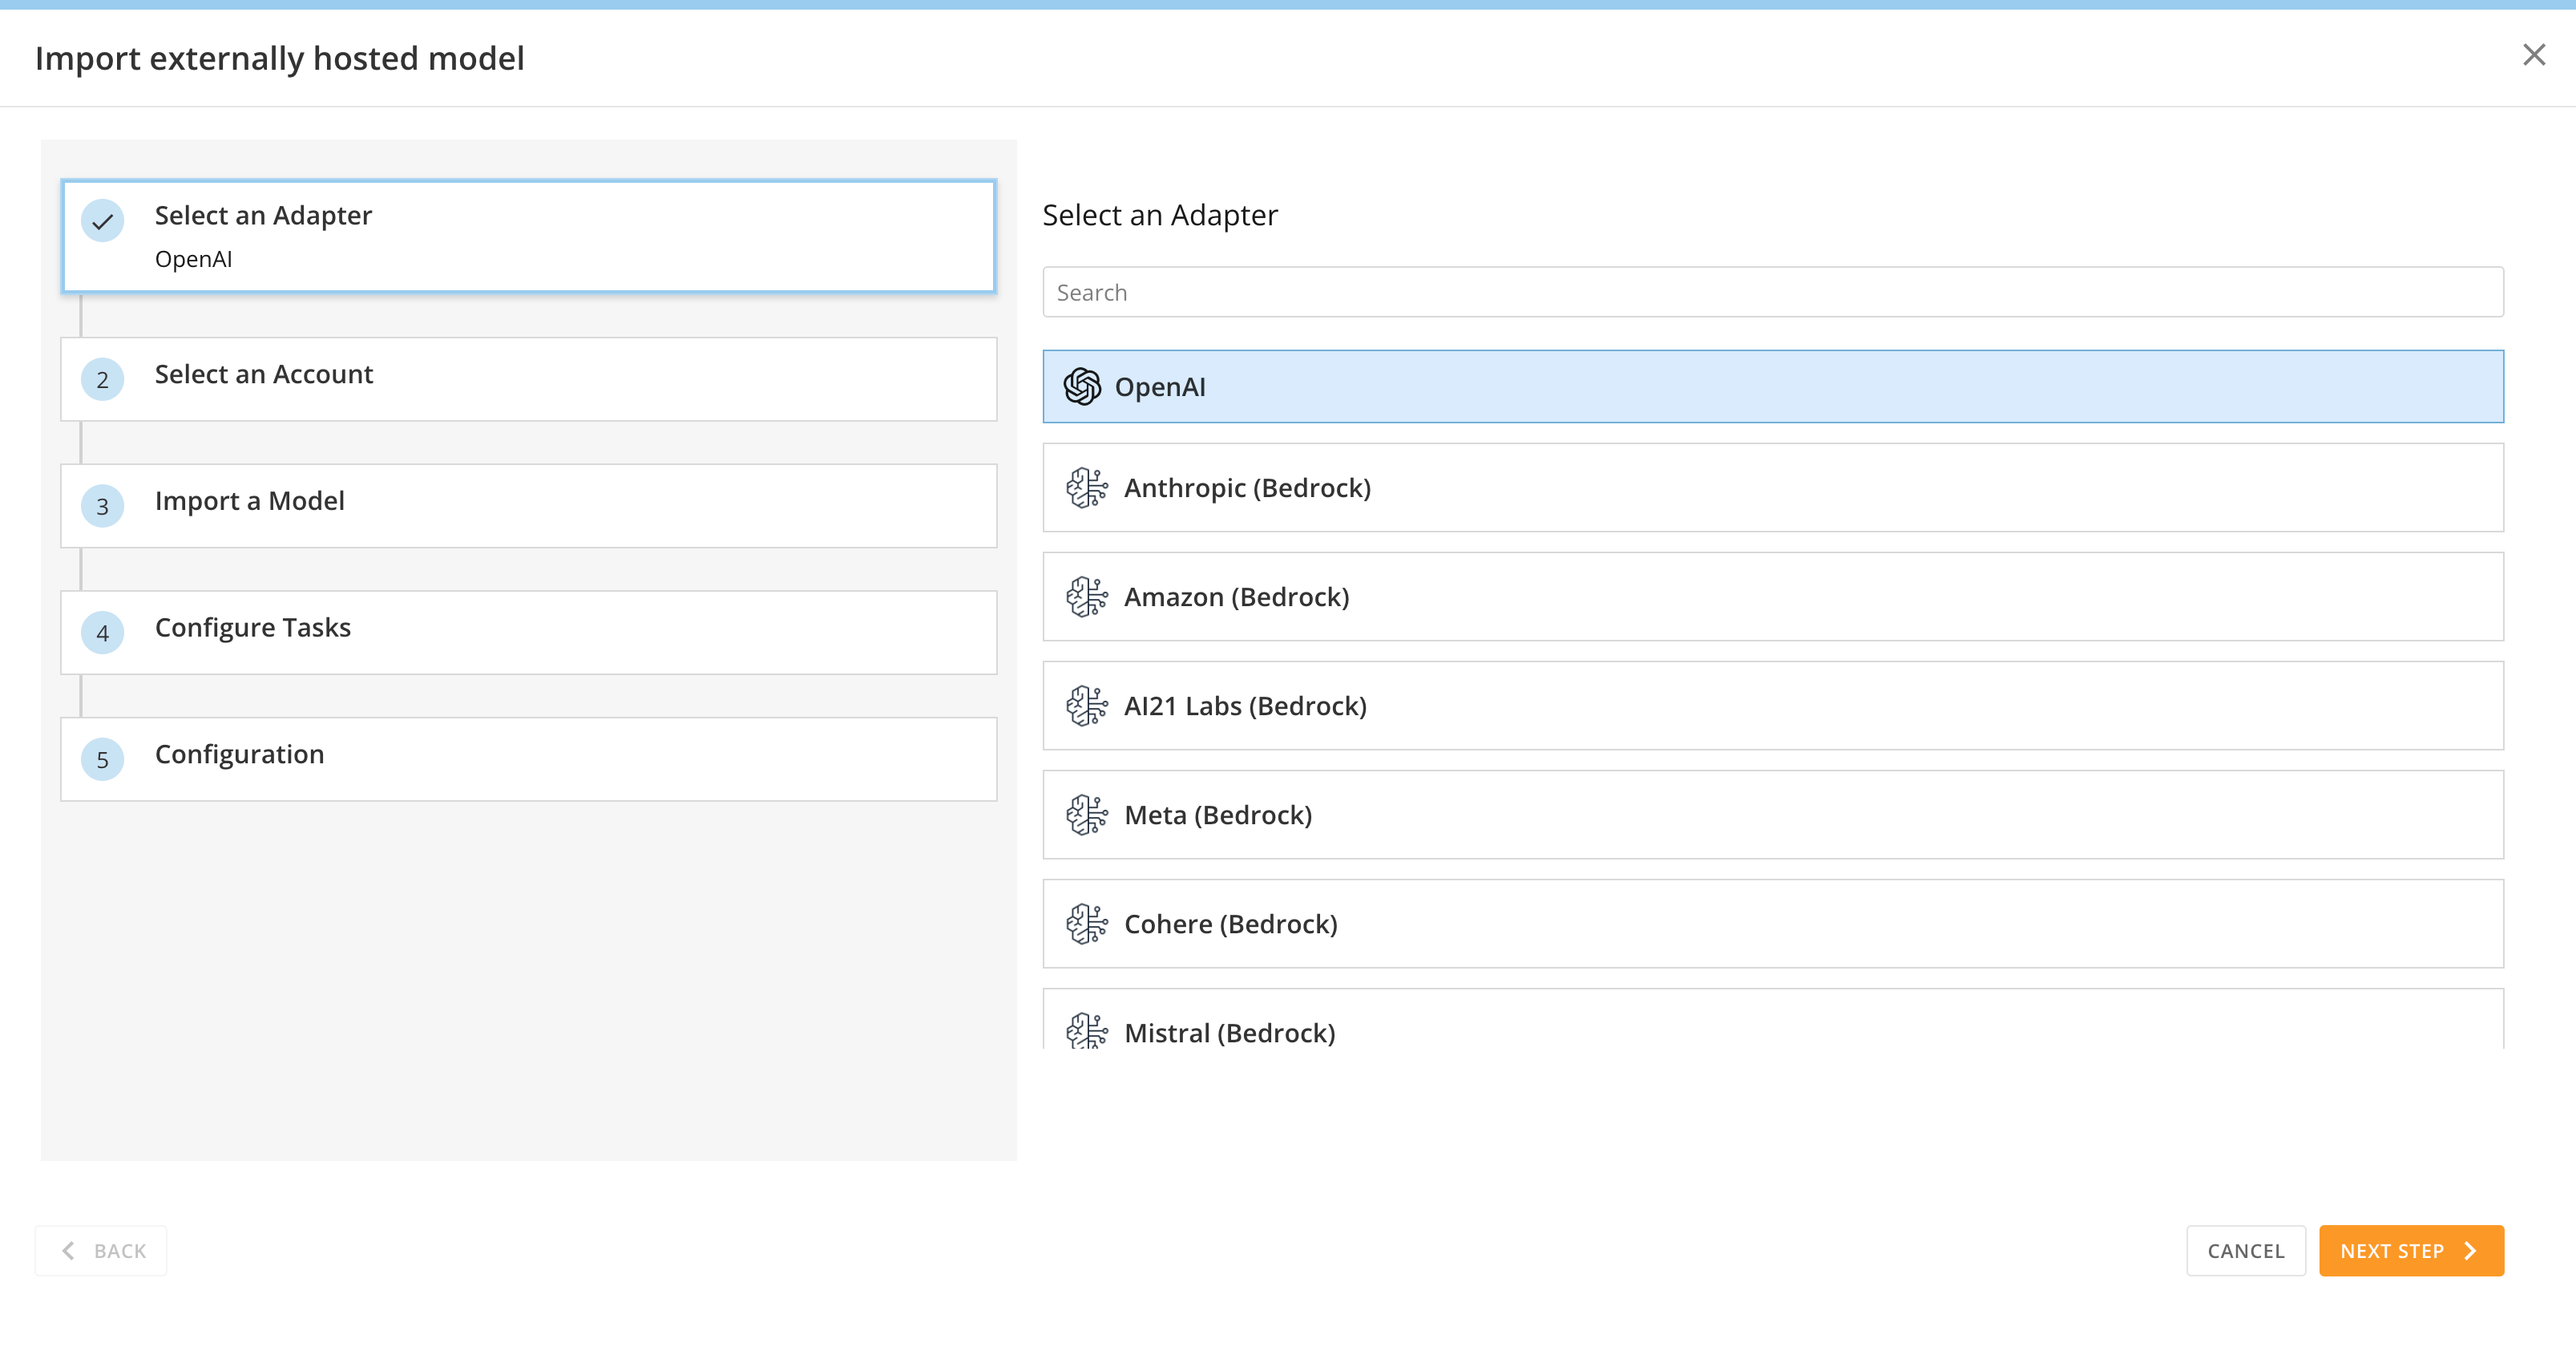
   The model import modal displays.

   <Frame>
     <img alt="Screenshot 2024-05-16 at 9.58.49 AM.png" src="https://mintcdn.com/domoinc-openapi-sync-dataflows/bxEAfEU9KvmS3YRs/images/kb/ka0Vq00000051Y9-00N5w00000Ri7BU-0EMVq000000yagX.jpg?fit=max&auto=format&n=bxEAfEU9KvmS3YRs&q=85&s=af5d642884f0cbbf0f12c0e5867f404e" style={{width: 799, height: 418}} width="3214" height="1680" data-path="images/kb/ka0Vq00000051Y9-00N5w00000Ri7BU-0EMVq000000yagX.jpg" />
   </Frame>
3. Complete the following steps outlined in the modal. After completing a step, select **Next Step** to move forward.

   At any time, you can select **Back** to return to the previous step or **Cancel** to exit the modal.

   1. **Select an Adapter —** The adapter is the third-party source of the model.

   2. **Select an Account —** You or your company must have an account with the third-party source of the model that is integrated with Domo.
      * If you haven't already integrated an existing third-party source with Domo, select **Create Account** and complete account integration. Learn how to [integrate an account.](https://domo-support.domo.com/s/article/360042926054?language=en_US)

        After integrating your account, restart the [Add a Model](#add_a_model) process.

   3. **Import a Model —** Choose the model to import from the list of available models from that source.

   4. **Configure Tasks  —** Specify the following:

      * Select the model task from the **Task** dropdown, which lists general model capabilities. The model account determines the available tasks. Possible task types include Binary Classification, Chat Completion, Classification, Image Generation, Regression, Summarization, Task Planning, Text Embedding, Text Generation, and Others.
      * Select input or output from the **Schema** dropdown.
      * Choose either `CSV` or `JSON` from the **Media Type** dropdown.

        In the image below, the task type is Chat Completion, the schema is `input`, and the media type is `JSON`

        <Frame>
          <img alt="Screenshot 2024-07-18 at 10.46.30 AM.png" src="https://mintcdn.com/domoinc-openapi-sync-dataflows/bxEAfEU9KvmS3YRs/images/kb/ka0Vq00000051Y9-00N5w00000Ri7BU-0EMVq000001osZL.jpg?fit=max&auto=format&n=bxEAfEU9KvmS3YRs&q=85&s=01ca59eb5caee0cf4afe1a2641abf42c" style={{width: 595, height: 100}} width="1618" height="272" data-path="images/kb/ka0Vq00000051Y9-00N5w00000Ri7BU-0EMVq000001osZL.jpg" />
        </Frame>

        This section of the modal includes a preview of the model metrics and hyperparameters, which are brought in from the selected adapter account.
      * (Optional) Select **+ Add New** to add a new input/output value row to your schema.

        <Frame>
          <img alt="add new input row.jpeg" src="https://mintcdn.com/domoinc-openapi-sync-dataflows/bxEAfEU9KvmS3YRs/images/kb/ka0Vq00000051Y9-00N5w00000Ri7BU-0EMVq000001nvsc.jpg?fit=max&auto=format&n=bxEAfEU9KvmS3YRs&q=85&s=63b5770c3ad8d97a49839077f5ab53e8" style={{width: 799, height: 621}} width="1538" height="1194" data-path="images/kb/ka0Vq00000051Y9-00N5w00000Ri7BU-0EMVq000001nvsc.jpg" />
        </Frame>

        <Note>
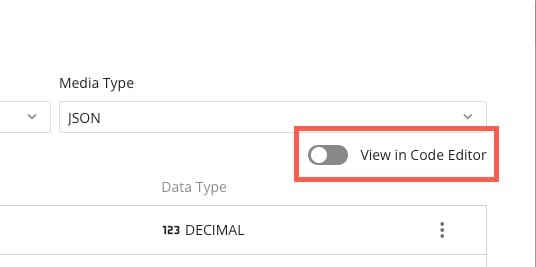
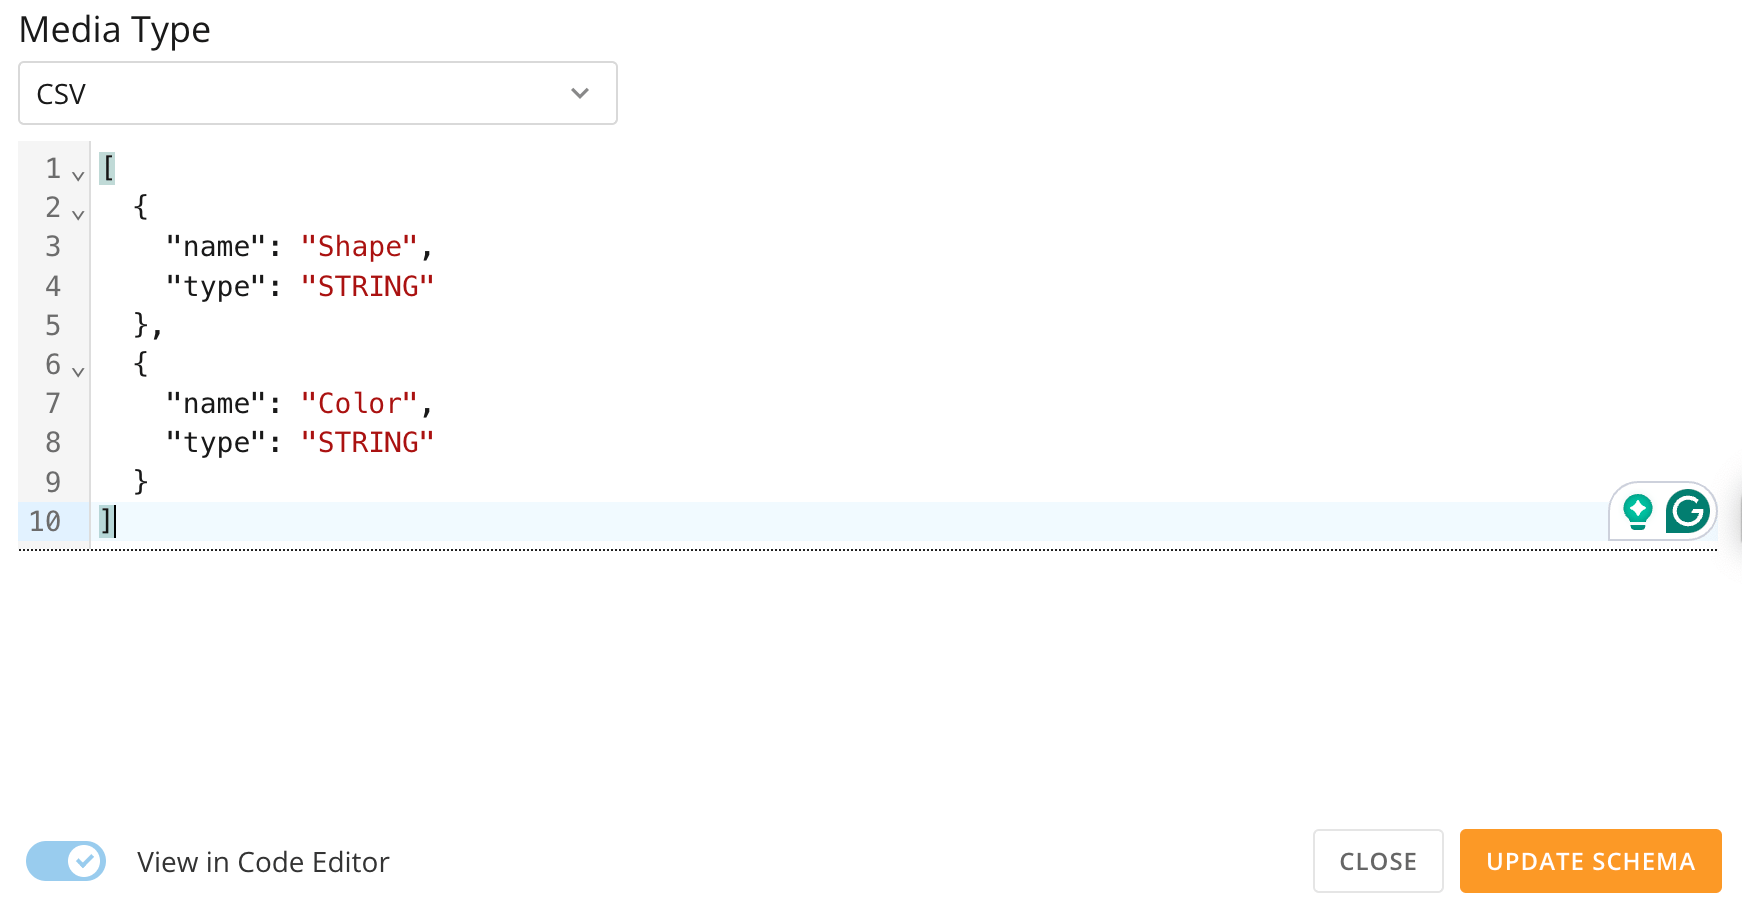
          **View in Code Editor:** Toggling the **View in Code Editor** switch displays the backend code that defines the model.

          <Frame>
            <img alt="view in code editor.jpg" src="https://mintcdn.com/domoinc-openapi-sync-dataflows/bxEAfEU9KvmS3YRs/images/kb/ka0Vq00000051Y9-00N5w00000Ri7BU-0EMVq000001o0fO.jpg?fit=max&auto=format&n=bxEAfEU9KvmS3YRs&q=85&s=49ecc2905924b0686e18c626fe0be031" style={{width: 401, height: 200}} width="536" height="267" data-path="images/kb/ka0Vq00000051Y9-00N5w00000Ri7BU-0EMVq000001o0fO.jpg" />
          </Frame>

          You can edit the code directly from the Code Editor to automatically update the model schema. Select **Update Schema** to save your changes.
          <Frame>
            <img alt="Screenshot 2024-06-19 at 10.38.08 AM.png" src="https://mintcdn.com/domoinc-openapi-sync-dataflows/bxEAfEU9KvmS3YRs/images/kb/ka0Vq00000051Y9-00N5w00000Ri7BU-0EMVq000001PbdJ.jpg?fit=max&auto=format&n=bxEAfEU9KvmS3YRs&q=85&s=cc5f13d7caafcd5c5dc3ff439e0ae031" style={{width: 695, height: 368}} width="1742" height="922" data-path="images/kb/ka0Vq00000051Y9-00N5w00000Ri7BU-0EMVq000001PbdJ.jpg" />
          </Frame>
        </Note>

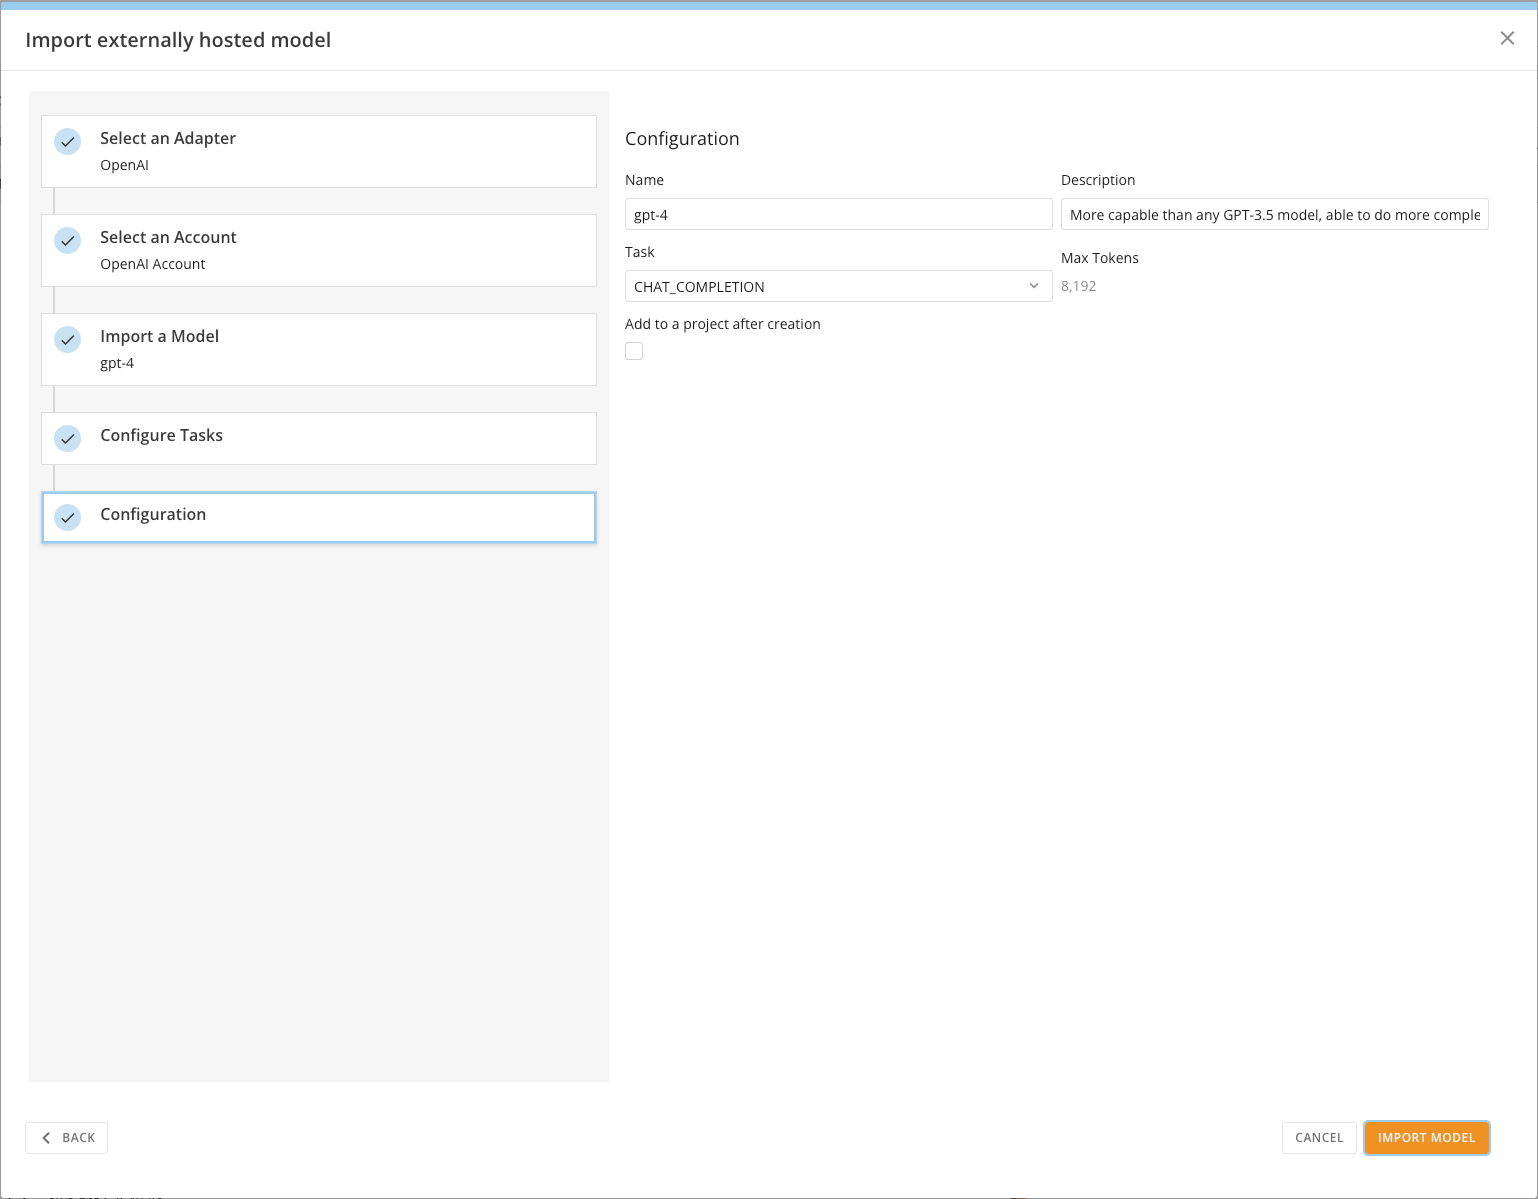
   5. **Configuration —** Fill out the required information. The following notes may be helpful:
      * The model task is auto-selected based on the adapter you selected in step 1 of this modal. You can override the selected option by selecting a new task type from the dropdown.
      * The **Max Tokens** are the maximum number of tokens the model can process in a single interaction (input prompt + output). A *token* is a sequence of characters used to identify the model.
      * (Optional) Selecting the checkbox labeled **Add to a project** **after creation** opens the **Manage Projects**

        modal, where you can choose projects to which to add the model.

        Learn more about [AI Projects below](#create_a_project).

Select **Import Model** to complete the setup. Your new AI model now displays on the **AI Models** page, and y ou can securely use it to complete tasks in Domo.

<Frame>
  <img alt="Screenshot 2024-05-16 at 10.20.06 AM.png" src="https://mintcdn.com/domoinc-openapi-sync-dataflows/bxEAfEU9KvmS3YRs/images/kb/ka0Vq00000051Y9-00N5w00000Ri7BU-0EMVq000000ydZZ.jpg?fit=max&auto=format&n=bxEAfEU9KvmS3YRs&q=85&s=c0451b87fa204bbc5e5e037560875da4" style={{width: 799, height: 622}} width="1538" height="1199" data-path="images/kb/ka0Vq00000051Y9-00N5w00000Ri7BU-0EMVq000000ydZZ.jpg" />
</Frame>

### Review Model Information

On the **AI Models** page, you can view the following about each model you have access to:

* The model name, description, owner, and the date it was created.
* The number of projects the model is added to.
* The current status of the model endpoint. See
  [Work with Model Endpoints](#work_with_model_endpoints) to learn more.
* Metrics associated with the model. You can see more about the metrics in the
  [Details view](#details_view).

  <Note>
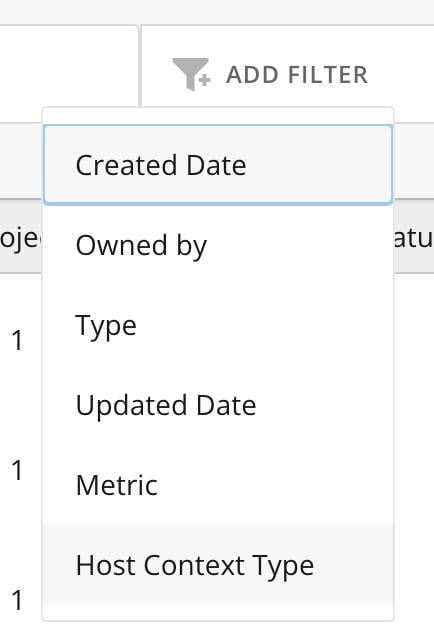
    **Note:** When filtering the models, the **Host Context Type** filter refers to the source of a model.

    <Frame>
      <img alt="host context type.jpg" src="https://mintcdn.com/domoinc-openapi-sync-dataflows/bxEAfEU9KvmS3YRs/images/kb/ka0Vq00000051Y9-00N5w00000Ri7BU-0EMVq000001nuwX.jpg?fit=max&auto=format&n=bxEAfEU9KvmS3YRs&q=85&s=05e9e4e9efca007d36af6ab43e5fb3fb" style={{width: 200, height: 295}} width="434" height="640" data-path="images/kb/ka0Vq00000051Y9-00N5w00000Ri7BU-0EMVq000001nuwX.jpg" />
    </Frame>
  </Note>

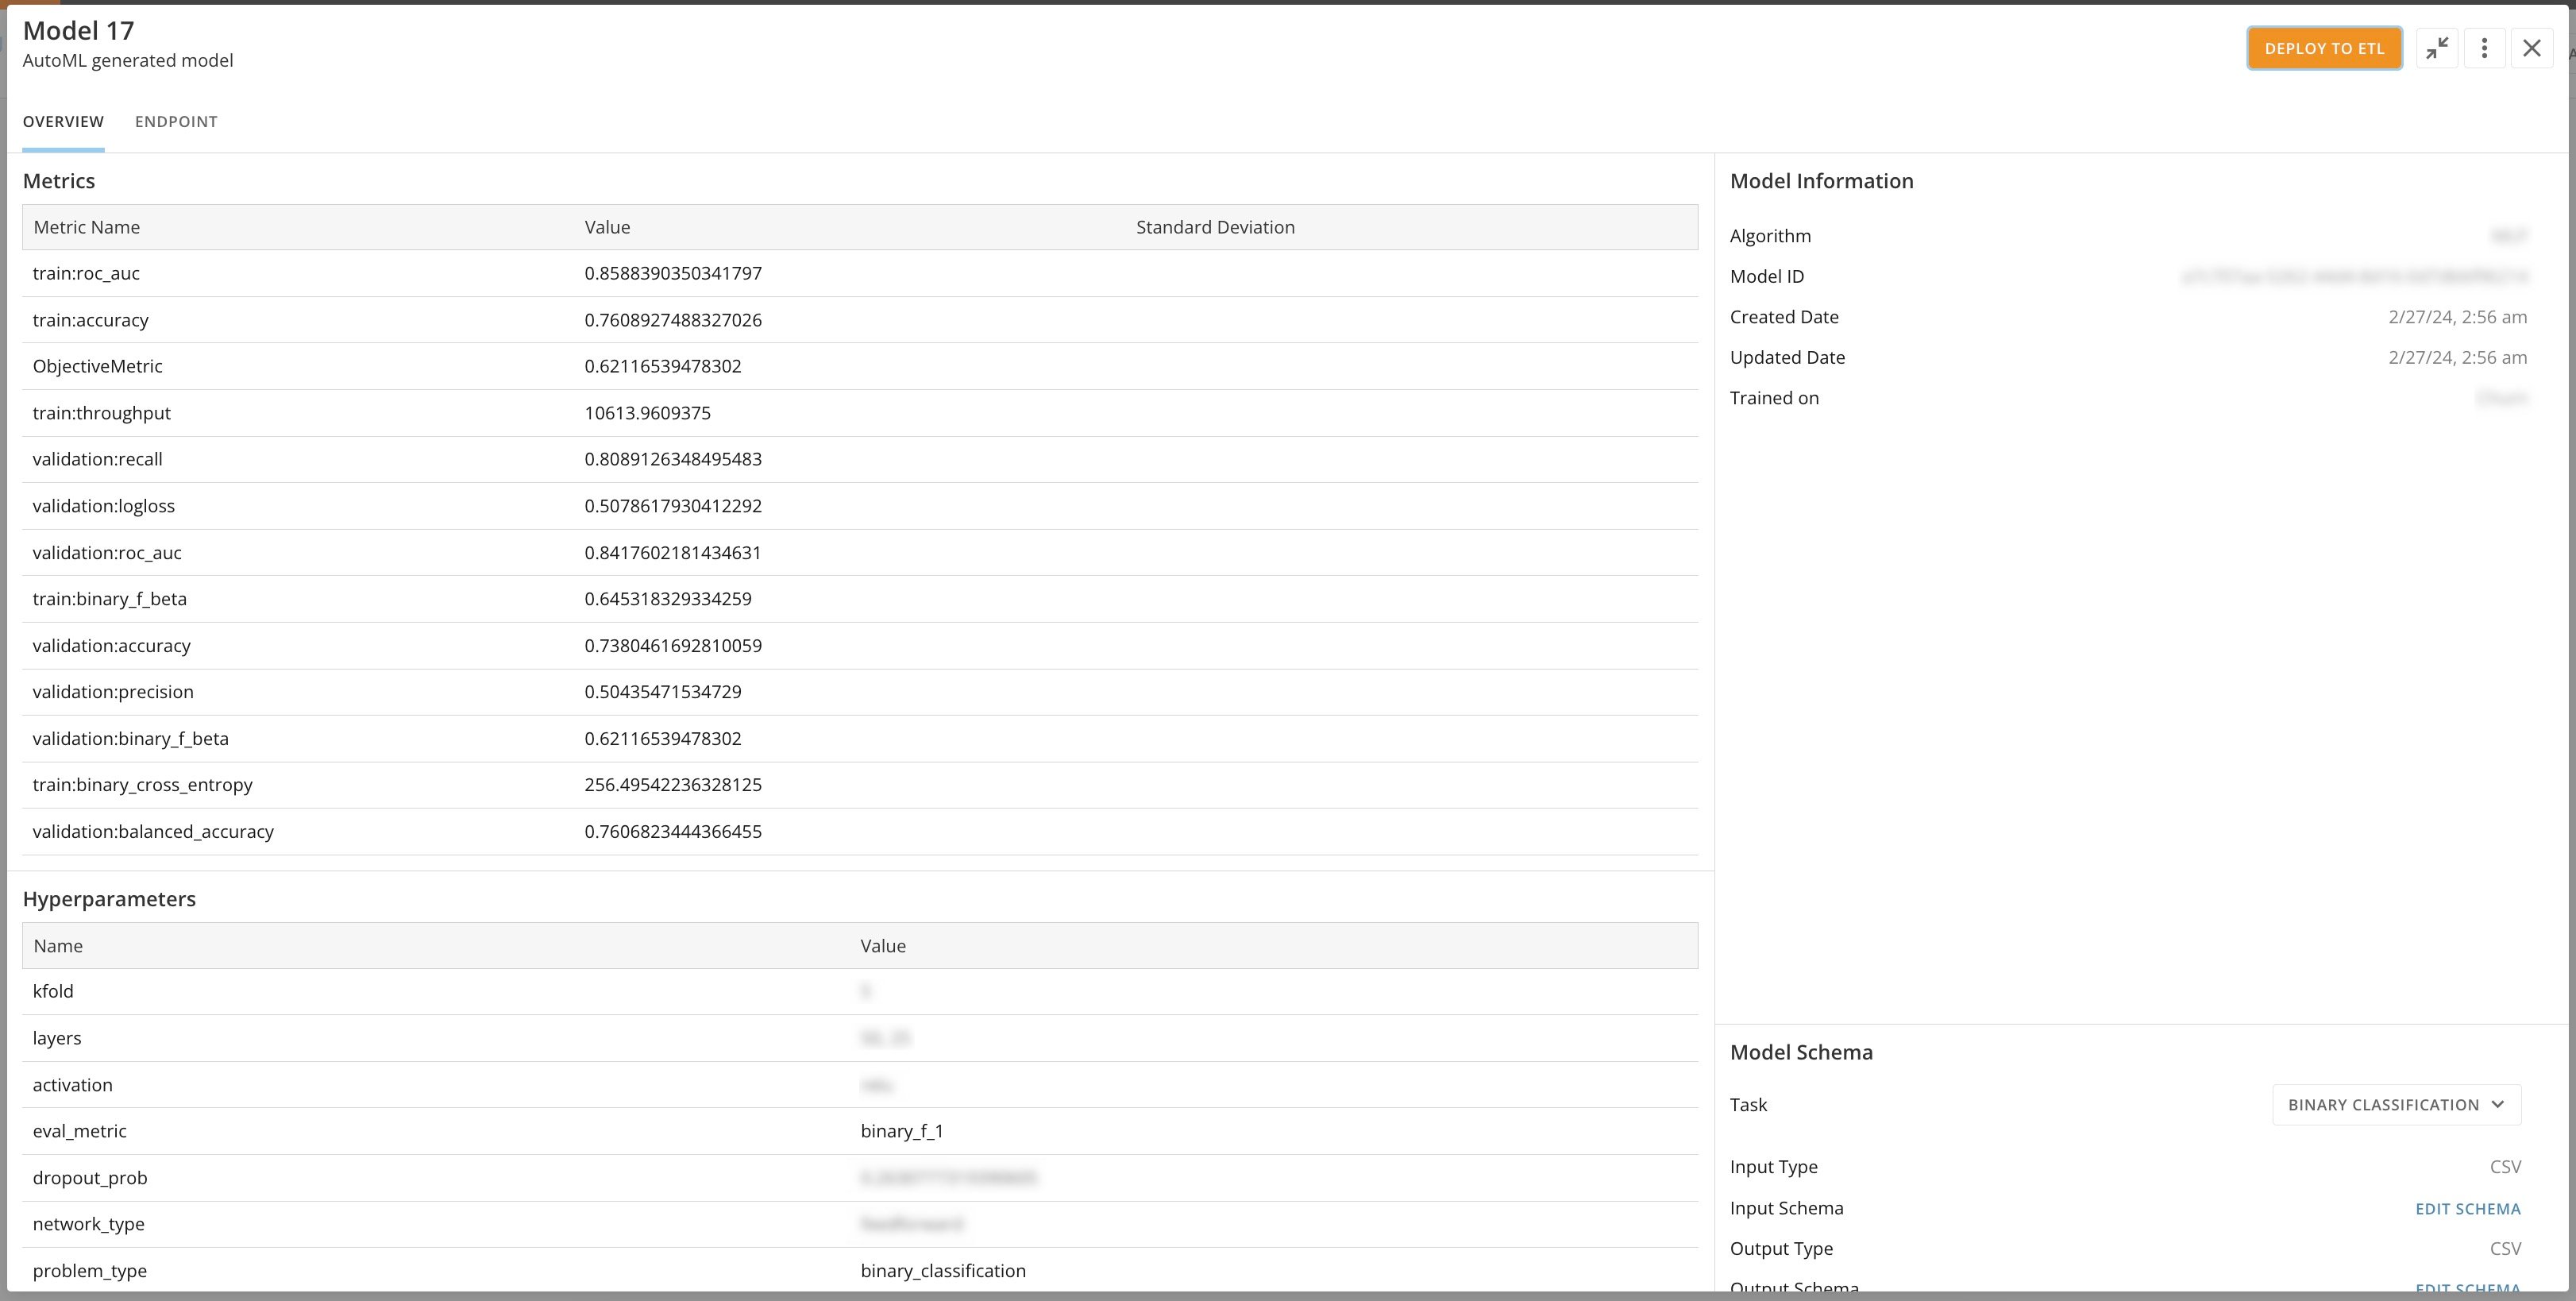
Selecting a model from the **AI Models** page opens the Details view for that model.

<Frame>
  <img alt="model details.jpg" src="https://mintcdn.com/domoinc-openapi-sync-dataflows/bxEAfEU9KvmS3YRs/images/kb/ka0Vq00000051Y9-00N5w00000Ri7BU-0EMVq000001oLYZ.jpg?fit=max&auto=format&n=bxEAfEU9KvmS3YRs&q=85&s=2f3bf3331a20691b48468e48fb0a5444" style={{width: 899, height: 454}} width="3244" height="1638" data-path="images/kb/ka0Vq00000051Y9-00N5w00000Ri7BU-0EMVq000001oLYZ.jpg" />
</Frame>

The Details view includes four sections, described in the table below. The values in each section depend on the model source and how it was trained and brought into Domo.

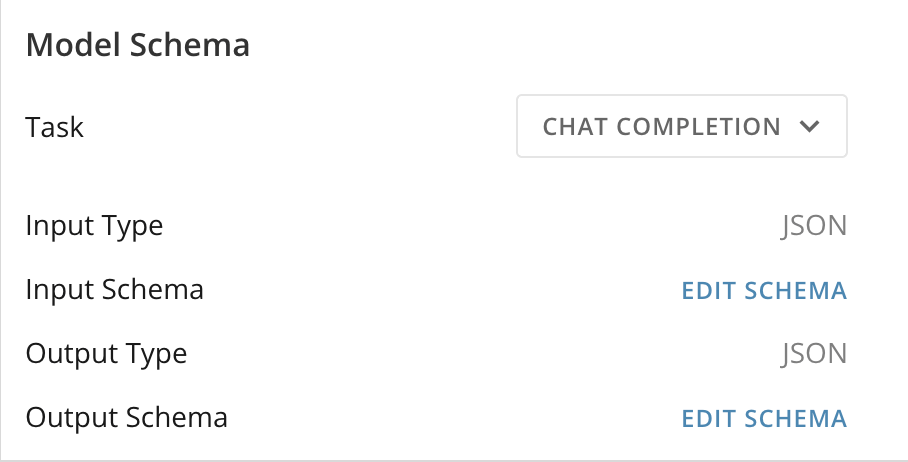
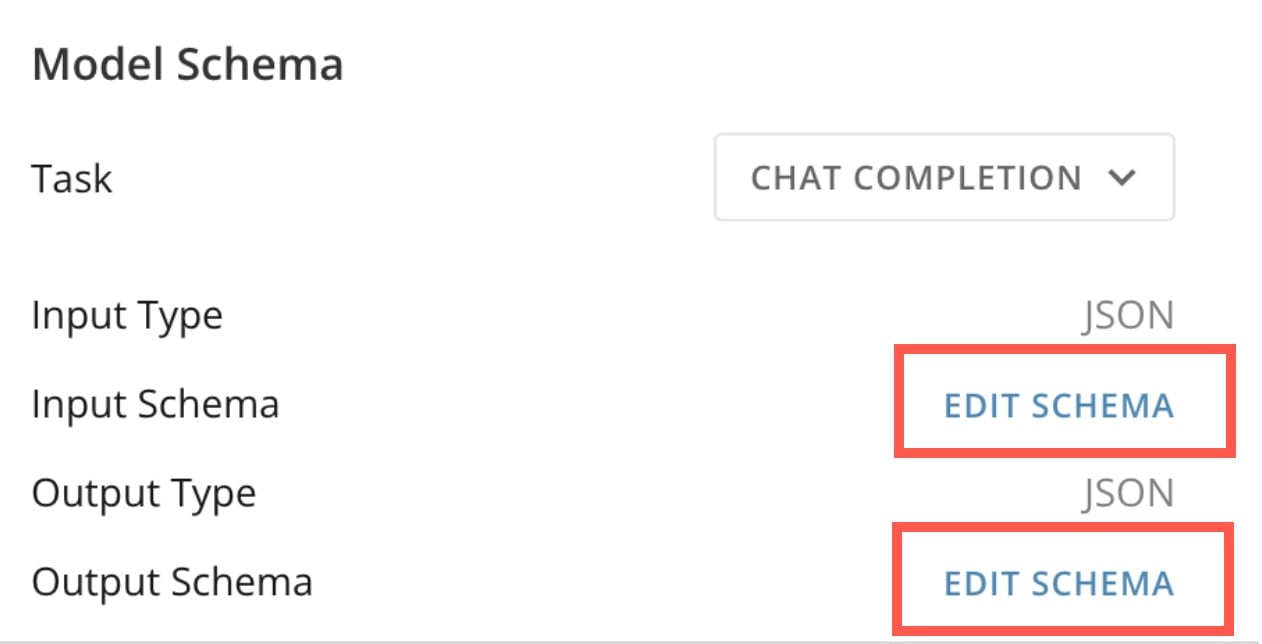
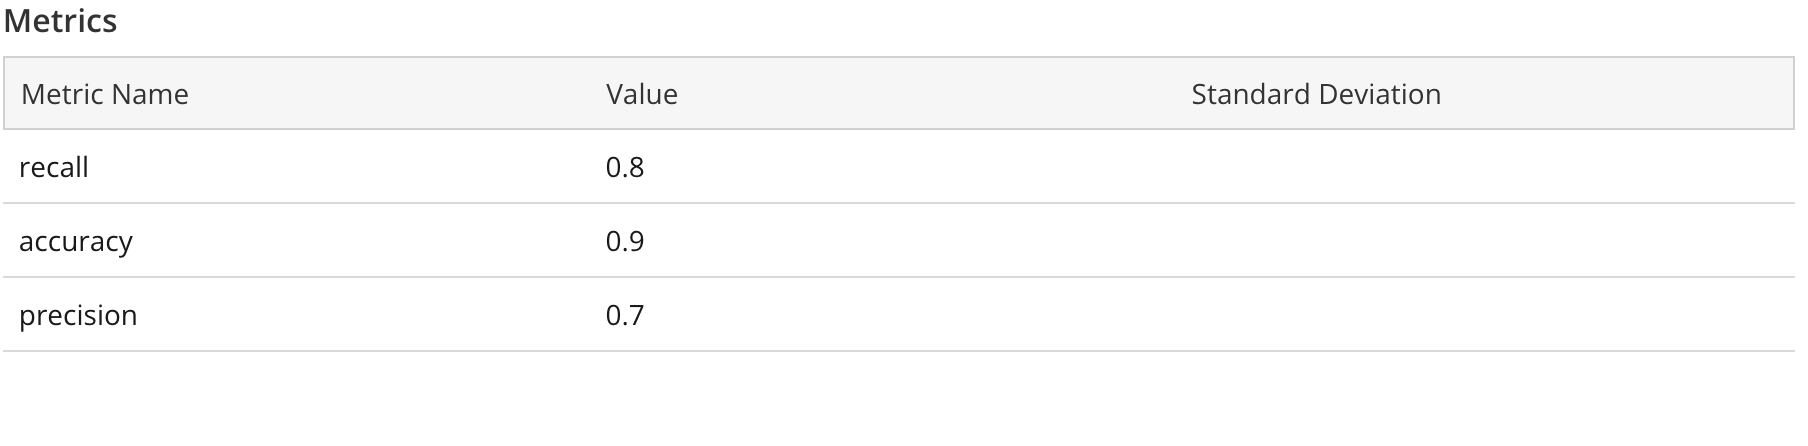
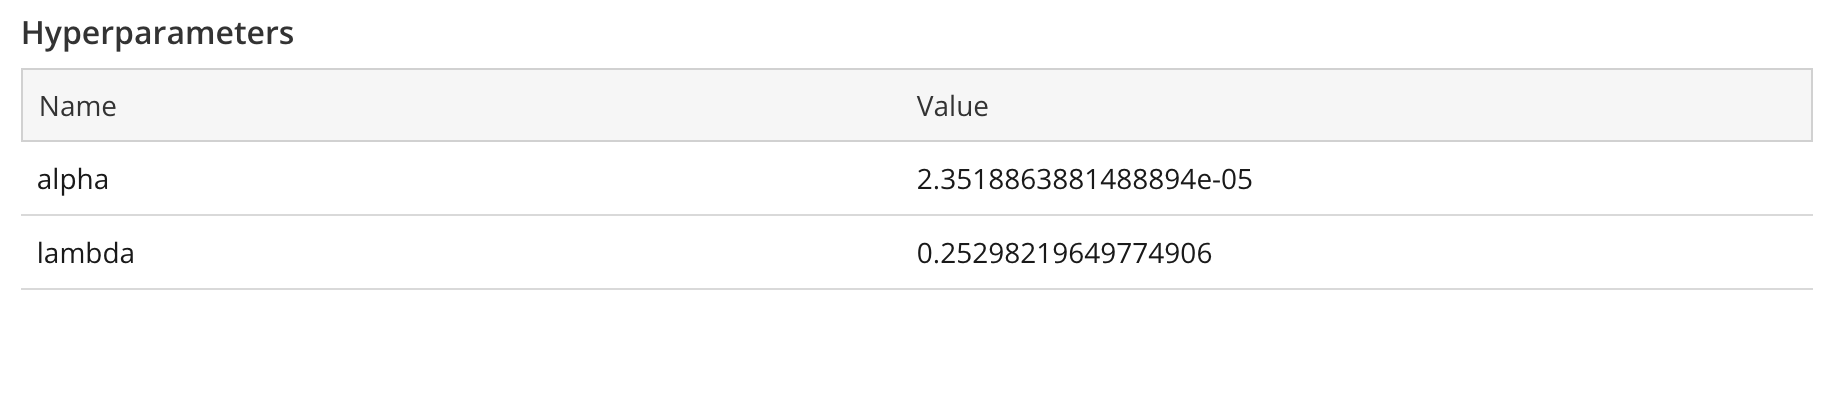
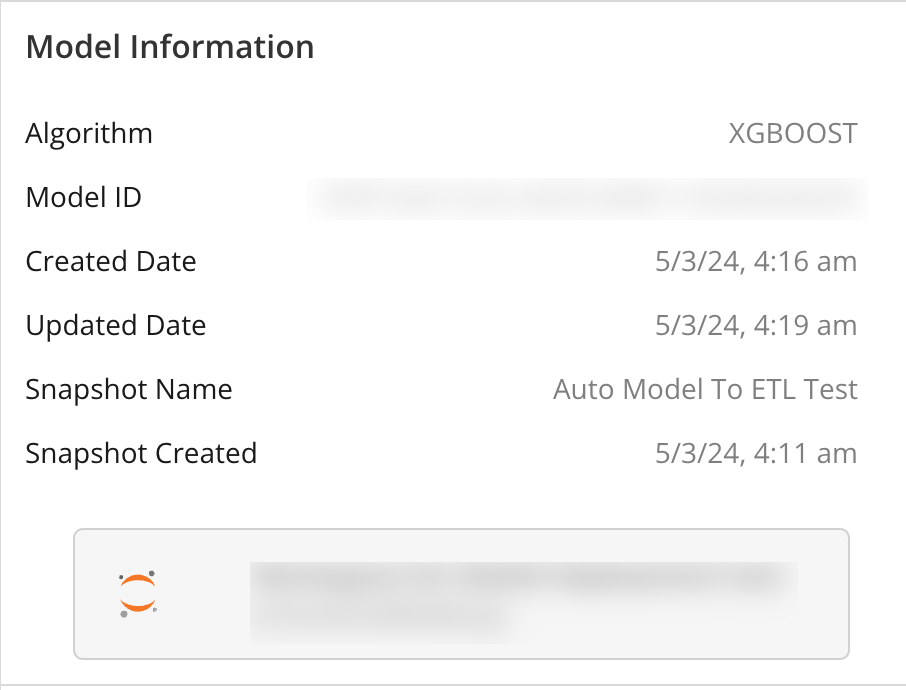
<table border="1" cellpadding="1" cellspacing="1" data-aura-rendered-by="33:208;a"><thead><tr><th colspan="1" rowspan="1"><p> Section </p></th><th colspan="1" rowspan="1"><p> Description </p></th><th colspan="1" rowspan="1"><p> Image </p></th></tr></thead><tbody><tr><td colspan="1" rowspan="1"><p> Metrics </p></td><td colspan="1" rowspan="1"><p> The values displayed here for metric name, value, and standard deviation are created during the initial training of the model when it is brought in from a third-party source. The model values and other results are initially compared to the sample data used in the model training. </p><p> The <b> Standard Deviation </b> column displays even when your model doesn't have them as an output. </p></td><td colspan="1" rowspan="1"><p><img alt="Screenshot 2024-05-16 at 2.56.42 PM.png" src="https://mintcdn.com/domoinc-openapi-sync-dataflows/bxEAfEU9KvmS3YRs/images/kb/ka0Vq00000051Y9-00N5w00000Ri7BU-0EMVq000000yoy1.jpg?fit=max&auto=format&n=bxEAfEU9KvmS3YRs&q=85&s=475a91eea6786d0da262011164b2fe17" style={{width: 450, height: 111}} width="1808" height="446" data-path="images/kb/ka0Vq00000051Y9-00N5w00000Ri7BU-0EMVq000000yoy1.jpg" /></p></td></tr><tr><td colspan="1" rowspan="1"><p> Hyperparameters </p></td><td colspan="1" rowspan="1"><p> These values are created during the initial model training and typically include items like limits, top values, variants, and any model configuration done external to Domo. </p></td><td colspan="1" rowspan="1"><p><img alt="Screenshot 2024-05-16 at 3.06.04 PM.png" src="https://mintcdn.com/domoinc-openapi-sync-dataflows/bxEAfEU9KvmS3YRs/images/kb/ka0Vq00000051Y9-00N5w00000Ri7BU-0EMVq000000ypVt.jpg?fit=max&auto=format&n=bxEAfEU9KvmS3YRs&q=85&s=8e5f0a1c4008b479f4e137e03e879a18" style={{width: 447, height: 96}} width="1834" height="394" data-path="images/kb/ka0Vq00000051Y9-00N5w00000Ri7BU-0EMVq000000ypVt.jpg" /></p></td></tr><tr><td colspan="1" rowspan="1"><p> Model Information </p></td><td colspan="1" rowspan="1"><p> These values include the machine learning algorithm the model was trained on, the model ID used to run the model endpoint in other areas in Domo, snapshot data if a snapshot exists, and a name and link to the model job (if the model was created in Domo). </p></td><td colspan="1" rowspan="1"><p><img alt="Screenshot 2024-05-17 at 9.22.09 AM.png" src="https://mintcdn.com/domoinc-openapi-sync-dataflows/bxEAfEU9KvmS3YRs/images/kb/ka0Vq00000051Y9-00N5w00000Ri7BU-0EMVq000000z8qH.jpg?fit=max&auto=format&n=bxEAfEU9KvmS3YRs&q=85&s=c5ac0afe5e9b3e5b9895e97a66df23f9" style={{width: 399, height: 304}} width="906" height="690" data-path="images/kb/ka0Vq00000051Y9-00N5w00000Ri7BU-0EMVq000000z8qH.jpg" /></p></td></tr><tr><td colspan="1" rowspan="1"><p> Model Schema </p></td><td colspan="1" rowspan="1"><p> These values include the model's assigned task, the input type, input schema, output type, and output schema. </p><p> Select <b> Edit Schema </b> for both the input and output to update them in the schema. Learn how to <a href="#edit_schema" target="_self"> edit the schema. </a><a id="edit_the_schema" target="_blank" /></p></td><td colspan="1" rowspan="1"><img alt="Screenshot 2024-05-17 at 9.49.03 AM.png" src="https://mintcdn.com/domoinc-openapi-sync-dataflows/bxEAfEU9KvmS3YRs/images/kb/ka0Vq00000051Y9-00N5w00000Ri7BU-0EMVq000000zA2T.jpg?fit=max&auto=format&n=bxEAfEU9KvmS3YRs&q=85&s=e73bd1f75266de77f8e5f5a4ea76504c" style={{width: 399, height: 203}} width="908" height="462" data-path="images/kb/ka0Vq00000051Y9-00N5w00000Ri7BU-0EMVq000000zA2T.jpg" /></td></tr></tbody></table>

# Edit the Schema

From the model Details view under **Model Schema**, you can select **Edit Schema** for both the input and output schema to make changes to them in the **Edit Schema** modal.

<Frame>
  <img alt="edit schema.jpg" src="https://mintcdn.com/domoinc-openapi-sync-dataflows/bxEAfEU9KvmS3YRs/images/kb/ka0Vq00000051Y9-00N5w00000Ri7BU-0EMVq000001oOGH.jpg?fit=max&auto=format&n=bxEAfEU9KvmS3YRs&q=85&s=70f716b28c0774f5b1dcaf8608dade51" style={{width: 451, height: 230}} width="1262" height="644" data-path="images/kb/ka0Vq00000051Y9-00N5w00000Ri7BU-0EMVq000001oOGH.jpg" />
</Frame>

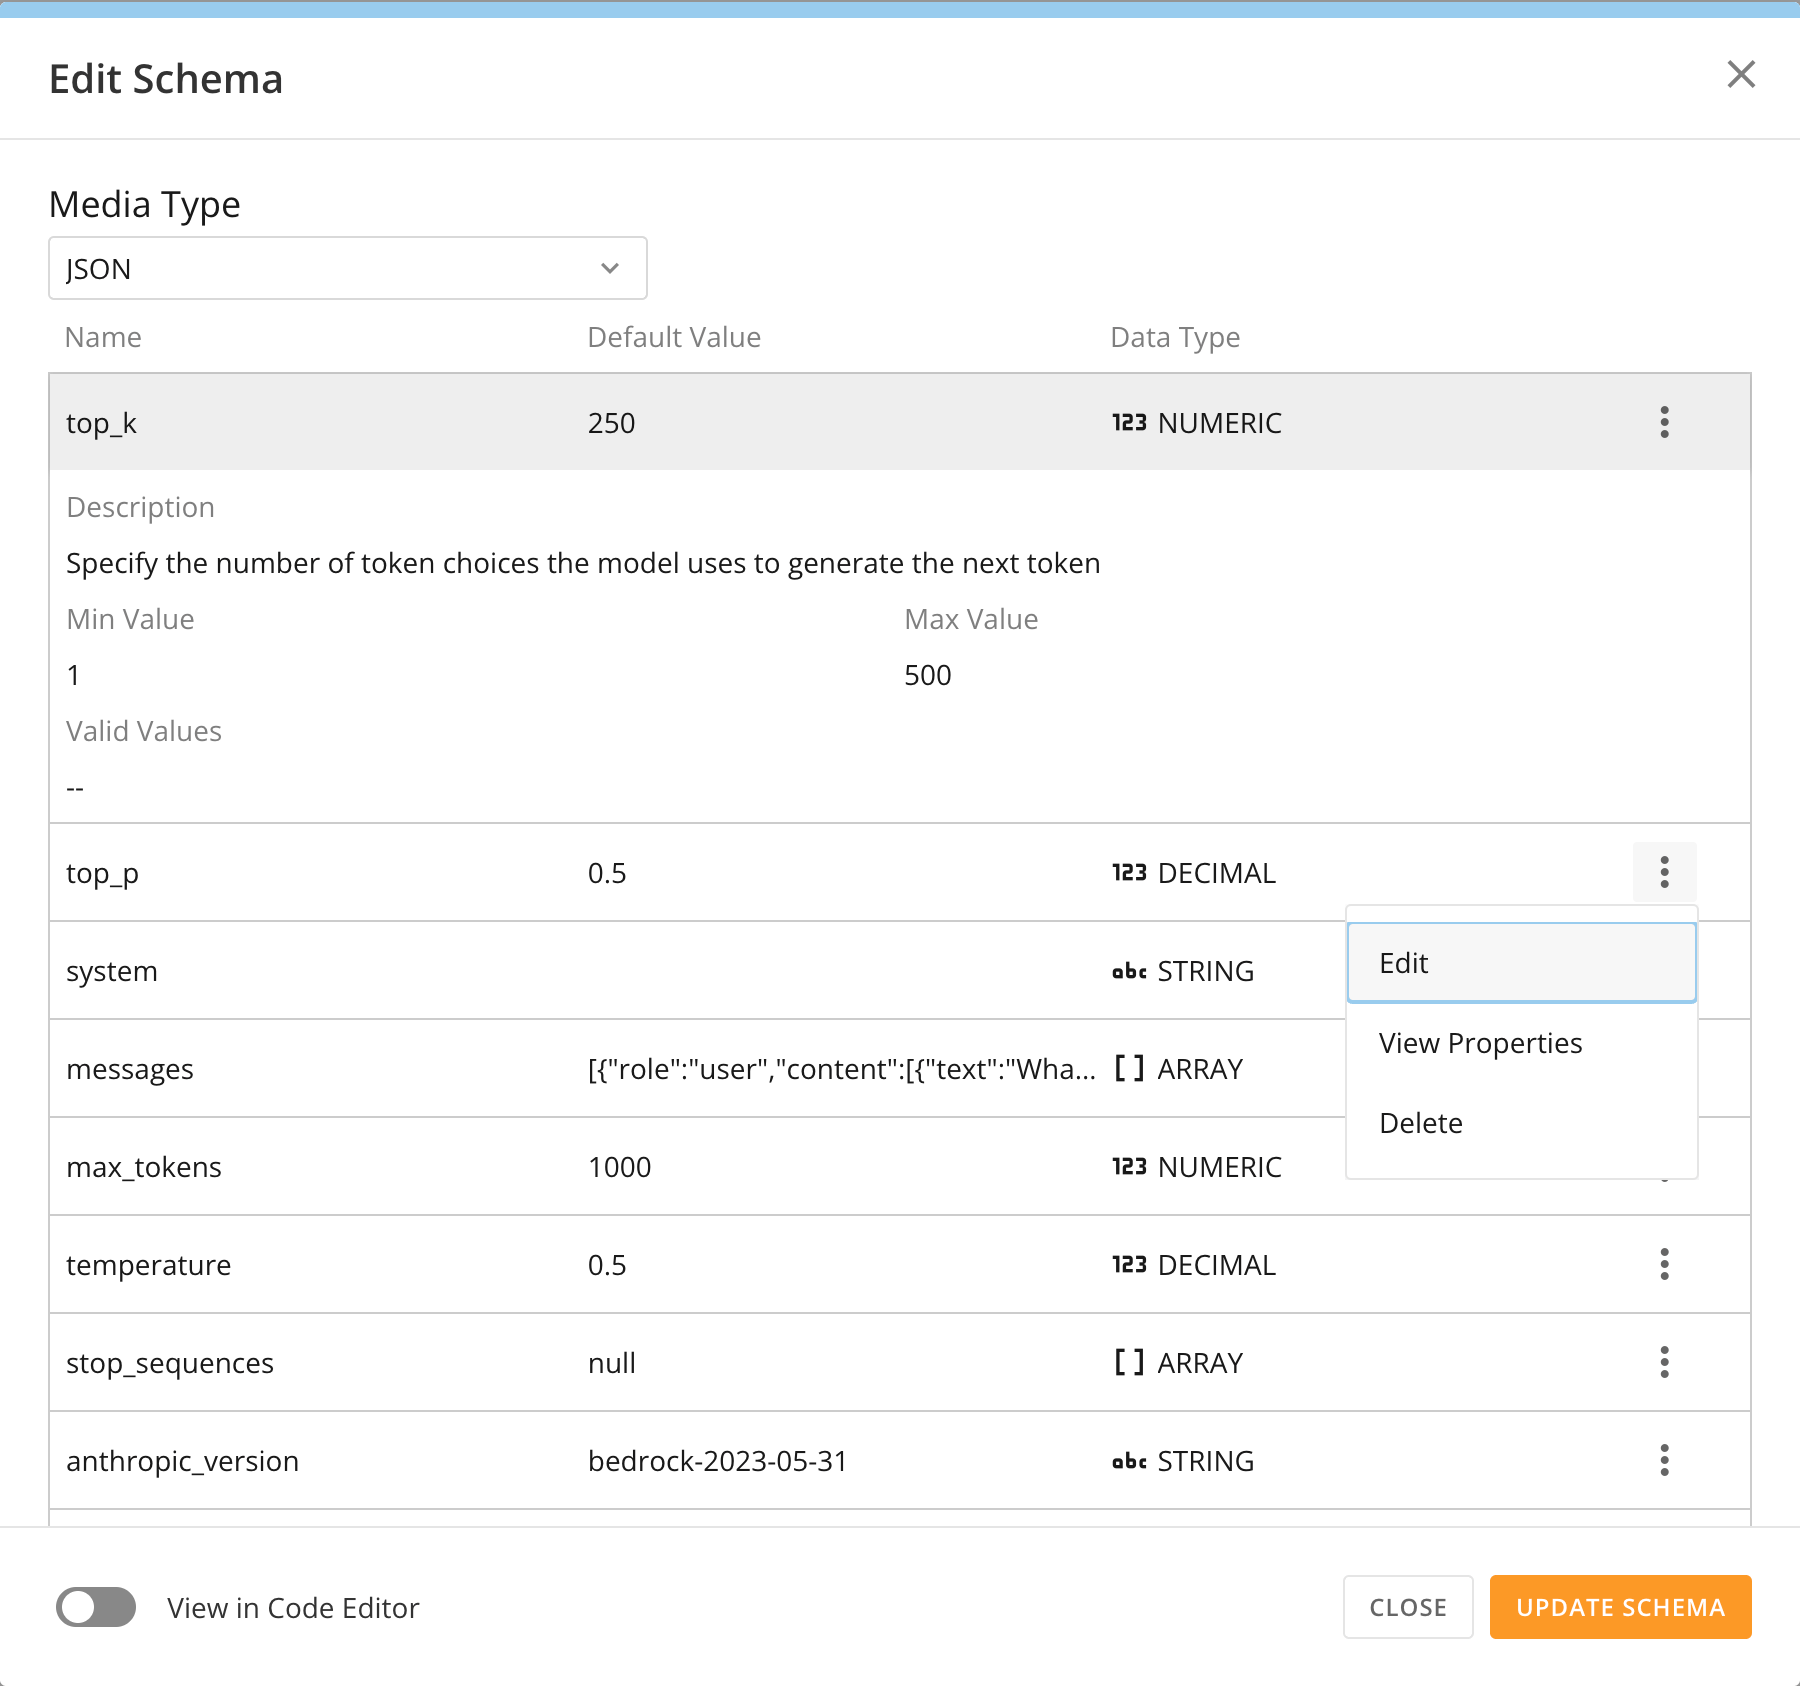
In the modal you can [view properties](#view_schema_properties) of the schema and make the following edits: [edit](#edit_schema) rows, [delete](#delete_input_output) rows, or [add](#add_new_input_output) a new row. Select **Update Schema** to save your changes.
<Frame>
  <img alt="Screenshot 2024-05-17 at 10.03.57 AM.png" src="https://mintcdn.com/domoinc-openapi-sync-dataflows/bxEAfEU9KvmS3YRs/images/kb/ka0Vq00000051Y9-00N5w00000Ri7BU-0EMVq000000zAor.jpg?fit=max&auto=format&n=bxEAfEU9KvmS3YRs&q=85&s=8e74681b48908f0106087b663ce267ea" style={{width: 501, height: 469}} width="1800" height="1686" data-path="images/kb/ka0Vq00000051Y9-00N5w00000Ri7BU-0EMVq000000zAor.jpg" />
</Frame>

#### View Schema Properties

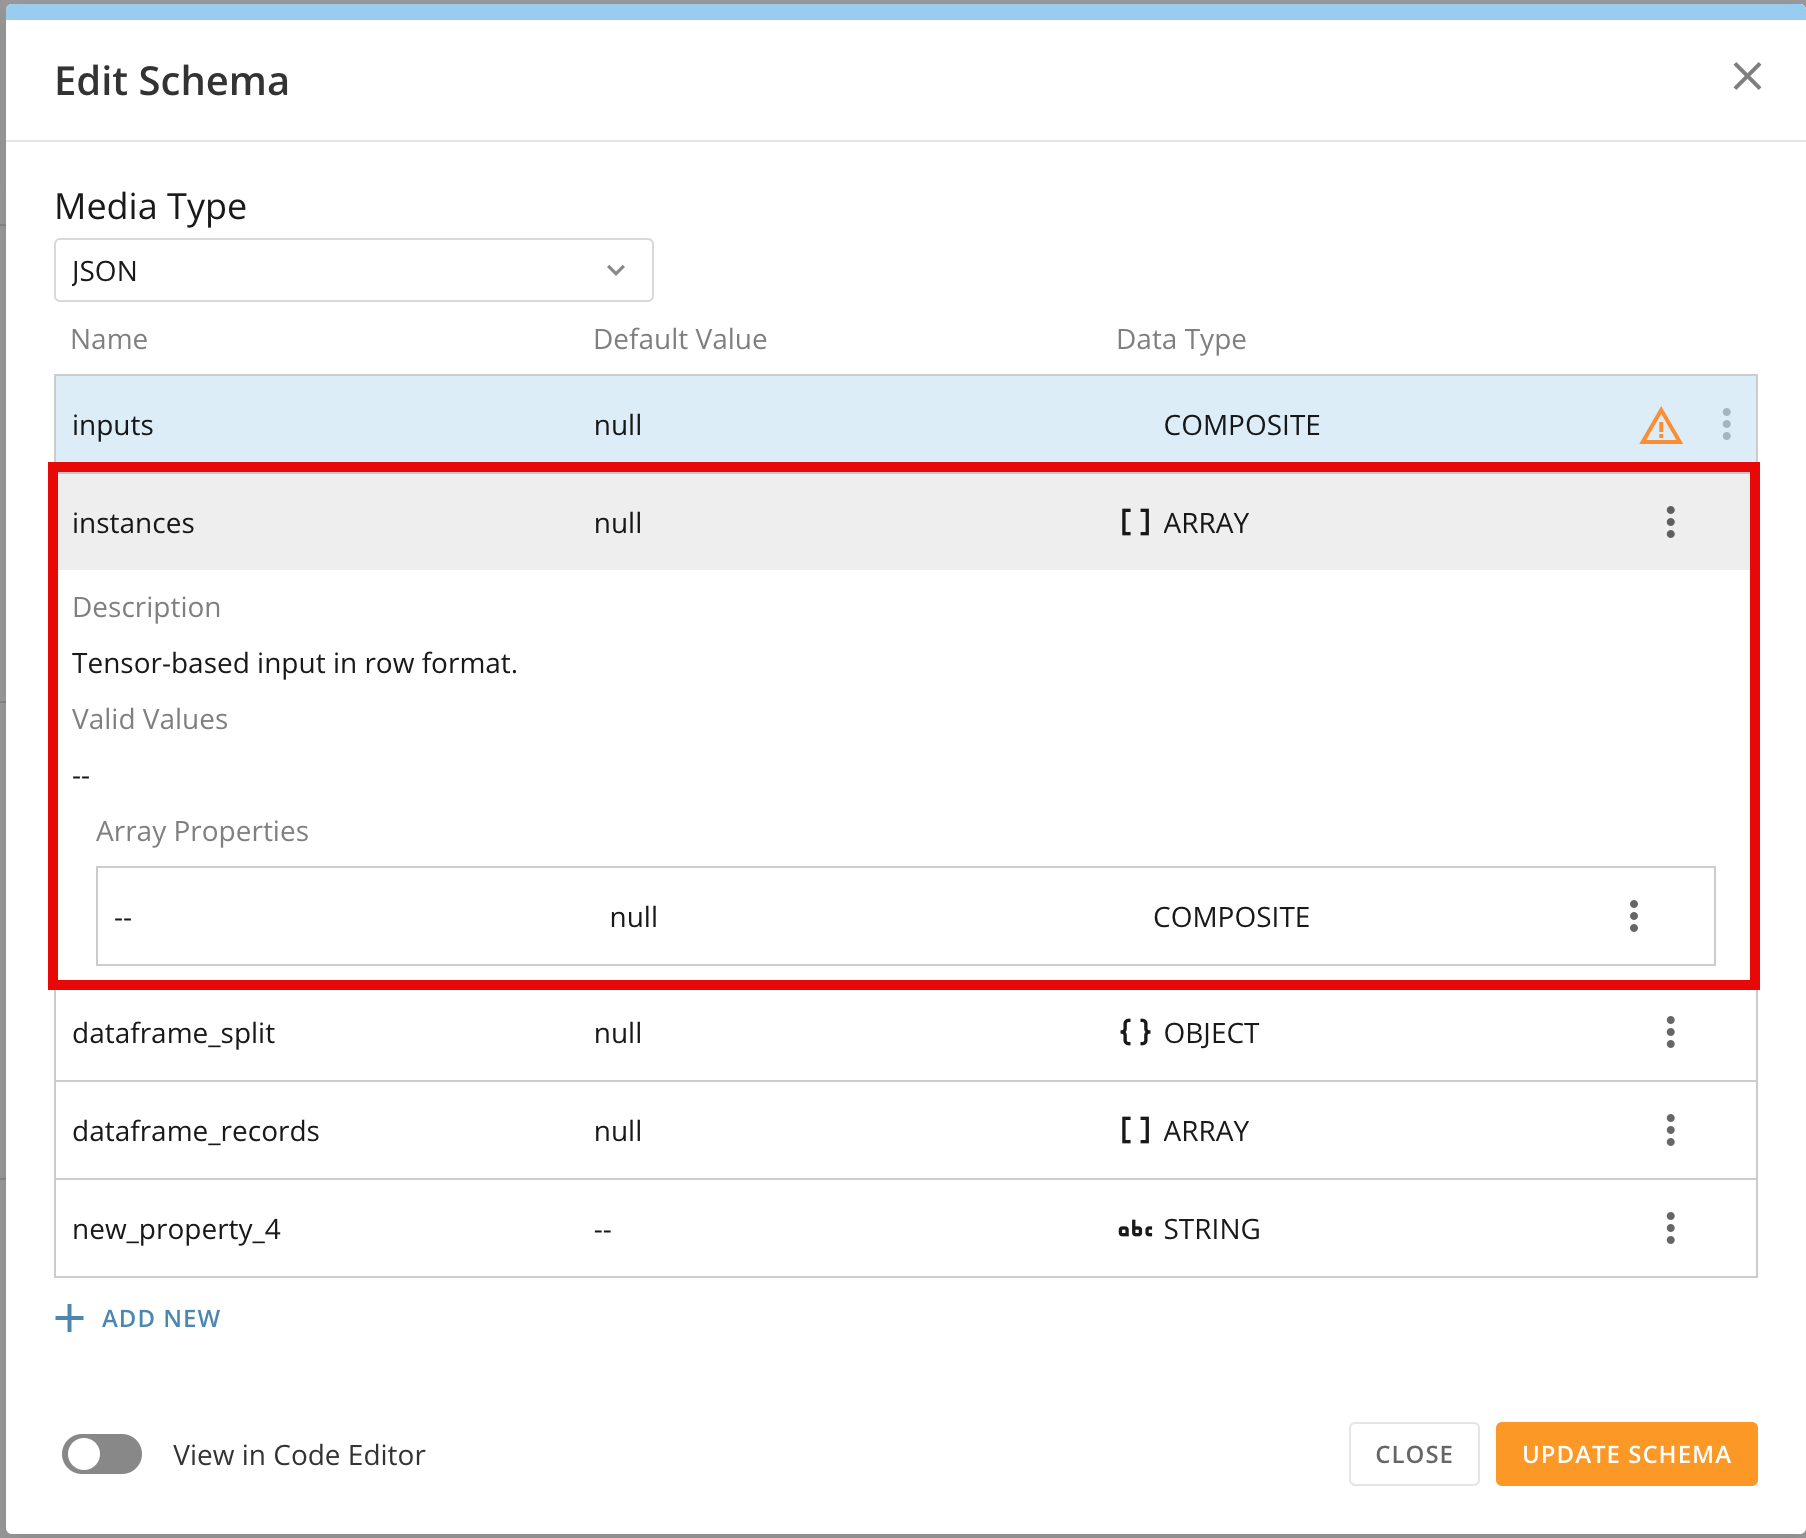
For any row in the schema, select <InlineImage src="/images/kb/ka0Vq00000051Y9-00N5w00000Ri7BU-0EMVq000000RJkw.jpg" /> **Action menu** > **View Properties** to see the description, values, and array properties for each input. These properties are based on your model schema and how the model was trained.
<Frame>
  <img alt="Screenshot 2024-05-31 at 10.58.38 AM.png" src="https://mintcdn.com/domoinc-openapi-sync-dataflows/bxEAfEU9KvmS3YRs/images/kb/ka0Vq00000051Y9-00N5w00000Ri7BU-0EMVq000001AExB.jpg?fit=max&auto=format&n=bxEAfEU9KvmS3YRs&q=85&s=e28c35baf1635dcbbf674d9e5c93d43c" style={{width: 499, height: 425}} width="1806" height="1538" data-path="images/kb/ka0Vq00000051Y9-00N5w00000Ri7BU-0EMVq000001AExB.jpg" />
</Frame>

#### Edit Schema

For any row in the schema, select <InlineImage src="/images/kb/ka0Vq00000051Y9-00N5w00000Ri7BU-0EMVq000000RJkw.jpg" /> **Action menu** > **Edit** to change the name, default value, data type, description, and values for that input/output.
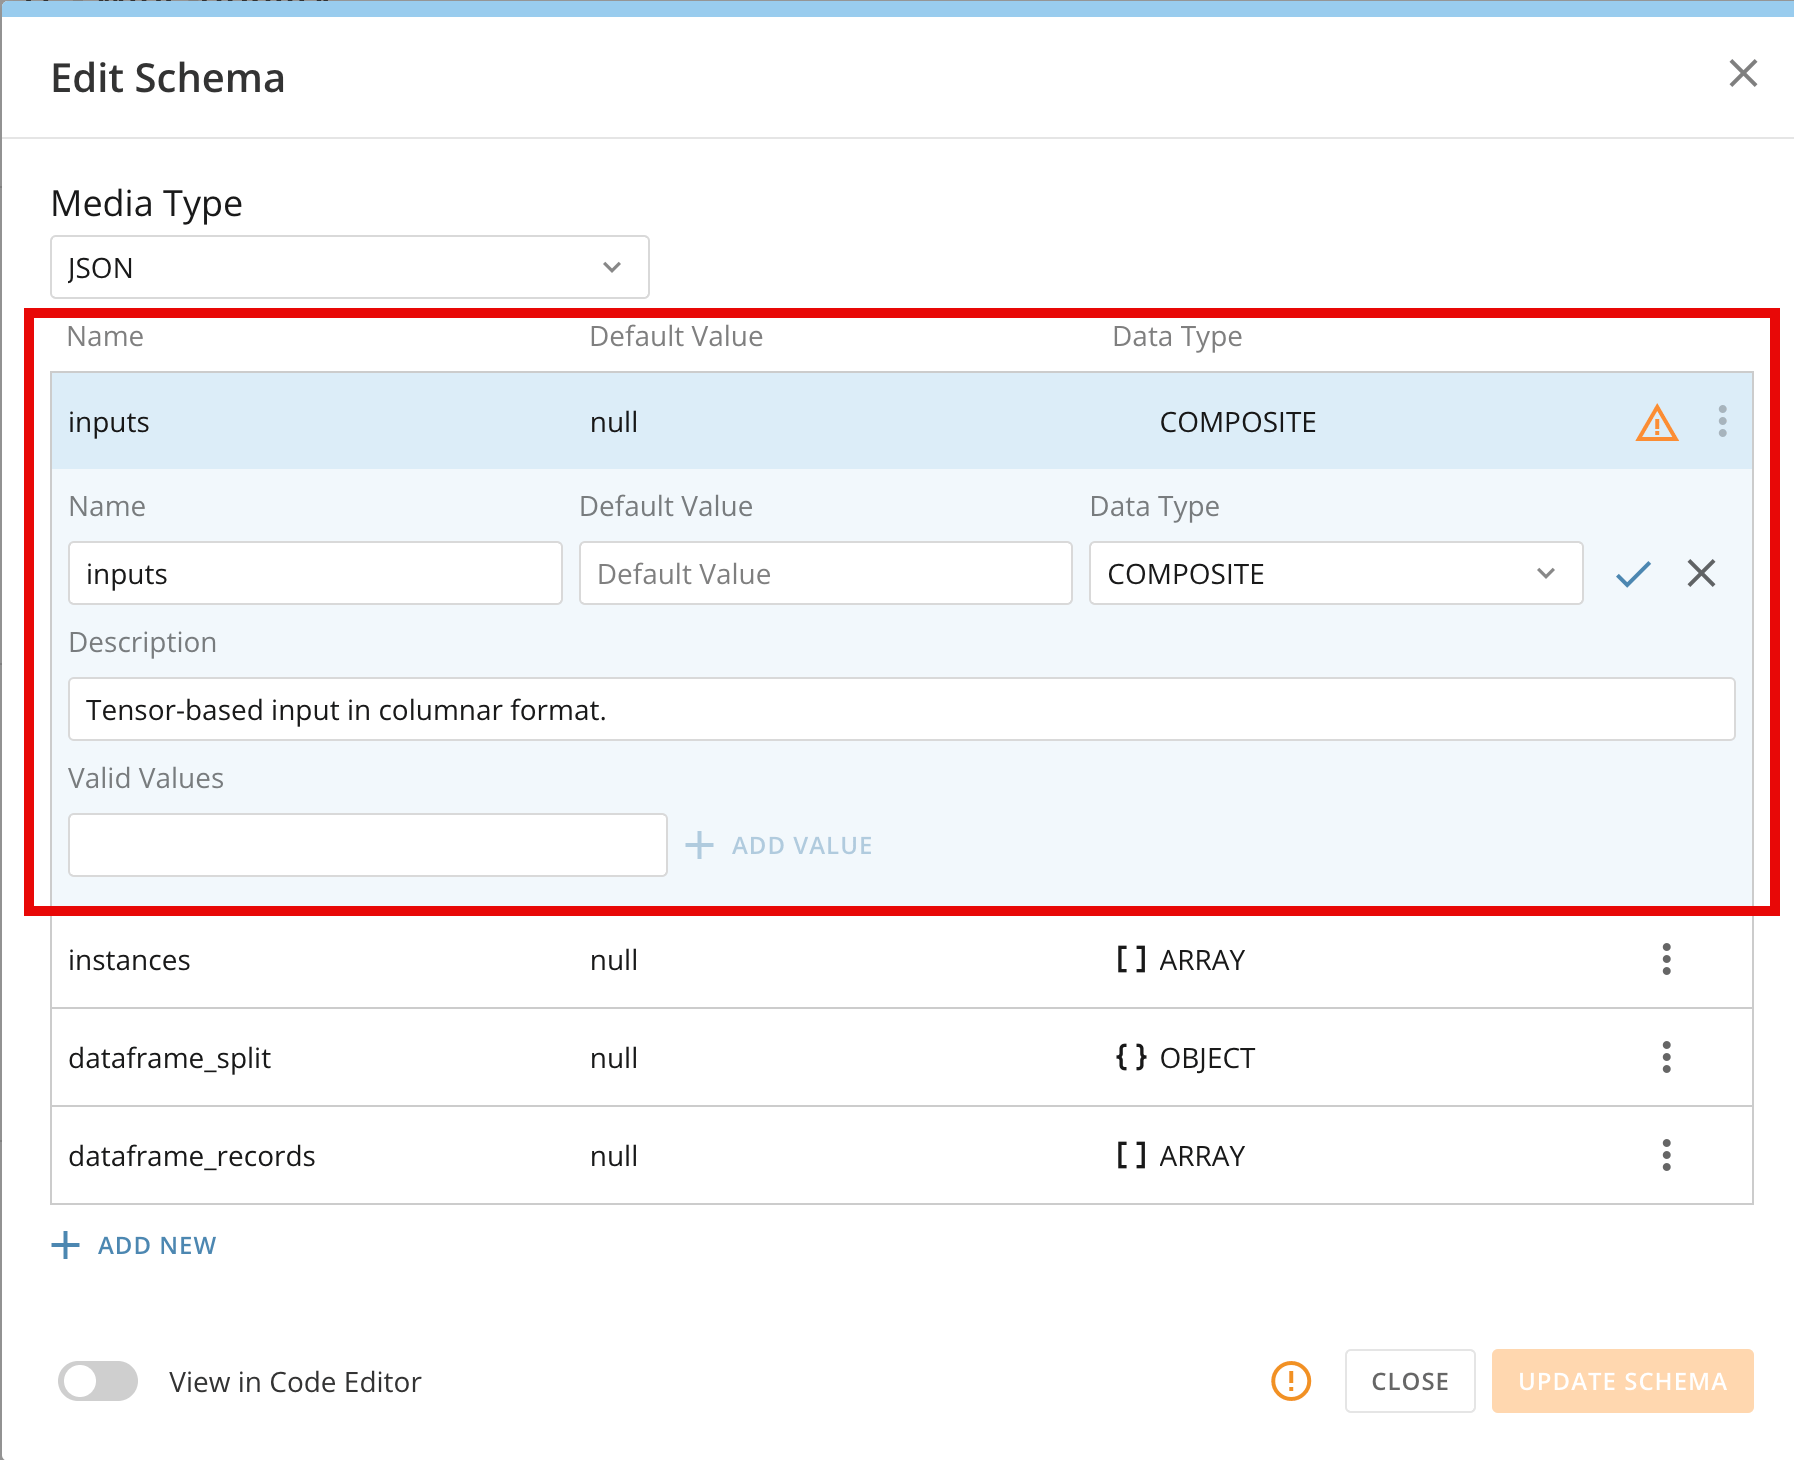
The available data types are Array, Boolean, Date, Datetime, Decimal, Double Long, Numeric, Object, and String Types.
The accepted input and output values rely on your model schema and how the data was trained.

<Frame>
  <img alt="Screenshot 2024-05-31 at 10.46.34 AM.png" src="https://mintcdn.com/domoinc-openapi-sync-dataflows/bxEAfEU9KvmS3YRs/images/kb/ka0Vq00000051Y9-00N5w00000Ri7BU-0EMVq000001AF3d.jpg?fit=max&auto=format&n=bxEAfEU9KvmS3YRs&q=85&s=23275e8127f067fd37fd30bf683b4857" style={{width: 499, height: 406}} width="1794" height="1460" data-path="images/kb/ka0Vq00000051Y9-00N5w00000Ri7BU-0EMVq000001AF3d.jpg" />
</Frame>

#### Add New Input/Output

In the **Edit Schema** modal, selecting **+ Add New** allows you to add a new input/output value row to your schema and edit its properties.

#### Delete Input/Output

For any row in the schema, select <InlineImage src="/images/kb/ka0Vq00000051Y9-00N5w00000Ri7BU-0EMVq000000RJkw.jpg" /> **Action menu** > **Delete** to remove the input/output from the list. If you then select **Update Schema**, the input/output is permanently deleted. This action cannot be undone.
### Work with Model Endpoints

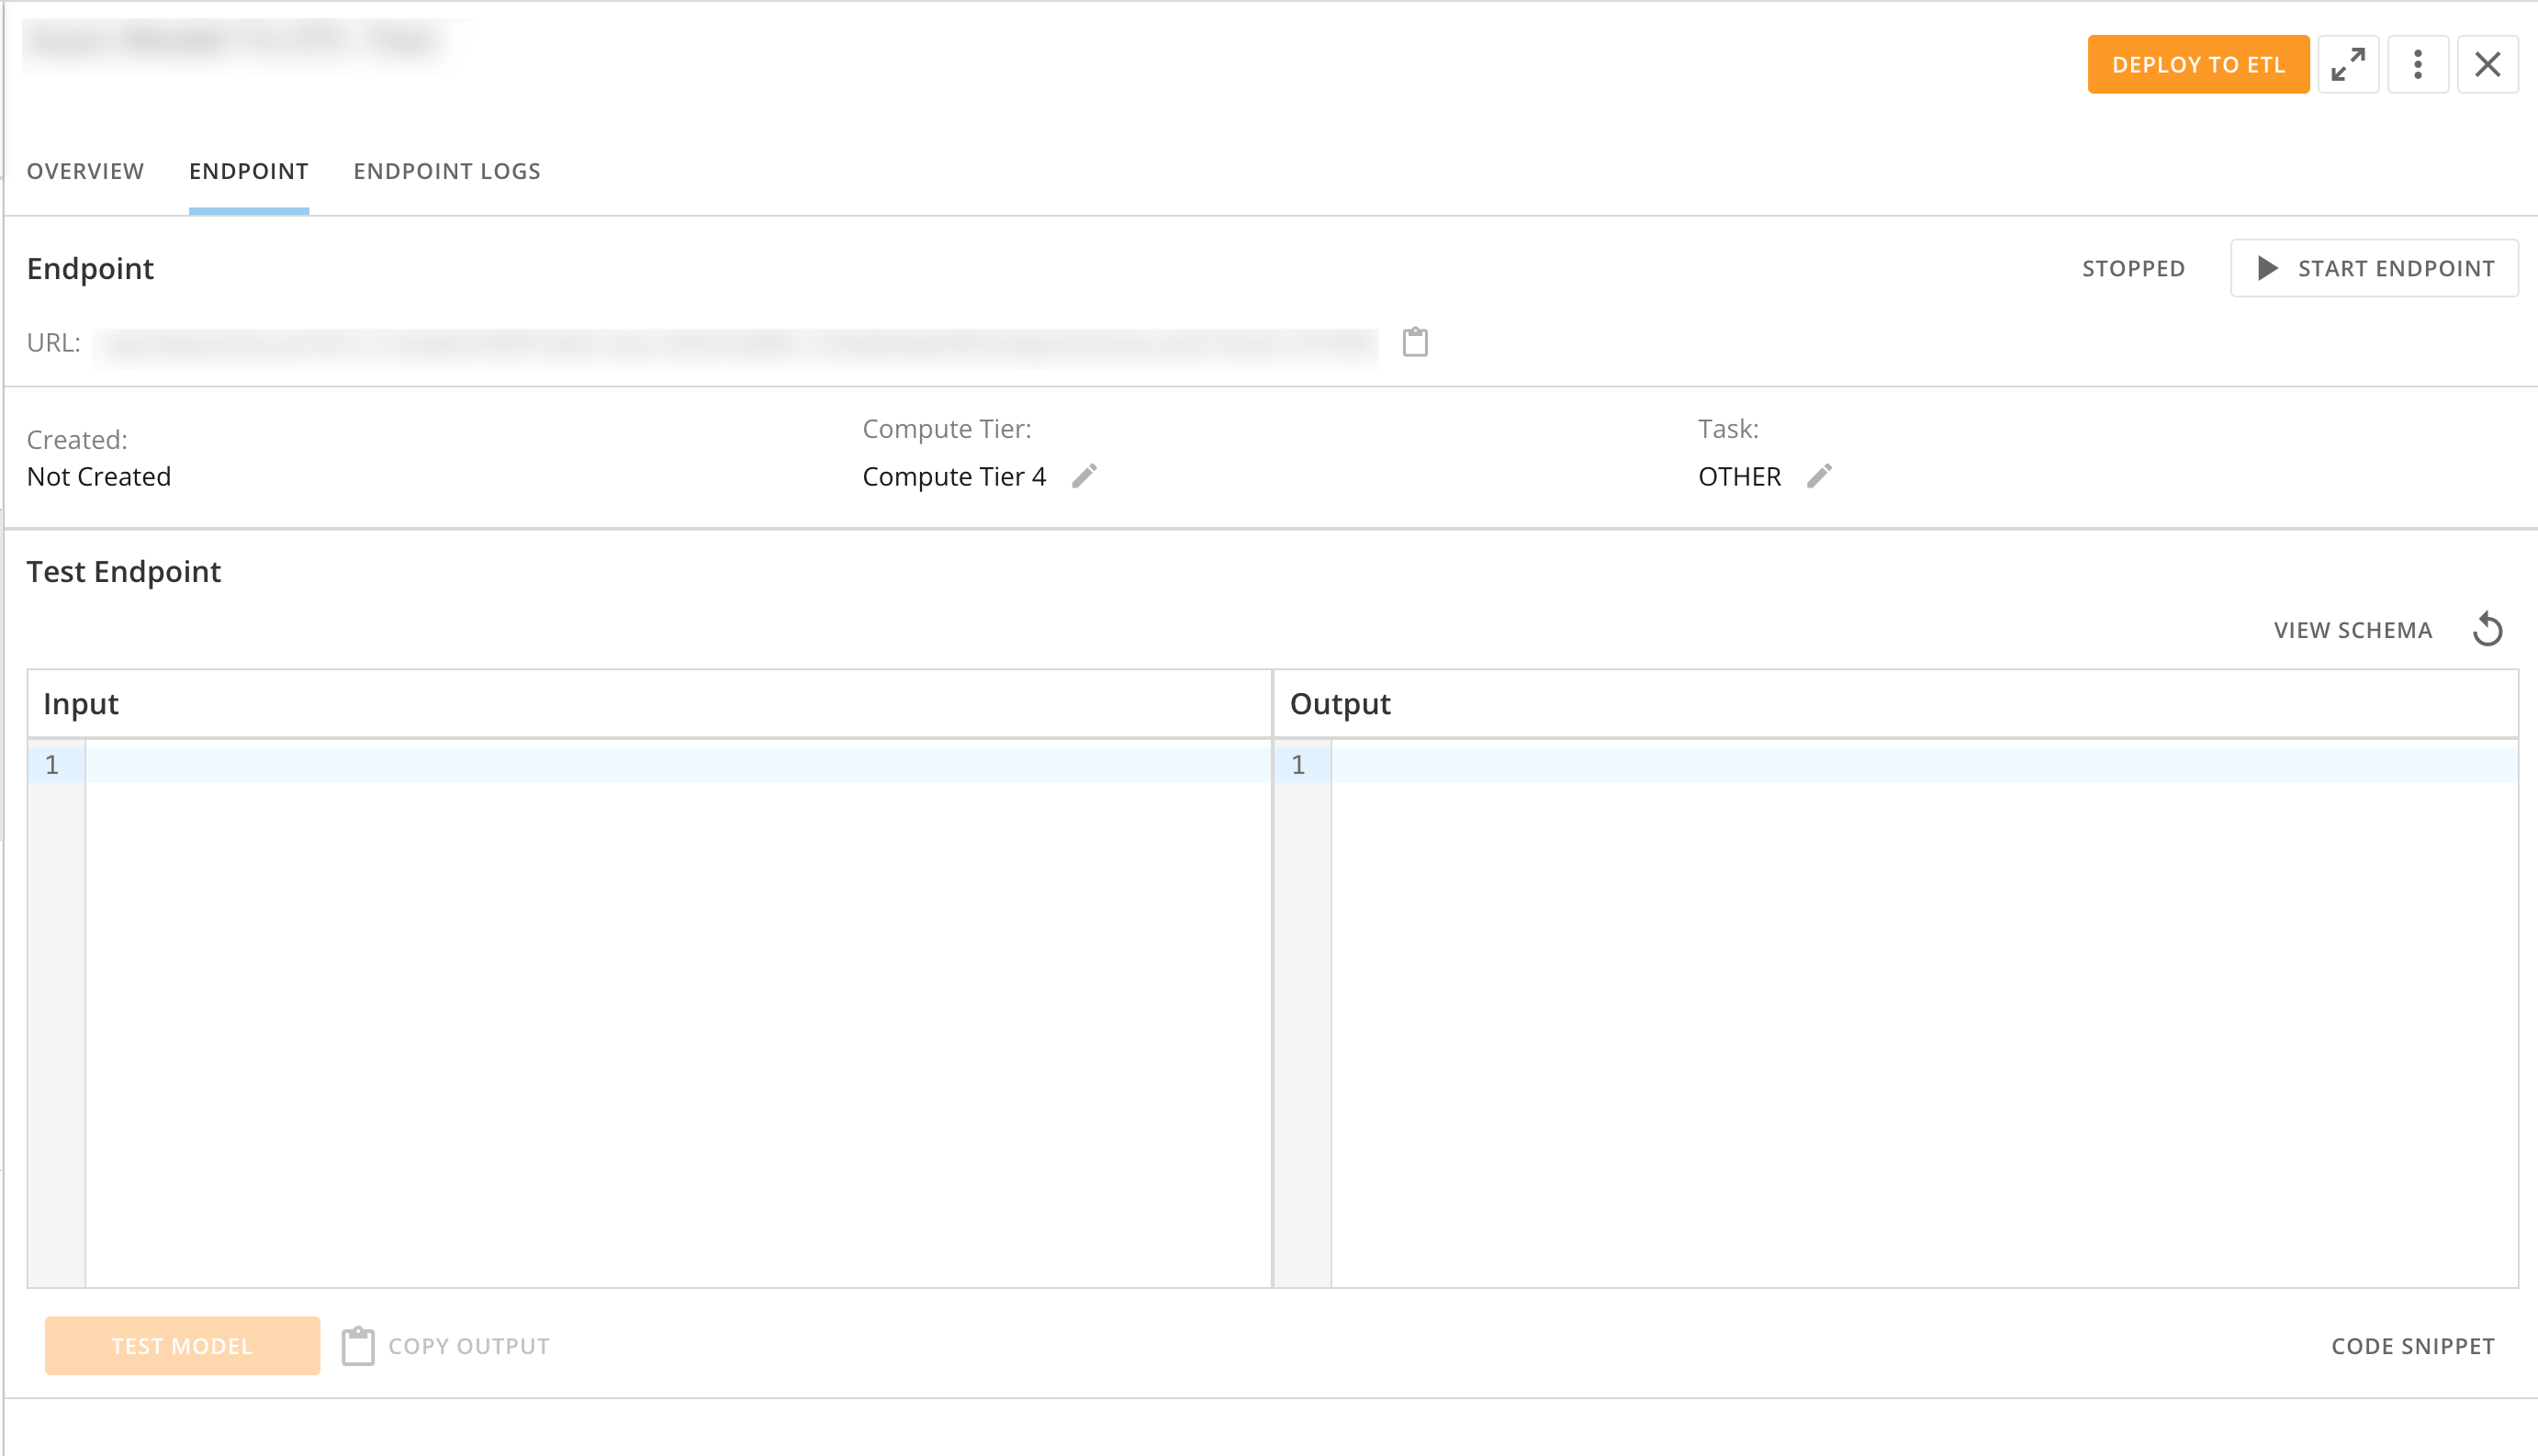
Endpoint information and the testing interface are available in the **Endpoint** tab of the model [details](#review_model_information).

<Frame>
  <img alt="Screenshot 2024-05-17 at 10.17.37 AM.png" src="https://mintcdn.com/domoinc-openapi-sync-dataflows/bxEAfEU9KvmS3YRs/images/kb/ka0Vq00000051Y9-00N5w00000Ri7BU-0EMVq000000zC5t.jpg?fit=max&auto=format&n=bxEAfEU9KvmS3YRs&q=85&s=996d2860b72b9fced343c36b724188b1" style={{width: 899, height: 516}} width="2764" height="1586" data-path="images/kb/ka0Vq00000051Y9-00N5w00000Ri7BU-0EMVq000000zC5t.jpg" />
</Frame>

# Start and Stop Endpoint

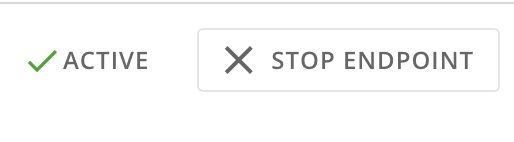
Starting and stopping the endpoint from the **Endpoint** tab also starts and stops it in other places it's being used in Domo, like Magic ETL. The endpoint status displays next to the **St** **art/Stop Endpoint** control.
<Frame>
  <img alt="Screenshot 2024-05-17 at 10.36.52 AM.png" src="https://mintcdn.com/domoinc-openapi-sync-dataflows/bxEAfEU9KvmS3YRs/images/kb/ka0Vq00000051Y9-00N5w00000Ri7BU-0EMVq000000zCc9.jpg?fit=max&auto=format&n=bxEAfEU9KvmS3YRs&q=85&s=3534dab1bbbf0f58339f76af91d8f757" style={{width: 217, height: 60}} width="514" height="142" data-path="images/kb/ka0Vq00000051Y9-00N5w00000Ri7BU-0EMVq000000zCc9.jpg" />
</Frame>

# Test Endpoint

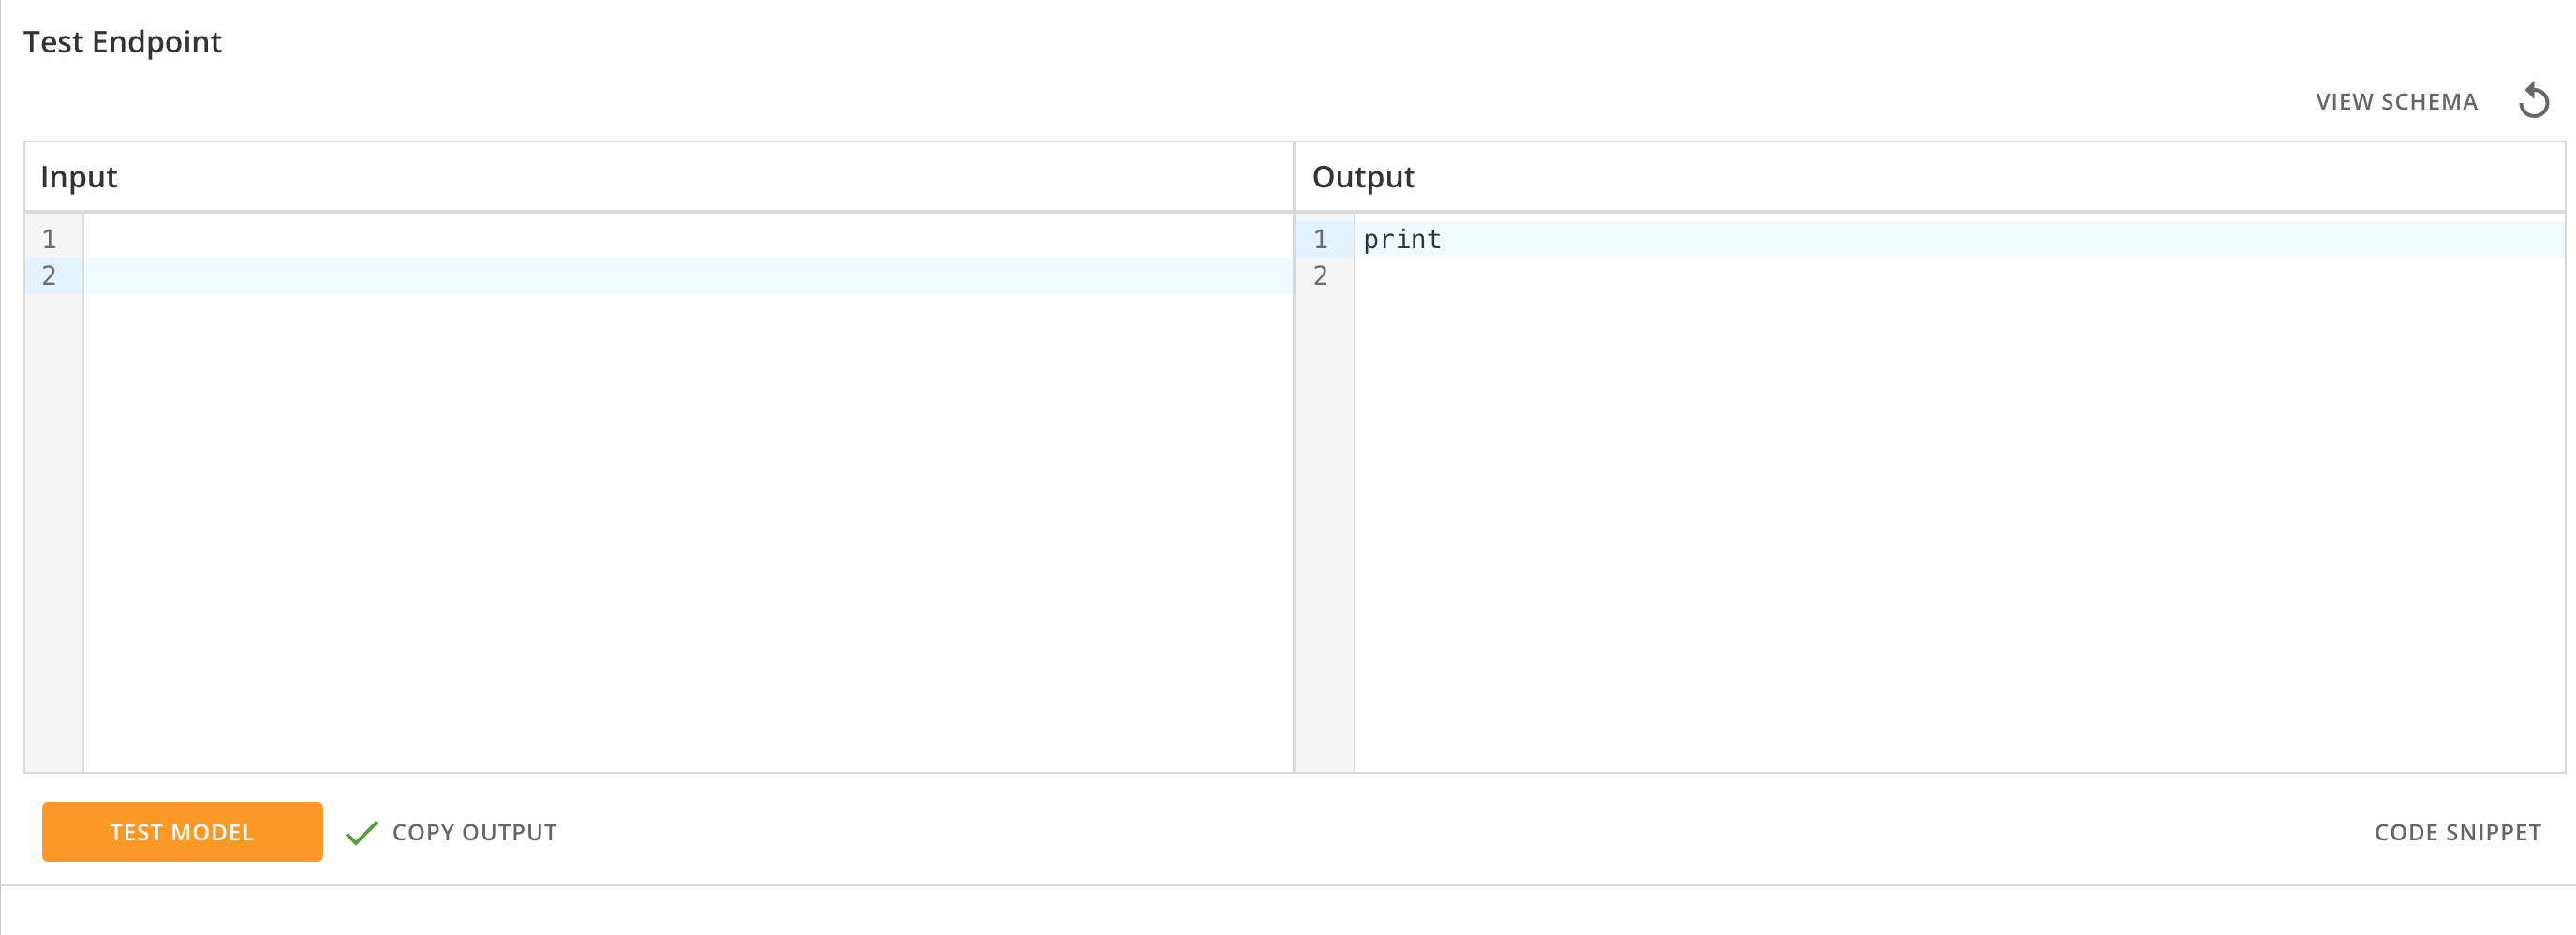
The **Test Endpoint** section of the **Endpoint** tab allows you to enter input and output text and run a test on your model. You can also copy the test output, view the schema, and view the model code snippet for the endpoint test.
<Frame>
  <img alt="Screenshot 2024-05-17 at 10.46.23 AM.png" src="https://mintcdn.com/domoinc-openapi-sync-dataflows/bxEAfEU9KvmS3YRs/images/kb/ka0Vq00000051Y9-00N5w00000Ri7BU-0EMVq000000zDBd.jpg?fit=max&auto=format&n=bxEAfEU9KvmS3YRs&q=85&s=8563a9ce3d933ee38970352739e48ead" style={{width: 810, height: 294}} width="2750" height="998" data-path="images/kb/ka0Vq00000051Y9-00N5w00000Ri7BU-0EMVq000000zDBd.jpg" />
</Frame>

Follow these steps to edit the code snippet used for the model:

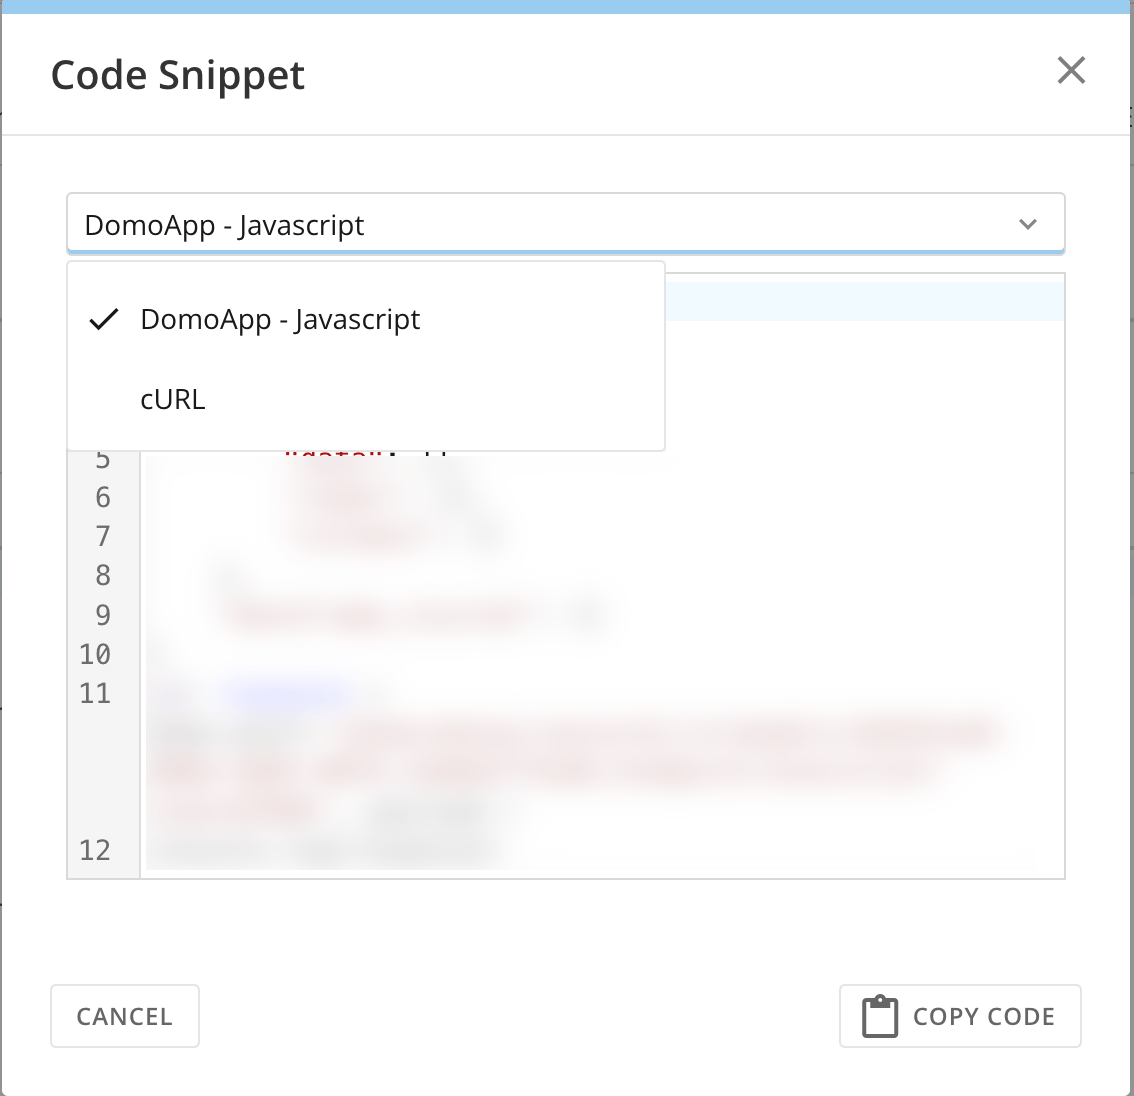
1. Select **Code Snippet** to open a modal that displays the model code snippet.
2. Select the code language from the dropdown.
3. Select **Copy Code** to copy the code snippet to your machine.
4. To update the code, make changes by directly modifying the code box.
   <Frame>
     <img alt="Screenshot 2024-05-31 at 11.21.56 AM.png" src="https://mintcdn.com/domoinc-openapi-sync-dataflows/bxEAfEU9KvmS3YRs/images/kb/ka0Vq00000051Y9-00N5w00000Ri7BU-0EMVq000001AHqD.jpg?fit=max&auto=format&n=bxEAfEU9KvmS3YRs&q=85&s=230302e36fd402c0e8cecc96459cbcba" style={{width: 350, height: 339}} width="1134" height="1096" data-path="images/kb/ka0Vq00000051Y9-00N5w00000Ri7BU-0EMVq000001AHqD.jpg" />
   </Frame>

# View Endpoint Logs

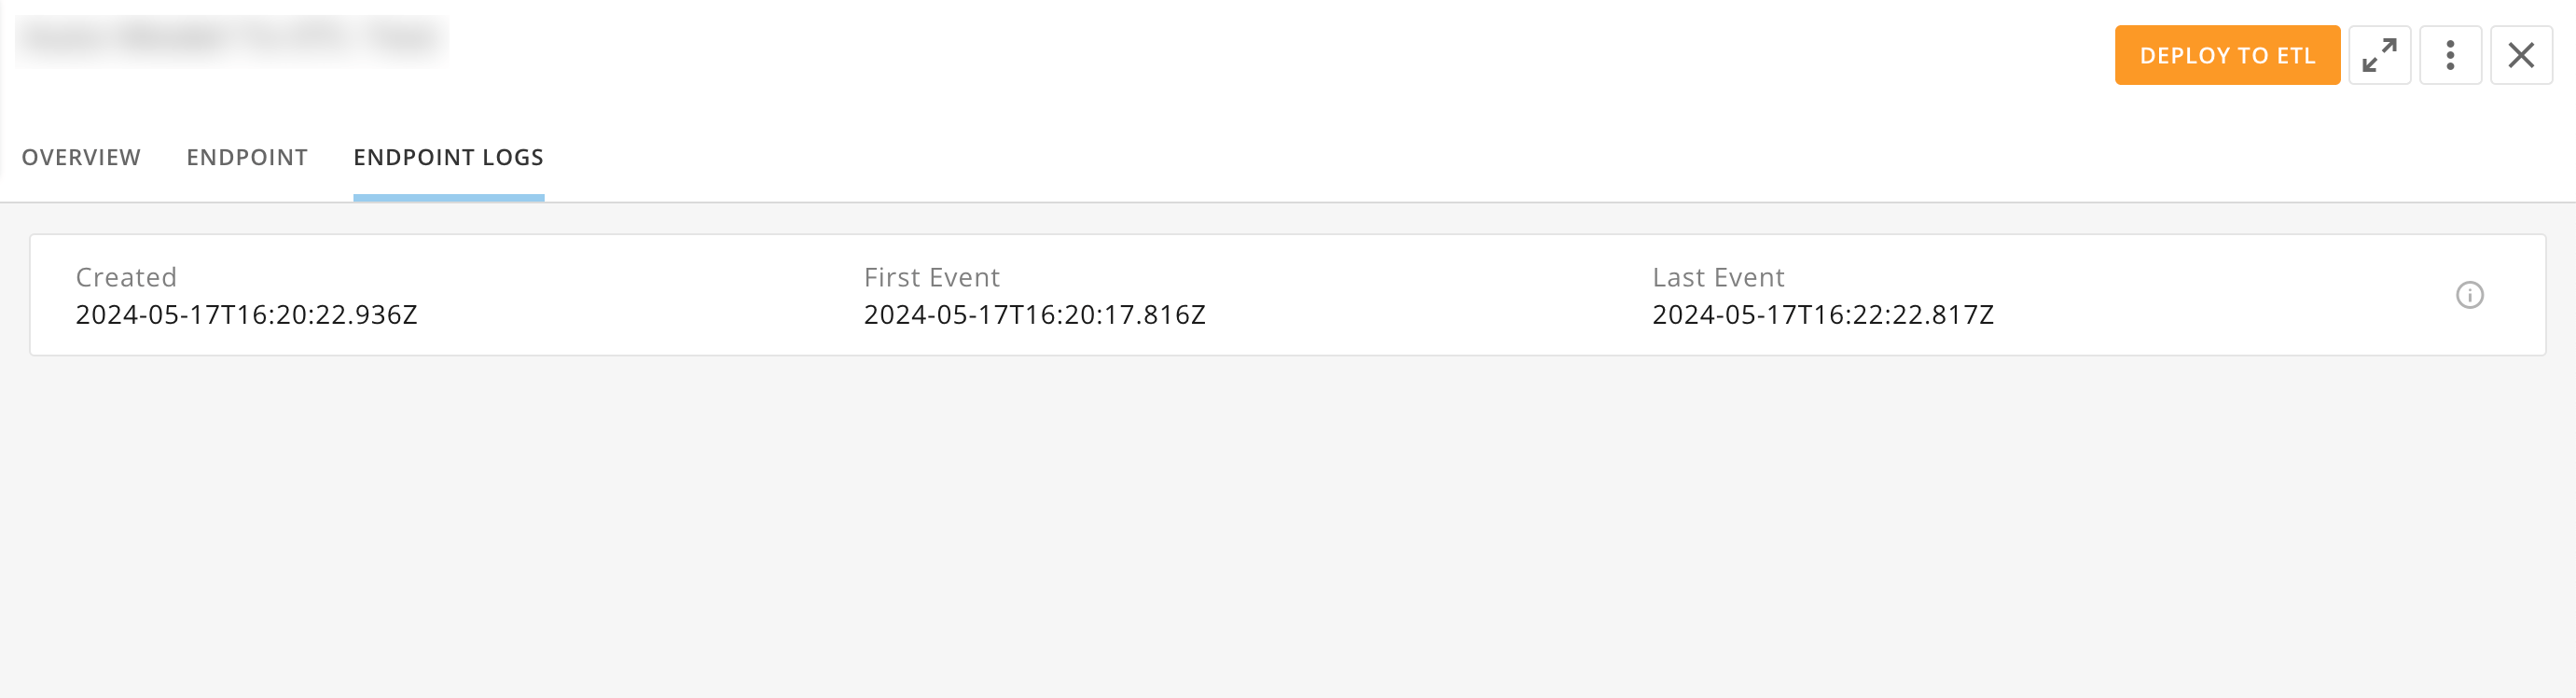
The **Endpoint Logs** tab is only visible if you have started or are currently running model endpoints.

In the tab, you can see event info for any model endpoints that have run or are running.
<Frame>
  <img alt="Screenshot 2024-05-17 at 10.51.52 AM.png" src="https://mintcdn.com/domoinc-openapi-sync-dataflows/bxEAfEU9KvmS3YRs/images/kb/ka0Vq00000051Y9-00N5w00000Ri7BU-0EMVq000000zE2r.jpg?fit=max&auto=format&n=bxEAfEU9KvmS3YRs&q=85&s=7e9848bf8f979b5182eef8c49a87c114" style={{width: 750, height: 203}} width="2762" height="748" data-path="images/kb/ka0Vq00000051Y9-00N5w00000Ri7BU-0EMVq000000zE2r.jpg" />
</Frame>

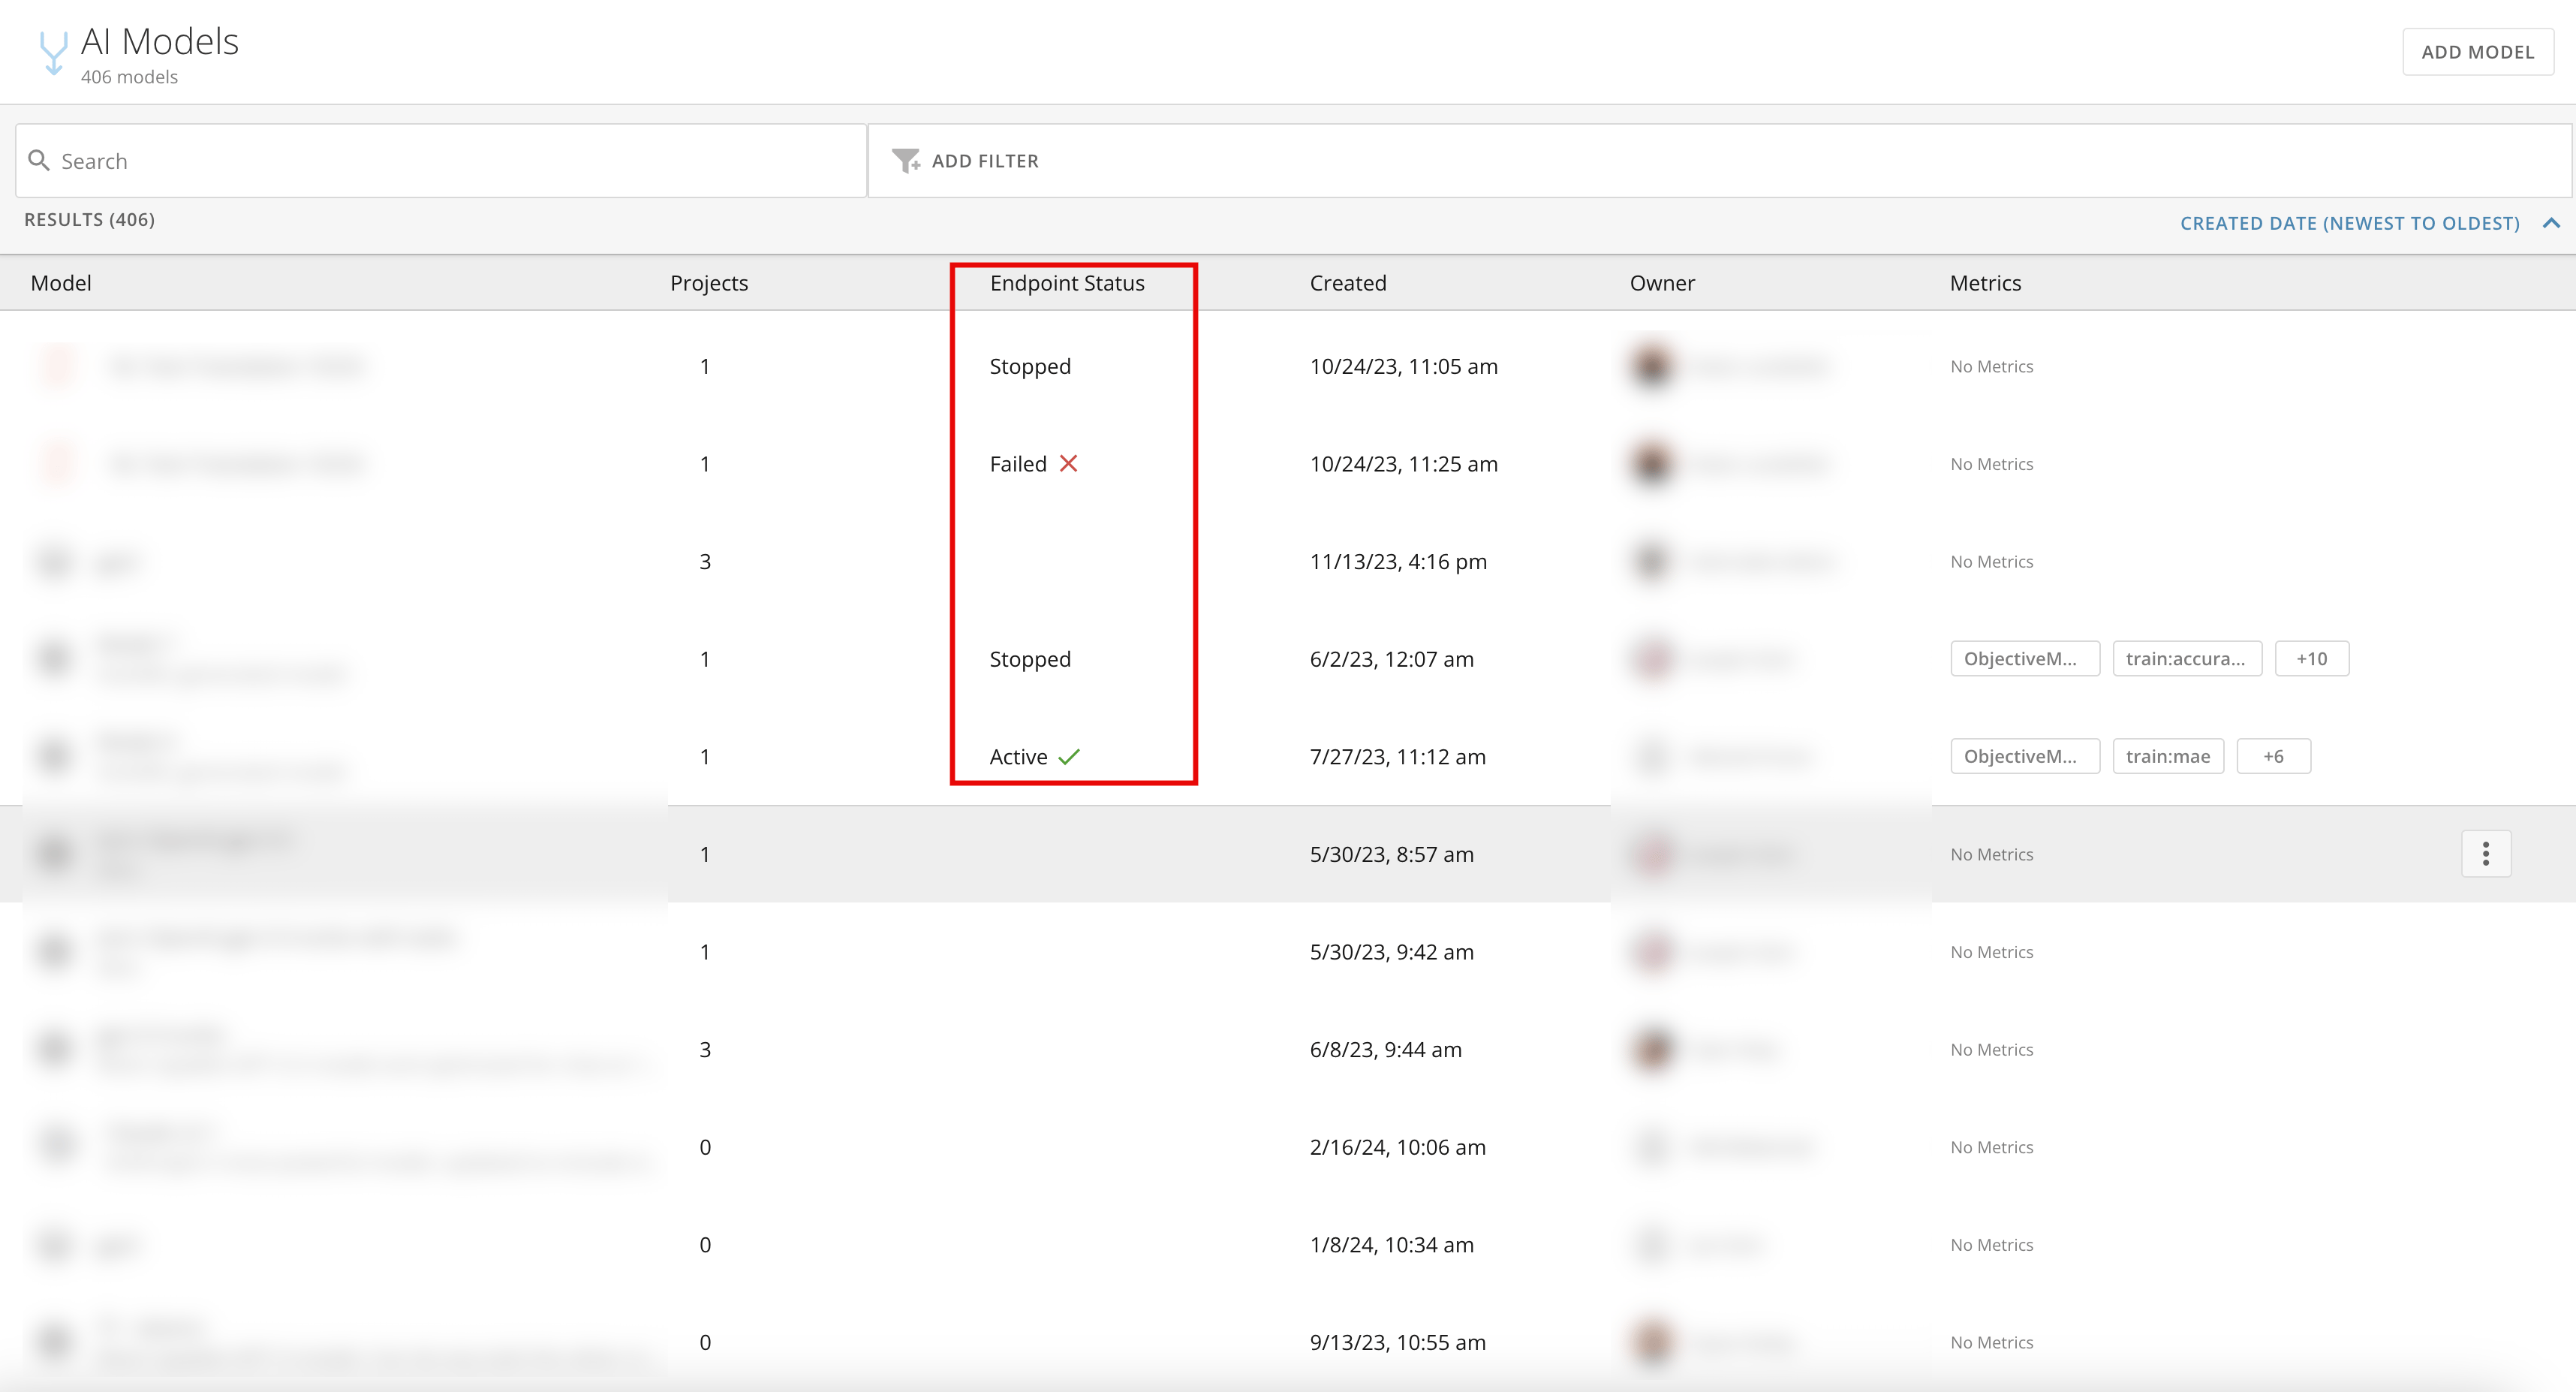
Possible endpoint states include: Started, Running, Stopped, Failed, Active, and Snapshot Failed. The current endpoint status displays on the **AI Models** page.
<Frame>
  <img alt="Screenshot 2024-06-19 at 2.15.40 PM.png" src="https://mintcdn.com/domoinc-openapi-sync-dataflows/bxEAfEU9KvmS3YRs/images/kb/ka0Vq00000051Y9-00N5w00000Ri7BU-0EMVq000001Pirj.jpg?fit=max&auto=format&n=bxEAfEU9KvmS3YRs&q=85&s=503a4e7a5ccdcfcdd641f3d32e2a7c87" style={{width: 754, height: 407}} width="3432" height="1854" data-path="images/kb/ka0Vq00000051Y9-00N5w00000Ri7BU-0EMVq000001Pirj.jpg" />
</Frame>

### Share Access to a Model

From the **AI Models** page, select <InlineImage src="/images/kb/ka0Vq00000051Y9-00N5w00000Ri7BU-0EMVq000000RJkw.jpg" /> **Action menu** > **Manage Permissions**.
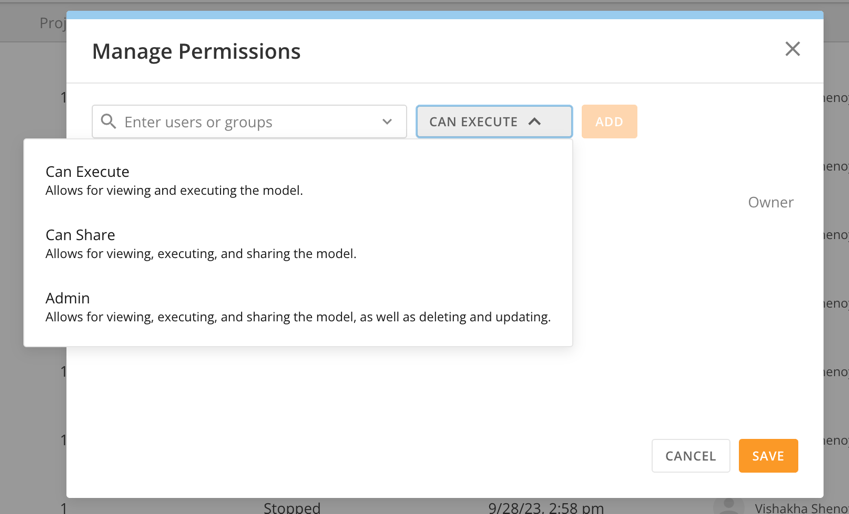
Use the dropdown to assign people/groups one of the following levels of access:

* **Can Execute —** Grants access to view and execute the model.
* **Can Share —** Grants access to view, execute, and share the model with others in your instance.
* **Admin —** Grants access to view, execute, share, delete, and update the model.

  <Frame>
    <img src="https://mintcdn.com/domoinc-openapi-sync-dataflows/bxEAfEU9KvmS3YRs/images/kb/ka0Vq00000051Y9-00N5w00000Ri7BU-0EMVq000000ylLp.jpg?fit=max&auto=format&n=bxEAfEU9KvmS3YRs&q=85&s=1daebb48512b896fb9c1e433cf0c67fc" style={{width: 515, height: 312}} width="849" height="514" data-path="images/kb/ka0Vq00000051Y9-00N5w00000Ri7BU-0EMVq000000ylLp.jpg" />
  </Frame>

### Deploy a Model to Magic ETL

<Warning>
  **Important:** You can deploy any model with a CSV input and an output task to a Magic ETL DataFlow.
</Warning>

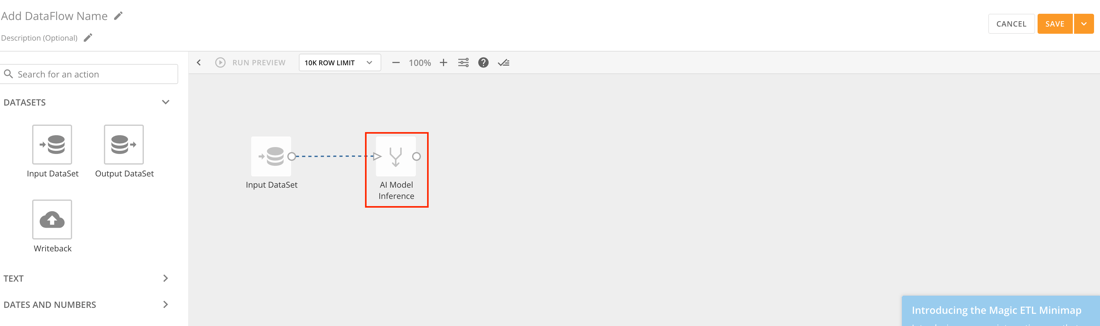
Deploy a model to Magic ETL from the **AI Models** page by selecting <InlineImage src="/images/kb/ka0Vq00000051Y9-00N5w00000Ri7BU-0EMVq000000RJkw.jpg" /> **Action menu** > **Deploy to ETL**.
The Magic ETL canvas opens with an AI Model Inference tile deployed. Learn more about the [AI Model Inference tile](https://domo-support.domo.com/s/article/000005741?language=en_US#ai_model_inference_tile).

<Frame>
  <img src="https://mintcdn.com/domoinc-openapi-sync-dataflows/bxEAfEU9KvmS3YRs/images/kb/ka0Vq00000051Y9-00N5w00000Ri7BU-0EMVq000000yk81.jpg?fit=max&auto=format&n=bxEAfEU9KvmS3YRs&q=85&s=b5b98977af33708da93f1e8d9878b500" style={{width: 845, height: 248}} width="1100" height="326" data-path="images/kb/ka0Vq00000051Y9-00N5w00000Ri7BU-0EMVq000000yk81.jpg" />
</Frame>

### Delete a Model

You can delete models you have access to from the **AI Models** page by selecting <InlineImage src="/images/kb/ka0Vq00000051Y9-00N5w00000Ri7BU-0EMVq000000RJkw.jpg" /> **Action menu** > **Delete**. This action cannot be undone.
### View Project Information

On the **AI Projects** page, you can view the name, description, owner, creation date, and date of last update for every project you can access. Select a project from the list to open its Details view, where you can [compare models](#compare_models).

If you don't yet have access to any project, learn how to create a new project below.

### Create a Project

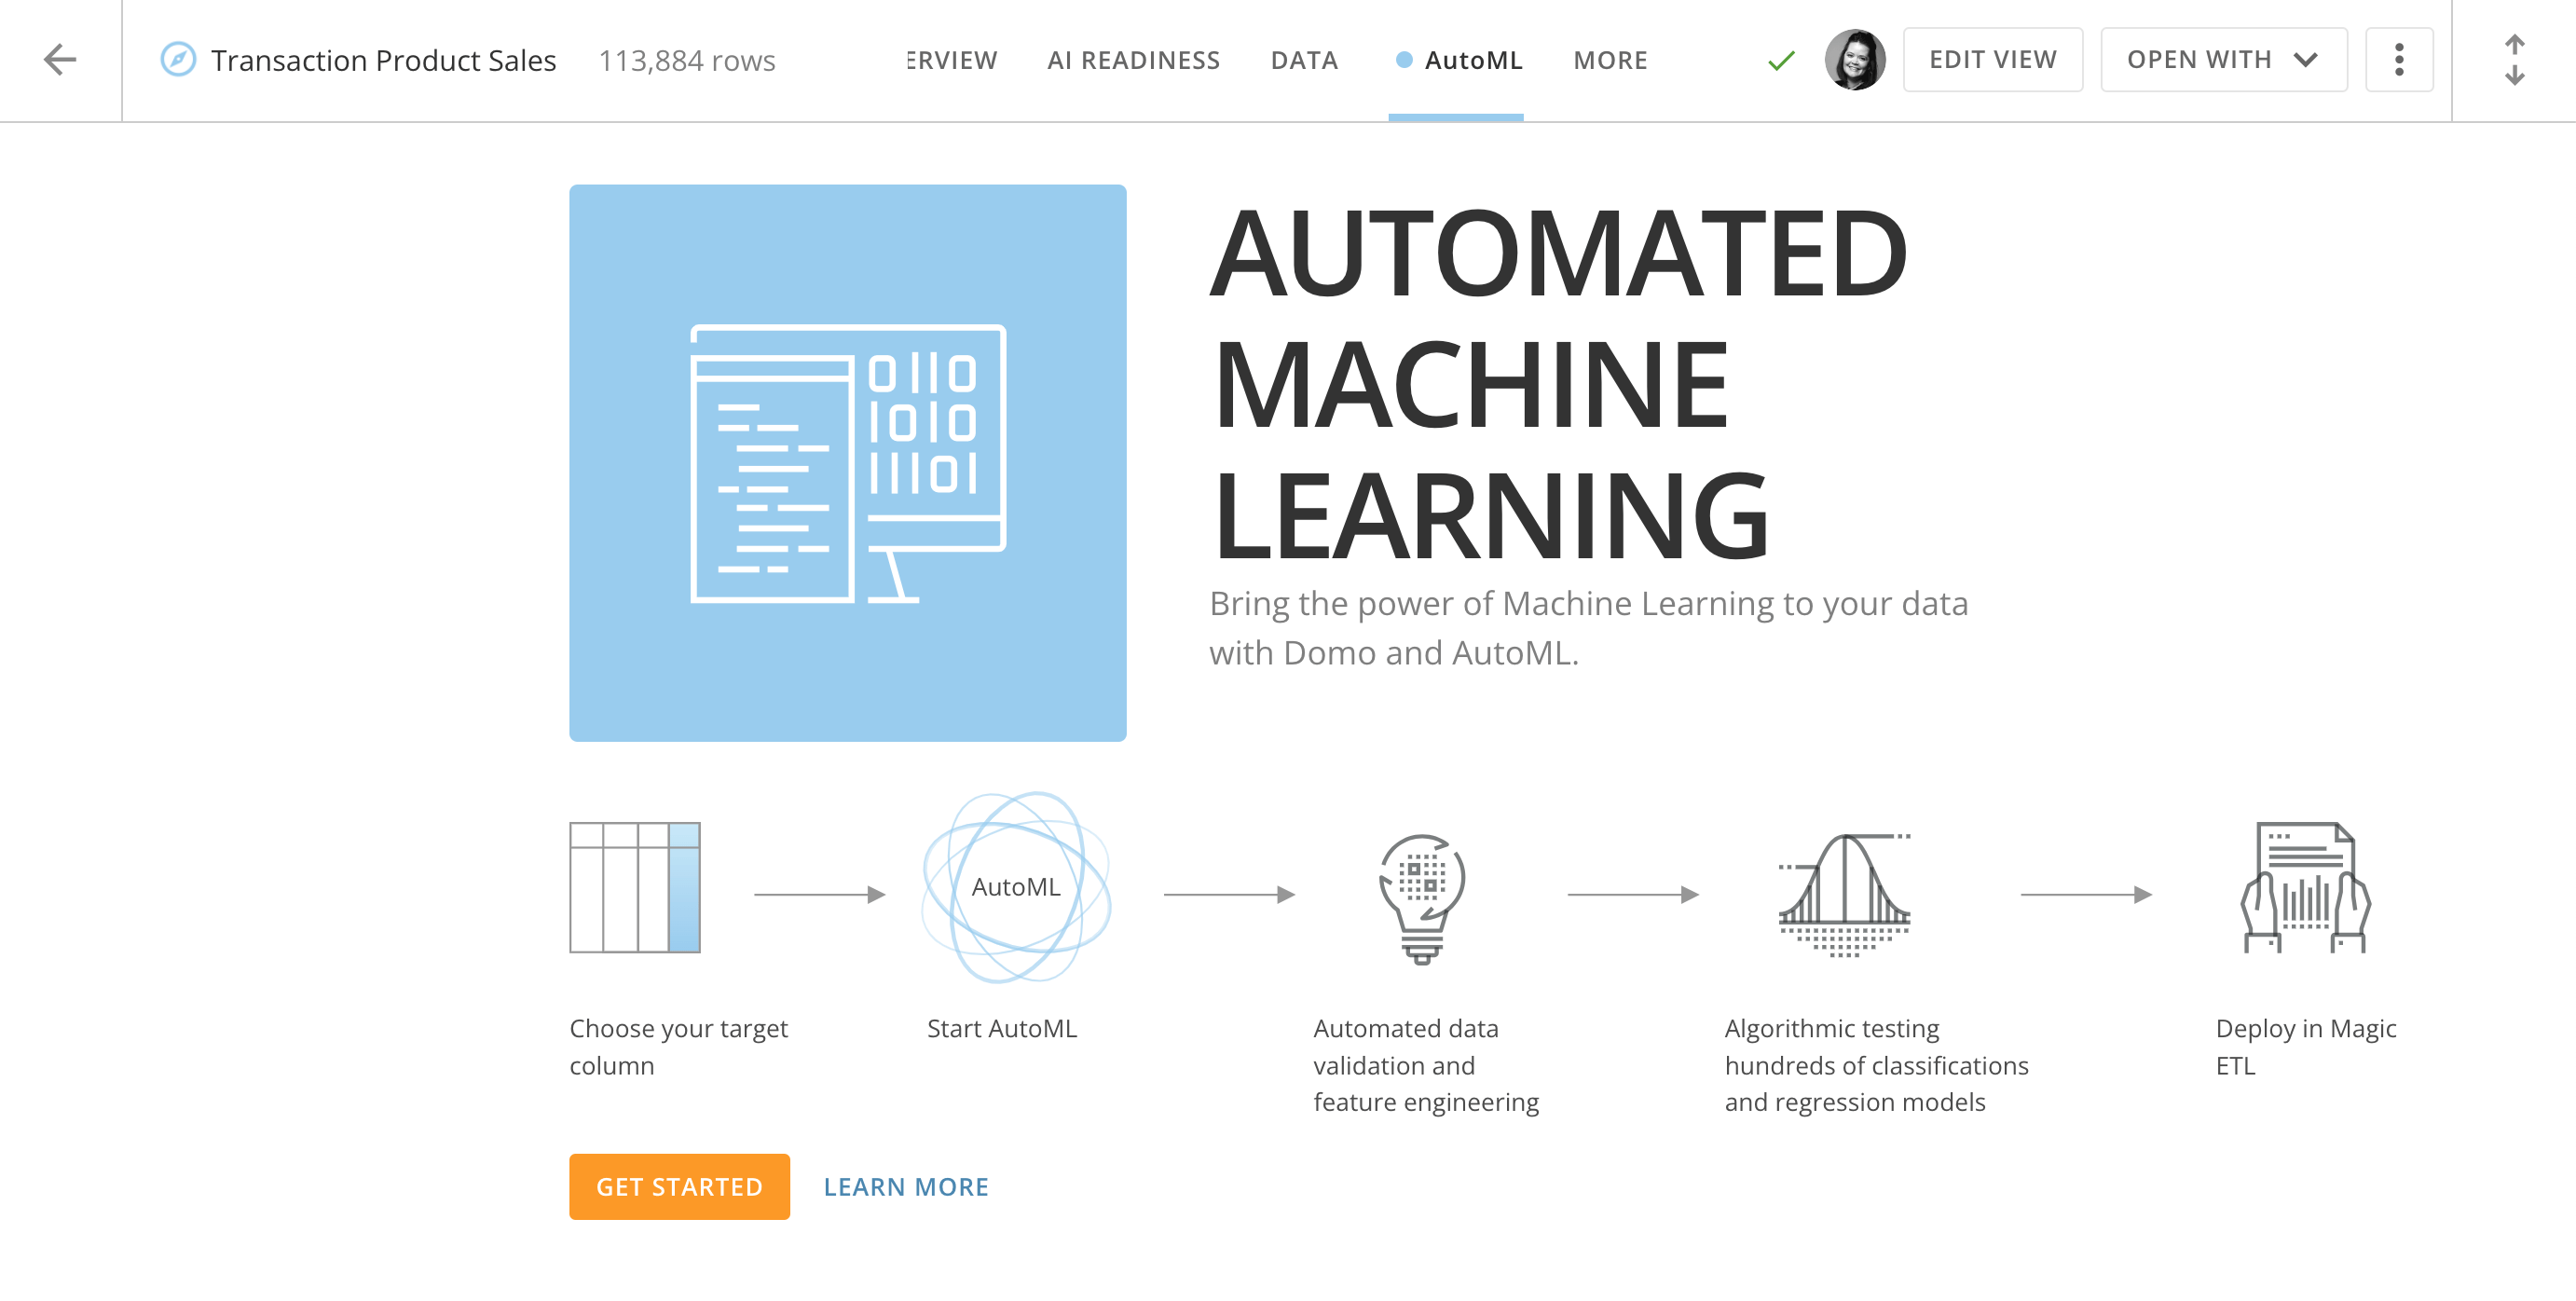
You can add projects to AI Projects using the Domo AutoML feature or create a custom project. Learn more about [Domo AutoML](/s/article/360048127854).

# Create a Project using AutoML

Follow the steps below to create a new project using Domo AutoML:

1. [Access **AI Projects**](#access_ai_models_and_projects).
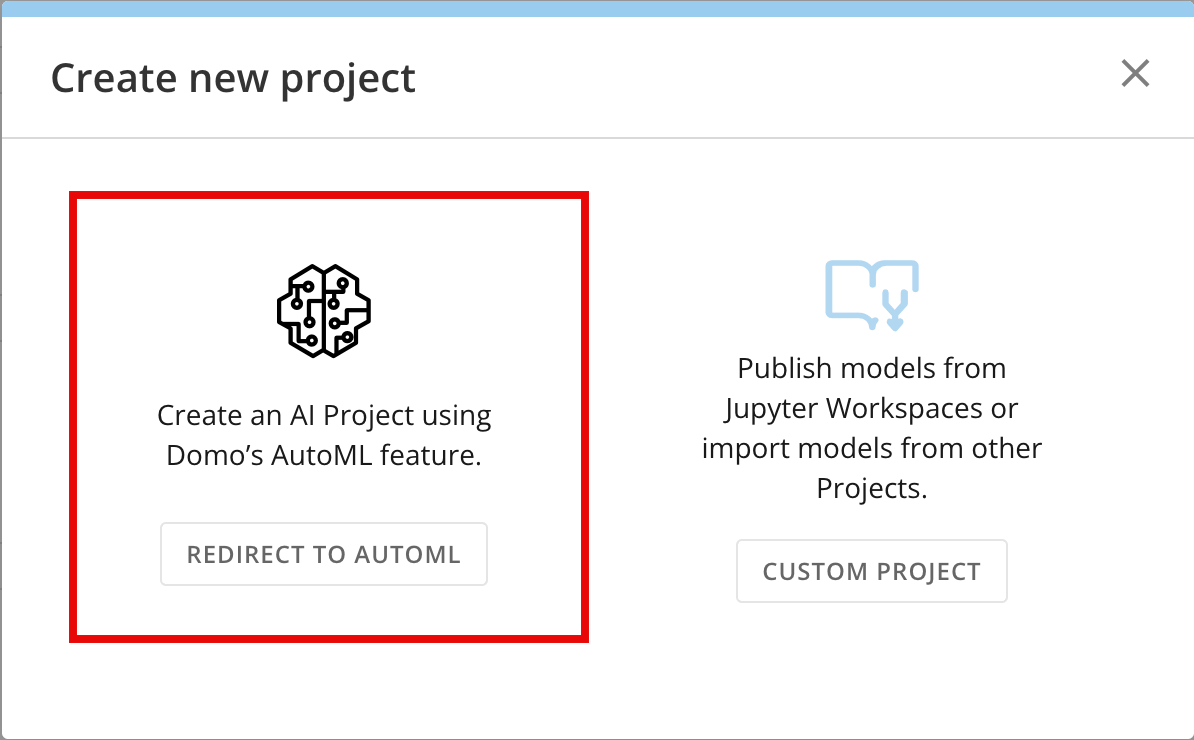
2. Select **New Project** to open the **Create new project** modal.
3. In the modal, select **Redirect to AutoML.**

   <Frame>
     <img alt="Screenshot 2024-08-15 at 2.58.08 PM.png" src="https://mintcdn.com/domoinc-openapi-sync-dataflows/bxEAfEU9KvmS3YRs/images/kb/ka0Vq00000051Y9-00N5w00000Ri7BU-0EMVq000002FK6v.jpg?fit=max&auto=format&n=bxEAfEU9KvmS3YRs&q=85&s=1357f9de60c6988234fa6856072f17bd" style={{width: 459, height: 284}} width="1194" height="740" data-path="images/kb/ka0Vq00000051Y9-00N5w00000Ri7BU-0EMVq000002FK6v.jpg" />
   </Frame>
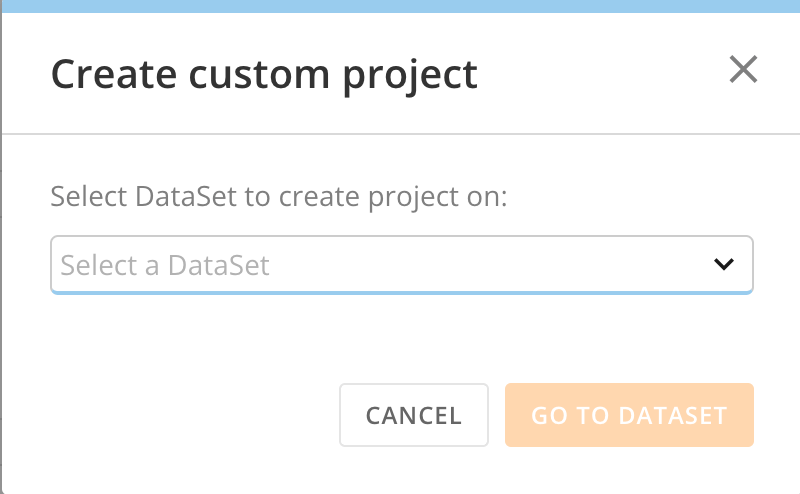
4. Use the dropdown to select a DataSet to create your project on and select **Go To DataSet**.

   The **AutoML** tab of the DataSet opens.
   <Warning>
     **Important:** To run an AutoMl job, your project DataSet must have at least 500 rows of data.
   </Warning>

   <Frame>
     <img alt="Screenshot 2024-08-15 at 3.16.49 PM.png" src="https://mintcdn.com/domoinc-openapi-sync-dataflows/bxEAfEU9KvmS3YRs/images/kb/ka0Vq00000051Y9-00N5w00000Ri7BU-0EMVq000002FJ62.jpg?fit=max&auto=format&n=bxEAfEU9KvmS3YRs&q=85&s=d7ff9999d350f78b4ff3c2fc7f3bbd49" style={{width: 360, height: 222}} width="800" height="494" data-path="images/kb/ka0Vq00000051Y9-00N5w00000Ri7BU-0EMVq000002FJ62.jpg" />
   </Frame>
5. Select **Get Started.**

   <Frame>
     <img alt="Screenshot 2024-11-21 at 5.48.51 PM.png" src="https://mintcdn.com/domoinc-openapi-sync-dataflows/bxEAfEU9KvmS3YRs/images/kb/ka0Vq00000051Y9-00N5w00000Ri7BU-0EMVq000003xqLq.jpg?fit=max&auto=format&n=bxEAfEU9KvmS3YRs&q=85&s=ff6118dbd16b8e57f04cb9d89463156b" style={{width: 899, height: 454}} width="2764" height="1396" data-path="images/kb/ka0Vq00000051Y9-00N5w00000Ri7BU-0EMVq000003xqLq.jpg" />
   </Frame>
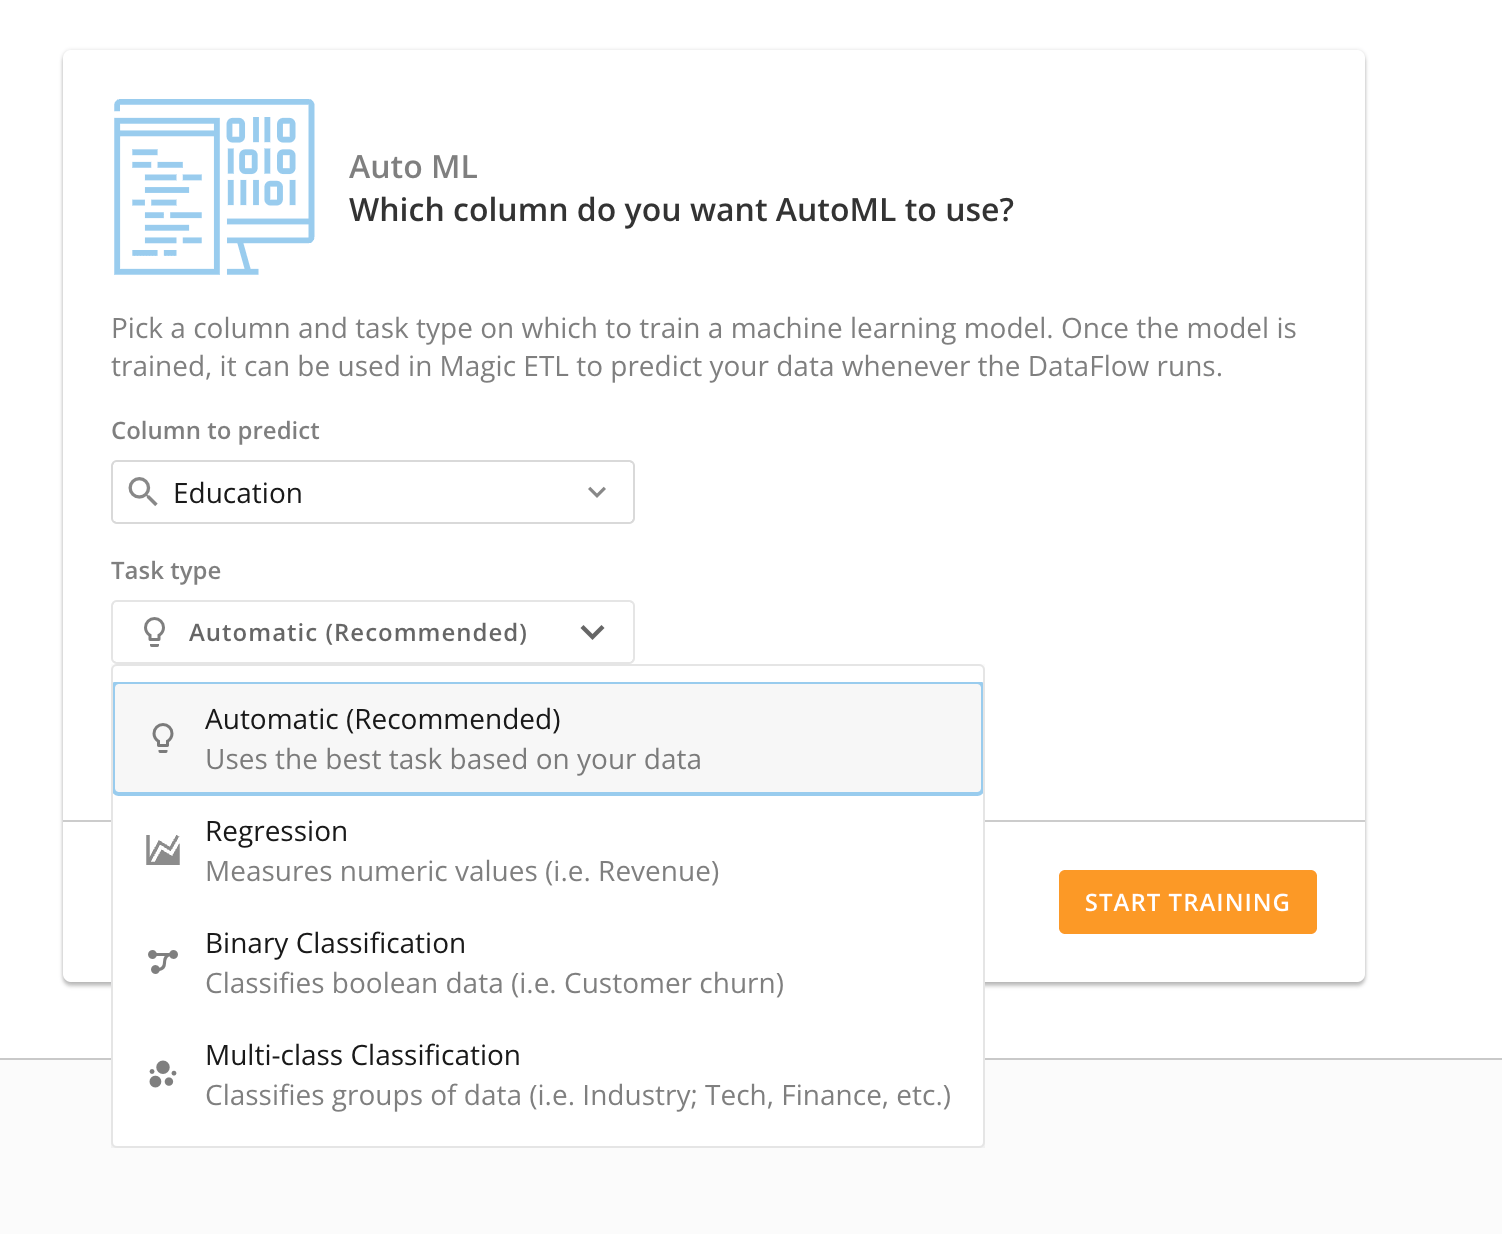
6. Select the column from your DataSet you want to predict and the task type. There are four types of tasks:

   * **Automatic (Recommended) —** This type uses the best task based on your data.
   * **Regression —** This type measures numeric values such as revenue.
   * **Binary Classification —** This type classifies boolean data such as customer churn.
   * **Multi-class Classification —** This type classifies data groups such as industry, tech, and finance.
   <Frame>
     <img alt="Screenshot 2024-08-16 at 9.18.37 AM.png" src="https://mintcdn.com/domoinc-openapi-sync-dataflows/bxEAfEU9KvmS3YRs/images/kb/ka0Vq00000051Y9-00N5w00000Ri7BU-0EMVq000002Ftz9.jpg?fit=max&auto=format&n=bxEAfEU9KvmS3YRs&q=85&s=14ee6641ab36b46d6b2429a2c1f78365" style={{width: 489, height: 401}} width="1502" height="1234" data-path="images/kb/ka0Vq00000051Y9-00N5w00000Ri7BU-0EMVq000002Ftz9.jpg" />
   </Frame>
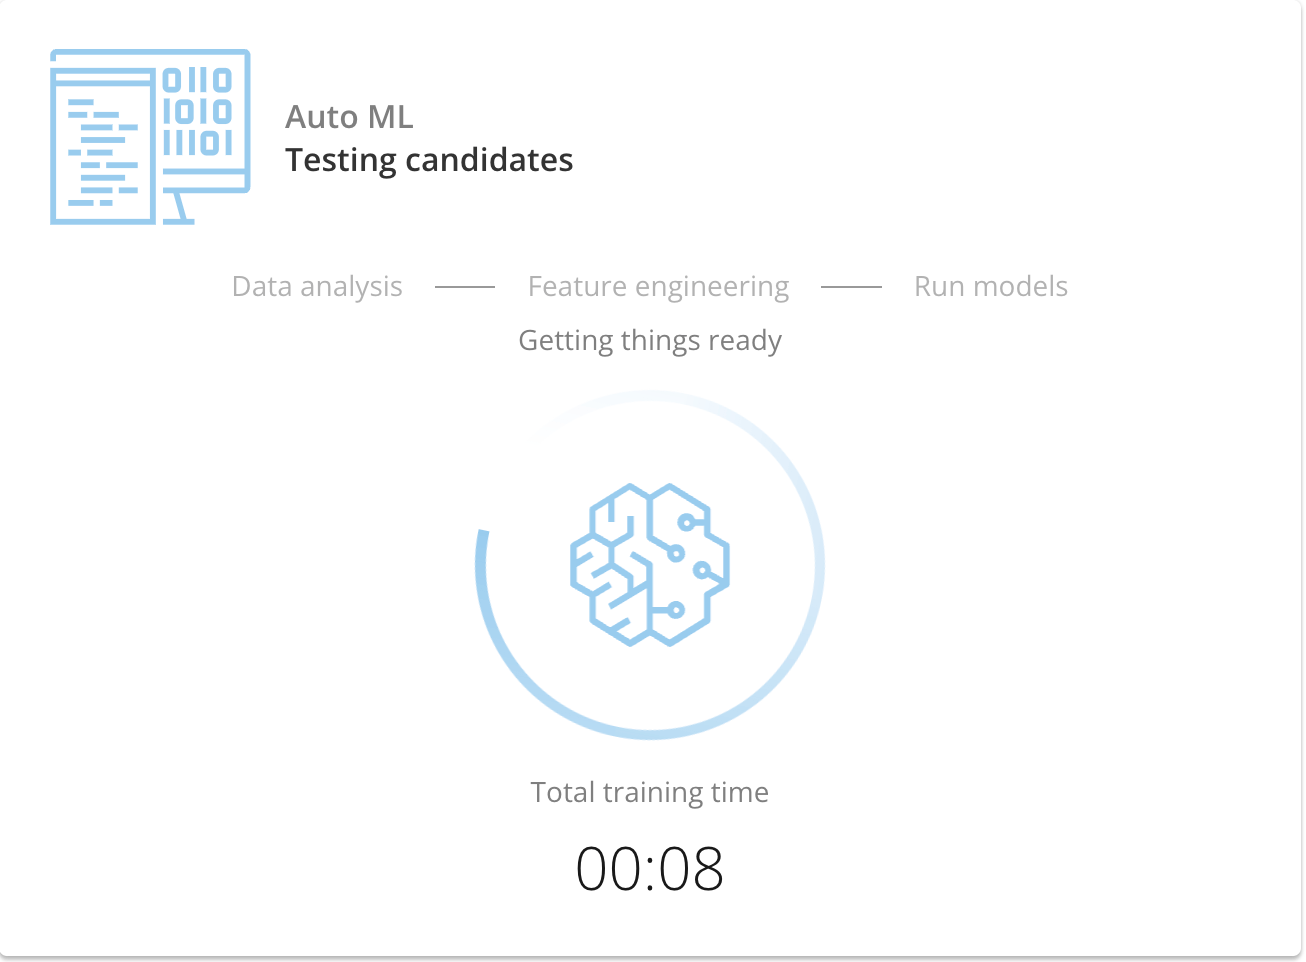
7. Select **Start Training**. A timer displays while AutoML trains and tests learning models using your data. Learn more about the [stages of training](/s/article/360048127854#training_stages).
   <Frame>
     <img alt="Screenshot 2024-08-16 at 9.25.12 AM.png" src="https://mintcdn.com/domoinc-openapi-sync-dataflows/bxEAfEU9KvmS3YRs/images/kb/ka0Vq00000051Y9-00N5w00000Ri7BU-0EMVq000002Fyqj.jpg?fit=max&auto=format&n=bxEAfEU9KvmS3YRs&q=85&s=aef7ac39c233e4bd75e3e1707193a107" style={{width: 512, height: 377}} width="1306" height="962" data-path="images/kb/ka0Vq00000051Y9-00N5w00000Ri7BU-0EMVq000002Fyqj.jpg" />
   </Frame>

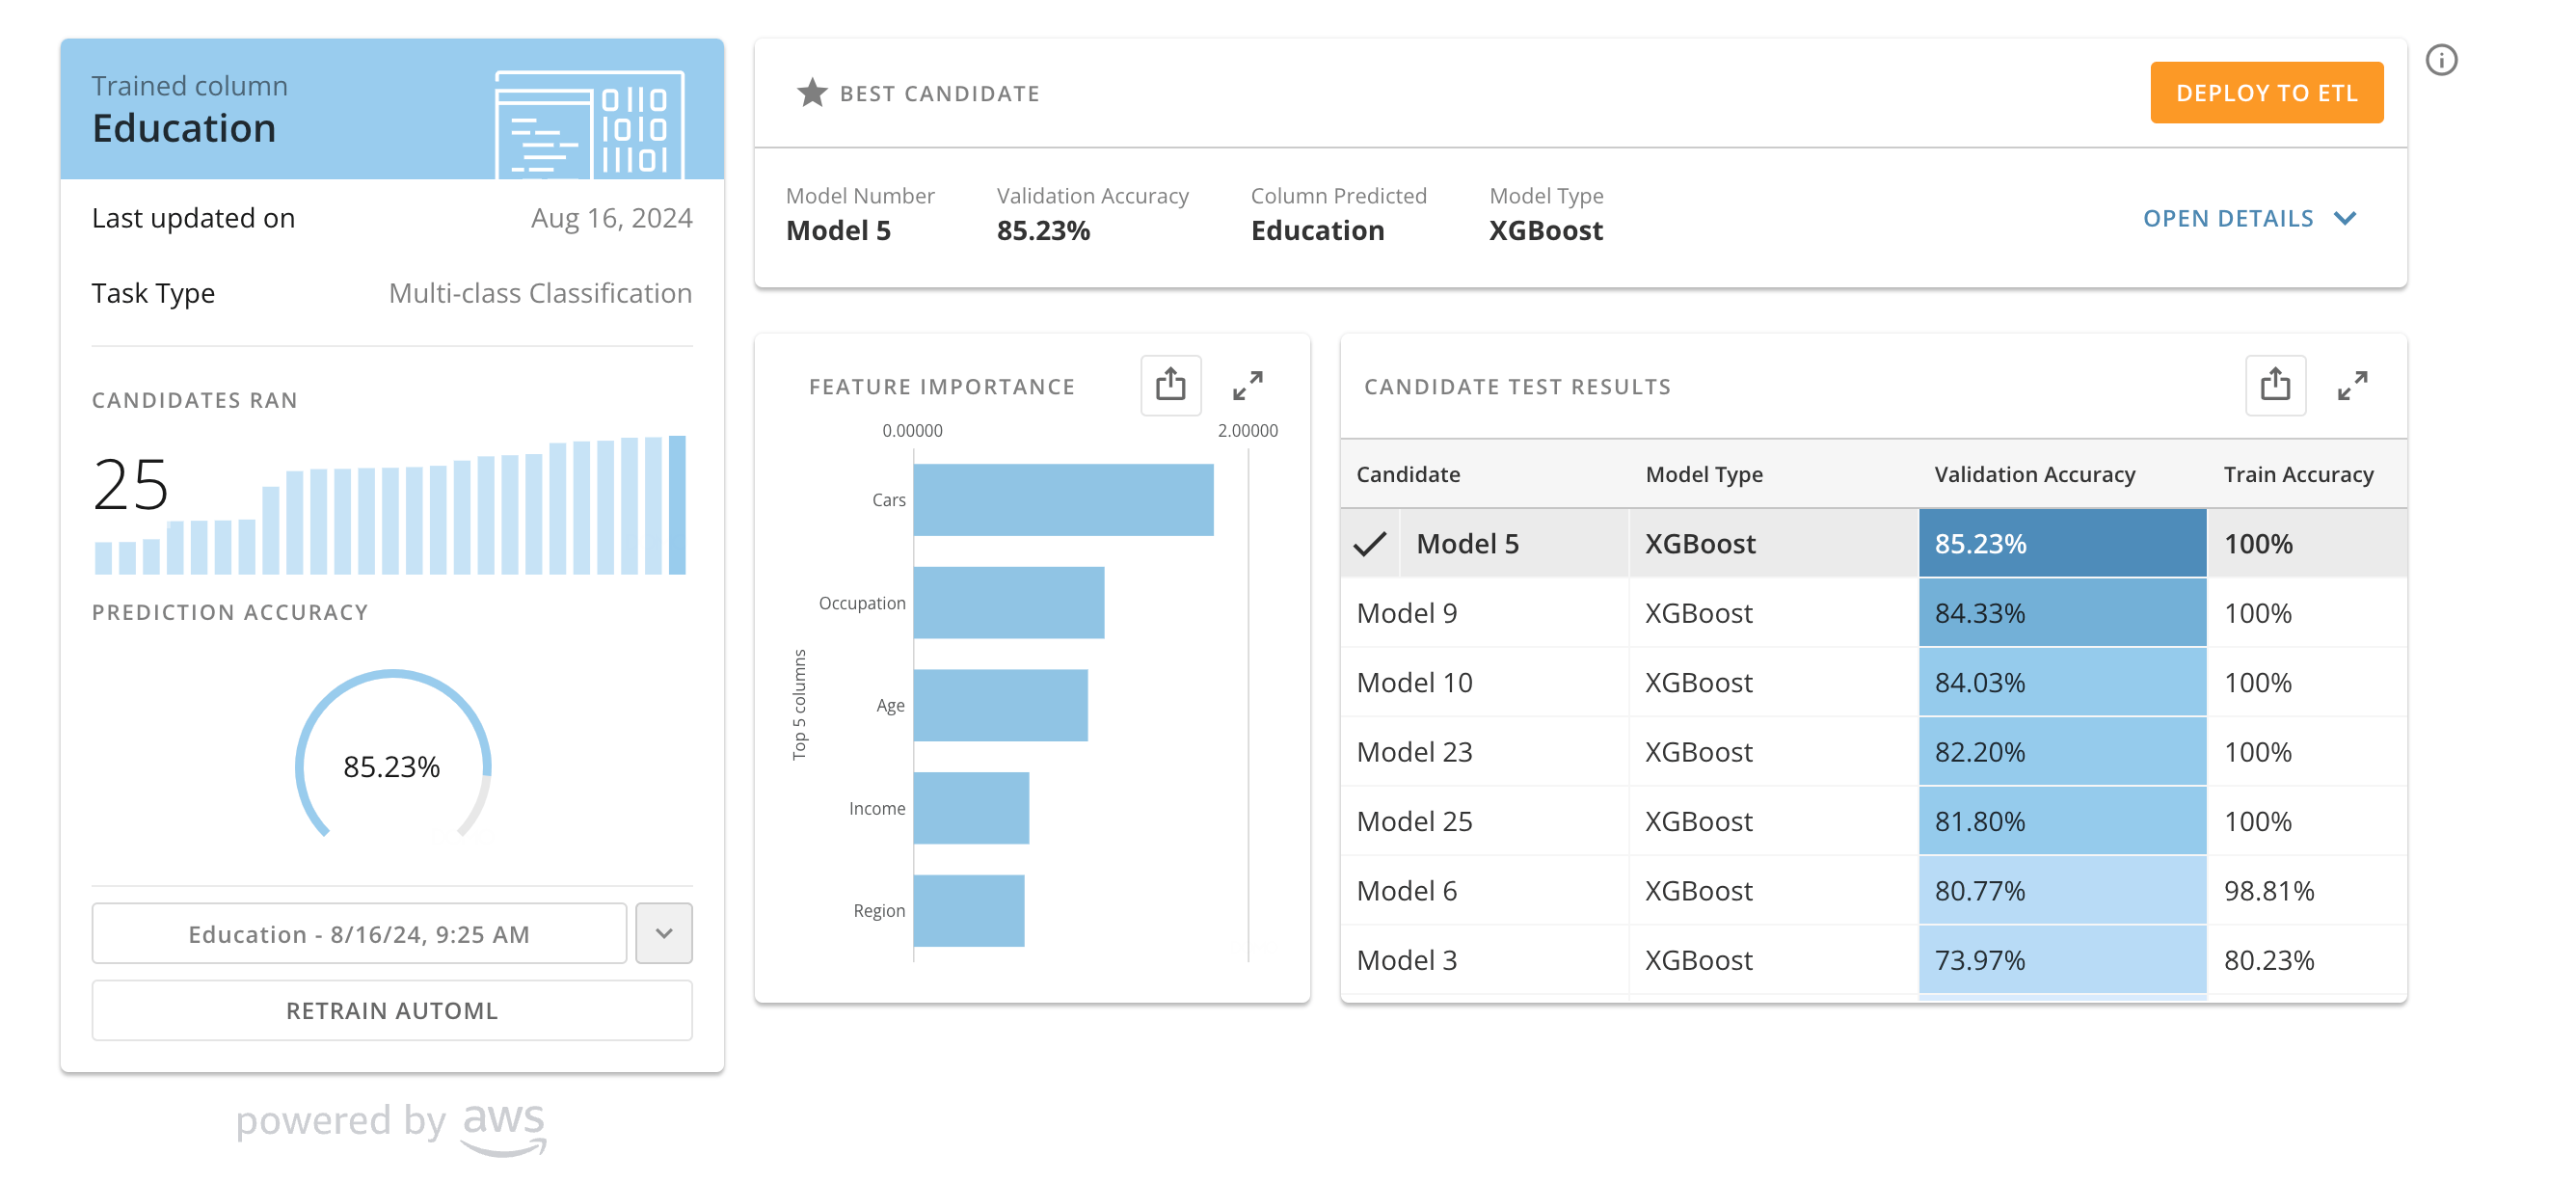
When AutoML is finished, a **Model Overview** page displays information about the performance of the models that AutoML built.
<Frame>
  <img alt="Screenshot 2024-08-16 at 10.01.12 AM.png" src="https://mintcdn.com/domoinc-openapi-sync-dataflows/bxEAfEU9KvmS3YRs/images/kb/ka0Vq00000051Y9-00N5w00000Ri7BU-0EMVq000002G2O5.jpg?fit=max&auto=format&n=bxEAfEU9KvmS3YRs&q=85&s=6c7d4c57c881c1541f4f9065bd33fb9f" style={{width: 765, height: 351}} width="2672" height="1226" data-path="images/kb/ka0Vq00000051Y9-00N5w00000Ri7BU-0EMVq000002G2O5.jpg" />
</Frame>

Your AutoML project now displays on the **AI Projects** page. Learn more about [preparing data for AutoML](https://domo-support.domo.com/s/article/360048127854?language=en_US#prepare_data_for_automl) and [training and deploying models with AutoML](/s/article/360048127854).

# Create a Custom Project

Follow the steps below to create a new custom project:

1. [Access **AI Projects**](#access_ai_models_and_projects).
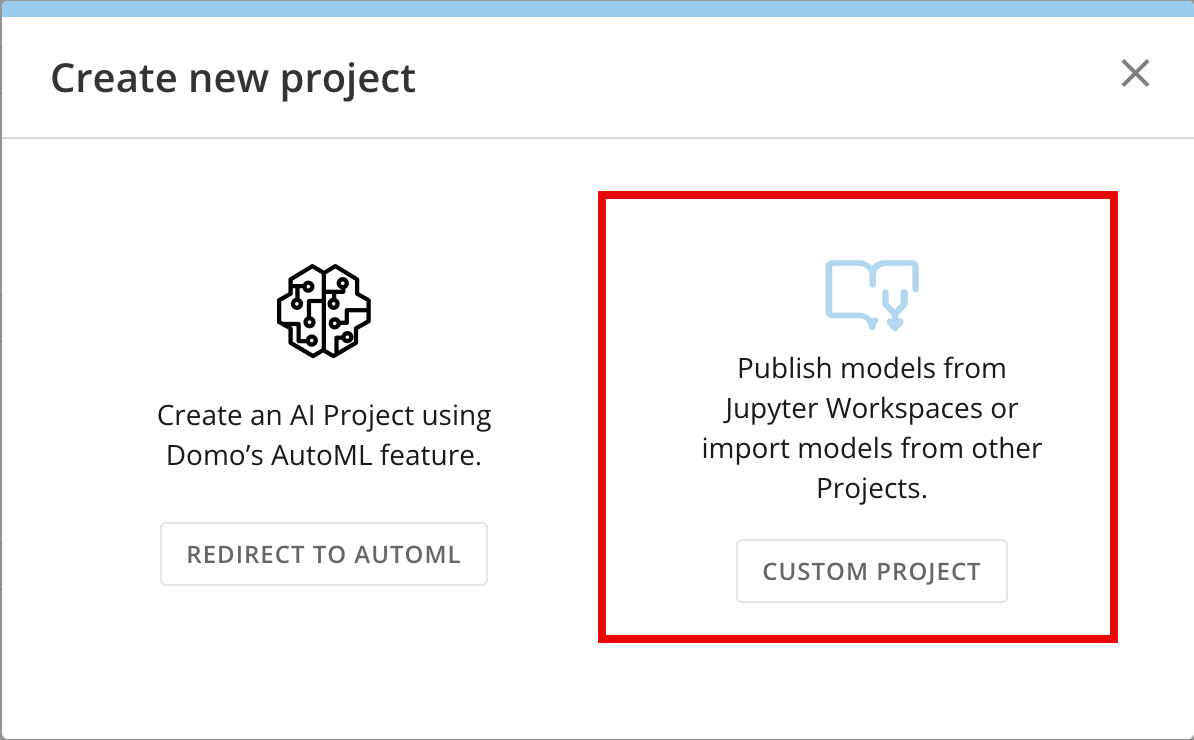
2. Select **New Project** to open the **Create new project** modal.
3. In the modal, select **Custom Project.**
   <Frame>
     <img alt="Screenshot 2024-08-15 at 2.58.08 PM.png" src="https://mintcdn.com/domoinc-openapi-sync-dataflows/bxEAfEU9KvmS3YRs/images/kb/ka0Vq00000051Y9-00N5w00000Ri7BU-0EMVq000002G3Gv.jpg?fit=max&auto=format&n=bxEAfEU9KvmS3YRs&q=85&s=84db65f3b95c59391fe9cb7a5e2f0722" style={{width: 516, height: 320}} width="1194" height="740" data-path="images/kb/ka0Vq00000051Y9-00N5w00000Ri7BU-0EMVq000002G3Gv.jpg" />
   </Frame>
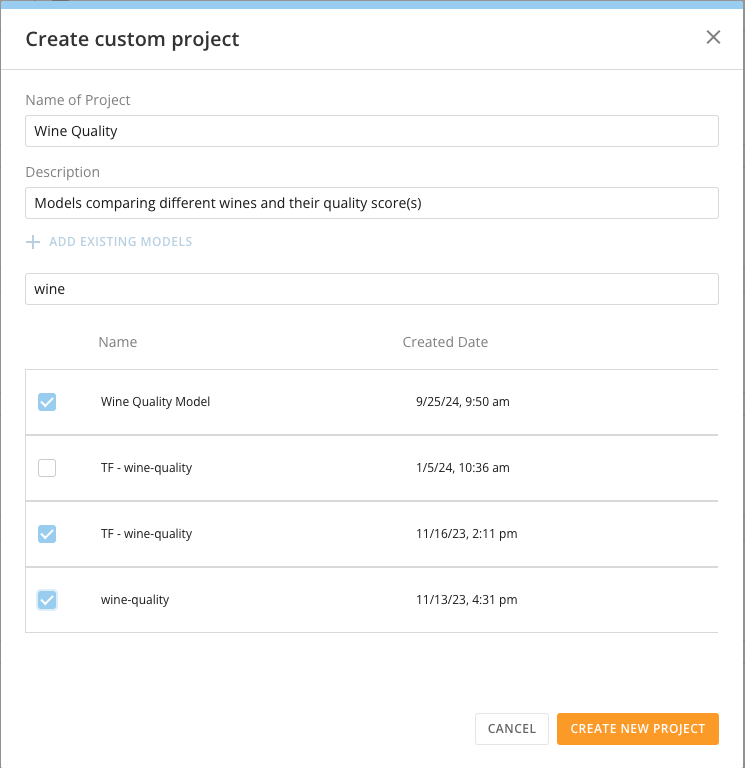
4. Name your project and enter an optional description.
5. Select **+ Add Existing Models** to add a model to the project.
   <Frame>
     <img alt="Screenshot 2024-11-25 at 2.38.11 PM.png" src="https://mintcdn.com/domoinc-openapi-sync-dataflows/bxEAfEU9KvmS3YRs/images/kb/ka0Vq00000051Y9-00N5w00000Ri7BU-0EMVq00000412ez.jpg?fit=max&auto=format&n=bxEAfEU9KvmS3YRs&q=85&s=73a316192ca5e32a8be8c3286c597d1c" style={{width: 534, height: 550}} width="745" height="768" data-path="images/kb/ka0Vq00000051Y9-00N5w00000Ri7BU-0EMVq00000412ez.jpg" />
   </Frame>
6. Select **Create New Project** to add the project to the **AI Projects** page.

Learn more about [managing AI models](/s/article/000005502).

### Add a Model to AI Projects

From the **AI Models** page, you can add a model to one or more projects by selecting <InlineImage src="/images/kb/ka0Vq00000051Y9-00N5w00000Ri7BU-0EMVq000000RJkw.jpg" /> **Action menu** > **Manage Projects** to open the **Manage Projects** modal.
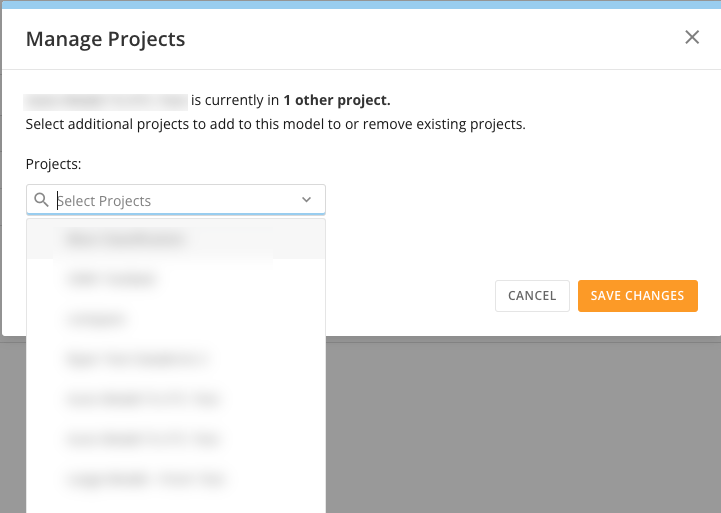
In the modal, you can add or remove the model from existing projects and save your changes.

<Frame>
  <img alt="Screenshot 2024-05-28 at 1.35.22 PM.png" src="https://mintcdn.com/domoinc-openapi-sync-dataflows/bxEAfEU9KvmS3YRs/images/kb/ka0Vq00000051Y9-00N5w00000Ri7BU-0EMVq0000016iiY.jpg?fit=max&auto=format&n=bxEAfEU9KvmS3YRs&q=85&s=bfd81d682a1cddcf4d0a2ef6c4ad6245" style={{width: 545, height: 388}} width="721" height="513" data-path="images/kb/ka0Vq00000051Y9-00N5w00000Ri7BU-0EMVq0000016iiY.jpg" />
</Frame>

### Compare Models

When you select a project from the **AI Projects** list, you open the project's Details view. Here, you can compare up to 10 models and 10 metrics total. The available metrics depend on the models brought into your project and how they were initially trained.

A project's Details view contains the **Metric Comparison** section, where you can view the metrics you are comparing, and the **model list**, where you can see b asic information about each model in the project. Select a model to see its additional [details](#details_view).

# Choose Models to Compare

In the **model list**, check the box for each model you want to compare (you can choose up to 10).
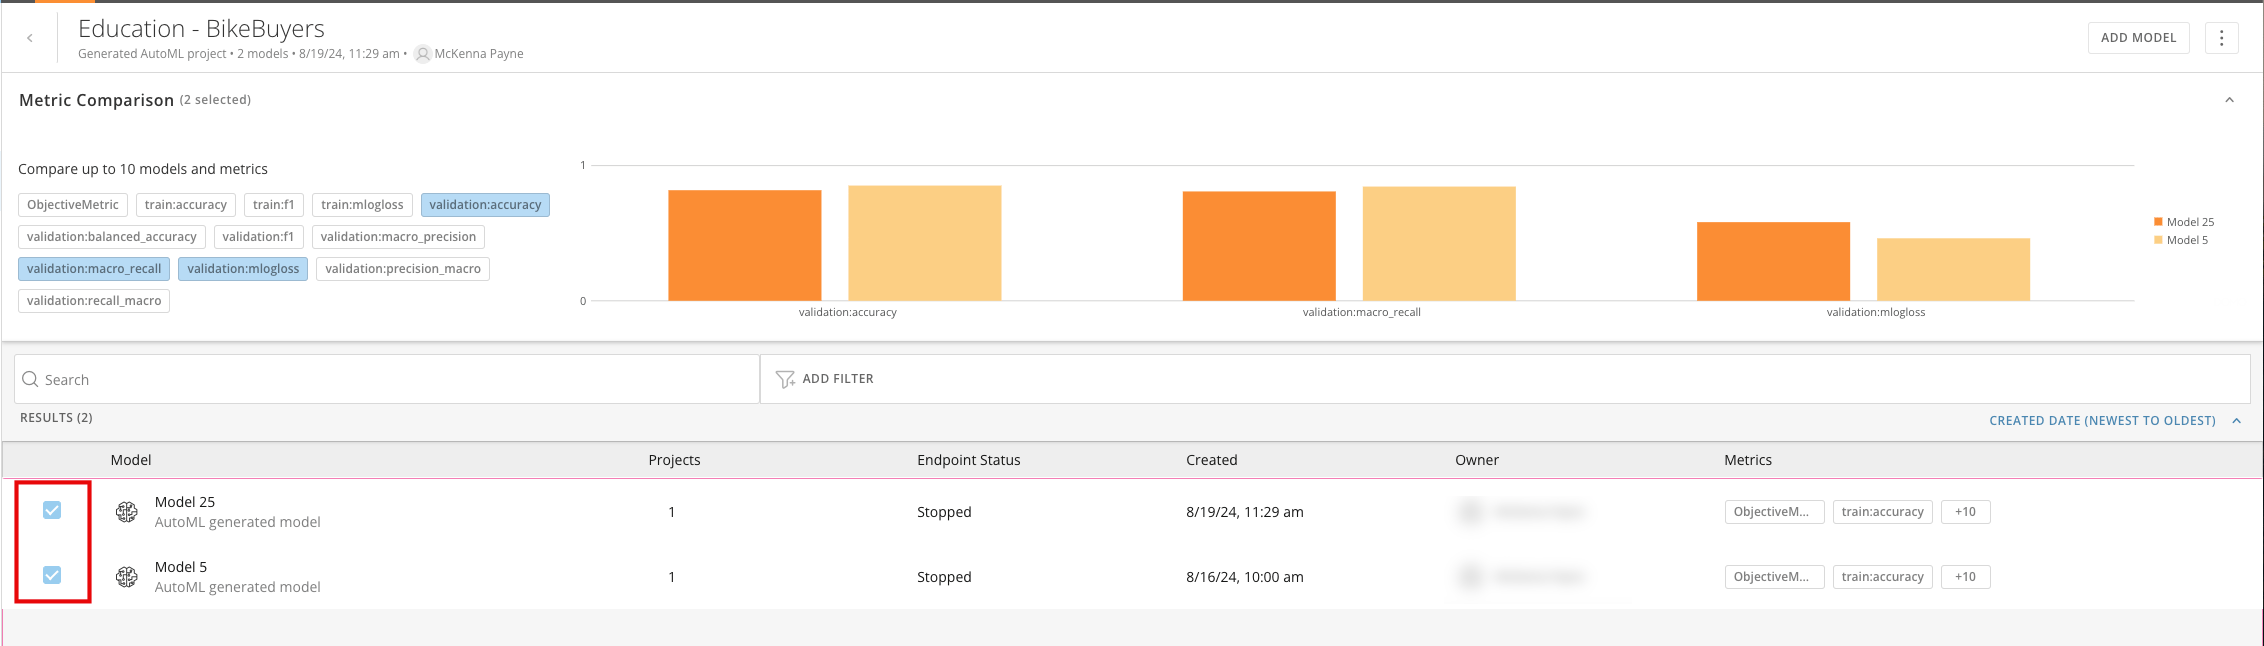
<Frame>
  <img alt="Screenshot 2025-01-13 at 11.09.46 AM.png" src="https://mintcdn.com/domoinc-openapi-sync-dataflows/bxEAfEU9KvmS3YRs/images/kb/ka0Vq00000051Y9-00N5w00000Ri7BU-0EMVq000004mOk6.jpg?fit=max&auto=format&n=bxEAfEU9KvmS3YRs&q=85&s=771b268ecdf49e0ac86e995a4623a642" style={{width: 901, height: 257}} width="2264" height="646" data-path="images/kb/ka0Vq00000051Y9-00N5w00000Ri7BU-0EMVq000004mOk6.jpg" />
</Frame>

Then, choose metrics to compare under **Metric Comparison**.
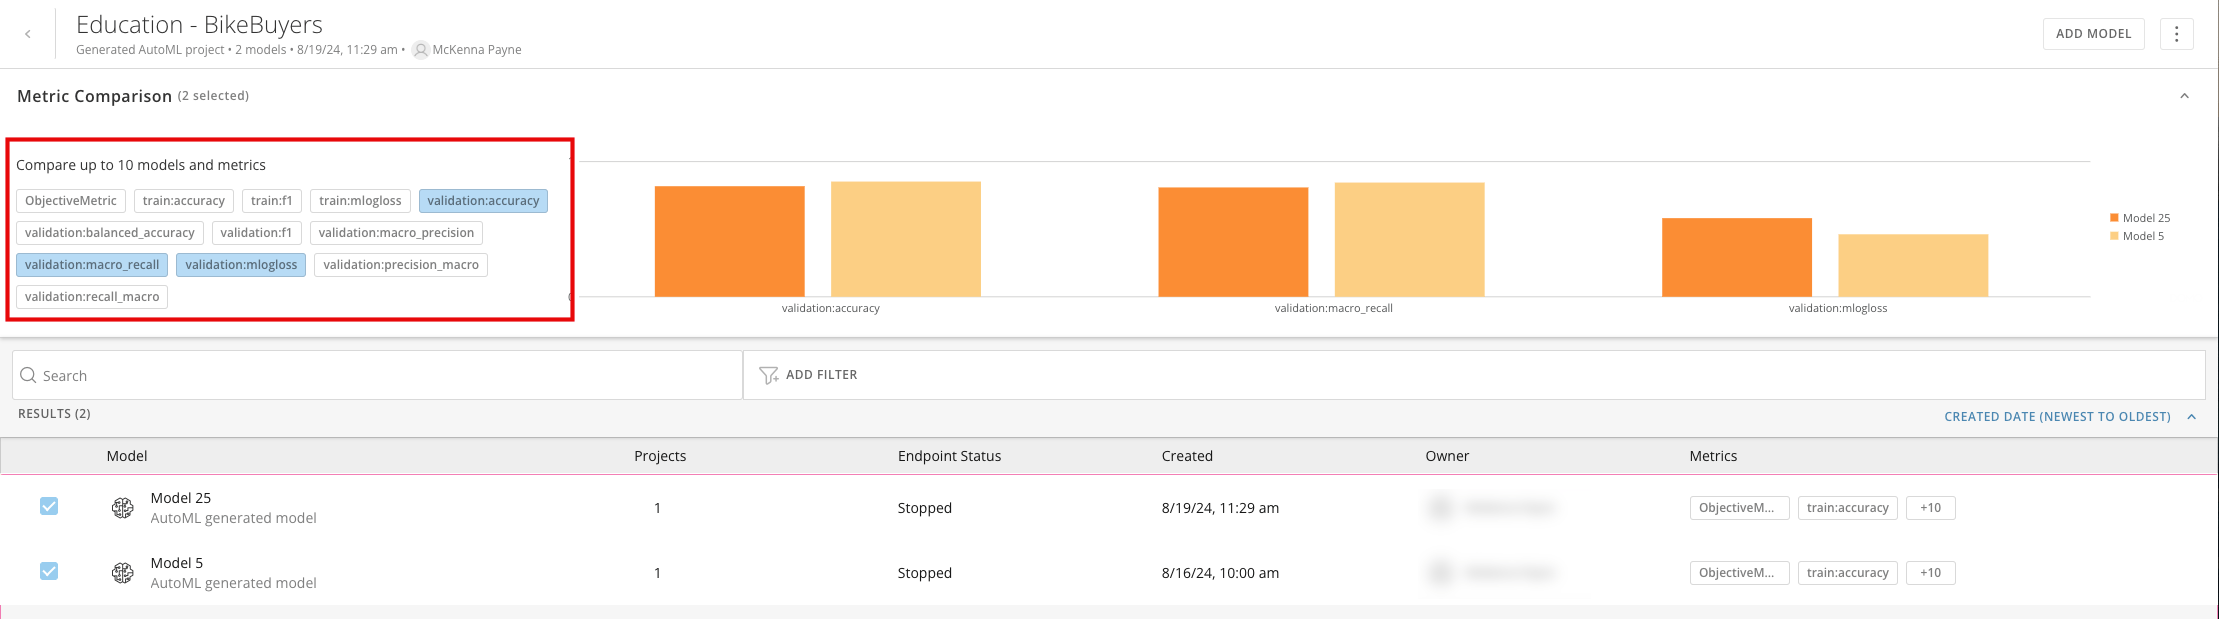
<Frame>
  <img alt="Screenshot 2025-01-10 at 9.03.50 AM.png" src="https://mintcdn.com/domoinc-openapi-sync-dataflows/bxEAfEU9KvmS3YRs/images/kb/ka0Vq00000051Y9-00N5w00000Ri7BU-0EMVq000004kLdS.jpg?fit=max&auto=format&n=bxEAfEU9KvmS3YRs&q=85&s=3c4c65654dfd51a301b1e5e92daaebb4" style={{width: 897, height: 250}} width="2219" height="619" data-path="images/kb/ka0Vq00000051Y9-00N5w00000Ri7BU-0EMVq000004kLdS.jpg" />
</Frame>

When you have at least two metrics selected, you can compare multiple metrics within a single model, the metric comparison loads as side-by-side comparison bar graphs. In the example above, the AutoML-generated model is used, and the `validation:accuracy`, `validation:macro\_recall`, and `validation:mlogloss` metrics are compared side-by-side.