> ## Documentation Index
> Fetch the complete documentation index at: https://domoinc-openapi-sync-dataflows.mintlify.site/llms.txt
> Use this file to discover all available pages before exploring further.
# Adding a Microsoft Sharepoint Online Rest OAuth Config
### Prerequisites
To connect to Microsoft SharePoint Online to retrieve the information, you must have the following:
* An installed Microsoft Azure app.
* The CLIENT ID and CLIENT SECRET. To generate an app and locate these credentials, see [Microsoft's documentation](https://docs.microsoft.com/en-us/azure/active-directory/develop/quickstart-register-app "Microsoft's documentation"). You may need the following information to register for the app:
* **Azure Portal:** [https://portal.azure.com/](https://portal.azure.com/ "https://portal.azure.com/")
* **Sharepoint App to Register:** SharePoint Online Rest API
* **Domo Re-direct URL:** [https://oauth.domo.com/api/data/v1/oauth/providers/microsoft-sharepoint-online-rest-enterprise-oauth/exchange](https://oauth.domo.com/api/data/v1/oauth/providers/microsoft-sharepoint-online-rest-enterprise-oauth/exchange "https://oauth.domo.com/api/data/v1/oauth/providers/microsoft-sharepoint-online-rest-enterprise-oauth/exchange")
### Creating an Azure App for Enterprise OAuth
To create a Microsoft Azure app, do the following:
1. Log in to [https://portal.azure.com](https://portal.azure.com/ "https://portal.azure.com").
2. Select Microsoft Entra ID > App registrations.
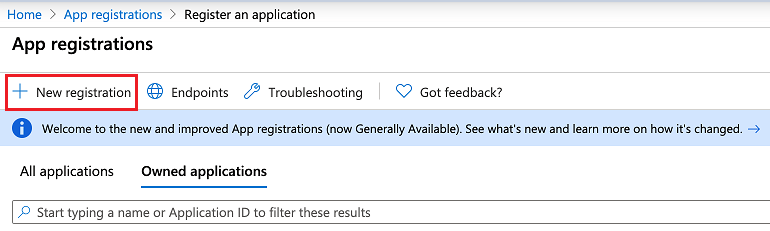 3. Click **New registration**.
4. Enter the application name and select the supported account type. Enter the Redirect URI for Web as [https://oauth.domo.com/api/data/v1/oauth/providers/microsoft-sharepoint-online-rest-enterprise-oauth/exchange](https://oauth.domo.com/api/data/v1/oauth/providers/microsoft-sharepoint-online-rest-enterprise-oauth/exchange).
5. Change the default tenant selection from single tenant to multi tenant. This is a requirement for the connector.
3. Click **New registration**.
4. Enter the application name and select the supported account type. Enter the Redirect URI for Web as [https://oauth.domo.com/api/data/v1/oauth/providers/microsoft-sharepoint-online-rest-enterprise-oauth/exchange](https://oauth.domo.com/api/data/v1/oauth/providers/microsoft-sharepoint-online-rest-enterprise-oauth/exchange).
5. Change the default tenant selection from single tenant to multi tenant. This is a requirement for the connector.
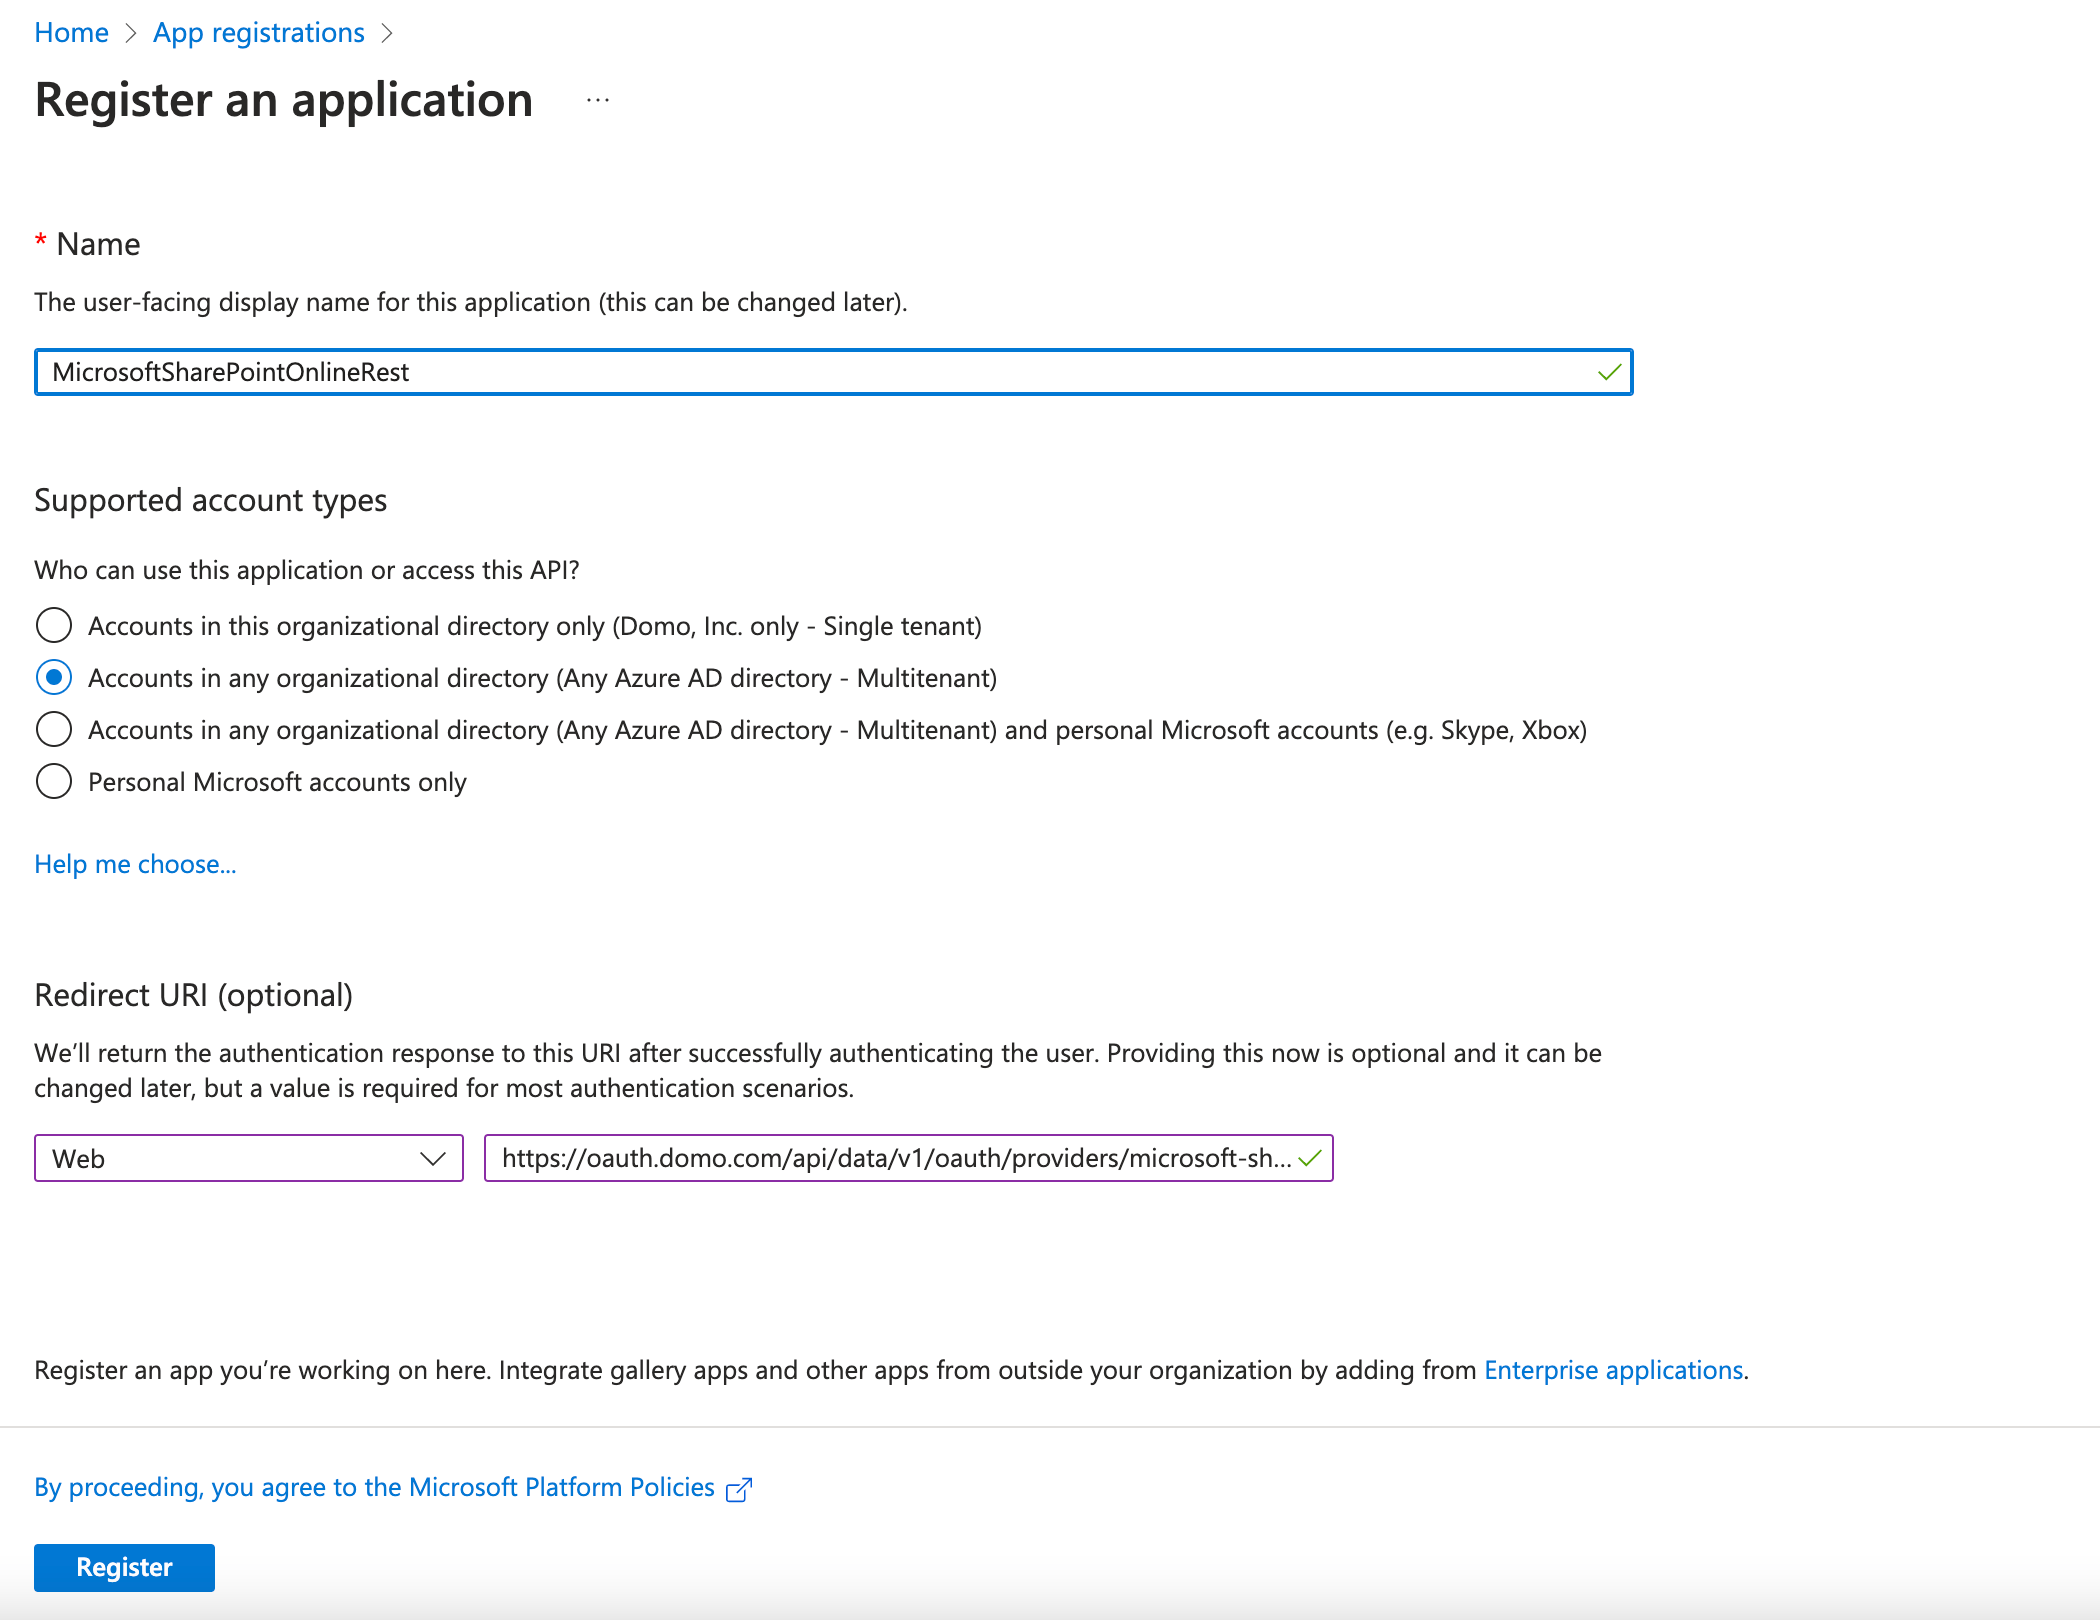 6. Click **Register**.
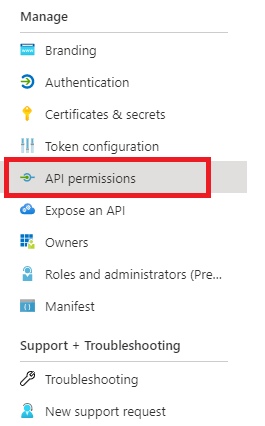
7. Now, click **API Permissions**.
6. Click **Register**.
7. Now, click **API Permissions**.
 8. Click **+Add Permissions** button.
 9. Select **Microsoft Graph > Delegated Permissions**.
10. Select the permissions as required.
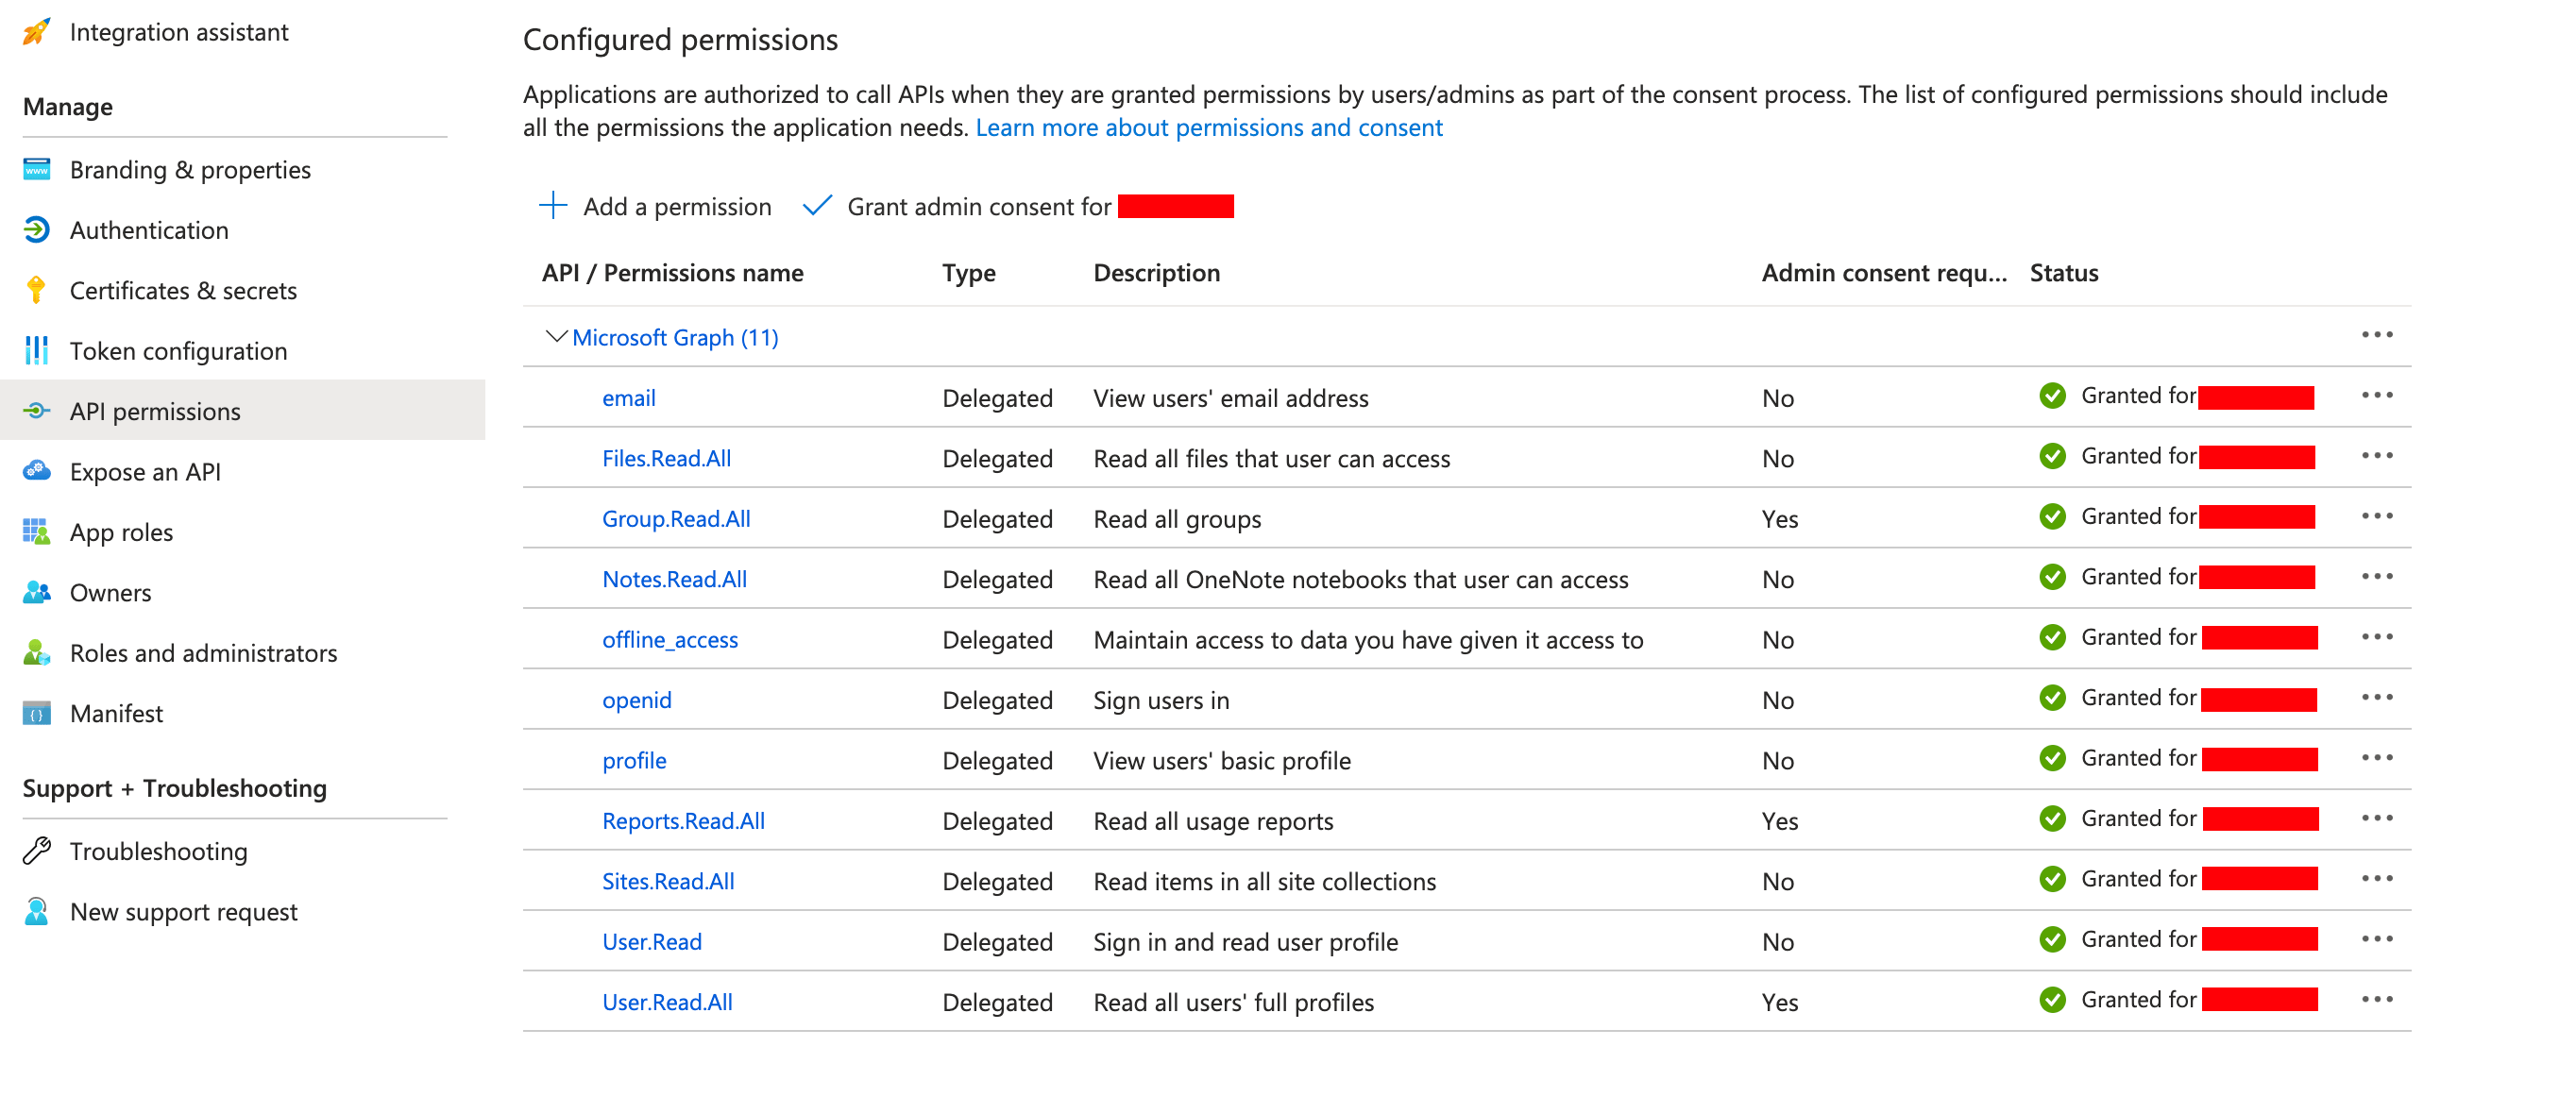
11. After adding the permissions, all configured permissions will be listed as below.
9. Select **Microsoft Graph > Delegated Permissions**.
10. Select the permissions as required.
11. After adding the permissions, all configured permissions will be listed as below.
 ### To Obtain the Sharepoint CLIENT ID:
1. Go to [https://portal.azure.com](https://portal.azure.com/ "https://portal.azure.com").
2. Select Microsoft Entra ID > App registrations.
3. Find and click on your web app.
4. The "application" ID is your CLIENT ID.
### To obtain the Sharepoint CLIENT SECRET:
1. Go to [https://portal.azure.com](https://portal.azure.com/ "https://portal.azure.com").
2. Select Microsoft Entra ID > App registrations.
3. Find and click on your web app.
4. Open **Certificates and secrets**.
5. Click **+New Value**.
6. Provide the value description and the expiry period for your secret. Click **Add**.
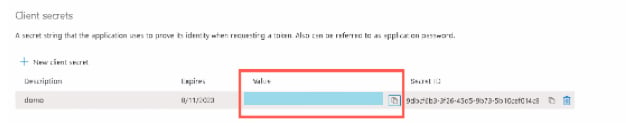
7. Your new value will appear. Copy the Value field and paste it in your Domo connector Value field.
### To Obtain the Sharepoint CLIENT ID:
1. Go to [https://portal.azure.com](https://portal.azure.com/ "https://portal.azure.com").
2. Select Microsoft Entra ID > App registrations.
3. Find and click on your web app.
4. The "application" ID is your CLIENT ID.
### To obtain the Sharepoint CLIENT SECRET:
1. Go to [https://portal.azure.com](https://portal.azure.com/ "https://portal.azure.com").
2. Select Microsoft Entra ID > App registrations.
3. Find and click on your web app.
4. Open **Certificates and secrets**.
5. Click **+New Value**.
6. Provide the value description and the expiry period for your secret. Click **Add**.
7. Your new value will appear. Copy the Value field and paste it in your Domo connector Value field.