> ## Documentation Index
> Fetch the complete documentation index at: https://domoinc-openapi-sync-dataflows.mintlify.site/llms.txt
> Use this file to discover all available pages before exploring further.
# Deliver Customized Reports with App Studio Report Builder
export const InlineImage = ({src, alt = '', height = '1.6em'}) => {
return  ;
};
### Intro
App Studio Report Builder allows you to create and automate personalized email reports from your App Studio apps.
This article covers topics like [creating a report](#create_a_report), [configuring](#configure_your_report) [a](#configure_your_report) [report](#configure_your_report), and [setting a report schedule](#schedule_your_report).
**Tip:** Learn how to [create an app](https://domo-support.domo.com/s/article/000005295?language=en_US#create_an_app) in App Studio.
***
### Required Grant
To create, edit, update, and delete reports in Report Builder, you must have the following grant enabled for your role:
* **Edit Report (Report Builder) —** Report Builder only appears as an option in App Studio if you have this grant, which is enabled for Admins and editors by default.
To learn more about grants, see [Manage User Roles and Grants](/s/article/360043438973).
### Access Report Builder
Follow the steps below to access Report Builder in App Studio.
**Don't see the Report Builder option?**
Make sure you have the [required grant](#required_grants).
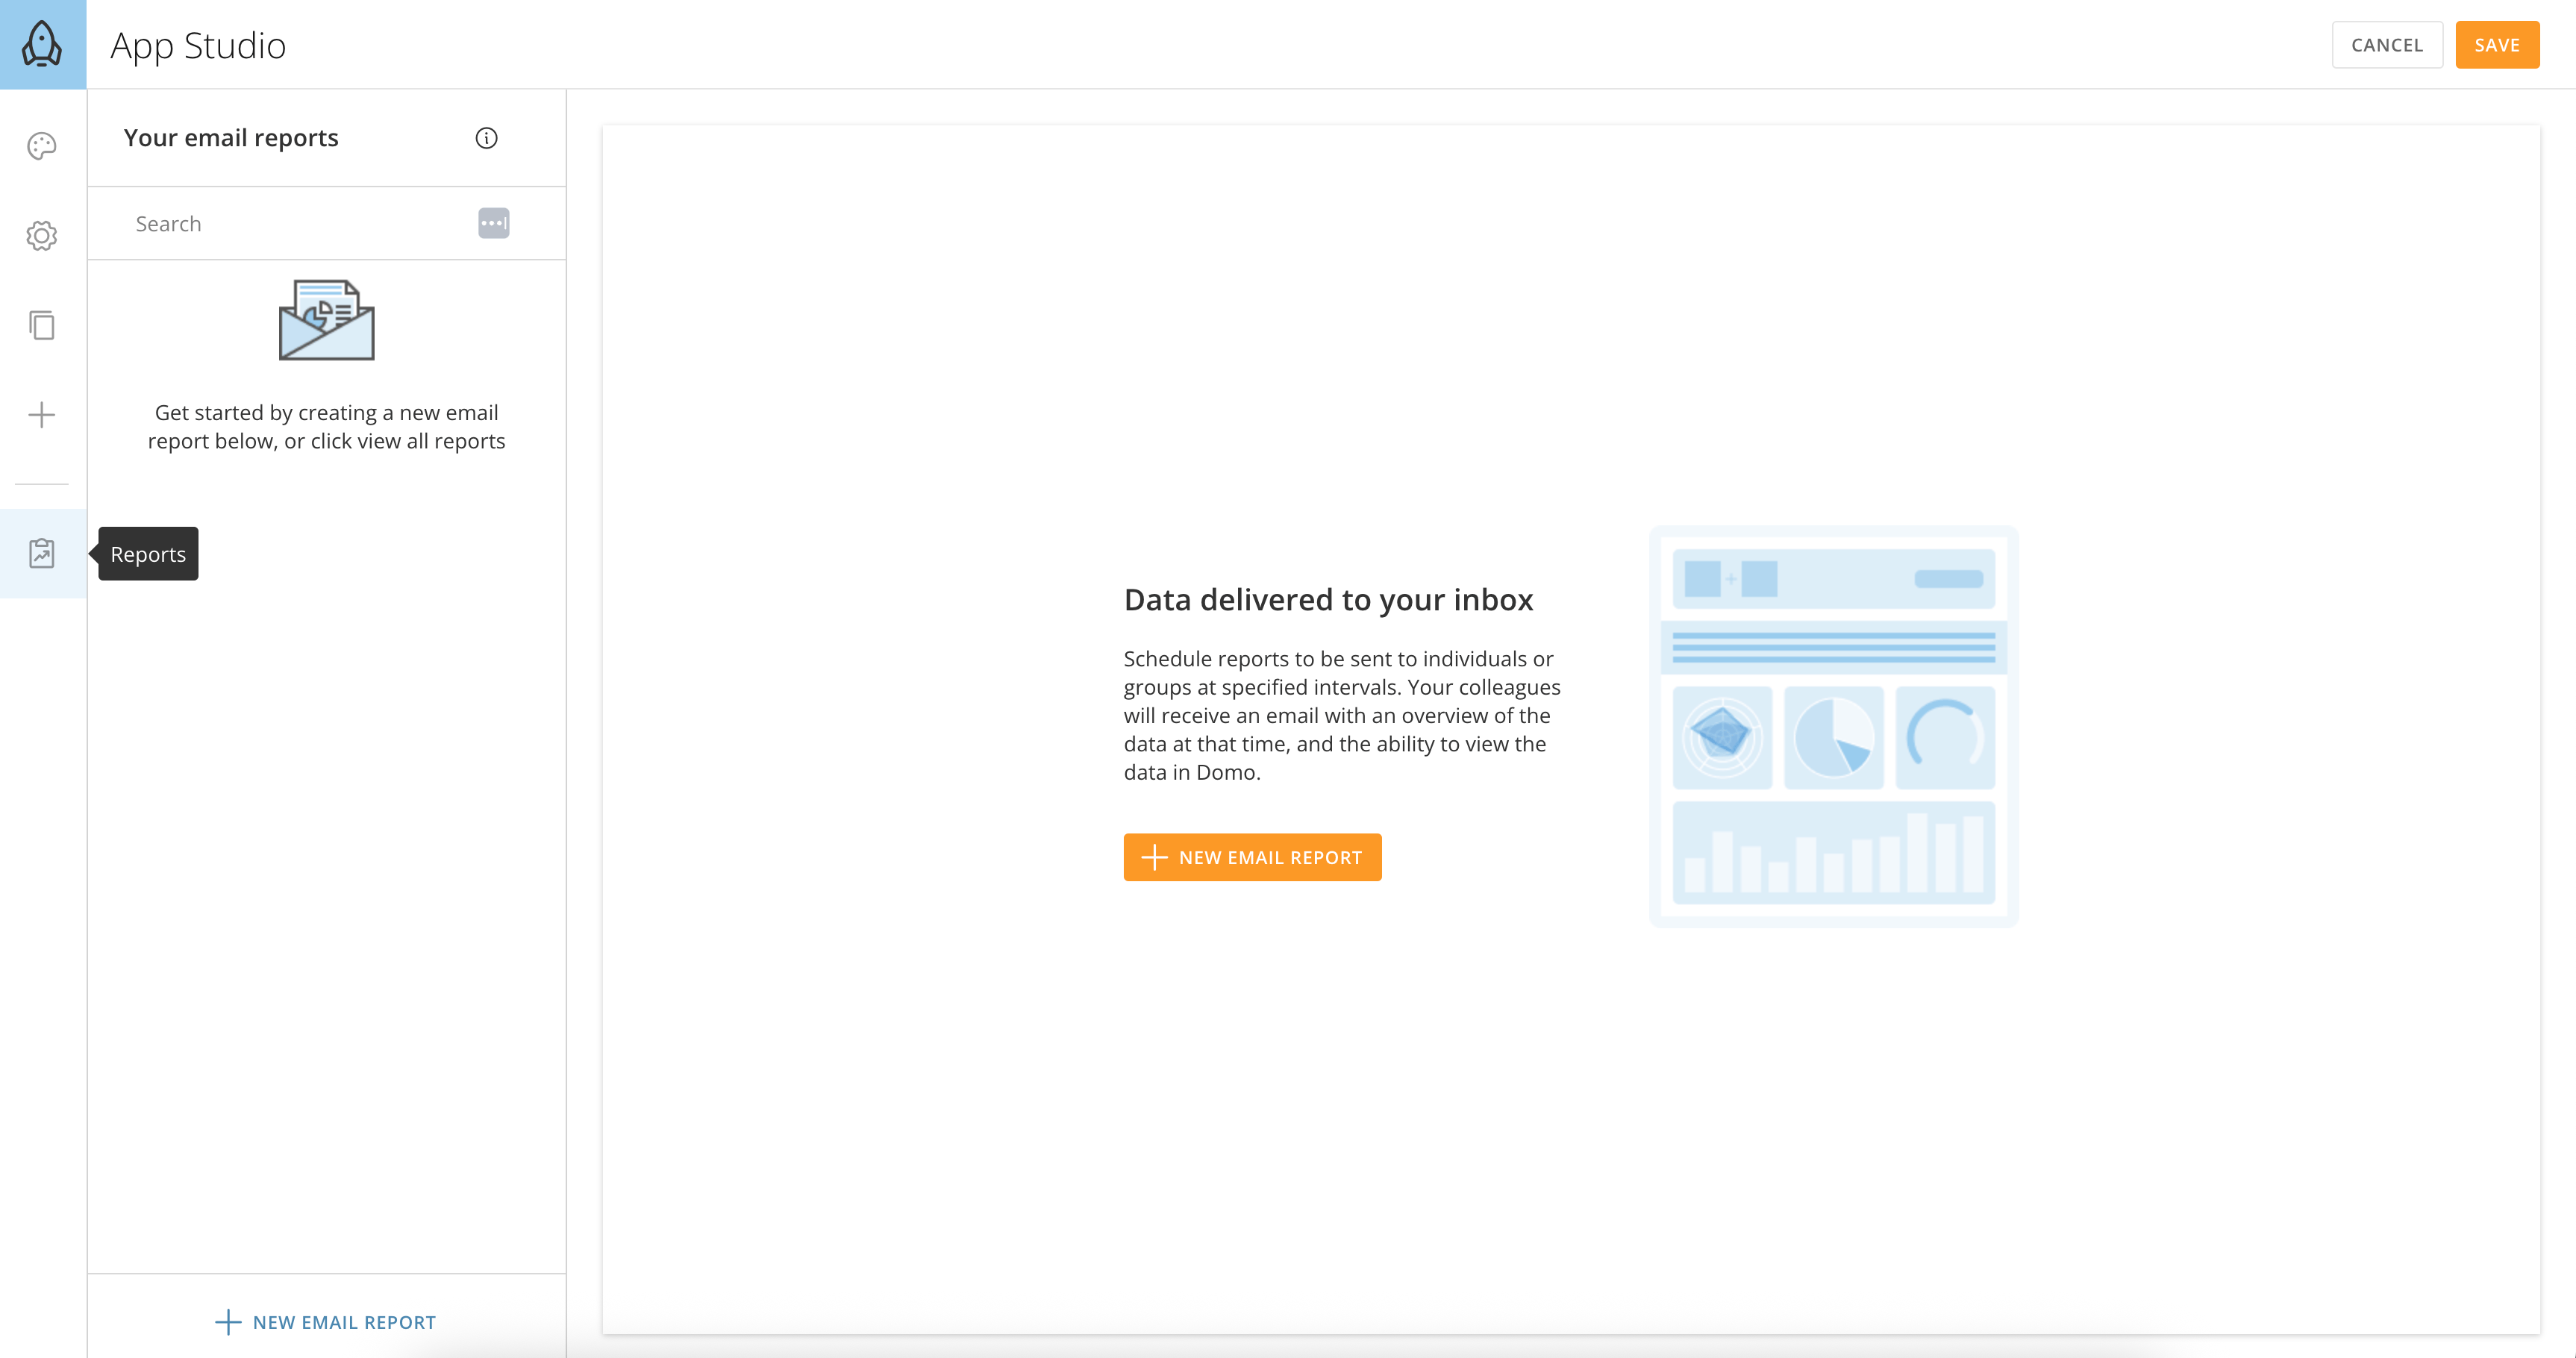
1. In App Studio, choose to create a new app or edit an existing app.
2. From the left navigation, select
**Reports**.
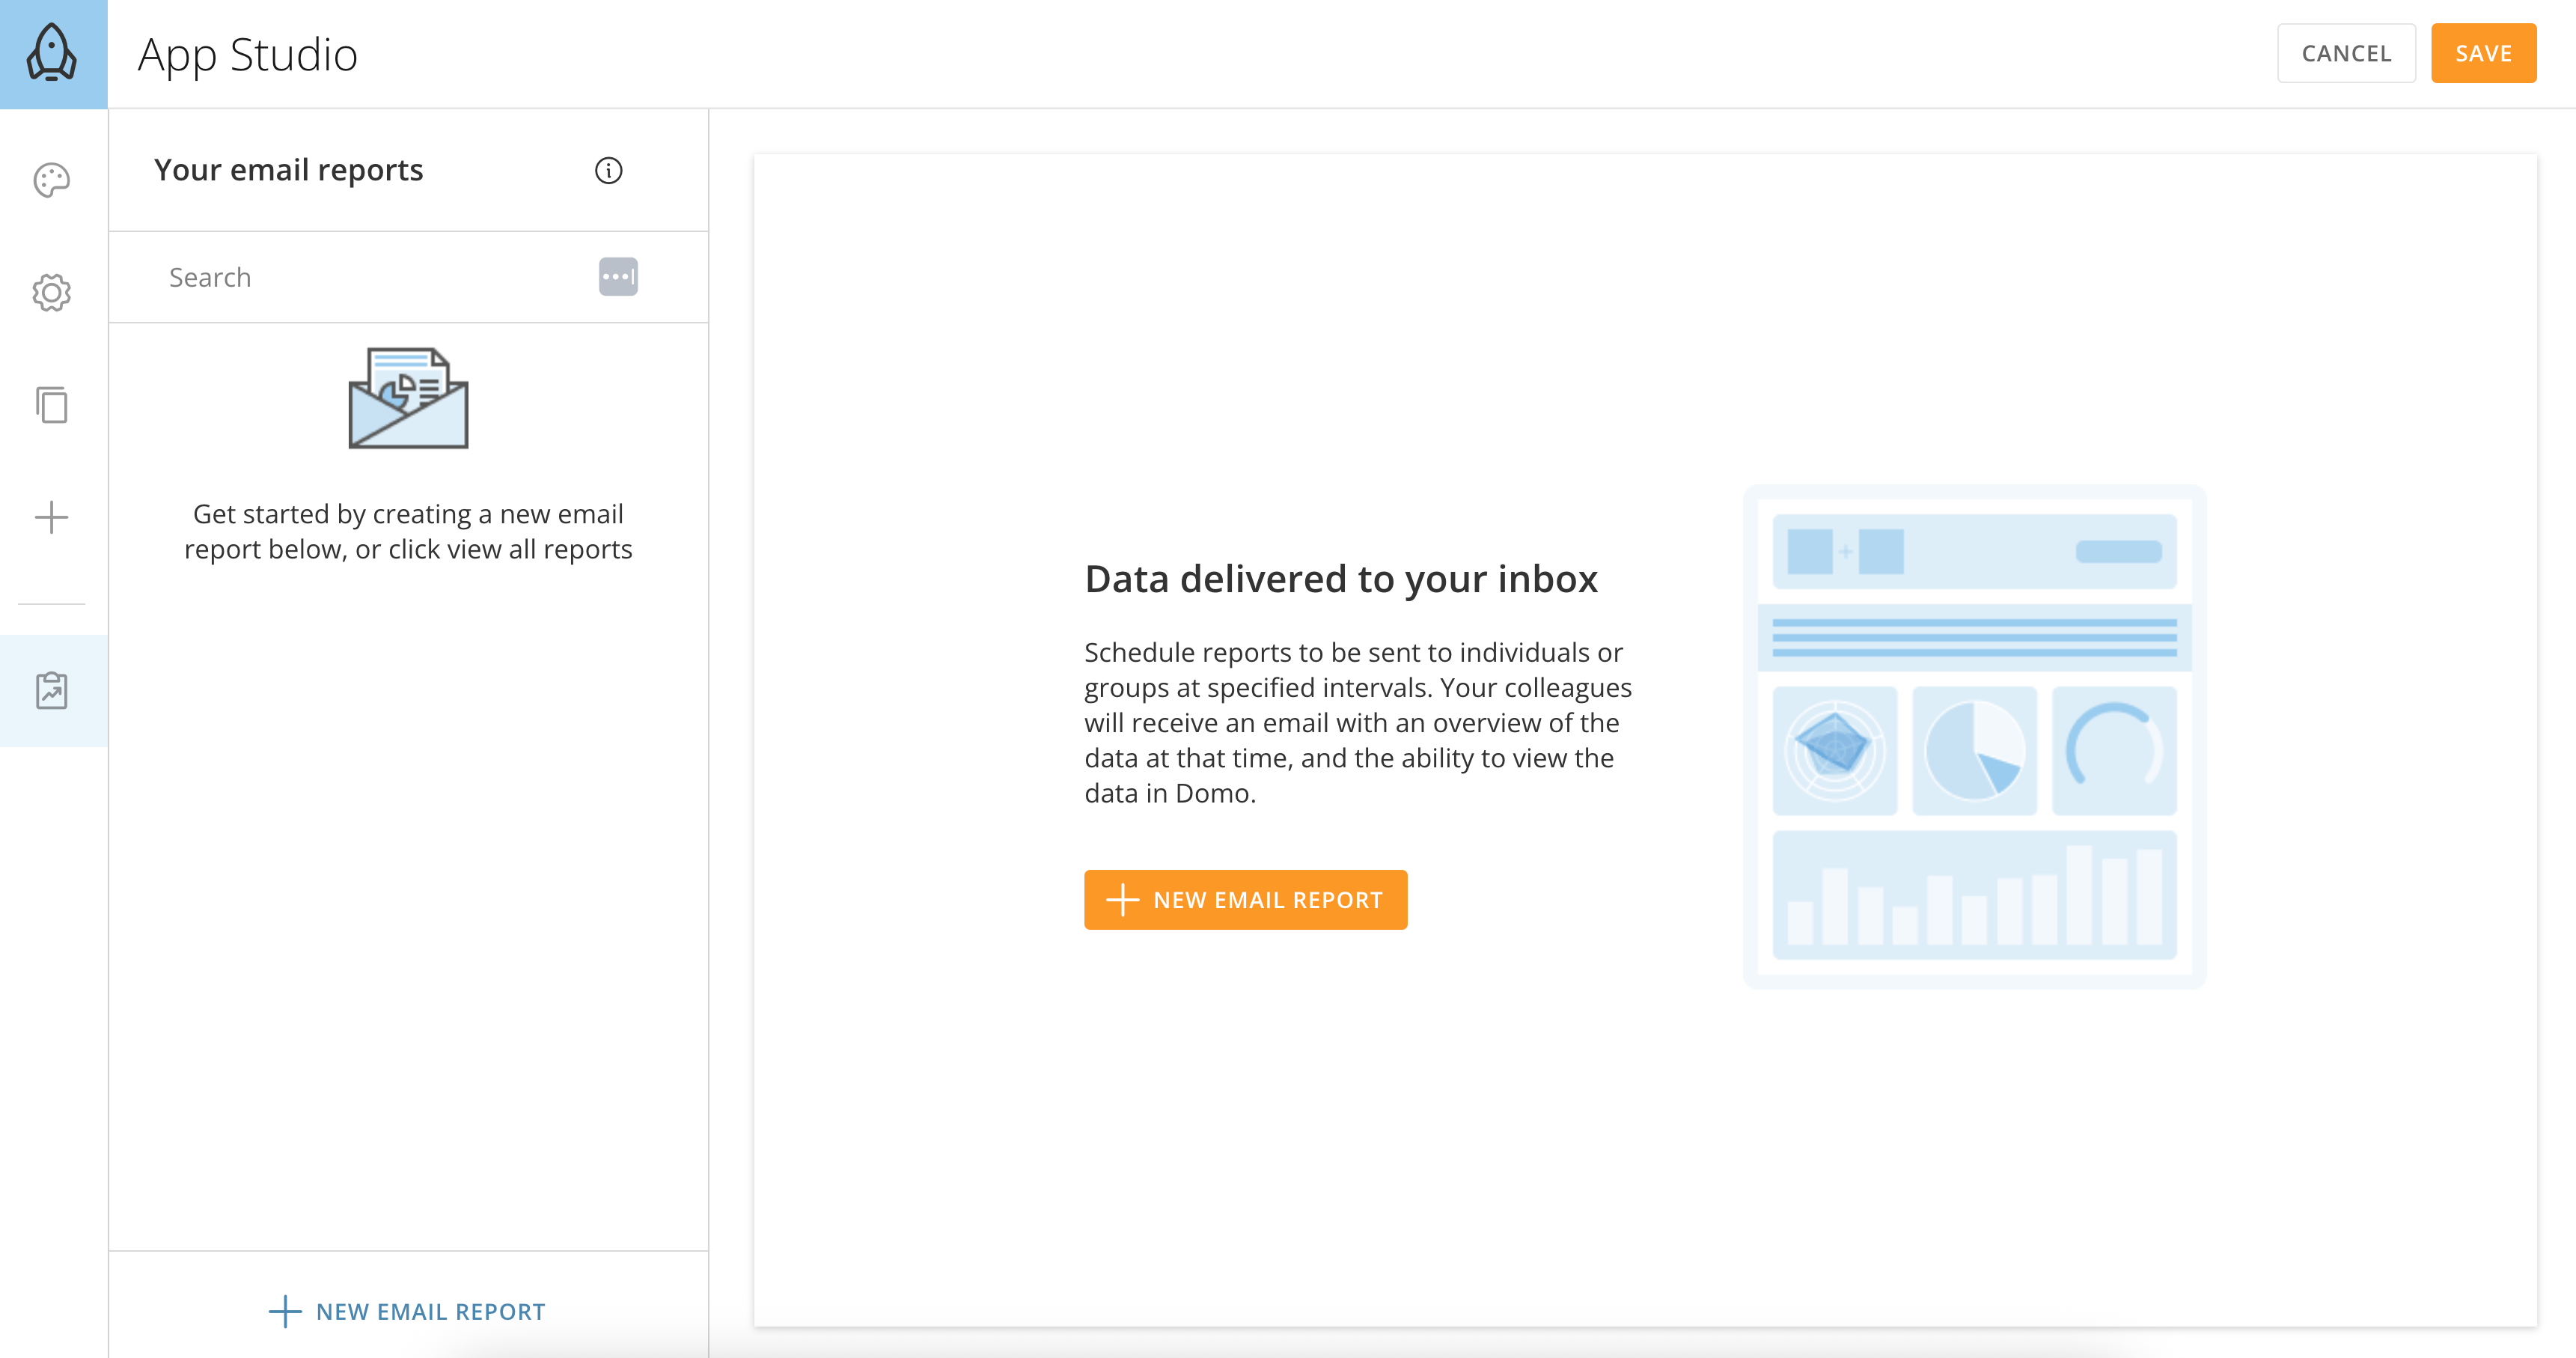
This opens Report Builder with all of your existing email reports.
;
};
### Intro
App Studio Report Builder allows you to create and automate personalized email reports from your App Studio apps.
This article covers topics like [creating a report](#create_a_report), [configuring](#configure_your_report) [a](#configure_your_report) [report](#configure_your_report), and [setting a report schedule](#schedule_your_report).
**Tip:** Learn how to [create an app](https://domo-support.domo.com/s/article/000005295?language=en_US#create_an_app) in App Studio.
***
### Required Grant
To create, edit, update, and delete reports in Report Builder, you must have the following grant enabled for your role:
* **Edit Report (Report Builder) —** Report Builder only appears as an option in App Studio if you have this grant, which is enabled for Admins and editors by default.
To learn more about grants, see [Manage User Roles and Grants](/s/article/360043438973).
### Access Report Builder
Follow the steps below to access Report Builder in App Studio.
**Don't see the Report Builder option?**
Make sure you have the [required grant](#required_grants).
1. In App Studio, choose to create a new app or edit an existing app.
2. From the left navigation, select
**Reports**.
This opens Report Builder with all of your existing email reports.
 ### Create a Report
Follow these steps to create a new report:
1. Select **New Email Report**.
### Create a Report
Follow these steps to create a new report:
1. Select **New Email Report**.
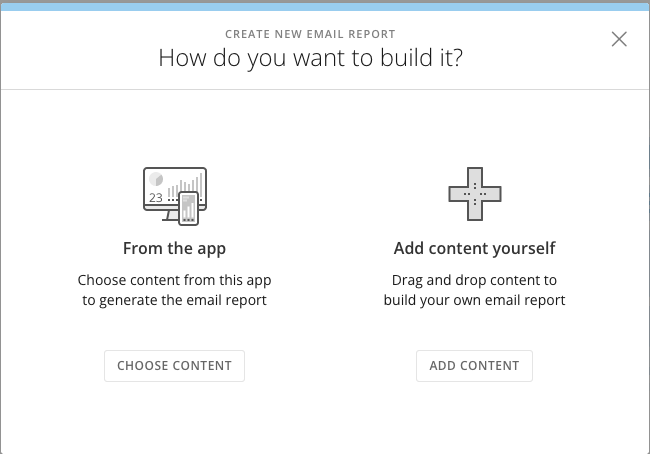
 In the modal that displays, choose to [create a report from this app](#create_report_from_app) or [add your own content](#create_report_own_content).
 # Create a Report From the App
Follow these steps to create a report from your app:
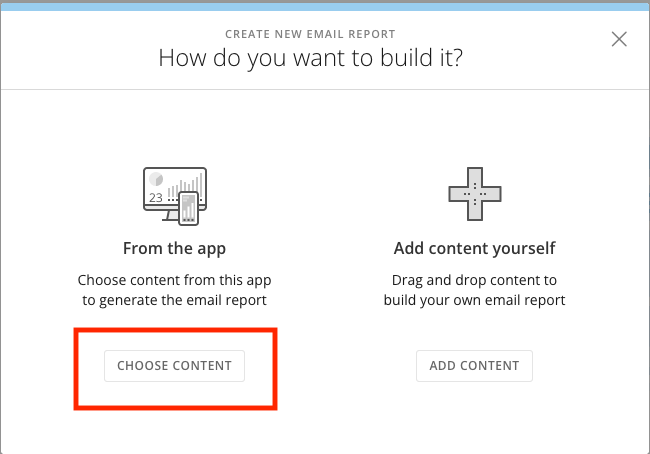
1. In the **Create New Email Report** modal, select **Choose Content**.
# Create a Report From the App
Follow these steps to create a report from your app:
1. In the **Create New Email Report** modal, select **Choose Content**.
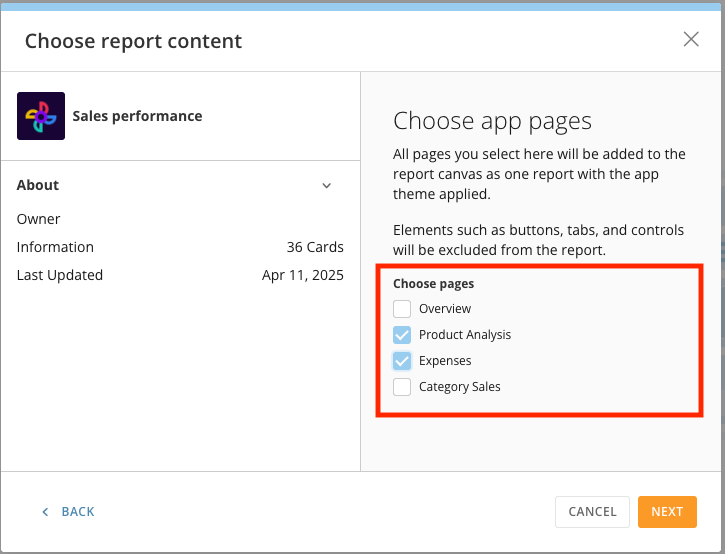
 2. Under **Choose app pages**, select the specific pages you want to include in your report, then select **Next.** **Note:** Buttons, tabs, and controls on app pages are excluded from the report.
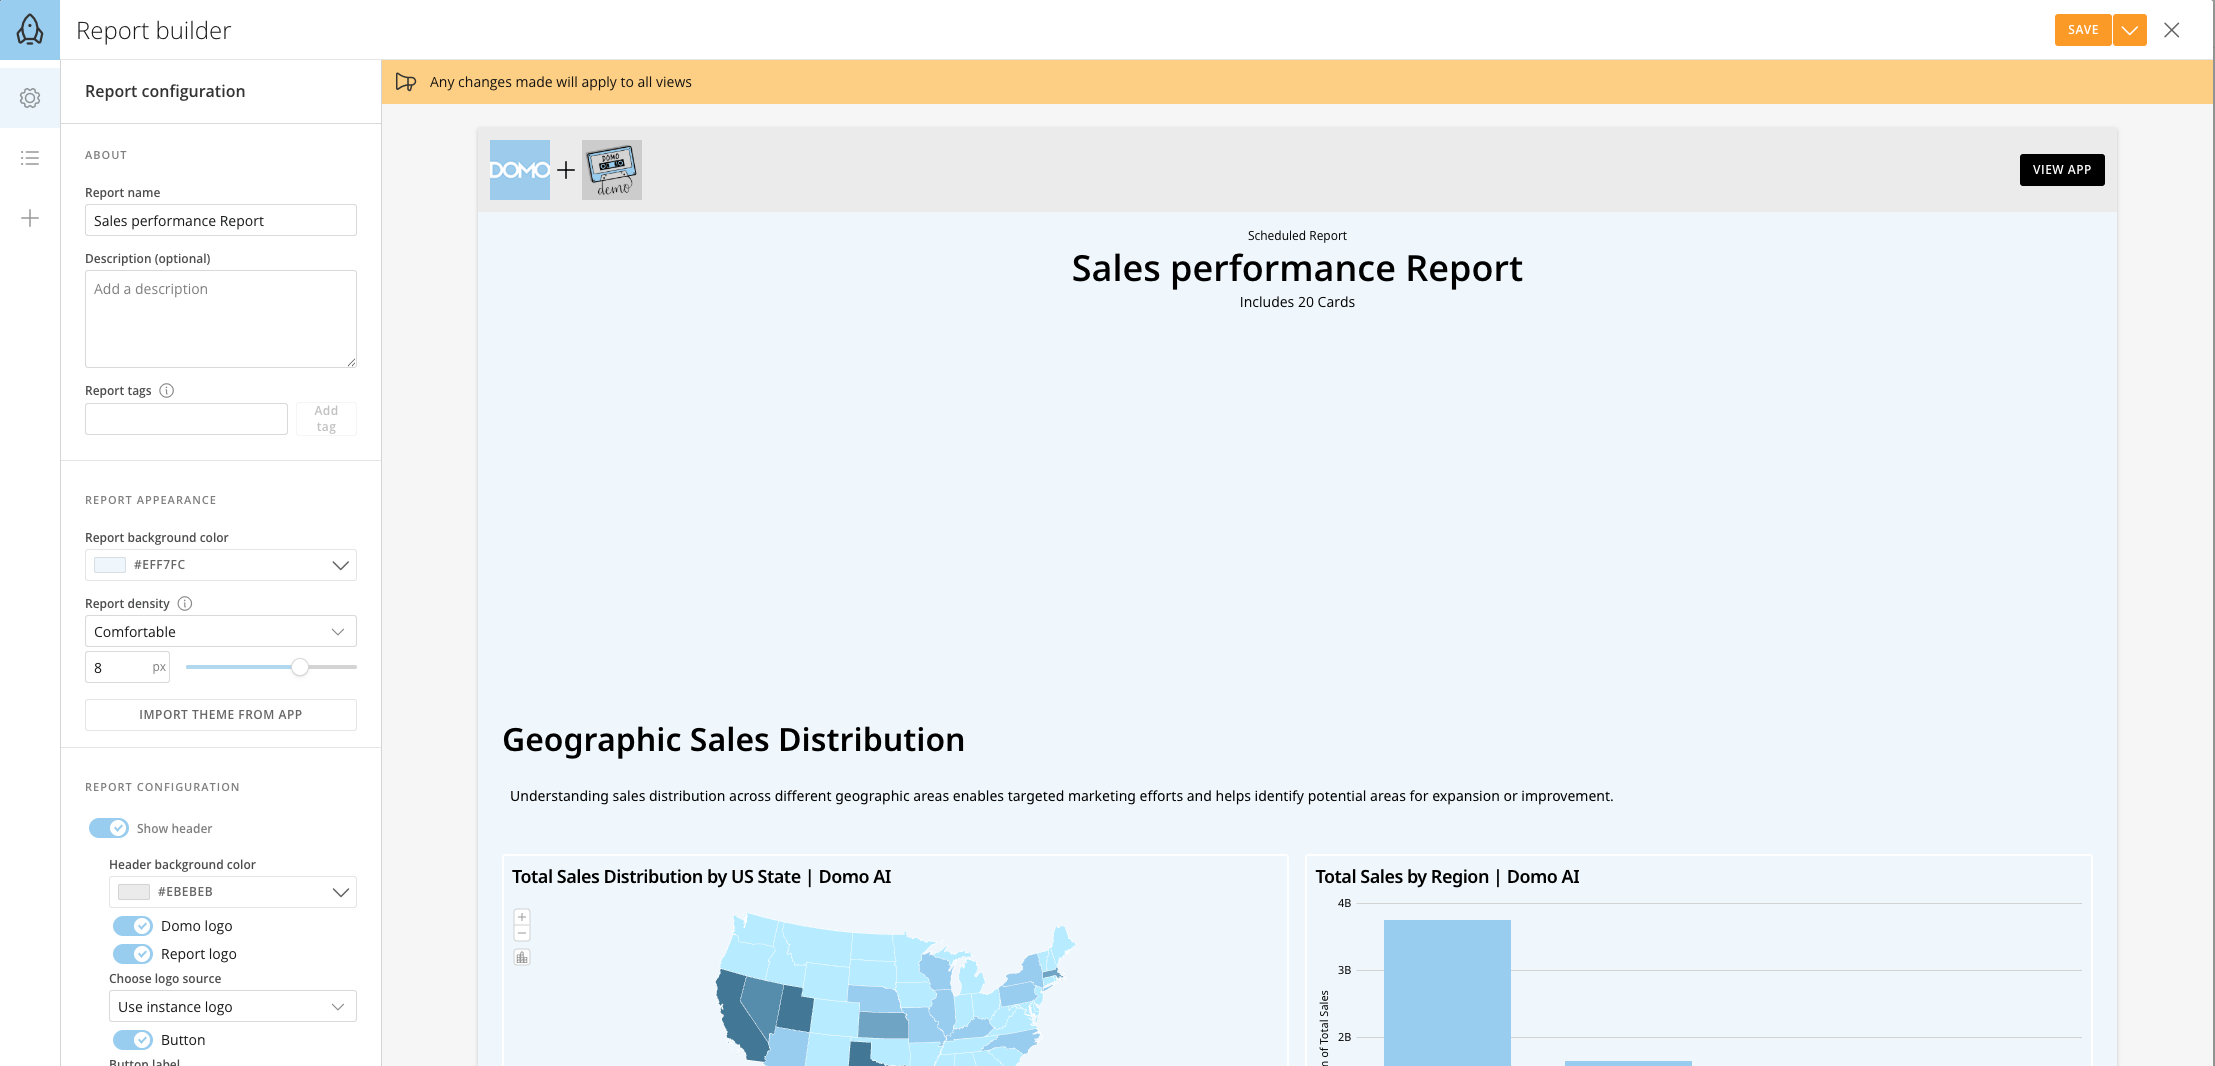
 The Report Builder interface opens and displays the pages you selected.
3. From here, configure your report. This process is described
[below](#configure_your_report).
The Report Builder interface opens and displays the pages you selected.
3. From here, configure your report. This process is described
[below](#configure_your_report).
 # Create a Report Using Your Own Content
Follow these steps to create a report using your own content:
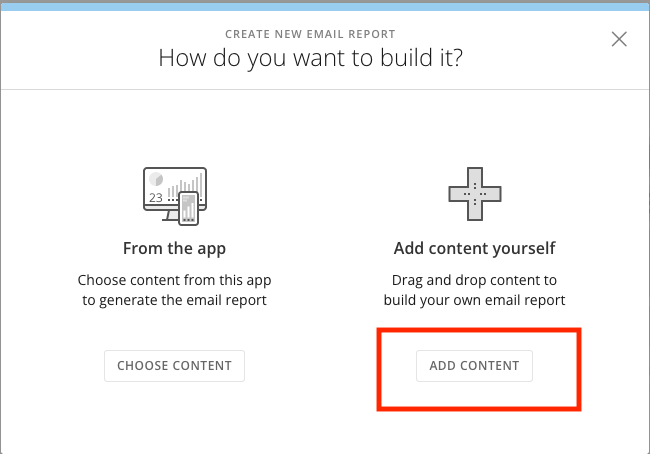
1. In the **Create New Email Report** modal, select **Add Content**.
# Create a Report Using Your Own Content
Follow these steps to create a report using your own content:
1. In the **Create New Email Report** modal, select **Add Content**.
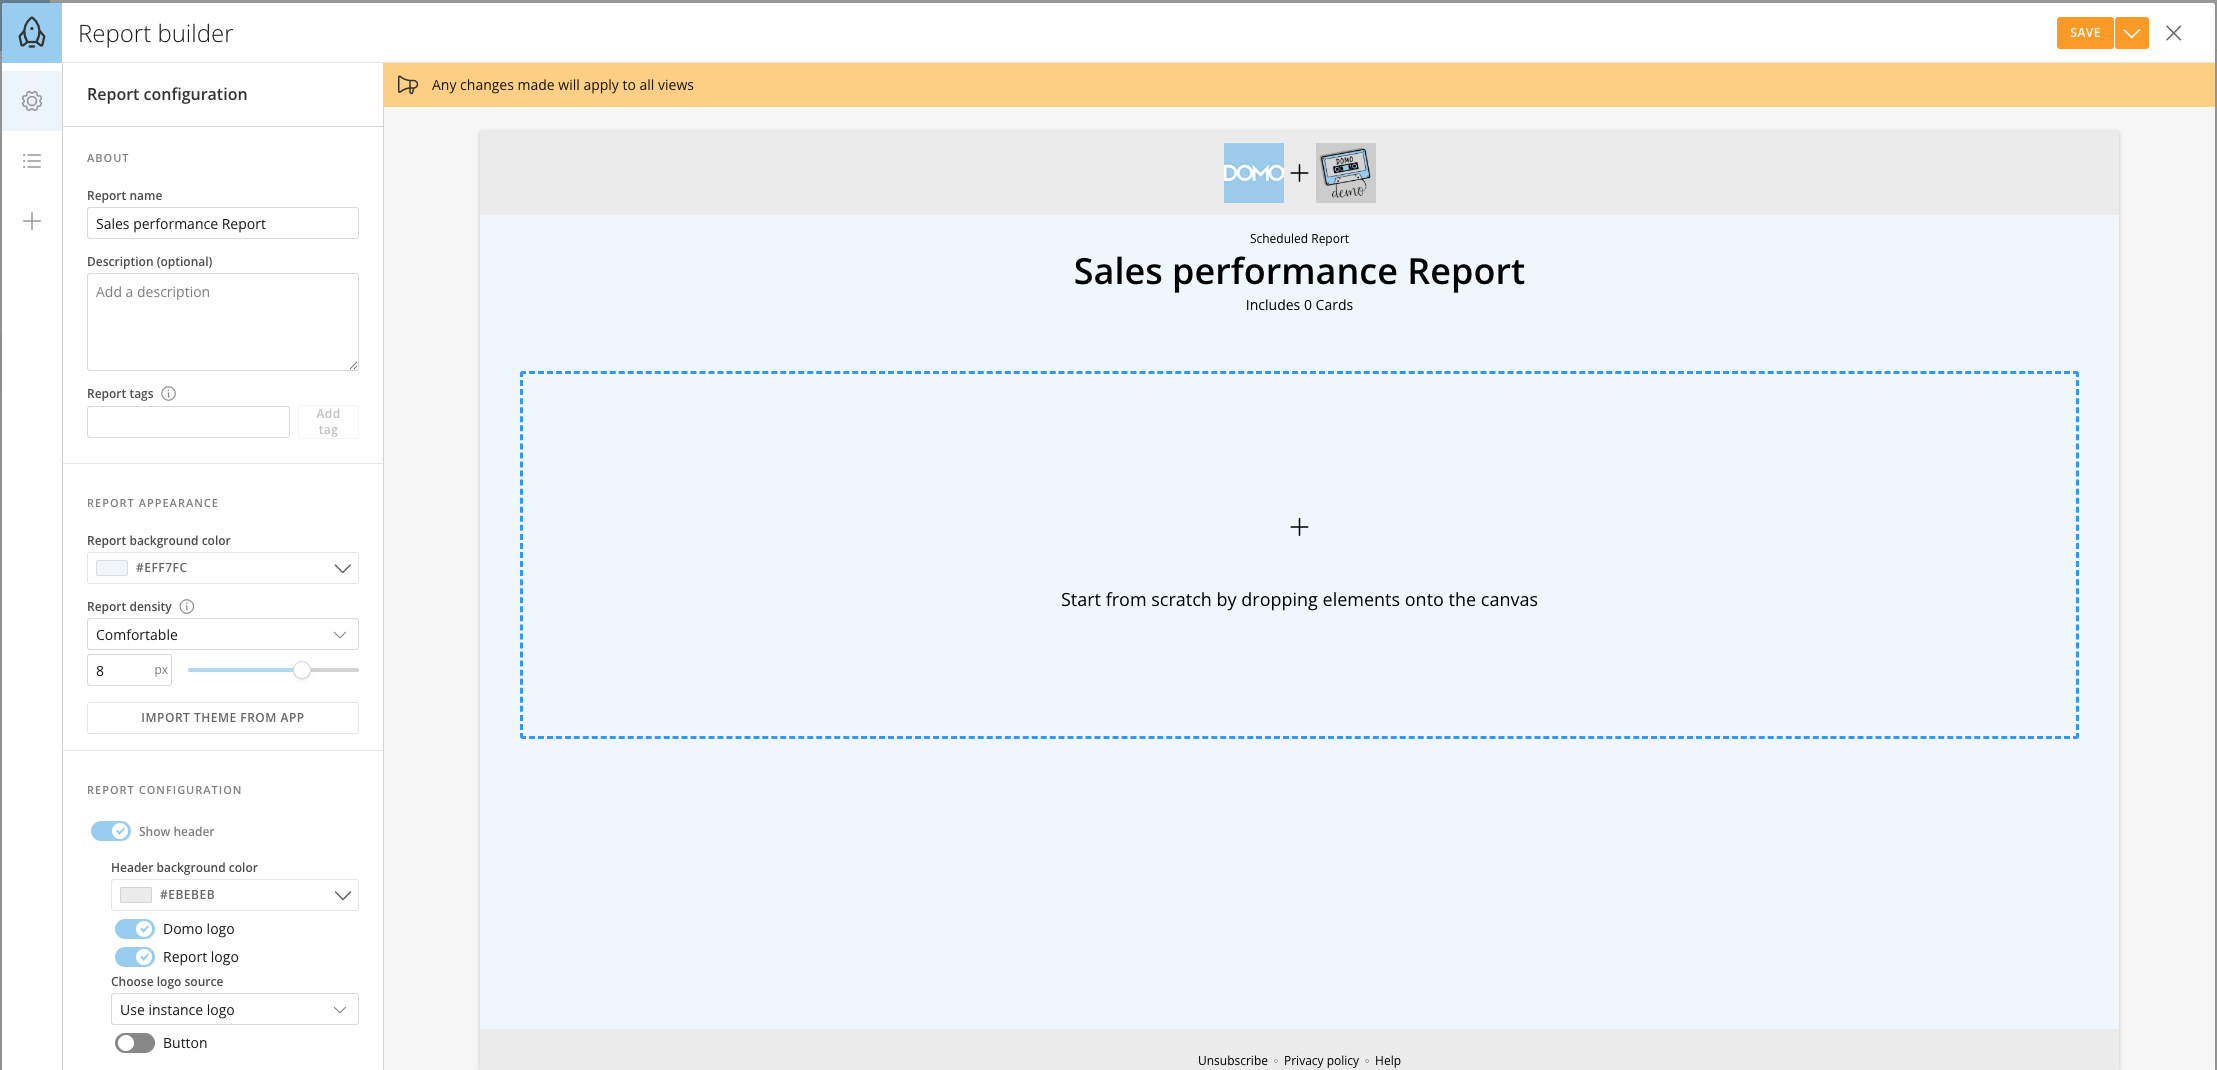
 The Report Builder interface opens.
2. From here, configure your report. This process is described
[below](#configure_your_report).
The Report Builder interface opens.
2. From here, configure your report. This process is described
[below](#configure_your_report).
 ### Configure Your Report
From the Report Builder, you can do the following:
* [Edit report name, description, and tags](#edit_name_description)
* [Design report appearance](#design_report_appearance)
* [Edit report configuration](#edit_report_configuration)
* [Add actions and elements](#add_actions_elements)
* [Delete report](#delete_report)
**Note:** Changes to the report layout or other report settings apply to all report views and their schedules.
# Edit Report Name, Description, and Tags
Under **About** in the left panel of the Report Builder, edit the report name and description and add report tags.
### Configure Your Report
From the Report Builder, you can do the following:
* [Edit report name, description, and tags](#edit_name_description)
* [Design report appearance](#design_report_appearance)
* [Edit report configuration](#edit_report_configuration)
* [Add actions and elements](#add_actions_elements)
* [Delete report](#delete_report)
**Note:** Changes to the report layout or other report settings apply to all report views and their schedules.
# Edit Report Name, Description, and Tags
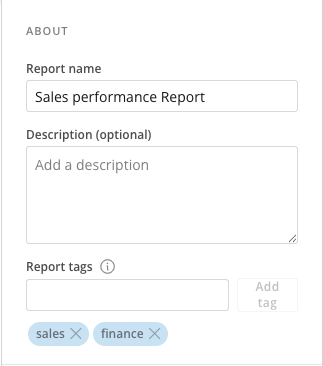
Under **About** in the left panel of the Report Builder, edit the report name and description and add report tags.
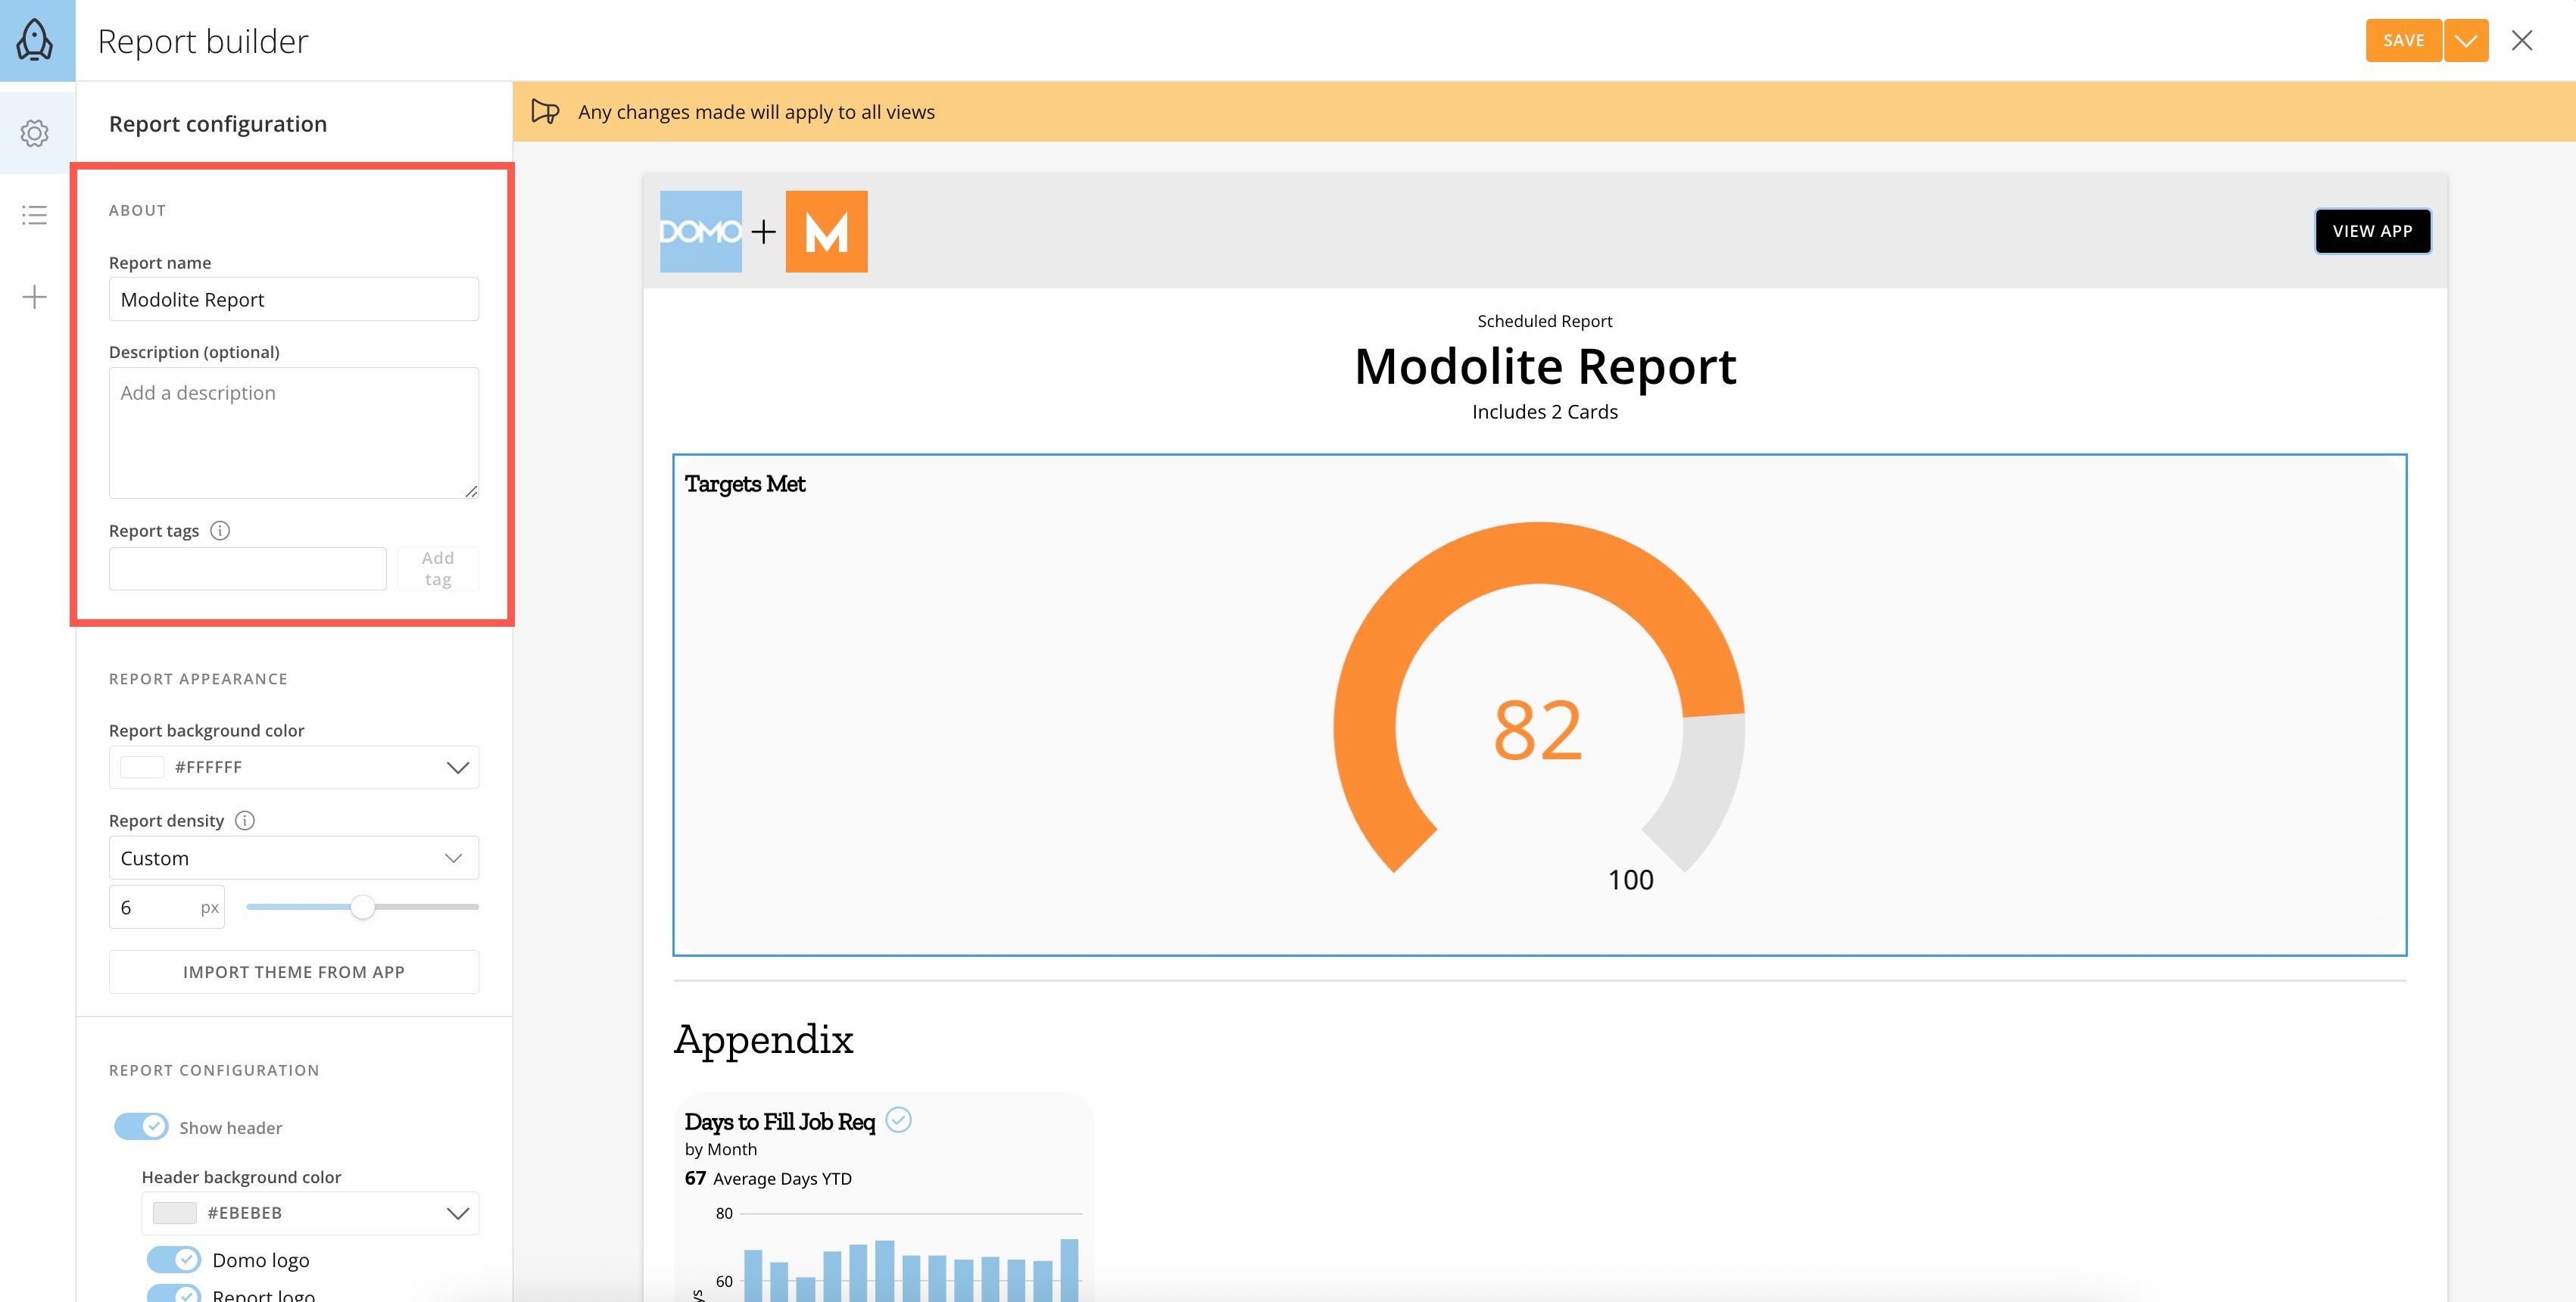 * By default, the report automatically inherits the name of your app.
* Report tags help you organize and categorize reports. Tags cannot include apostrophes, underscores, backslashes, percent signs, or emojis.
* By default, the report automatically inherits the name of your app.
* Report tags help you organize and categorize reports. Tags cannot include apostrophes, underscores, backslashes, percent signs, or emojis.
 # Design Report Appearance
Under **Report Appearance** in the left panel of the Report Builder, you can choose a report background color and the amount of density (the space around objects in the report).
# Design Report Appearance
Under **Report Appearance** in the left panel of the Report Builder, you can choose a report background color and the amount of density (the space around objects in the report).
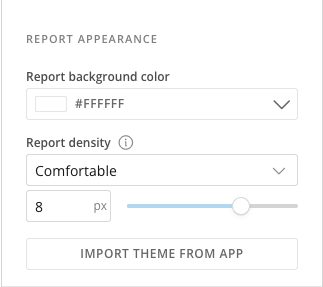 Selecting **Import Theme From App** opens the App Studio themes modal. Learn more about [App Studio themes](/s/article/000005543).
**Note:** Supported theme components include chart color palette, layout density (minor rendering differences), background colors, borders, and rounded corners (minor rendering differences). Spacing and density may vary.
Selecting **Import Theme From App** opens the App Studio themes modal. Learn more about [App Studio themes](/s/article/000005543).
**Note:** Supported theme components include chart color palette, layout density (minor rendering differences), background colors, borders, and rounded corners (minor rendering differences). Spacing and density may vary.
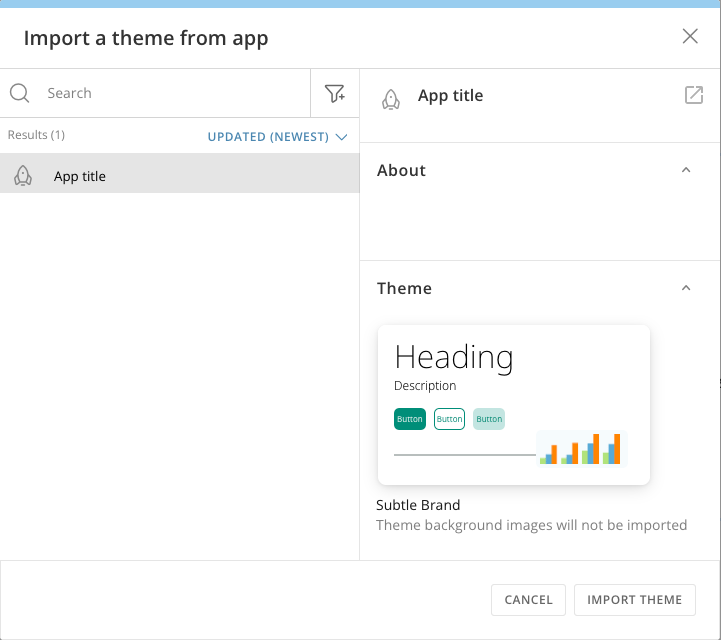 **Important:** If changes are made to the *theme* used in the report after the report is created, those changes are NOT automatically synced with the report. The report continues to use the theme as it was when the report was created. To update your report theme, use the **Import Theme From App** option to reassign the theme or choose another.
# Edit Report Configuration
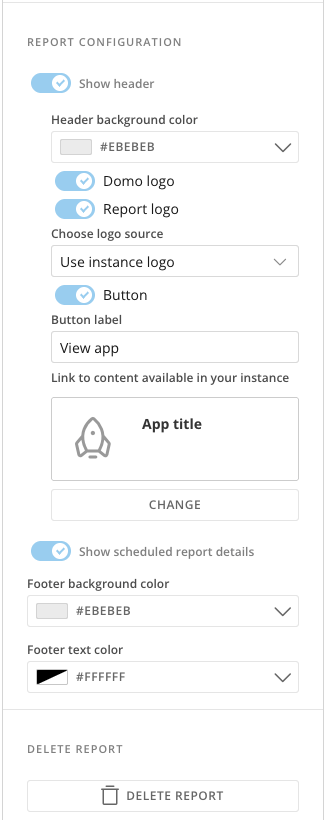
Use the **Report Configuration** section in the left panel of the Report Builder to make changes to the report header and footer, including whether to display the Domo logo and text and background colors.
When you're finished, save your changes to add the new/updated report to your list of reports.
**Important:** If changes are made to the *theme* used in the report after the report is created, those changes are NOT automatically synced with the report. The report continues to use the theme as it was when the report was created. To update your report theme, use the **Import Theme From App** option to reassign the theme or choose another.
# Edit Report Configuration
Use the **Report Configuration** section in the left panel of the Report Builder to make changes to the report header and footer, including whether to display the Domo logo and text and background colors.
When you're finished, save your changes to add the new/updated report to your list of reports.
 # Add Actions and Elements
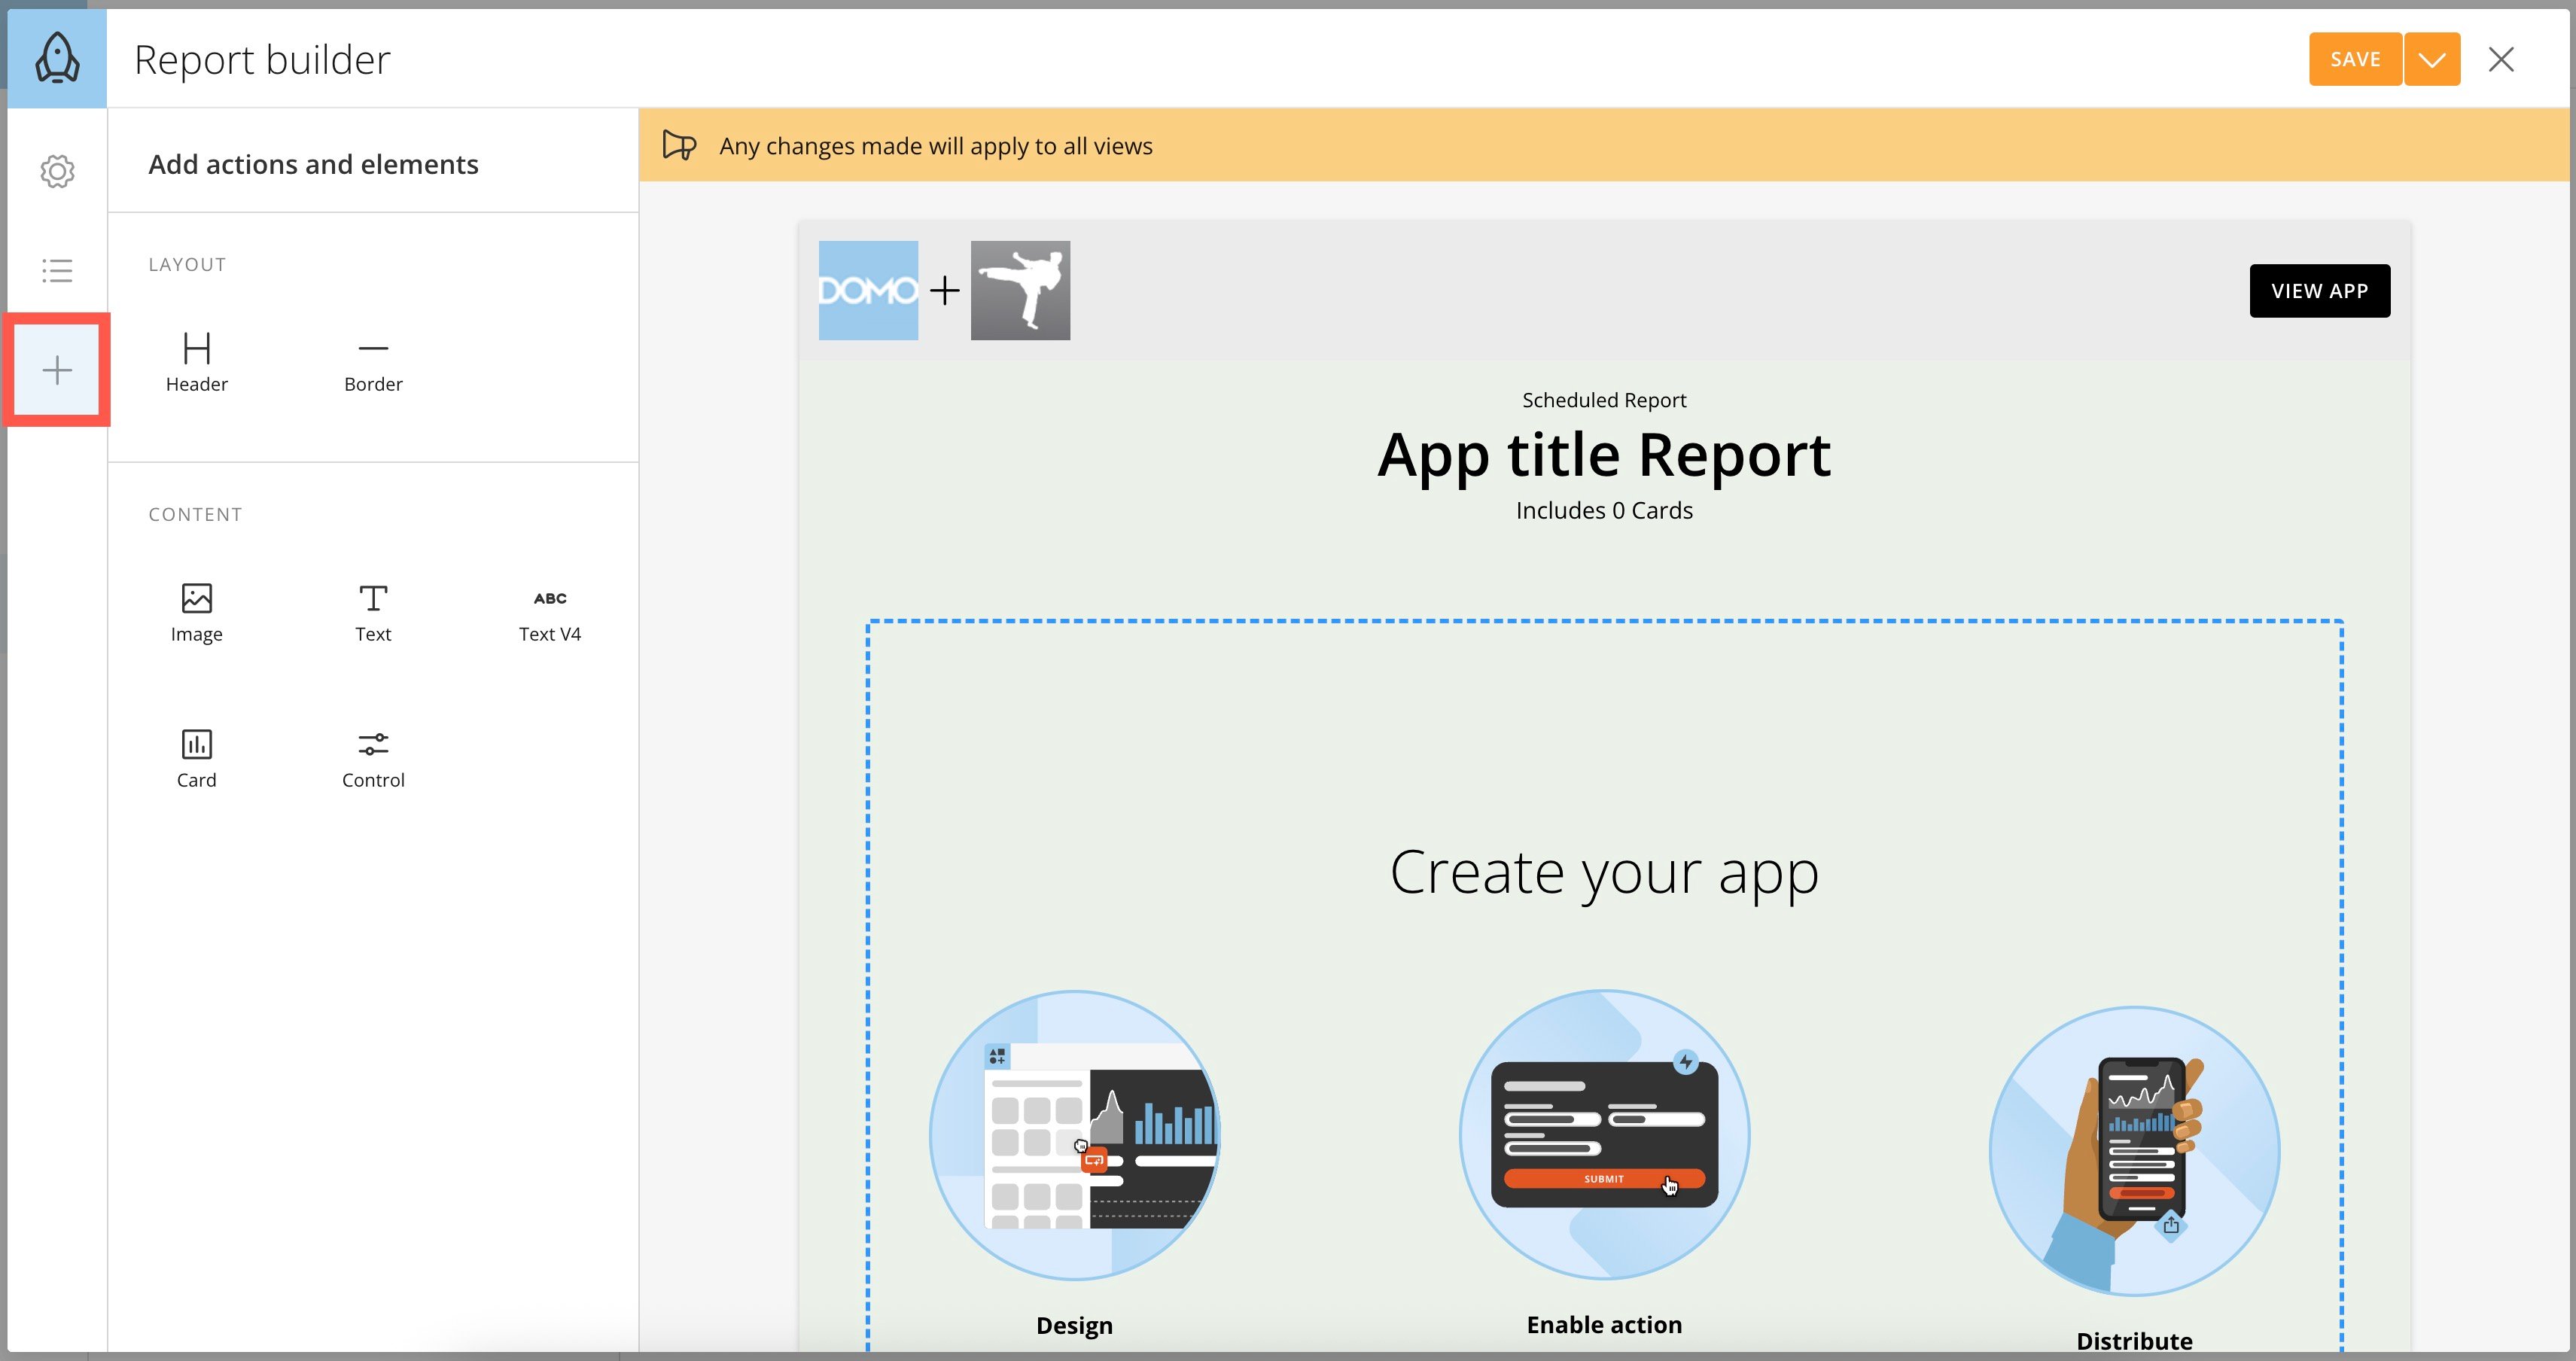
You can add the following to your reports by dragging and dropping each item onto your report in the **Add actions and elements** section of the Report Builder:
* Headers
* Borders
* Images
* Text
* Cards
* Controls
These function as they do throughout App Studio. [Learn more](https://domo-support.domo.com/s/article/000005295?language=en_US#add_actions_and_elements) about how these items work.
# Add Actions and Elements
You can add the following to your reports by dragging and dropping each item onto your report in the **Add actions and elements** section of the Report Builder:
* Headers
* Borders
* Images
* Text
* Cards
* Controls
These function as they do throughout App Studio. [Learn more](https://domo-support.domo.com/s/article/000005295?language=en_US#add_actions_and_elements) about how these items work.
 # Delete Report
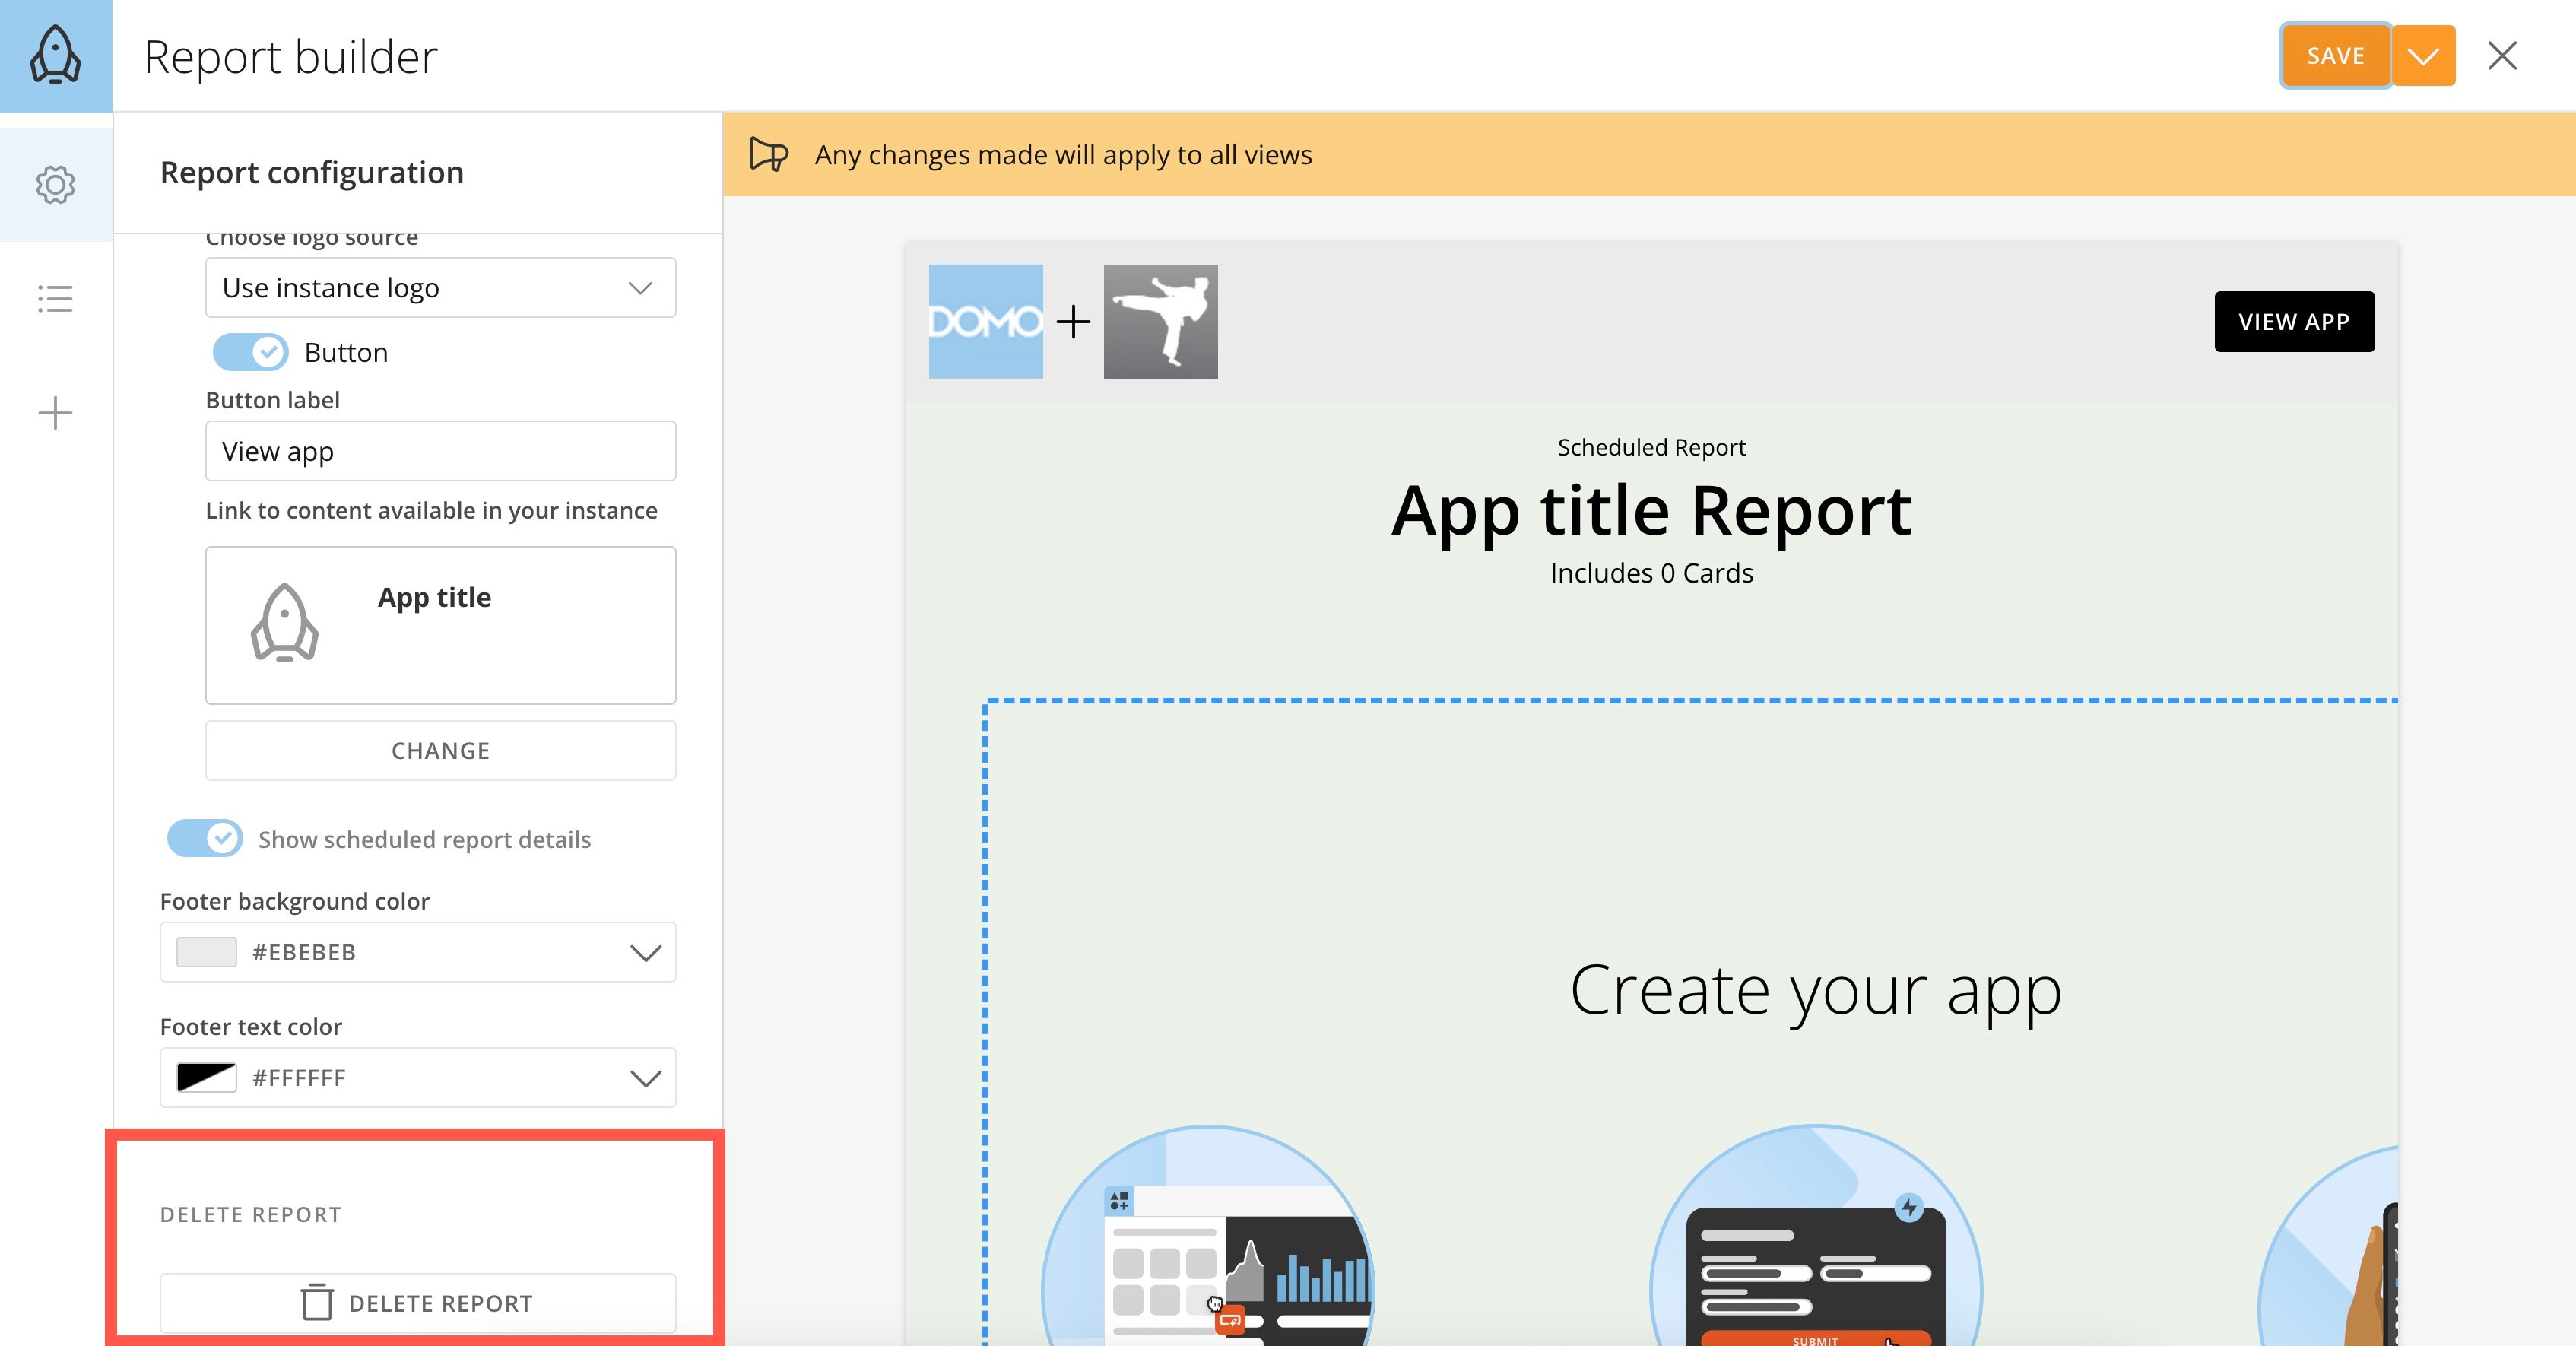
Under **Delete Report** in the left panel of the Report Builder, you can delete your report. This action cannot be undone.
# Delete Report
Under **Delete Report** in the left panel of the Report Builder, you can delete your report. This action cannot be undone.
 ### Create Report Views
To help your report viewers see the content most appropriate for them, you can choose filters and variables for each report in the **Report Views** section of Report Builder. There is no limit on the number of report views you can create.
**Note:** Changes to the report configuration or other report settings apply to all report views and their schedules.
### Create Report Views
To help your report viewers see the content most appropriate for them, you can choose filters and variables for each report in the **Report Views** section of Report Builder. There is no limit on the number of report views you can create.
**Note:** Changes to the report configuration or other report settings apply to all report views and their schedules.
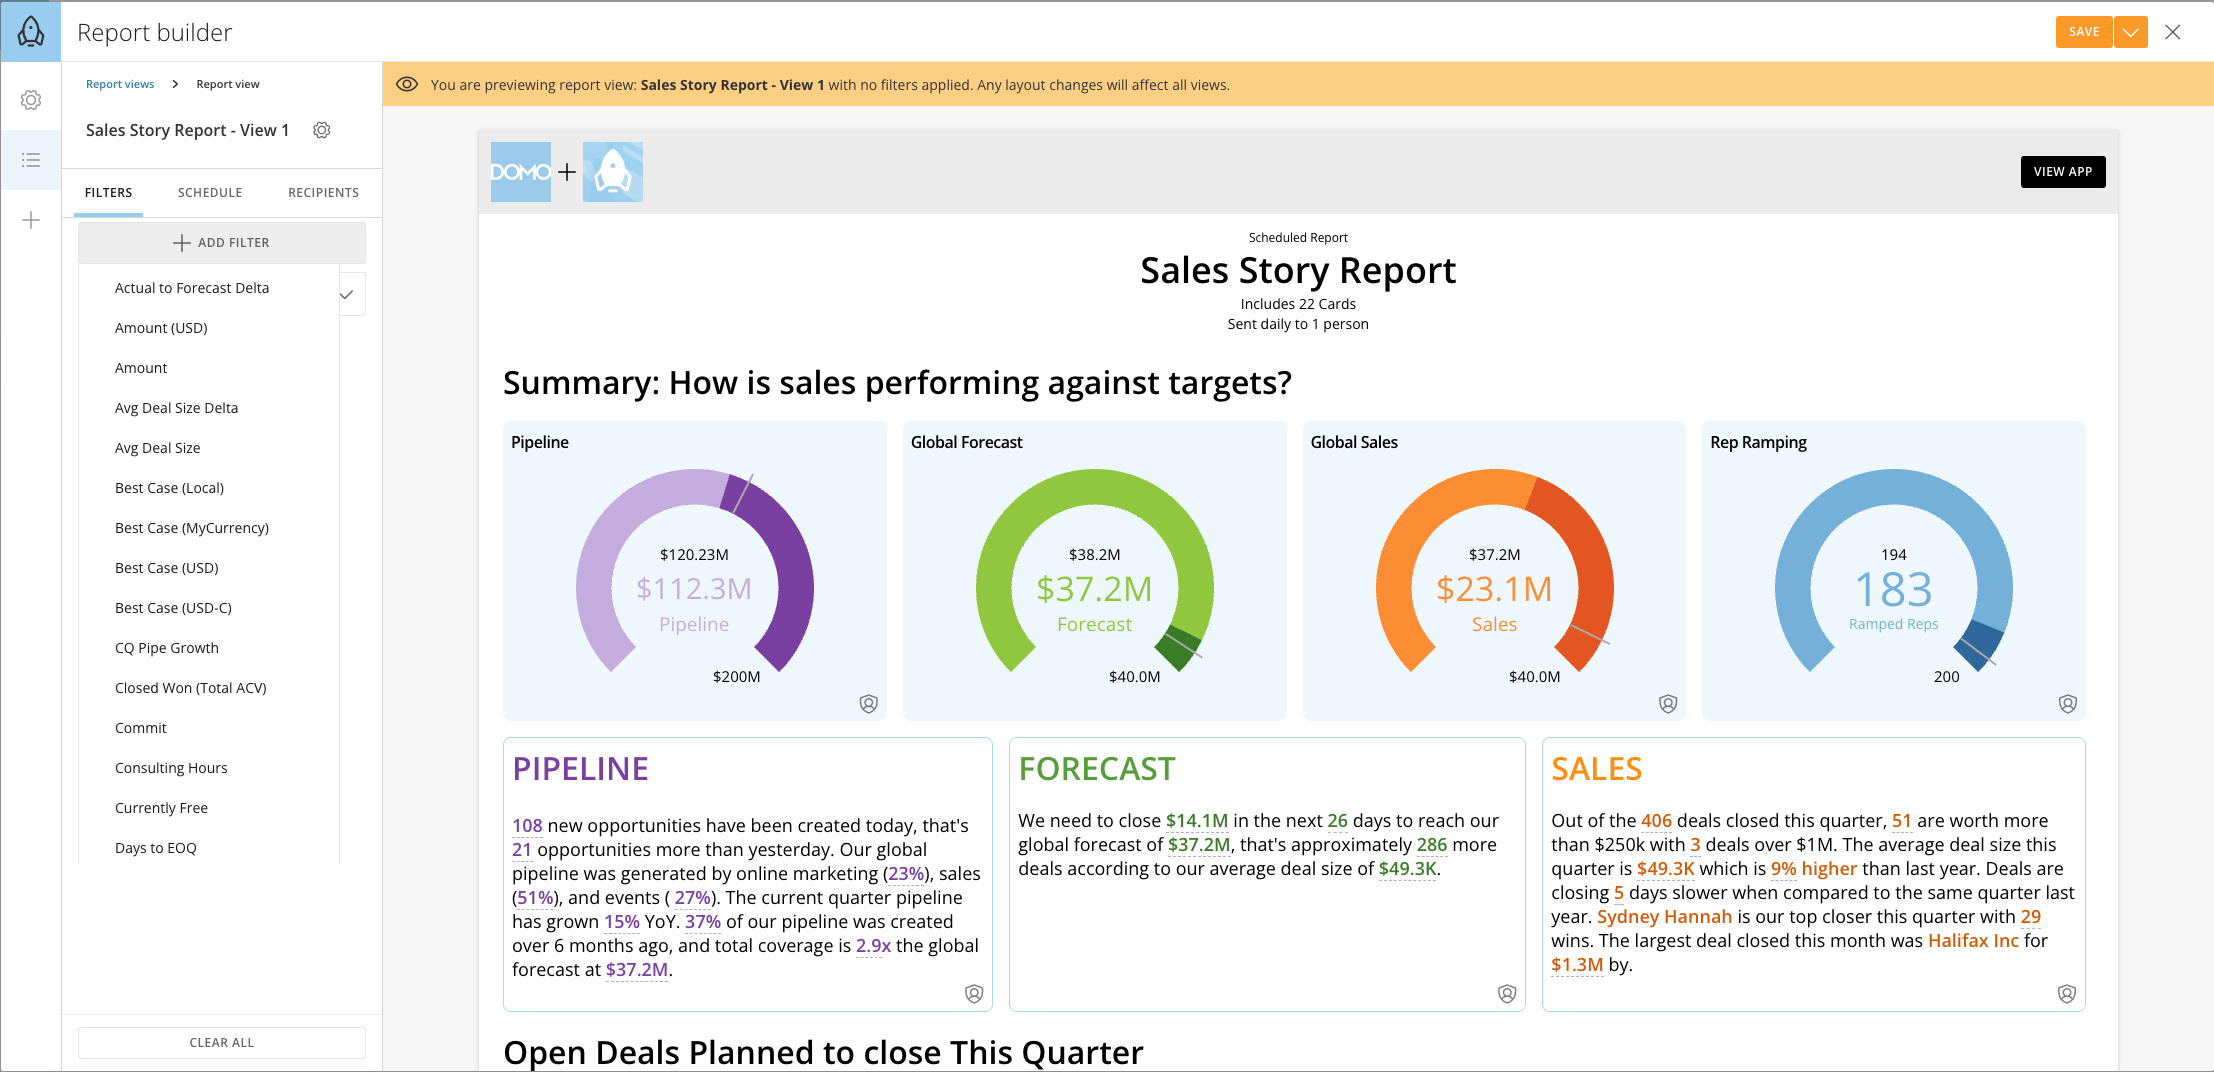 To create a new report view, select **+ New Report View**.
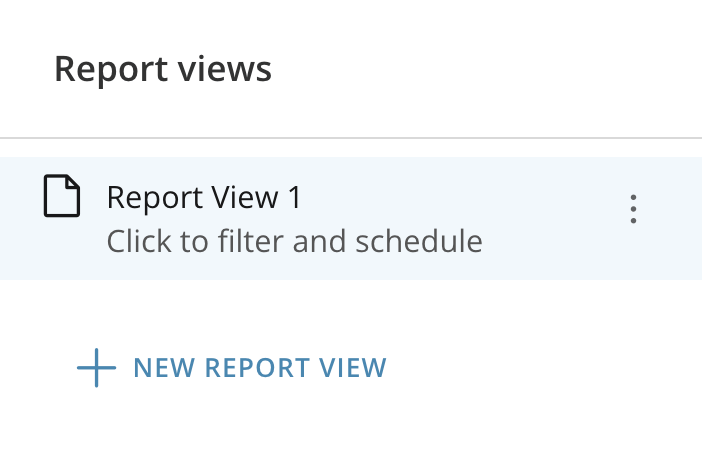 In the Report View editor, you can [add filters](#add_filters), [schedule delivery](#schedule_your_report) for the report view, and [choose recipients](#add_report_recipients) for the report view. These tasks are described below.
# Add Filters
Under ** Report Views** > **Filters** (tab), add filters to your report using the data in your app report and date range filters.
In the Report View editor, you can [add filters](#add_filters), [schedule delivery](#schedule_your_report) for the report view, and [choose recipients](#add_report_recipients) for the report view. These tasks are described below.
# Add Filters
Under ** Report Views** > **Filters** (tab), add filters to your report using the data in your app report and date range filters.
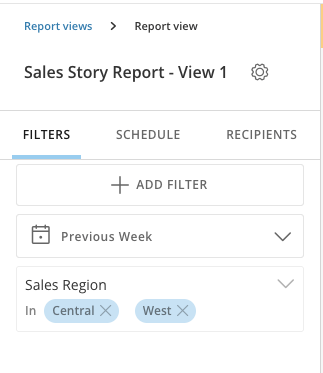 **Note:** Filters are not a substitute for PDP (Personalized Data Permissions). Filters help customize views, but do not enforce data security. Use PDP as you would for other scheduled reports.
# Schedule Your Report
After configuring your report and adding any filters to a particular report view, you can schedule your report view and begin distributing it to others. Under ** Report Views** > **Schedule** (tab), you can choose when that report view should be emailed to recipients.
Use the fields to give your report email a subject, choose the frequency for report delivery (daily, weekly, or monthly), and a start and end date.
**Note:** Filters are not a substitute for PDP (Personalized Data Permissions). Filters help customize views, but do not enforce data security. Use PDP as you would for other scheduled reports.
# Schedule Your Report
After configuring your report and adding any filters to a particular report view, you can schedule your report view and begin distributing it to others. Under ** Report Views** > **Schedule** (tab), you can choose when that report view should be emailed to recipients.
Use the fields to give your report email a subject, choose the frequency for report delivery (daily, weekly, or monthly), and a start and end date.
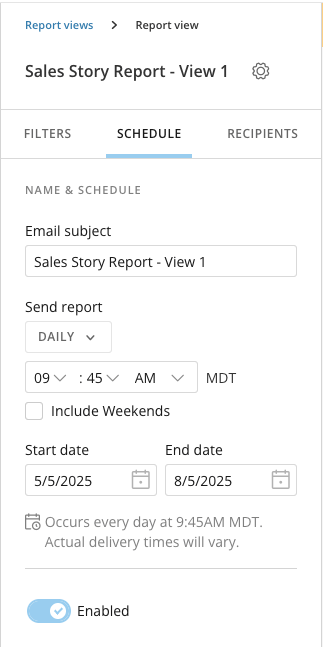 **Enable schedule:** You must enable your configured report schedule by toggling the **Enabled** button on. If you do not enable the report, it will not be sent as scheduled.
# Add Report Recipients
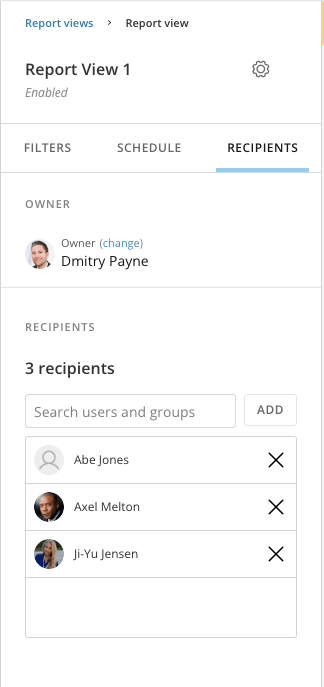
Under ** Report Views** > **Recipients** (tab), you can choose who should receive it. Recipients receive the report by email.
You can also choose who owns the report view.
**Enable schedule:** You must enable your configured report schedule by toggling the **Enabled** button on. If you do not enable the report, it will not be sent as scheduled.
# Add Report Recipients
Under ** Report Views** > **Recipients** (tab), you can choose who should receive it. Recipients receive the report by email.
You can also choose who owns the report view.
 ### FAQ
Yes, you can add cards and content that you own or have access to, even if they are located outside of the current app you are editing. [Add a card element](#add_actions_elements) to your report and choose a card from another app.
**Note:** All reports are tied to the app where they are created and appear under the "Your email reports" tab in that app.
App buttons do not carry over into Report Builder. However, you can add a custom button in the report header that links to outside content, including the original app, dashboards, and cards. Learn how to configure this button [above](#edit_report_configuration).
Tabs from your app are stacked vertically in the report.
No, charts and tables are static in reports. However, you can add a button that links users to interactive content. Learn how to configure this button [above](#edit_report_configuration).
Yes, reports display table snapshots similar to the existing scheduled reports functionality. Learn more about scheduled reports.
Dark mode may alter background and header colors in email, but it won't affect your charts or data visuals.
### FAQ
Yes, you can add cards and content that you own or have access to, even if they are located outside of the current app you are editing. [Add a card element](#add_actions_elements) to your report and choose a card from another app.
**Note:** All reports are tied to the app where they are created and appear under the "Your email reports" tab in that app.
App buttons do not carry over into Report Builder. However, you can add a custom button in the report header that links to outside content, including the original app, dashboards, and cards. Learn how to configure this button [above](#edit_report_configuration).
Tabs from your app are stacked vertically in the report.
No, charts and tables are static in reports. However, you can add a button that links users to interactive content. Learn how to configure this button [above](#edit_report_configuration).
Yes, reports display table snapshots similar to the existing scheduled reports functionality. Learn more about scheduled reports.
Dark mode may alter background and header colors in email, but it won't affect your charts or data visuals.