 ### Groups Home
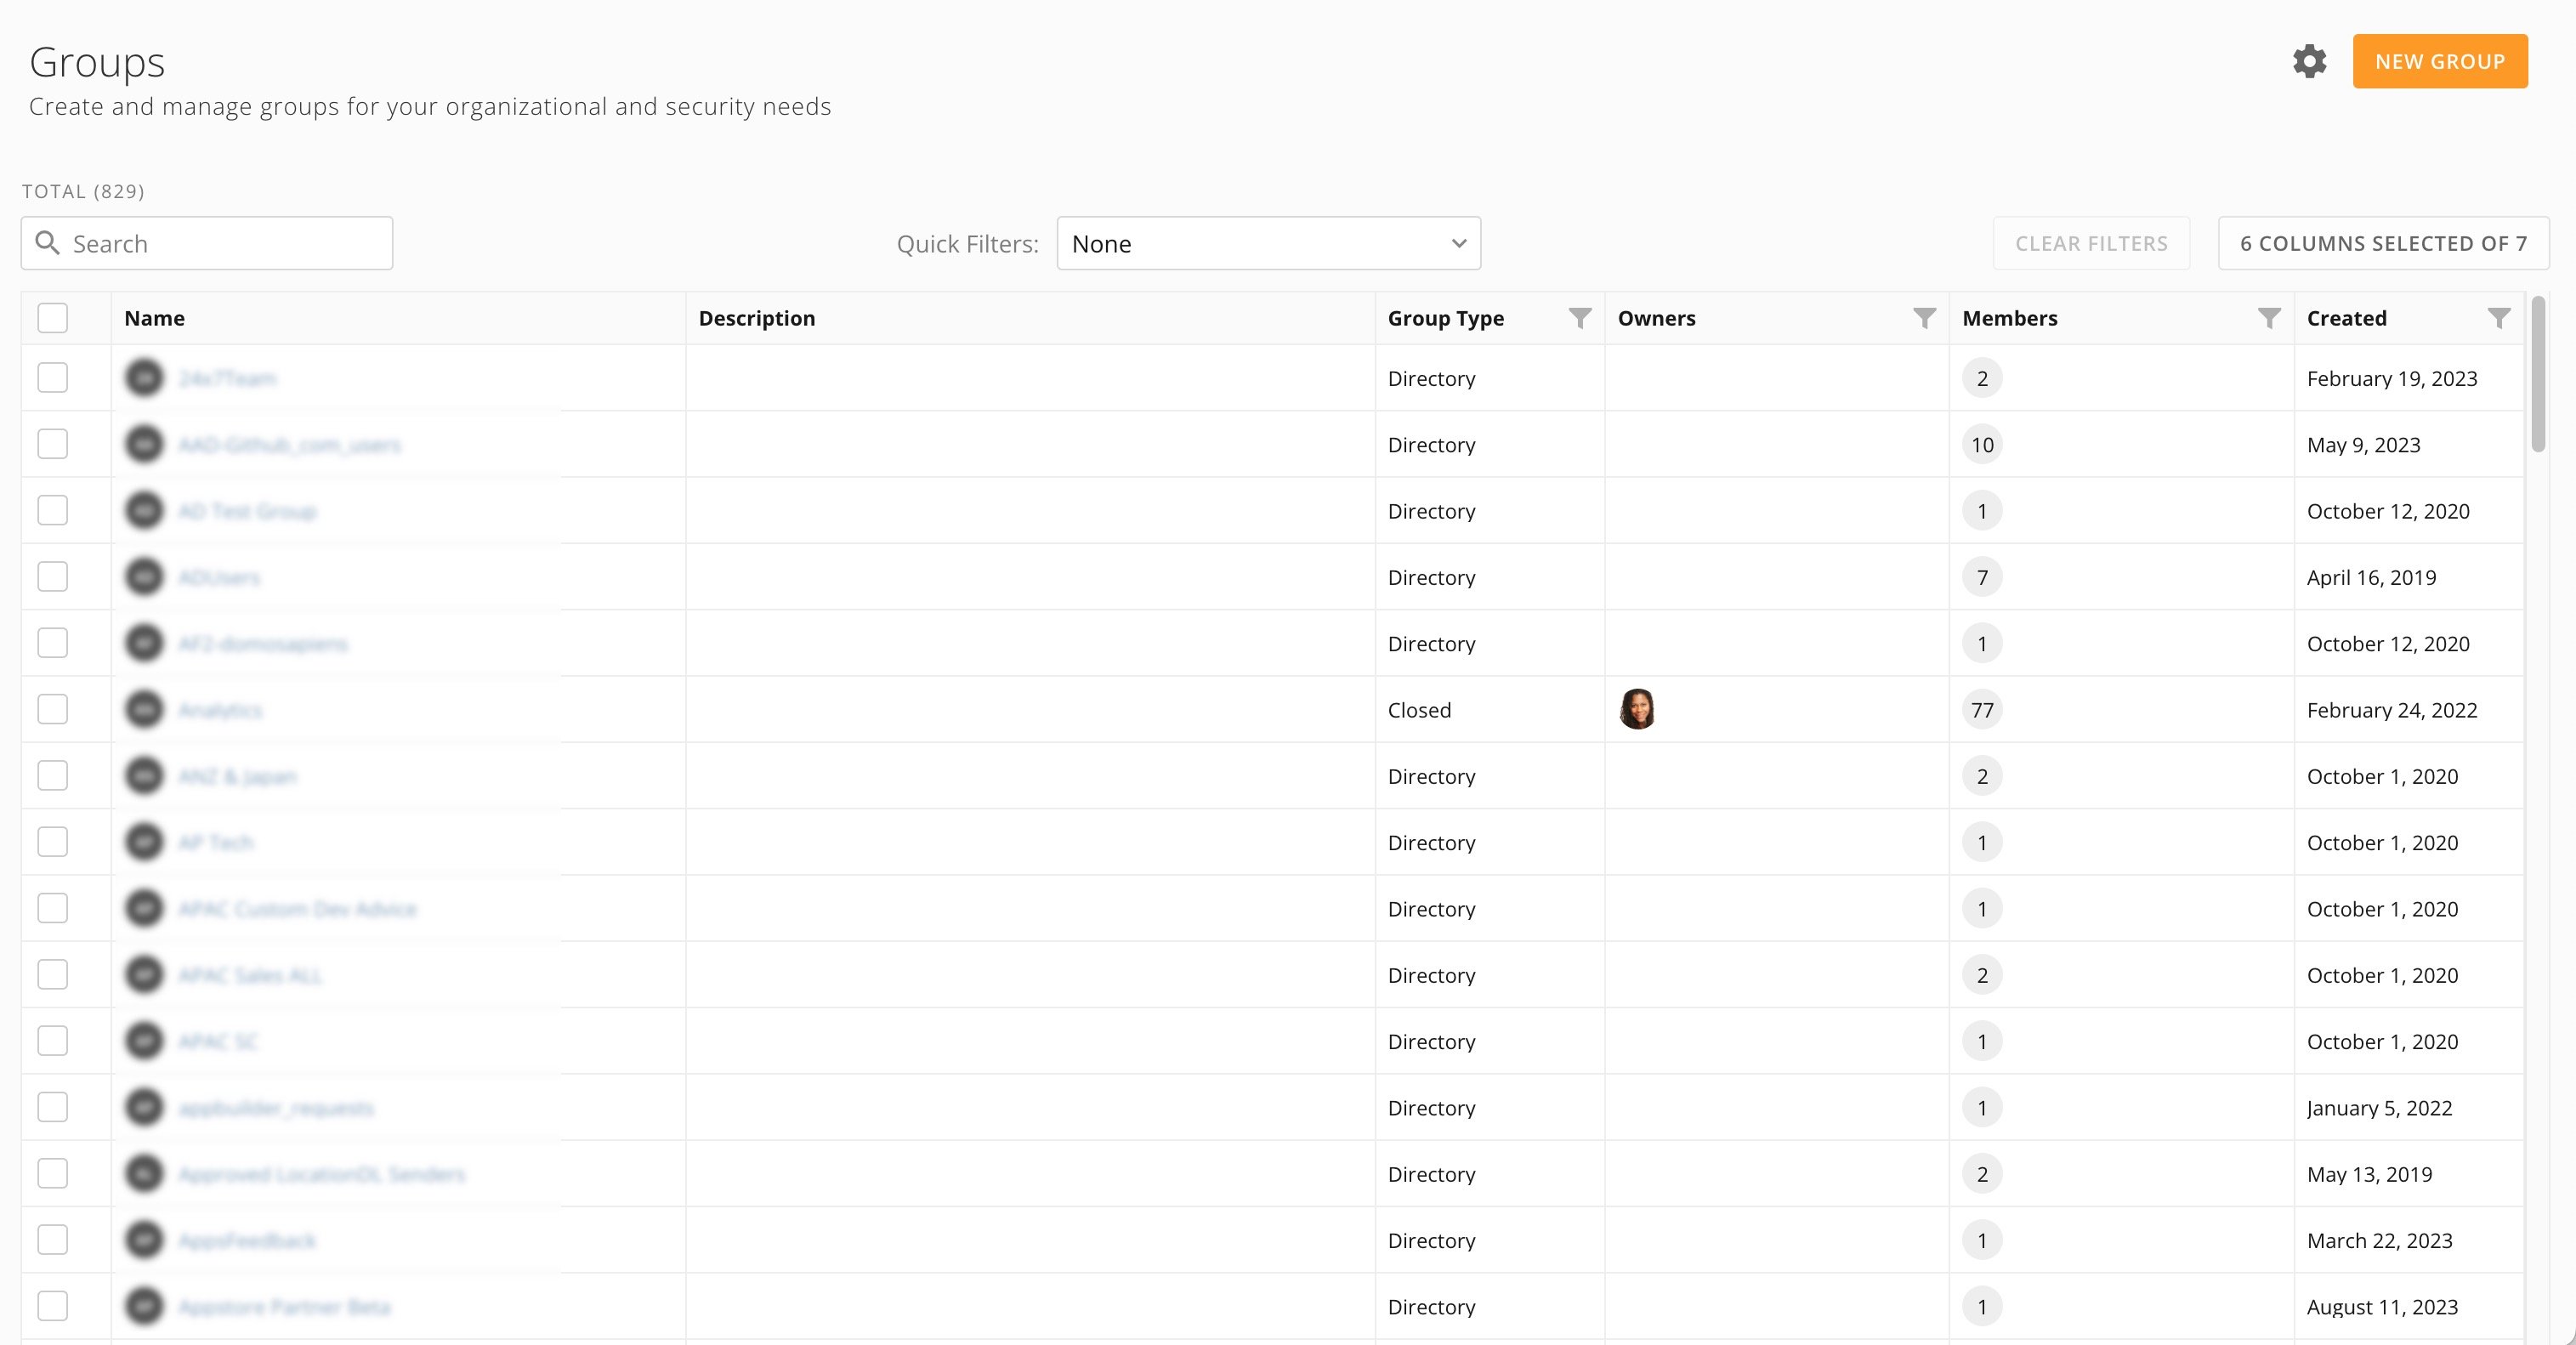
From the Groups Home, you can create groups and manage them (if you are the group owner). Admins can also adjust the [Group Settings](#group_settings).
Existing groups appear in the [groups list](#groups_list), which you can search, filter, and sort.
# Group Settings
From the Groups Home, select
### Groups Home
From the Groups Home, you can create groups and manage them (if you are the group owner). Admins can also adjust the [Group Settings](#group_settings).
Existing groups appear in the [groups list](#groups_list), which you can search, filter, and sort.
# Group Settings
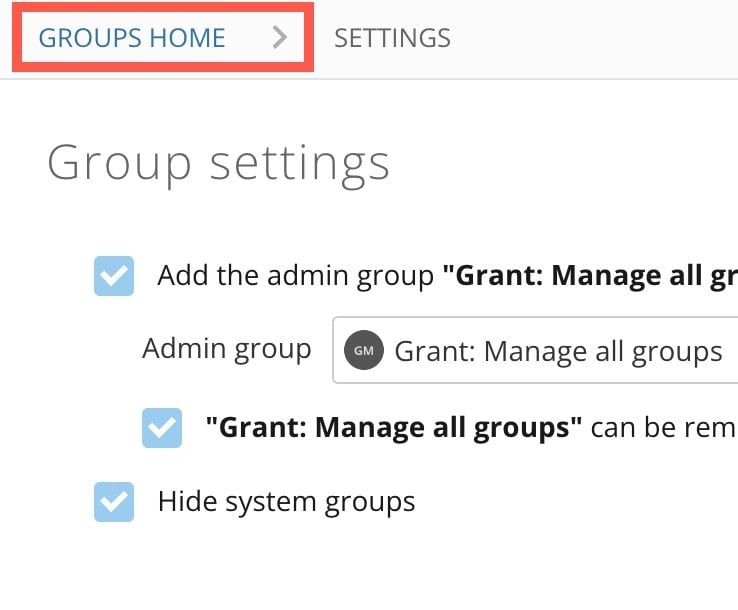
From the Groups Home, select  There are two options in the **Group settings** interface, which you can enable by checking the appropriate box.
* **Add the admin group " *\
There are two options in the **Group settings** interface, which you can enable by checking the appropriate box.
* **Add the admin group " *\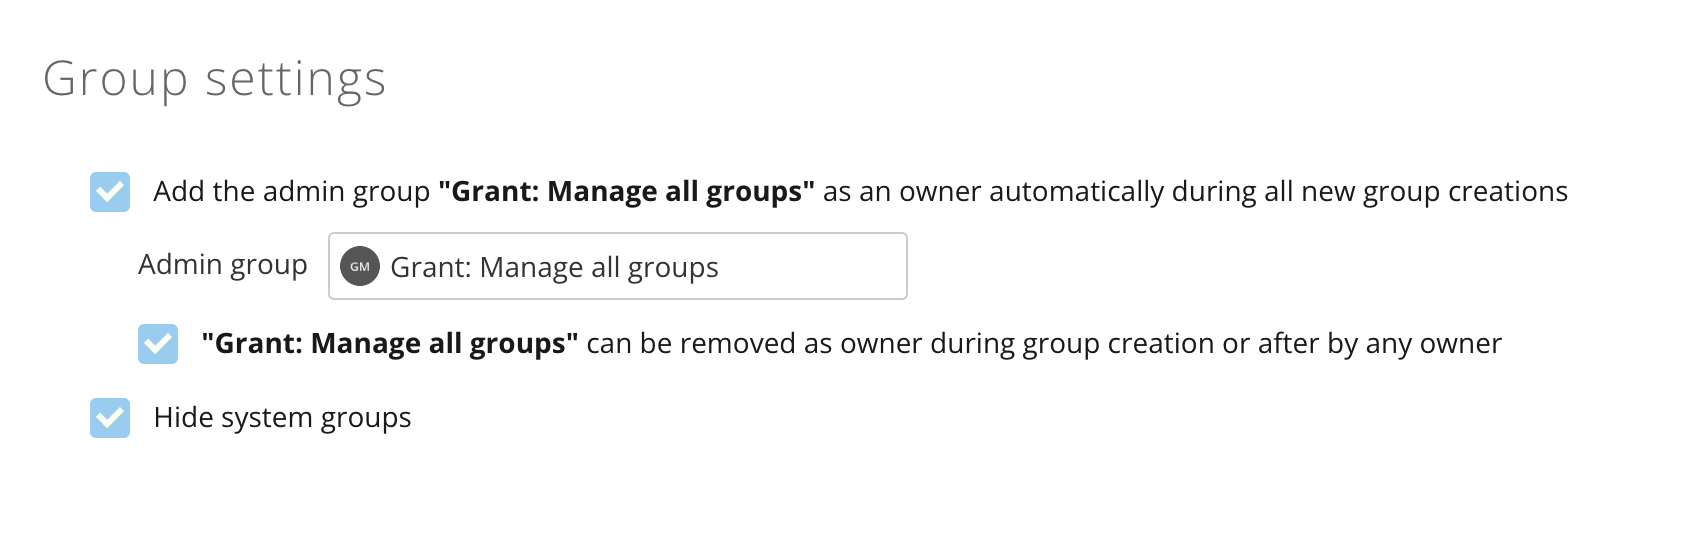 To return to the Groups Home, follow the breadcrumbs at the top of the **Group settings**.
 # Groups List
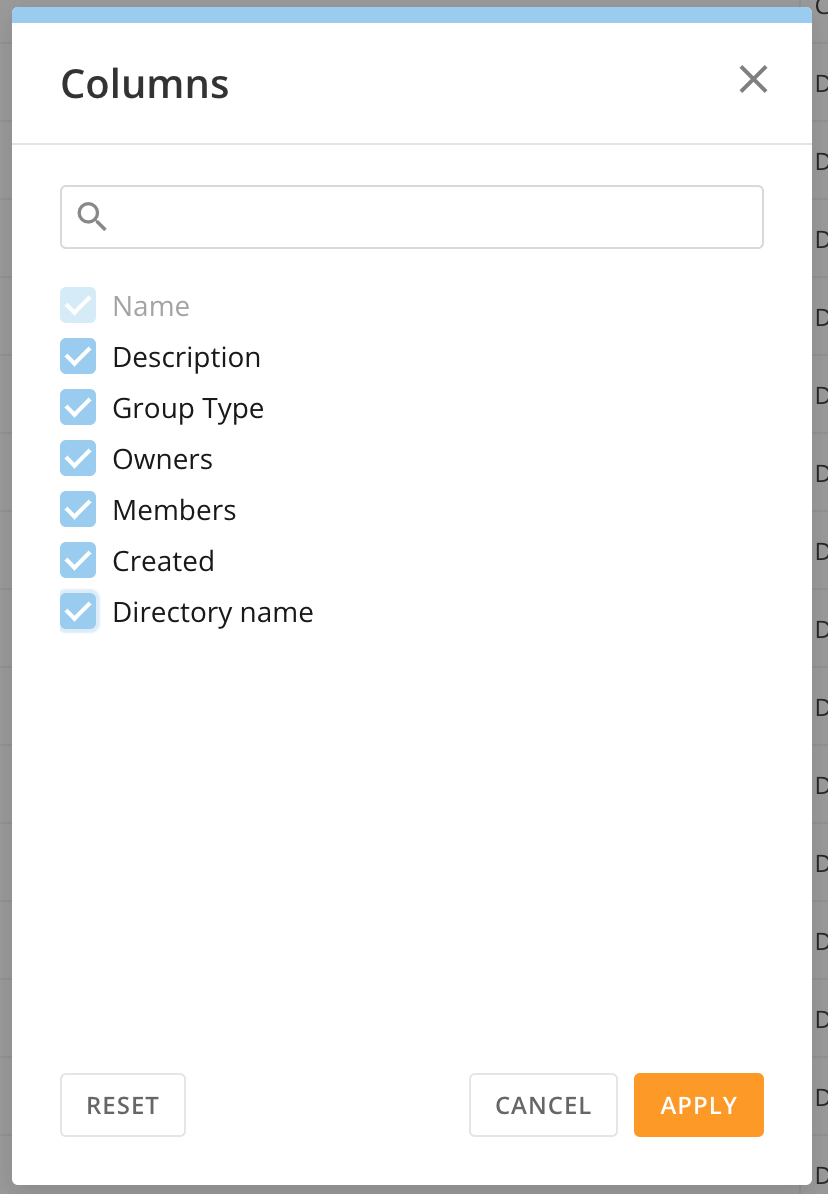
The groups list can contain seven available columns, based on your selection. The first column, **Name**, always displays. You can choose to show or hide the remaining columns.
To change the column configuration, select **x Columns Selected of 7**.
# Groups List
The groups list can contain seven available columns, based on your selection. The first column, **Name**, always displays. You can choose to show or hide the remaining columns.
To change the column configuration, select **x Columns Selected of 7**.
 A modal displays the columns. Check the boxes for the columns you want to display in your groups list. The available columns include the following:
* **Name —** The group name and avatar. By default, the groups display in the list in alphabetical order. You cannot hide this column.
* **Description —** A description of the group. This is optional when creating a group.
* **Group Type —** The group type. The options are Open, Ad Hoc, Directory, Closed, Dynamic, and System.
* **Owners —** The avatar of the group owner(s). Hover over an avatar to see the name of the person/group.
* **Members —** Displays the number of group members, rounded to one decimal for numbers above 1,000. For example, 1,600 members displays as 1.6K.
* **Created —** The date the group was created.
* **Directory name —** Need a description - messaged Dan
A modal displays the columns. Check the boxes for the columns you want to display in your groups list. The available columns include the following:
* **Name —** The group name and avatar. By default, the groups display in the list in alphabetical order. You cannot hide this column.
* **Description —** A description of the group. This is optional when creating a group.
* **Group Type —** The group type. The options are Open, Ad Hoc, Directory, Closed, Dynamic, and System.
* **Owners —** The avatar of the group owner(s). Hover over an avatar to see the name of the person/group.
* **Members —** Displays the number of group members, rounded to one decimal for numbers above 1,000. For example, 1,600 members displays as 1.6K.
* **Created —** The date the group was created.
* **Directory name —** Need a description - messaged Dan
| Component | Description |
|---|---|
| Dashboard | Displays the number of groups of a certain type in your Domo instance and allows you to filter the group list to display only groups of that type. The following filters are available:
|
| Refresh icon | Refreshes the group listing. |
| Settings icon | Opens the Group Settings subtab, in which you can toggle the following options:
|
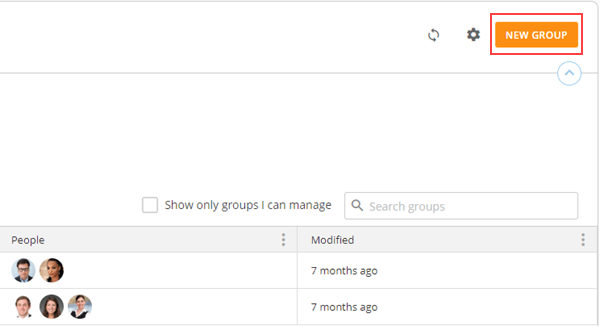
| New group icon | Lets you add a closed, open, or dynamic group to your Domo instance using the Group Creation wizard. |
| Your group filters | Lets you filter the group listing to show all groups in your instance, groups you're an owner of, or groups you're a member of. |
| Group listing | Shows all groups in your instance that pass the filters you have applied (if any). For any group, you can see the group name, owners, group type (open, ad hoc, directory, closed, dynamic, or system), the people in the group, and the amount of time since the group was last modified. For all columns, you can apply sorts and filters by clicking the
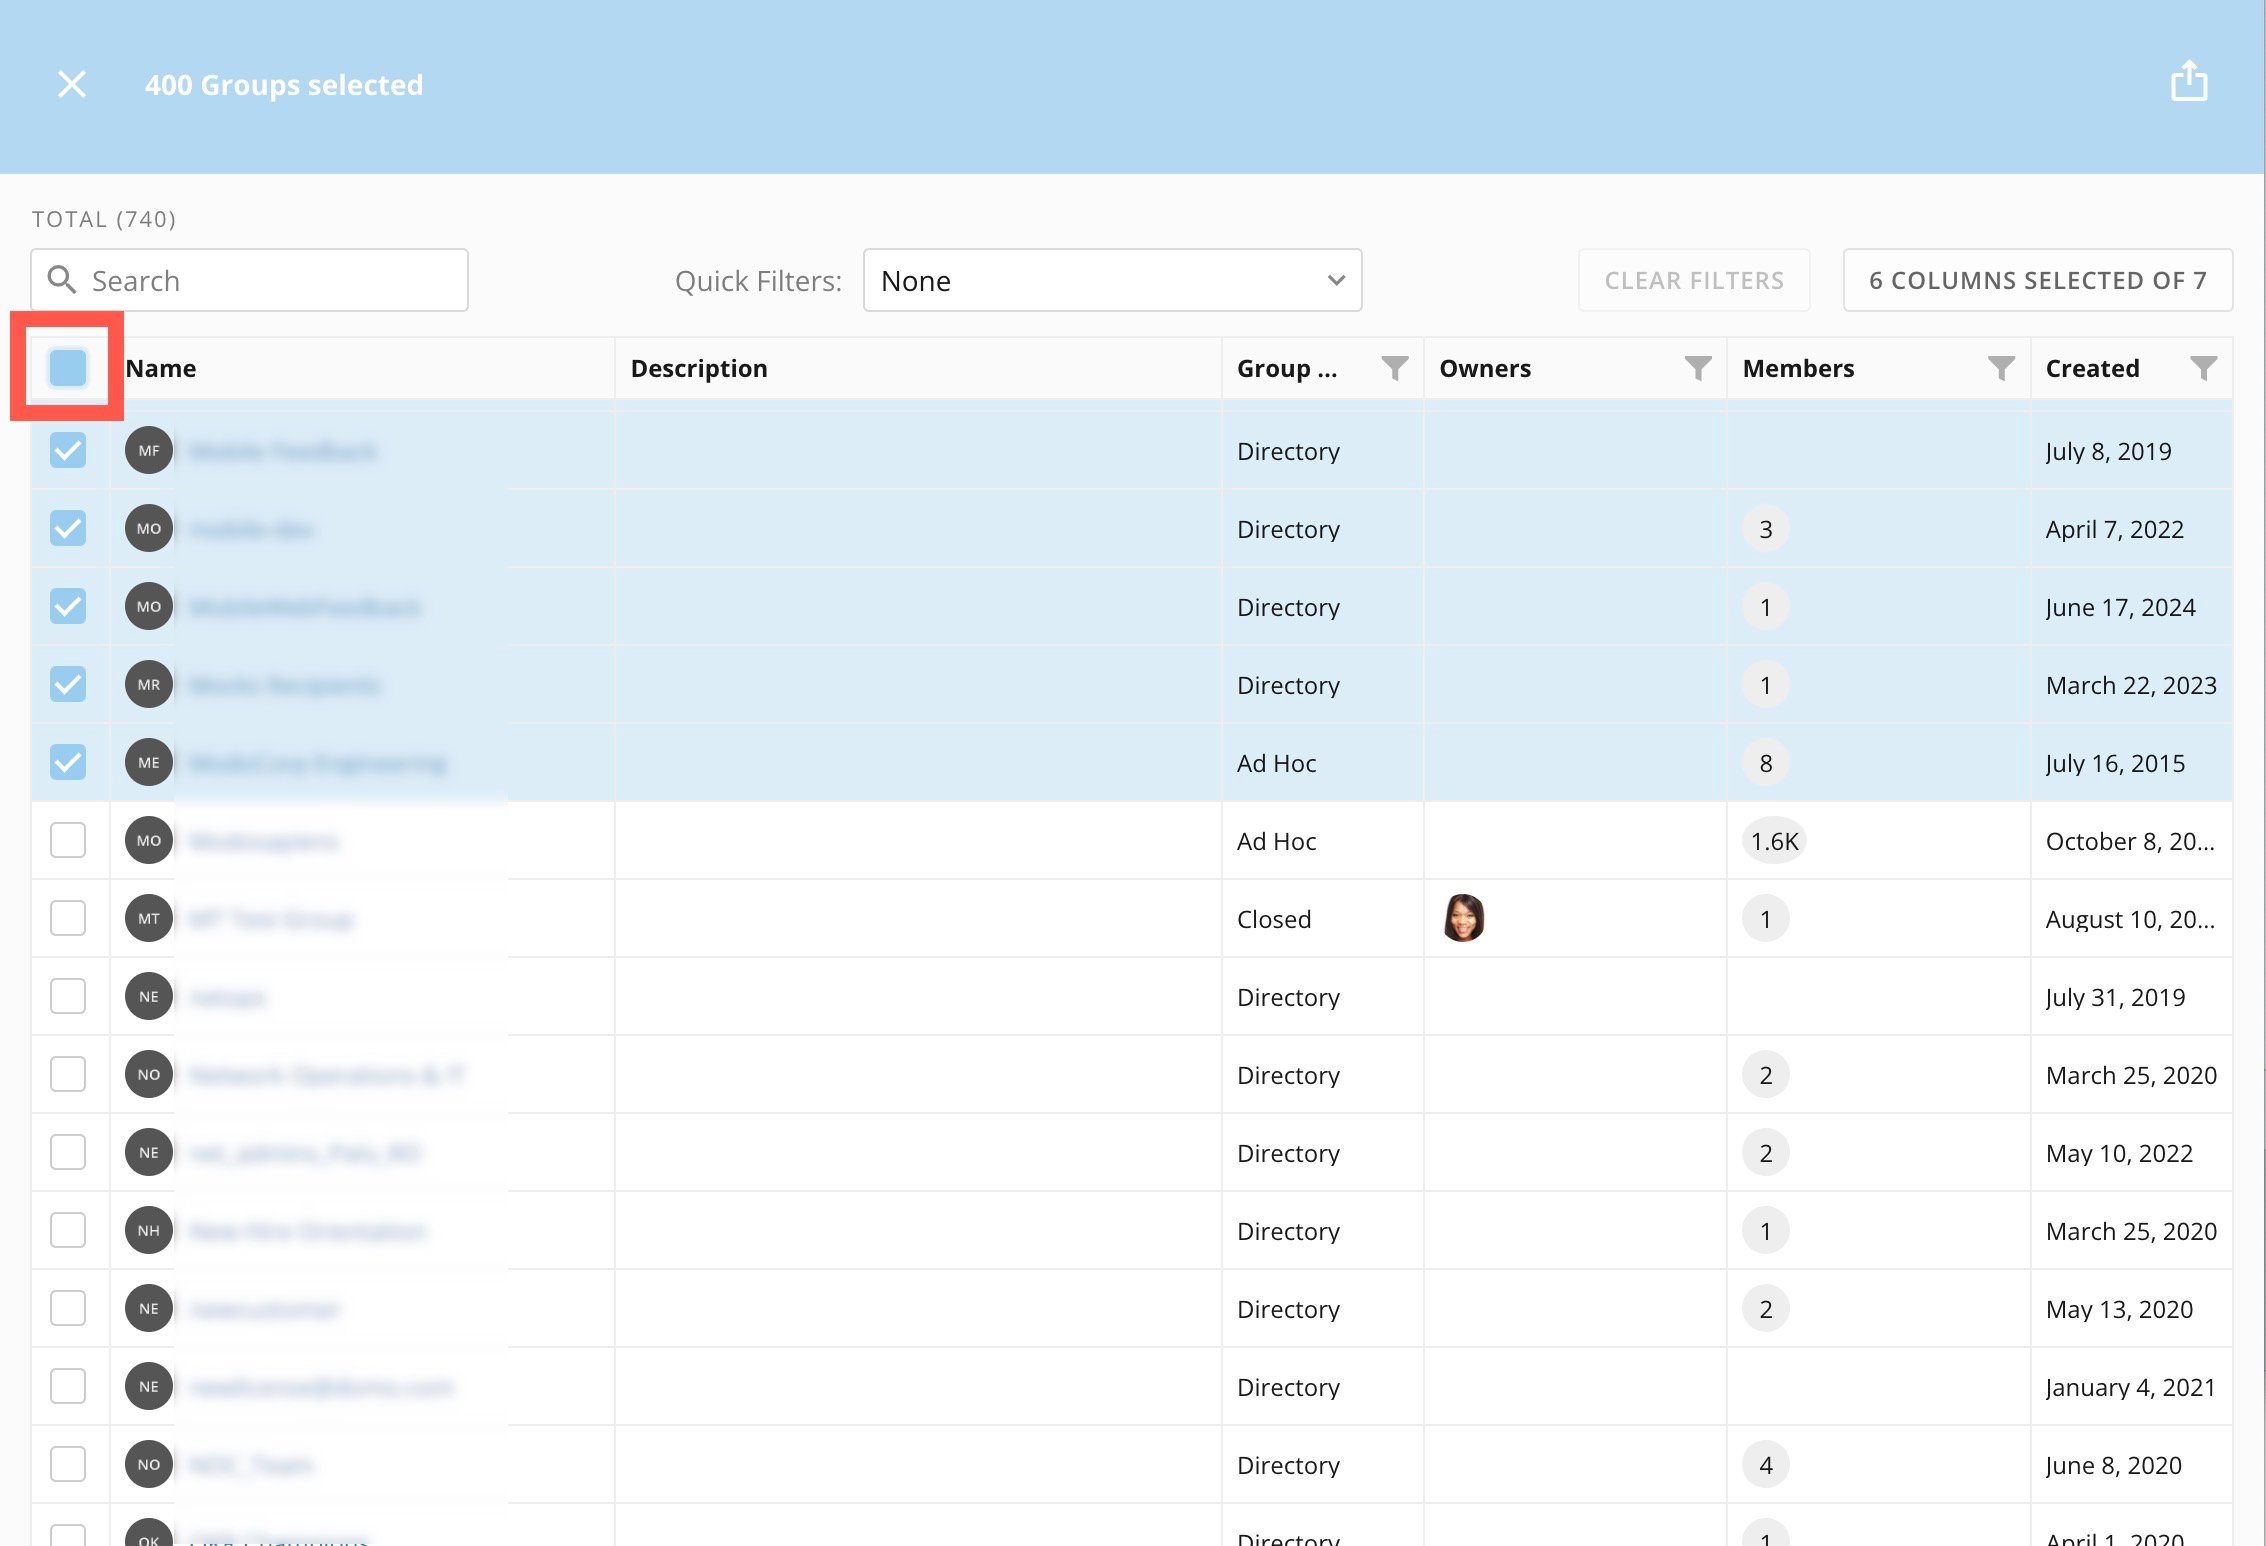
When you check the box for one or more groups, a number of additional icons display in the top right corner of the Groups page. These allow you to perform bulk actions on the groups. The following options are available:
If you click within the cell for a group name, a details view for the group displays where you can do all of the following:
|
| Show only groups I can manage checkbox | When toggled, filters the group listing to show only those groups you have rights to manage. |
| Search field | Lets you search the group listing to display only specific groups. |
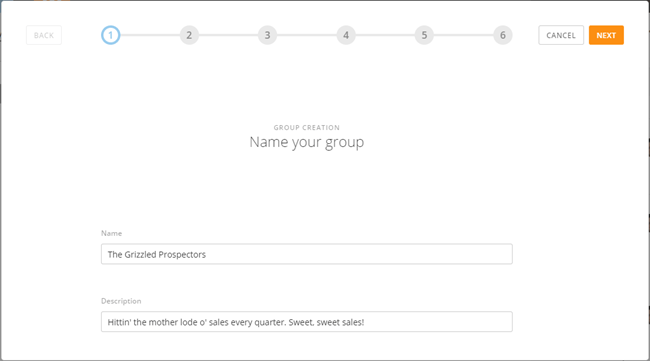
 2. Enter a name for the group.
3. (Optional) Enter a description for the group so you and other users can more easily identify it later, then select **Next**.
2. Enter a name for the group.
3. (Optional) Enter a description for the group so you and other users can more easily identify it later, then select **Next**.
 4. Select your desired group type, which include:
* With an **Open** group, you select all group members, and any member of the group can invite anyone to join the group.
* With a **Closed** group, you select all group members, but only group owners can invite new users to join the group.
* With **Dynamic** groups, you do *not* select specific members of the group; rather, membership is based on adherence to dynamic rules. For example, you might have dynamic groups for all of your sales regions. If a new sales rep is hired within the "West" region, that person is automatically added to the "West" group in your Domo instance because it matches the sales region they were hired into.
5. (Conditional) Do one of the following:
* If you chose **Open** or **Closed** in the previous step, select all desired members of the group from the list of users. You can search for users by name or filter using the filter options available in each column. Once you are done, select **Next**.
* If you chose **Dynamic** in the previous step, do the following:
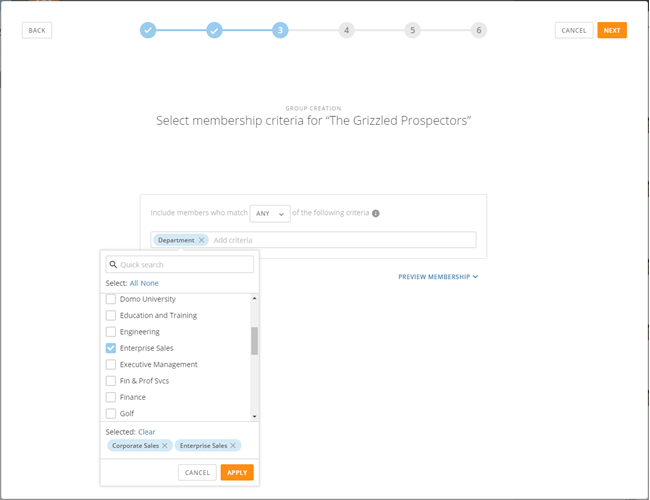
1. In the first dropdown menu, select **Any** if group membership is only dependent on a single rule being met (an OR statement), or select **All** if all of the selected rules must be met (an AND statement). For example, you may have a case where group members may be members of the "Sales" department OR have a title of "Account Development Manager"; if either condition is met, they are included in the group. Alternatively, you may have a group where members must be in the "Sales" department AND have a title of "Account Development Manager"; if both conditions are not met, the user is not included in the group.
2. In the **Add criteria** field, select a trusted attribute to filter on. For more information about setting trusted attributes, see our article about [Personalized Data Permissions (PDP)](https://domo-support.domo.com/s/article/360042934614?language=en_US).
3. Select all values within the attribute that meet the conditions of group membership. For example, if you selected Department as an attribute in step 5ii, you would select all departments whose members should be members of this group.
4. Select your desired group type, which include:
* With an **Open** group, you select all group members, and any member of the group can invite anyone to join the group.
* With a **Closed** group, you select all group members, but only group owners can invite new users to join the group.
* With **Dynamic** groups, you do *not* select specific members of the group; rather, membership is based on adherence to dynamic rules. For example, you might have dynamic groups for all of your sales regions. If a new sales rep is hired within the "West" region, that person is automatically added to the "West" group in your Domo instance because it matches the sales region they were hired into.
5. (Conditional) Do one of the following:
* If you chose **Open** or **Closed** in the previous step, select all desired members of the group from the list of users. You can search for users by name or filter using the filter options available in each column. Once you are done, select **Next**.
* If you chose **Dynamic** in the previous step, do the following:
1. In the first dropdown menu, select **Any** if group membership is only dependent on a single rule being met (an OR statement), or select **All** if all of the selected rules must be met (an AND statement). For example, you may have a case where group members may be members of the "Sales" department OR have a title of "Account Development Manager"; if either condition is met, they are included in the group. Alternatively, you may have a group where members must be in the "Sales" department AND have a title of "Account Development Manager"; if both conditions are not met, the user is not included in the group.
2. In the **Add criteria** field, select a trusted attribute to filter on. For more information about setting trusted attributes, see our article about [Personalized Data Permissions (PDP)](https://domo-support.domo.com/s/article/360042934614?language=en_US).
3. Select all values within the attribute that meet the conditions of group membership. For example, if you selected Department as an attribute in step 5ii, you would select all departments whose members should be members of this group.
 4. (Optional) Add additional OR statements to the membership criteria by selecting **OR** under the criteria box and repeating steps 5i through 5iii above.
5. (Optional) View the members who pass the filters by selecting **Preview Membership**.
6. Select **Next** when done.
6. Choose an avatar from one of the following options, and then select **Next**.
* Edit the standard text avatar (a bubble with two or three initial letters) by clicking **Edit Text Avatar** then choosing a background color and text color and entering the desired text (limit three characters).
* Upload an image from your computer by clicking **Upload Photo**, selecting your image file (the image does not need to be a photo, only a standard image file such as a JPEG or PNG), then rotating and cropping as desired.
* Taking a picture of yourself using your webcam.
7. Specify all owners of the group, then select **Next**. By default, you are assigned to own the group you create. You cannot change this here, but you can remove yourself as an owner later, as described in the [Assign Owners to a Group](#h_53ee87c3-30b8-4f28-bea6-e393c9b0e214 "Creating and Managing User Groups - BETA") section below. Unless you unchecked the box for **Add the admin group \[Selected group] as an owner automatically during all groups creations** in the Group Settings screen (accessible by clicking the gear icon in **Admin Settings** > **Groups**), members of the default group are also automatically assigned as owners.
8. Review your settings, and when you are ready, select **Save**.
4. (Optional) Add additional OR statements to the membership criteria by selecting **OR** under the criteria box and repeating steps 5i through 5iii above.
5. (Optional) View the members who pass the filters by selecting **Preview Membership**.
6. Select **Next** when done.
6. Choose an avatar from one of the following options, and then select **Next**.
* Edit the standard text avatar (a bubble with two or three initial letters) by clicking **Edit Text Avatar** then choosing a background color and text color and entering the desired text (limit three characters).
* Upload an image from your computer by clicking **Upload Photo**, selecting your image file (the image does not need to be a photo, only a standard image file such as a JPEG or PNG), then rotating and cropping as desired.
* Taking a picture of yourself using your webcam.
7. Specify all owners of the group, then select **Next**. By default, you are assigned to own the group you create. You cannot change this here, but you can remove yourself as an owner later, as described in the [Assign Owners to a Group](#h_53ee87c3-30b8-4f28-bea6-e393c9b0e214 "Creating and Managing User Groups - BETA") section below. Unless you unchecked the box for **Add the admin group \[Selected group] as an owner automatically during all groups creations** in the Group Settings screen (accessible by clicking the gear icon in **Admin Settings** > **Groups**), members of the default group are also automatically assigned as owners.
8. Review your settings, and when you are ready, select **Save**.
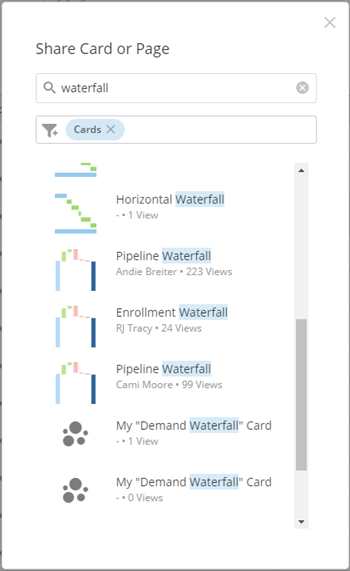 4. Select **Share** to confirm.
### Share Content in Bulk With Multiple Groups
1. In the group listing in **More** > **Admin** > **Governance** > **Groups**, check the box(es) for the group(s) you want to share content with, then select
3. Select **Share** to confirm.
### Add Members to a Group
In the Admin Settings, you can add members to an open or closed group, meaning that those users have access to all Dashboards and cards assigned to that group.
4. Select **Share** to confirm.
### Share Content in Bulk With Multiple Groups
1. In the group listing in **More** > **Admin** > **Governance** > **Groups**, check the box(es) for the group(s) you want to share content with, then select
3. Select **Share** to confirm.
### Add Members to a Group
In the Admin Settings, you can add members to an open or closed group, meaning that those users have access to all Dashboards and cards assigned to that group.
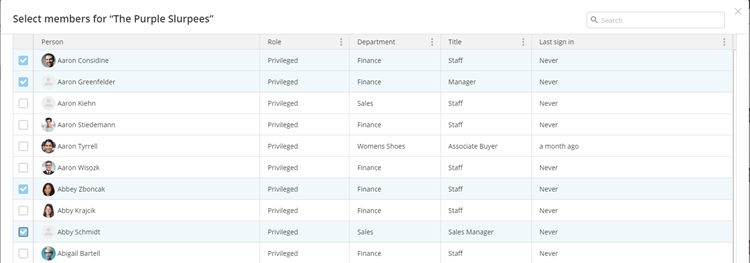 5. Select **Save**.
The users are now added to the group and can access the group's content.
### Add a Specific User to a Group
1. In the user list in **More** > **Admin** > **Governance** > **People**, select the user you want to add to a group.
The information panel for the user displays.
2. Select **Add Group**.
A field displays in which you can search for existing groups in Domo.
5. Select **Save**.
The users are now added to the group and can access the group's content.
### Add a Specific User to a Group
1. In the user list in **More** > **Admin** > **Governance** > **People**, select the user you want to add to a group.
The information panel for the user displays.
2. Select **Add Group**.
A field displays in which you can search for existing groups in Domo.
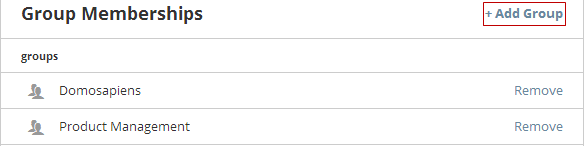 3. In the field, enter the name of a group.
The top results of your search display automatically in a list as you enter characters and filter accordingly as you add or remove characters.
3. In the field, enter the name of a group.
The top results of your search display automatically in a list as you enter characters and filter accordingly as you add or remove characters.
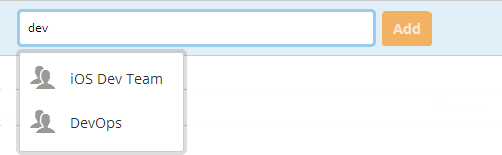 4. Select a group from the list.
The name of the group displays in the field.
5. (Optional) Add this user to other groups by repeating the previous two steps.
6. (Optional) Remove a group name from the field by select **✕** to the right of the name.
7. Select **Add**.
The user is now a member of the groups and has access to the group's content.
### Remove Members From a Group
When you remove users from an open or closed user group, they can no longer access the group's content (unless they are members of another group with access OR they have been granted access to the same content in the **People** subtab).
To remove users from a group, you must be an owner of the group.
Users removed from a group lose access to all of the group's past Buzz conversations. For more information, see our article about [Chatting in Buzz](https://domo-support.domo.com/s/article/360042925574).
### Remove Users From a Group
1. In **More** > **Admin** > **Governance** > **Groups**, locate the group you want to remove members from.
2. Select the group name to open its details view.
3. Check the boxes for all users you want to remove from the group.
4. In the upper-right corner of the window, select
4. Select a group from the list.
The name of the group displays in the field.
5. (Optional) Add this user to other groups by repeating the previous two steps.
6. (Optional) Remove a group name from the field by select **✕** to the right of the name.
7. Select **Add**.
The user is now a member of the groups and has access to the group's content.
### Remove Members From a Group
When you remove users from an open or closed user group, they can no longer access the group's content (unless they are members of another group with access OR they have been granted access to the same content in the **People** subtab).
To remove users from a group, you must be an owner of the group.
Users removed from a group lose access to all of the group's past Buzz conversations. For more information, see our article about [Chatting in Buzz](https://domo-support.domo.com/s/article/360042925574).
### Remove Users From a Group
1. In **More** > **Admin** > **Governance** > **Groups**, locate the group you want to remove members from.
2. Select the group name to open its details view.
3. Check the boxes for all users you want to remove from the group.
4. In the upper-right corner of the window, select
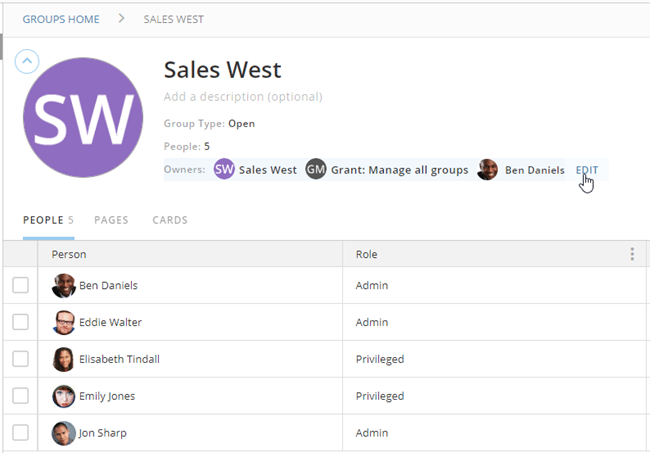 3. In the **Set owners** dialog, add or remove owners as needed.
4. Select **Save**.
### Change Group Type
As the owner of an open, dynamic, or ad hoc group, you can change the group type to open, dynamic, or closed. If a group is closed, you cannot change the group type. You cannot change the group type for directory or system group, but directory groups can be nested within dynamic groups.
To change the group type for a group, follow these steps:
1. In **More** > **Admin** > **Governance** > **Groups**, select the group name to open its details view.
2. Hover over the **Group Type** area, and then select **Edit**.
3. In the **Set owners** dialog, add or remove owners as needed.
4. Select **Save**.
### Change Group Type
As the owner of an open, dynamic, or ad hoc group, you can change the group type to open, dynamic, or closed. If a group is closed, you cannot change the group type. You cannot change the group type for directory or system group, but directory groups can be nested within dynamic groups.
To change the group type for a group, follow these steps:
1. In **More** > **Admin** > **Governance** > **Groups**, select the group name to open its details view.
2. Hover over the **Group Type** area, and then select **Edit**.
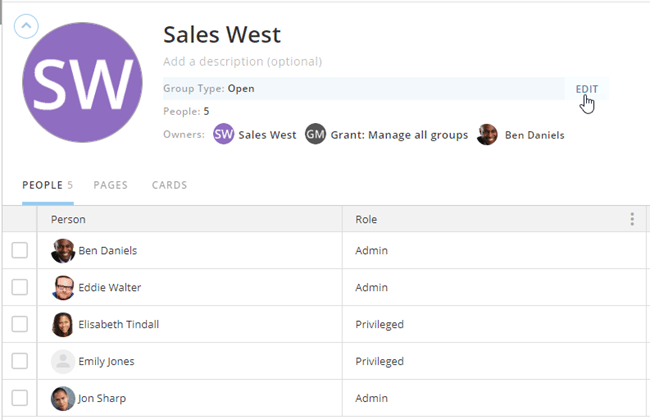 3. Select
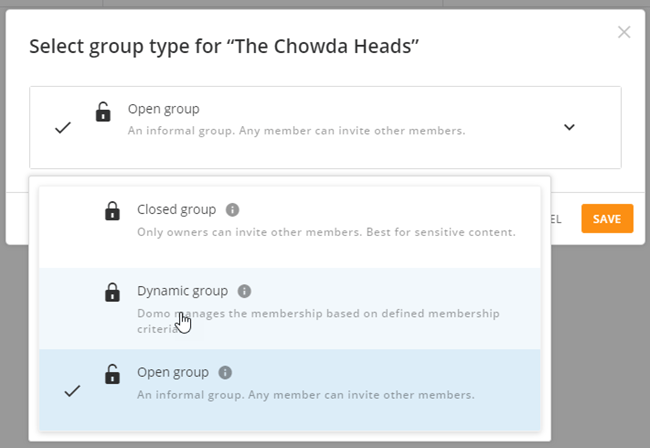 Keep in mind all of the following when making your selection:
* Changing a **dynamic** group to an **open** or **closed** group stops the dynamic addition of users to the group. In an **open** group, any member of the group can manage its content and membership.
* Changing a **dynamic** or **open** group to a **closed** group is irreversible. Once a group is closed, it remains closed.
* Changing an **open** group to a **dynamic** group requires that you set membership criteria for the group, as explained in steps 5i-5vi in the [Create a Group](#create_a_group) section of this article.
* You can change an **ad hoc** group to **dynamic**, **open**, or **closed**, but you cannot change it back to **ad hoc**.
4. After you have made your changes, select **Save**.
### Change the Membership Criteria for a Dynamic Group
Keep in mind all of the following when making your selection:
* Changing a **dynamic** group to an **open** or **closed** group stops the dynamic addition of users to the group. In an **open** group, any member of the group can manage its content and membership.
* Changing a **dynamic** or **open** group to a **closed** group is irreversible. Once a group is closed, it remains closed.
* Changing an **open** group to a **dynamic** group requires that you set membership criteria for the group, as explained in steps 5i-5vi in the [Create a Group](#create_a_group) section of this article.
* You can change an **ad hoc** group to **dynamic**, **open**, or **closed**, but you cannot change it back to **ad hoc**.
4. After you have made your changes, select **Save**.
### Change the Membership Criteria for a Dynamic Group
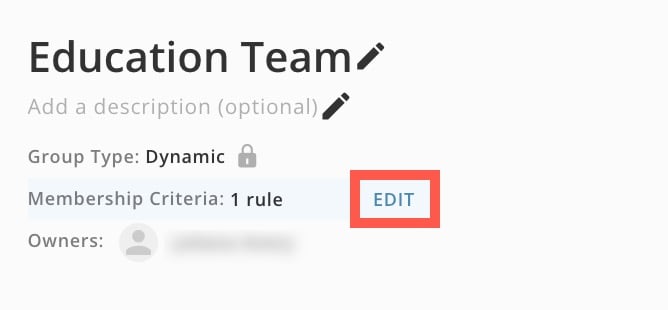 4. Make your changes, as explained in steps 5i-5vi in
[Creating a group](#h_5a037d85-d2ba-4410-8e47-1383e3eb14f5 "Creating and Managing User Groups - BETA"), above.
5. Click **Save** when done.
### Change the Group Avatar
4. Make your changes, as explained in steps 5i-5vi in
[Creating a group](#h_5a037d85-d2ba-4410-8e47-1383e3eb14f5 "Creating and Managing User Groups - BETA"), above.
5. Click **Save** when done.
### Change the Group Avatar
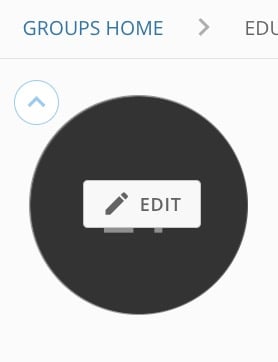 4. Make your changes to the avatar as described in Create a Group, above.