> ## Documentation Index
> Fetch the complete documentation index at: https://domoinc-openapi-sync-dataflows.mintlify.site/llms.txt
> Use this file to discover all available pages before exploring further.
# Creating a Recursive/Snapshot Old Magic ETL DataFlow
A "recursive" or "snapshot" DataFlow is a DataFlow that uses itself as an input.
DataFlows (neither SQL nor Magic ETL types) cannot append data natively like connectors. However, if you need to create a DataFlow that appends data, you can do so by running it once and then using the output as part of the input for the next run. This way, every time the DataFlow runs, it includes the data from before and also appends the new data onto itself.
**Important:** If a recursive DataFlow is edited incorrectly, you could lose ALL historical data. To avoid this any time you are editing, create an additional DataSet that is a copy of your historical DataSet. This DataSet will remain static. If anything happens to your historical DataSet, you will have a backup from before you began editing.
**Video - What is a Recursive DataFlow?**
**To create a recursive DataFlow in Magic ETL,**
1. Create and run a Magic ETL DataFlow.
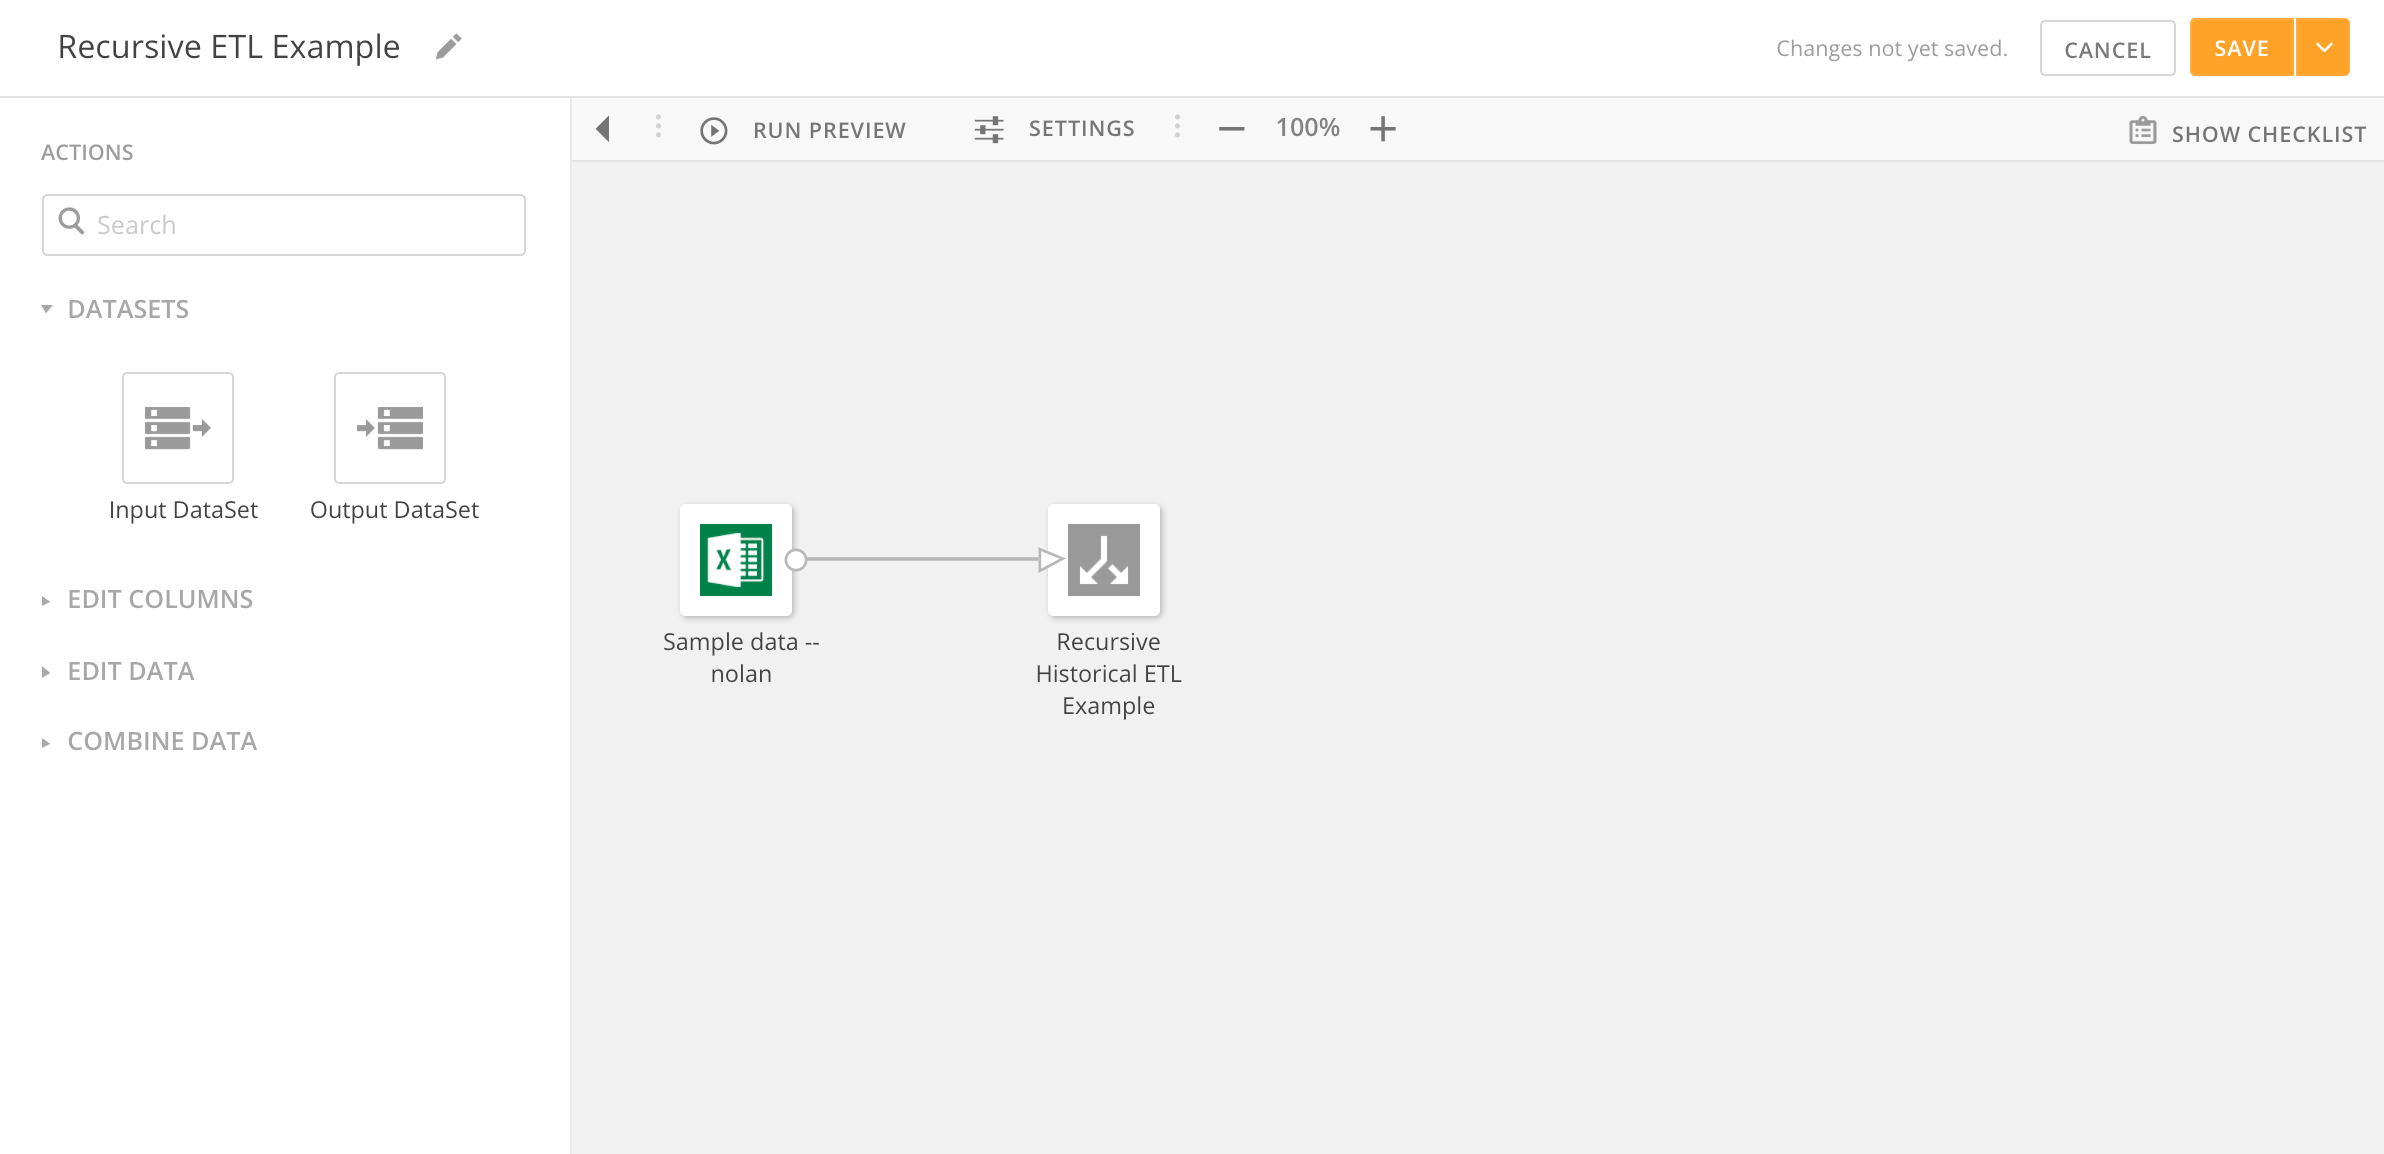 2. Once the DataFlow has finished running, load the output DataSet as an input DataSet.
The DataSet name will show the output DataSet name followed by "1."
2. Once the DataFlow has finished running, load the output DataSet as an input DataSet.
The DataSet name will show the output DataSet name followed by "1."
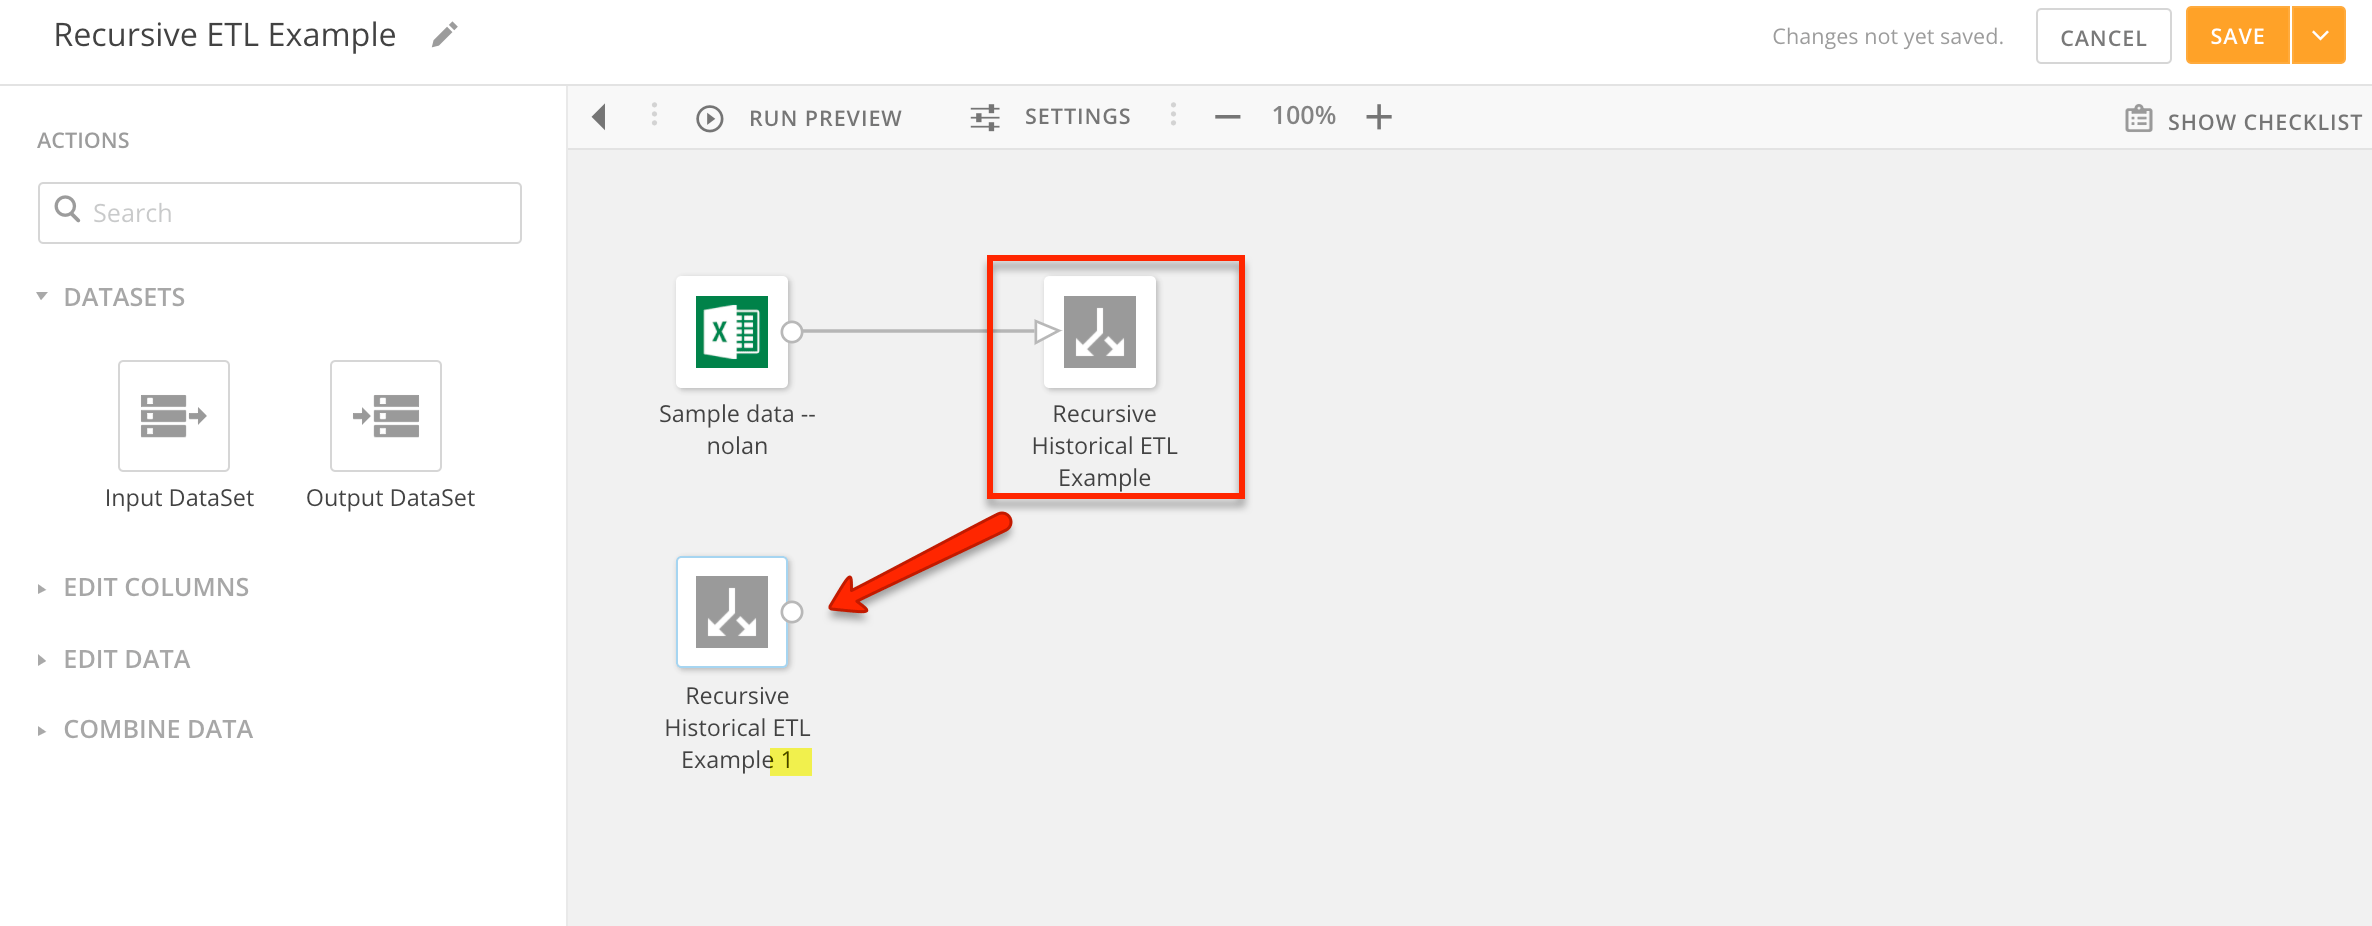 You should now have two DataSets in the DataFlow—the updating original DataSet and the historical DataSet.
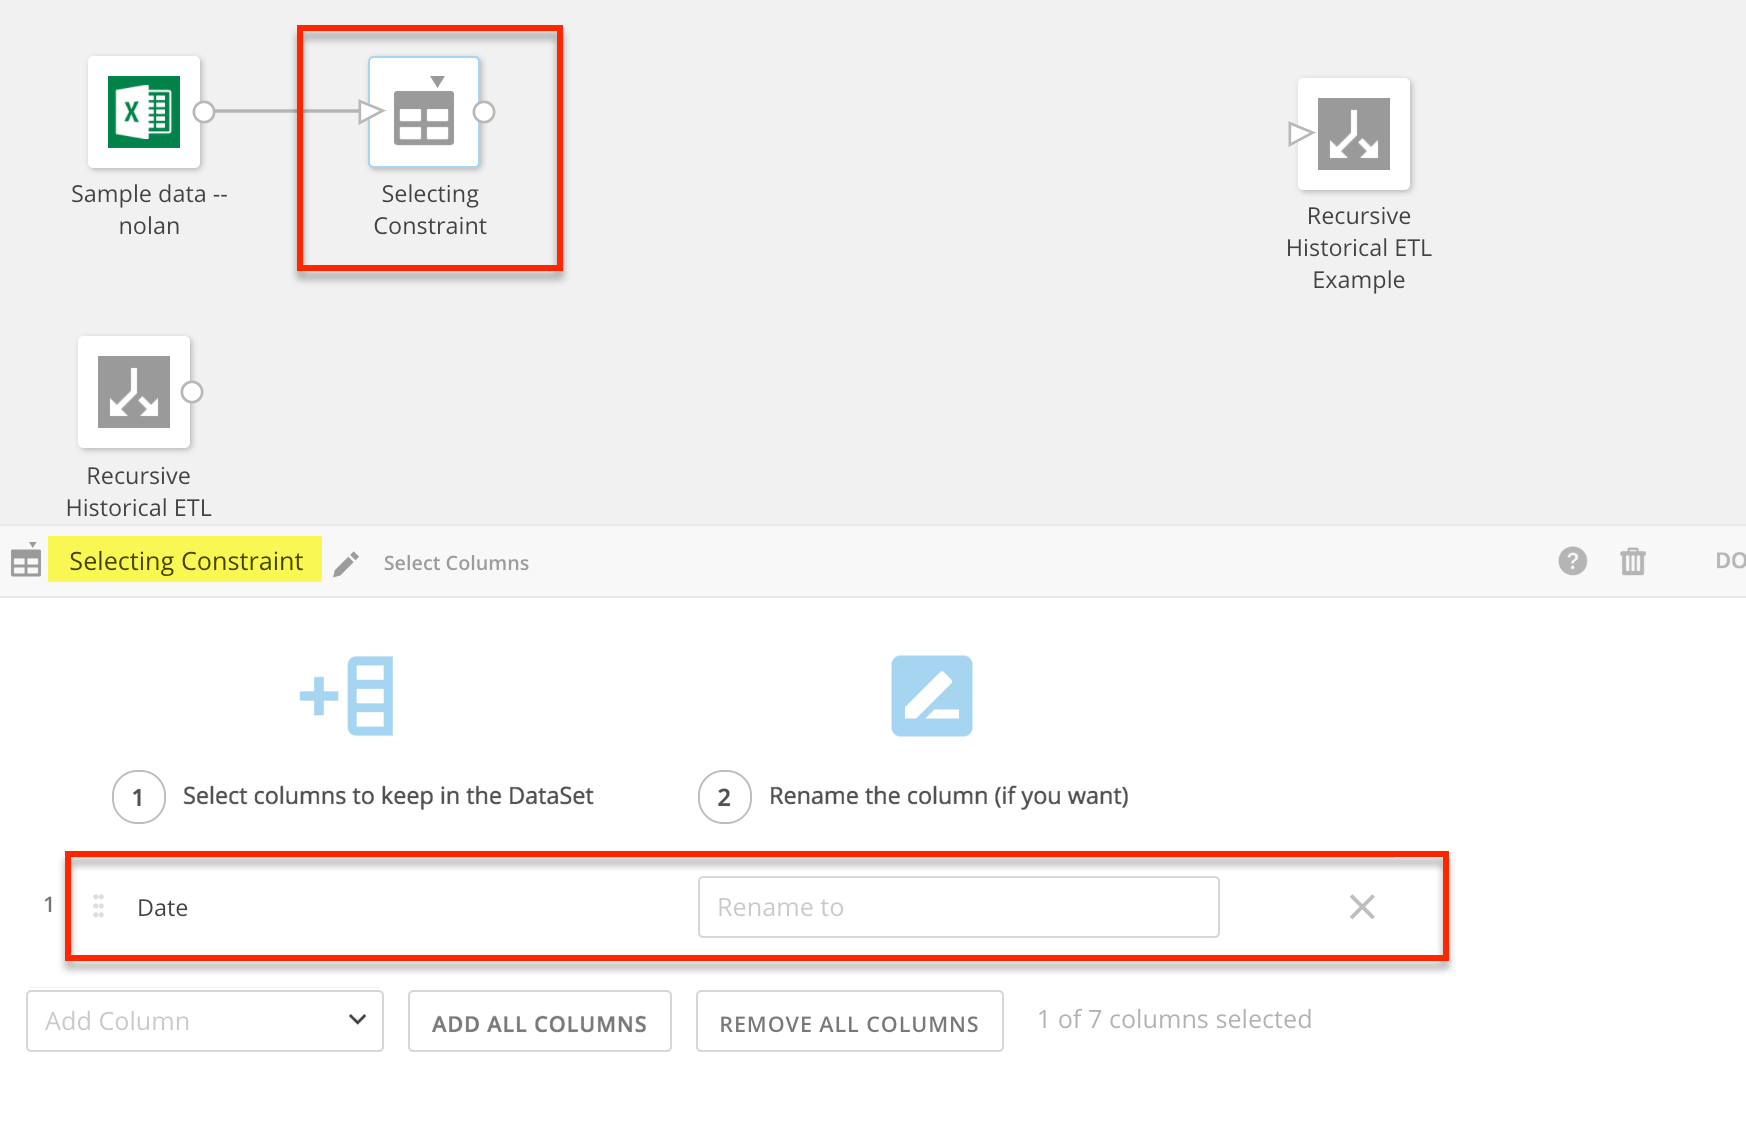
You now need to find a column to use as a constraint. This helps determine when to replace data in your historical DataSet with new data. Constraint columns are normally ID columns or date columns or have other unique identifiers. In this example we use the `Date` column as a constraint.
3. Use **Select Columns** to select only the constraint column.
You should now have two DataSets in the DataFlow—the updating original DataSet and the historical DataSet.
You now need to find a column to use as a constraint. This helps determine when to replace data in your historical DataSet with new data. Constraint columns are normally ID columns or date columns or have other unique identifiers. In this example we use the `Date` column as a constraint.
3. Use **Select Columns** to select only the constraint column.
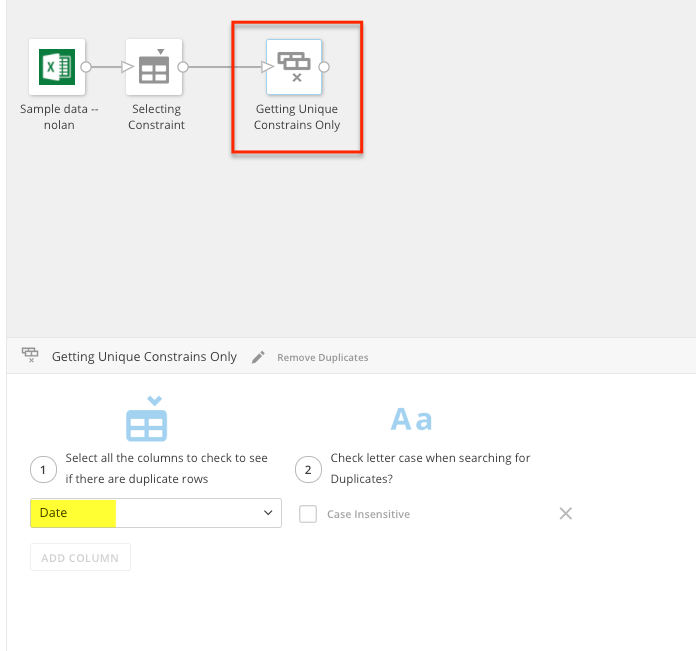
 4. Use **Remove Duplicates** to return a unique list of constraints.
 5. Use **Add Constants** to create a new column that tells you when a row needs to be deleted.
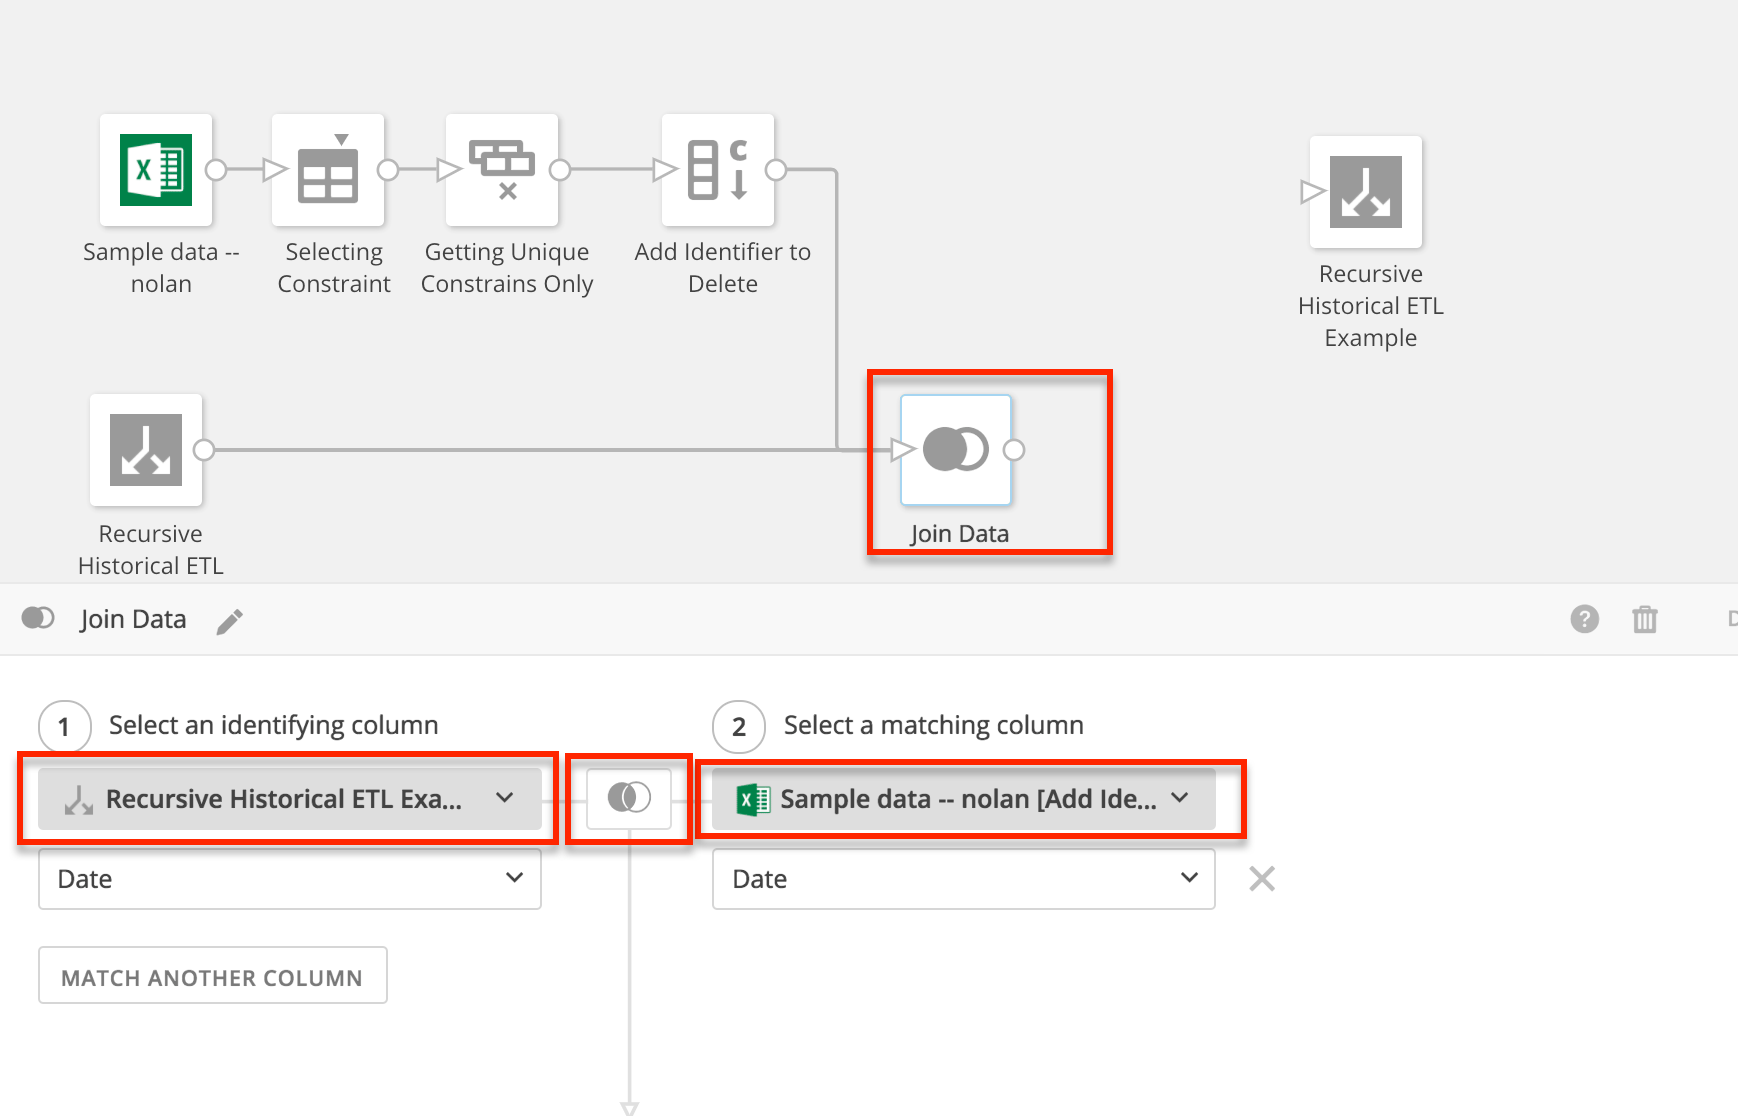
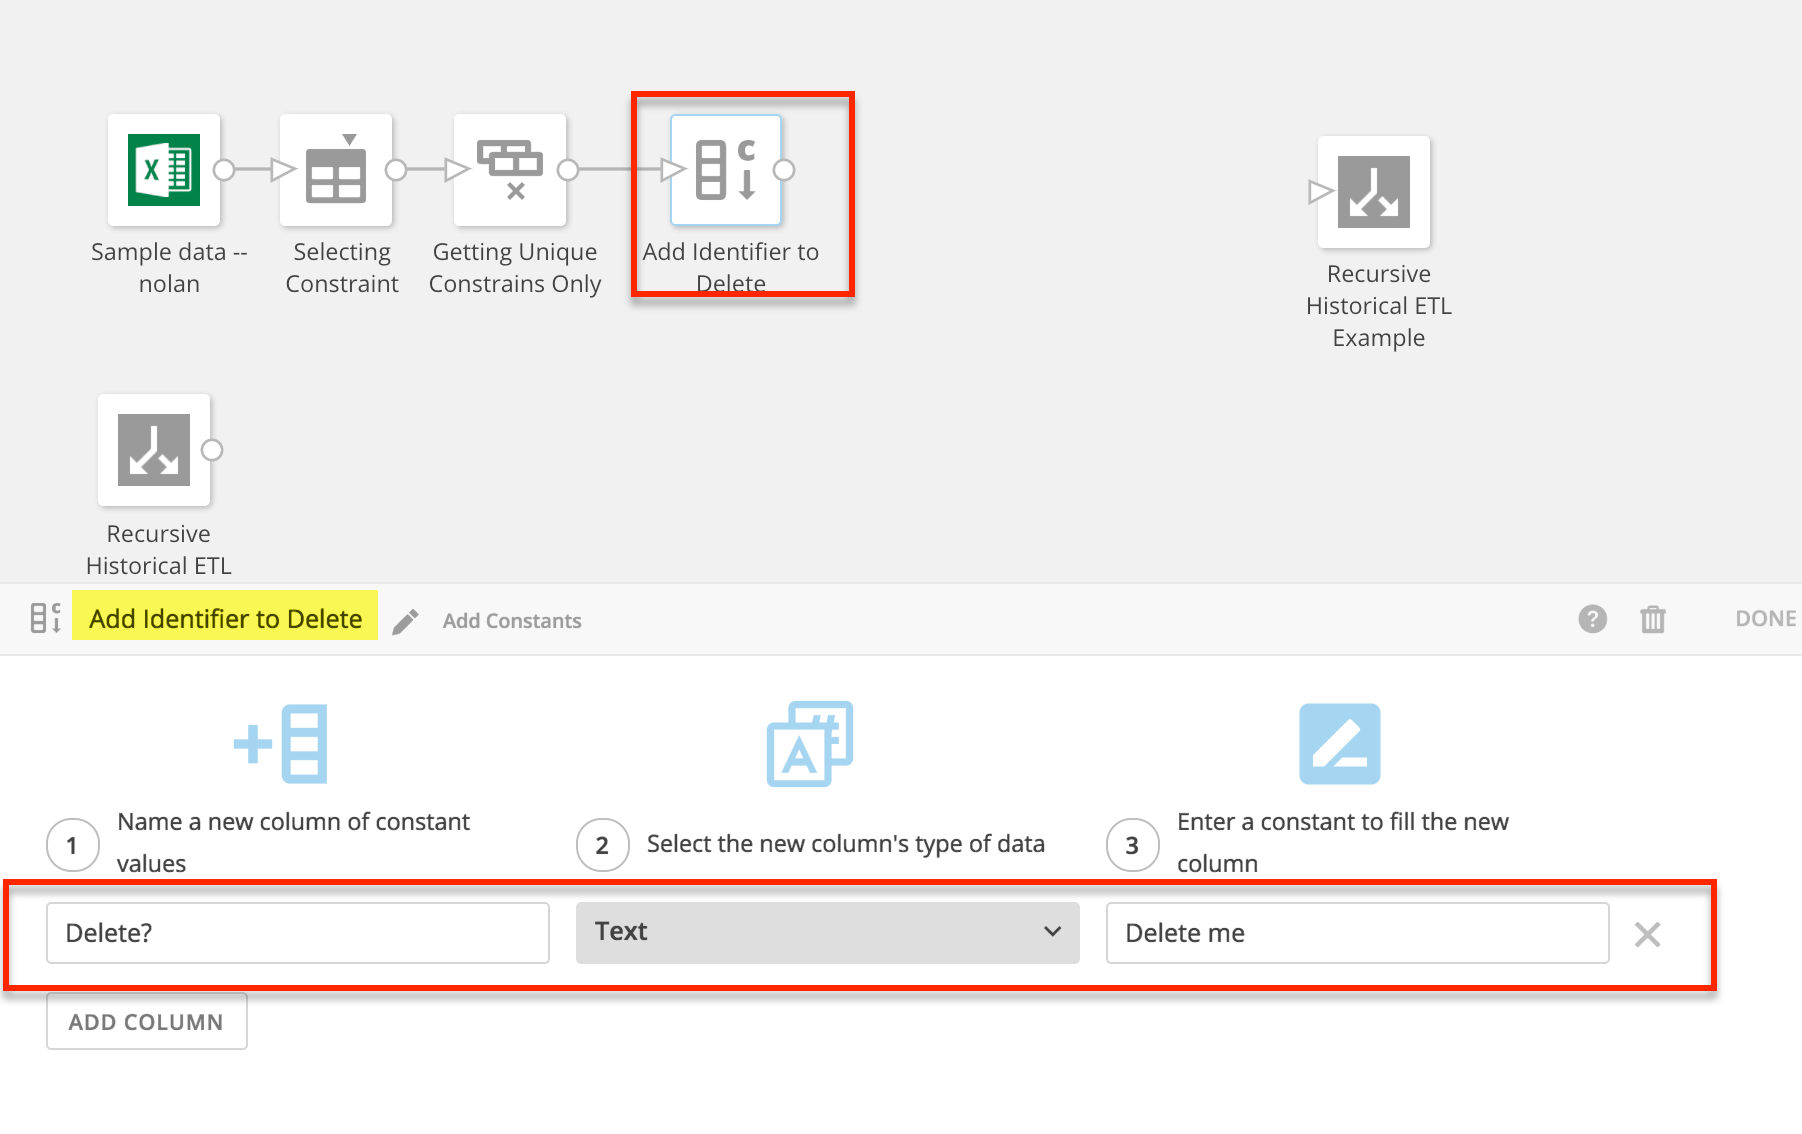 6. Use an Outer Join to join your deletion-identifying column to the unique constraint column in your historical DataSet. If you selected the historical DataSet on the left side of the join, as shown below, use a left outer join. If you select the historical DataSet on the right side of the join, use a right outer join. (Do not select **Inner Join**, as this could result in a loss of data.)
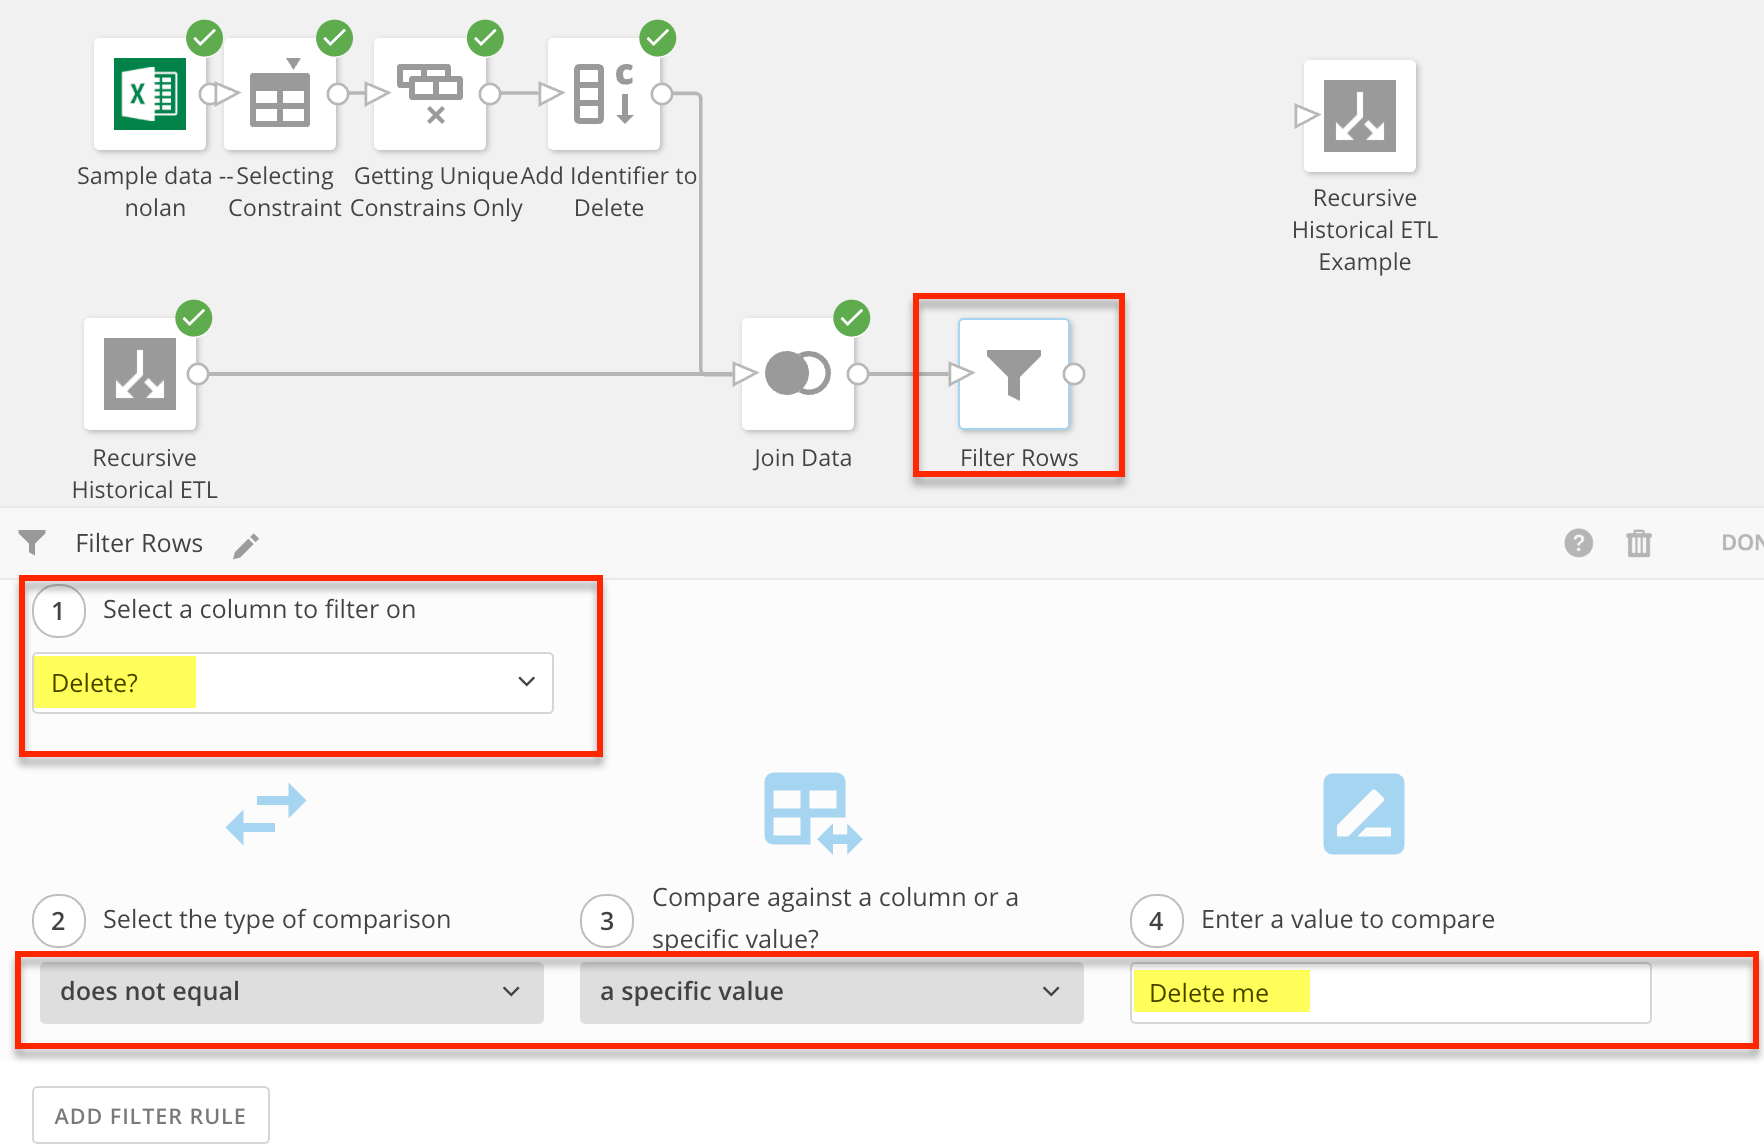
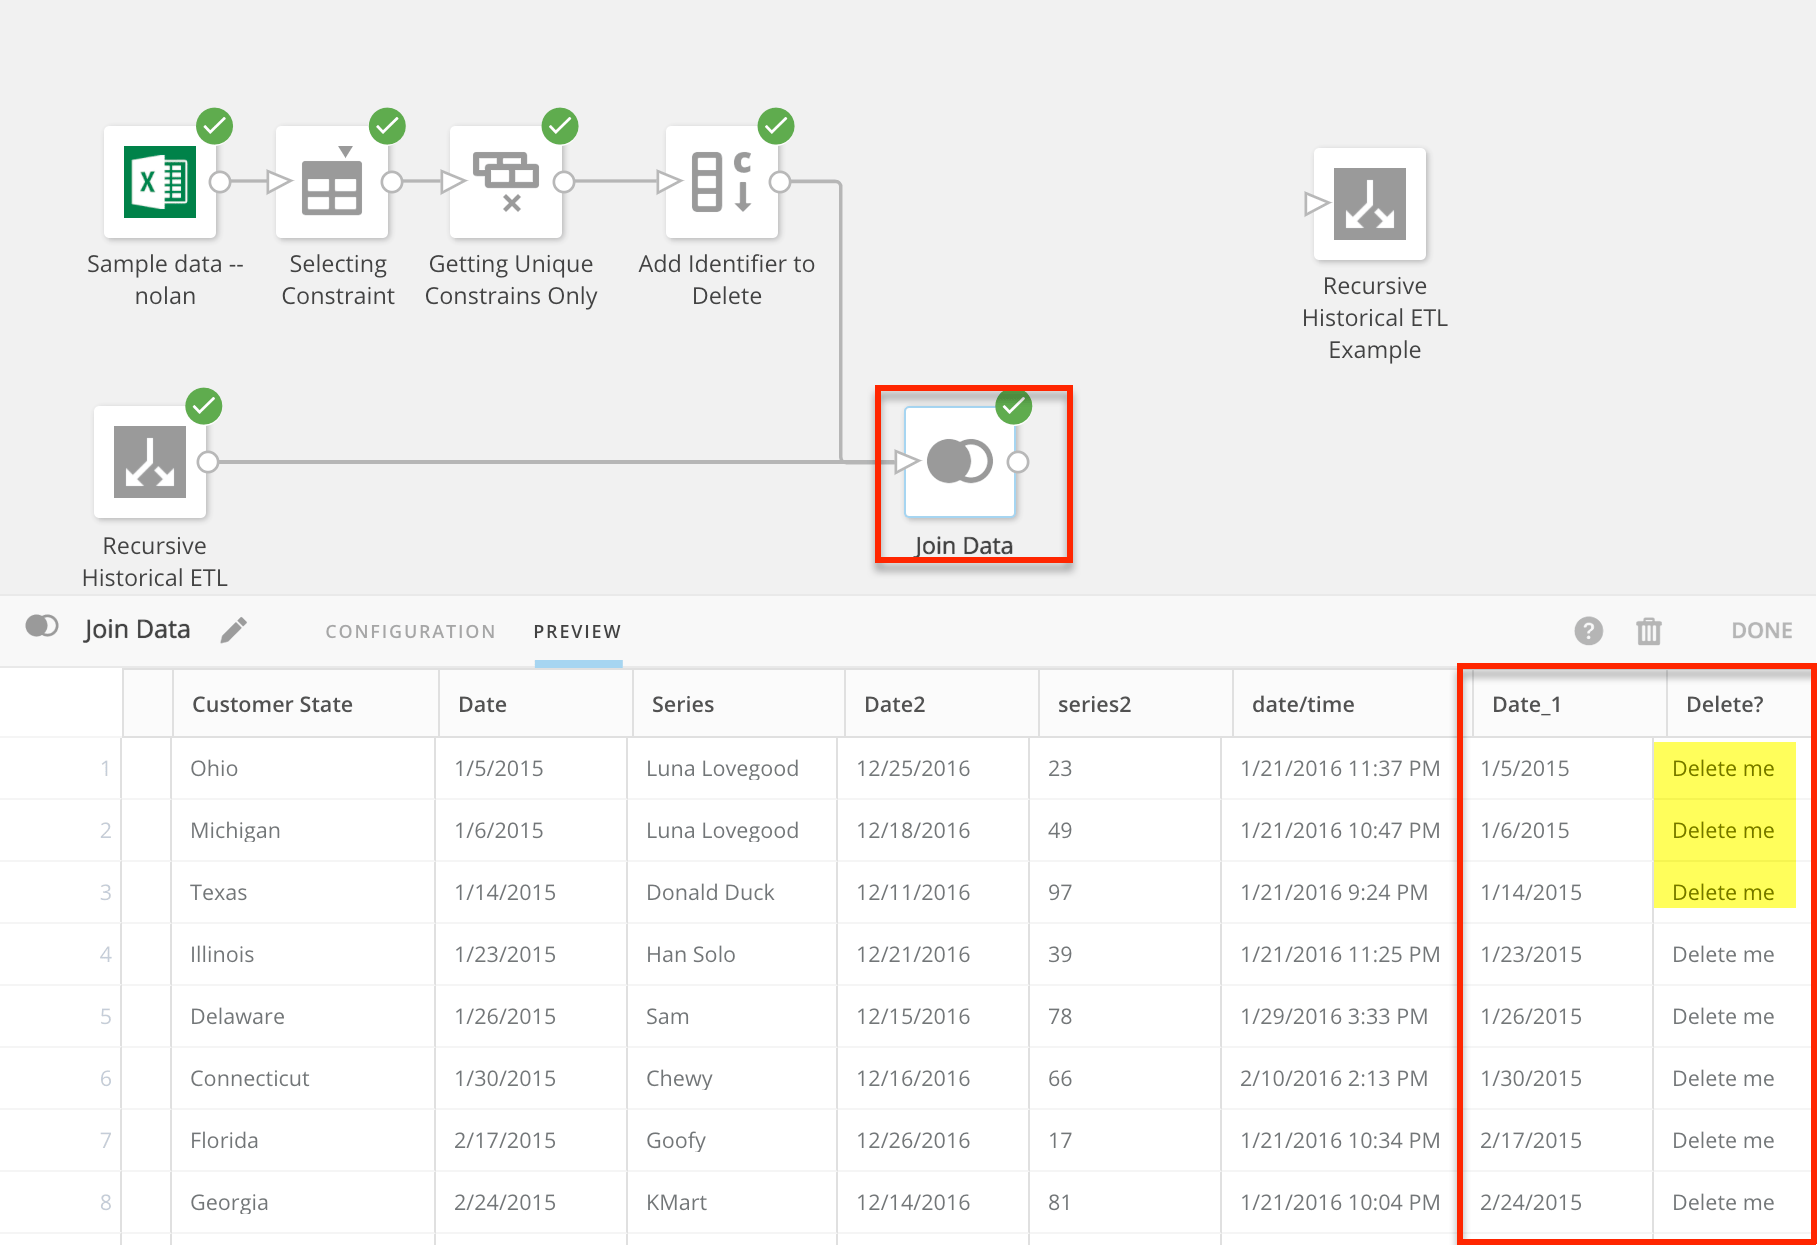 7. Filter any rows from your DataSet that contain the value "Delete Me" (or whatever identifier you came up with in step 5).
This returns only rows from the historical DataSet that do not exist in the new updating DataSet.
7. Filter any rows from your DataSet that contain the value "Delete Me" (or whatever identifier you came up with in step 5).
This returns only rows from the historical DataSet that do not exist in the new updating DataSet.
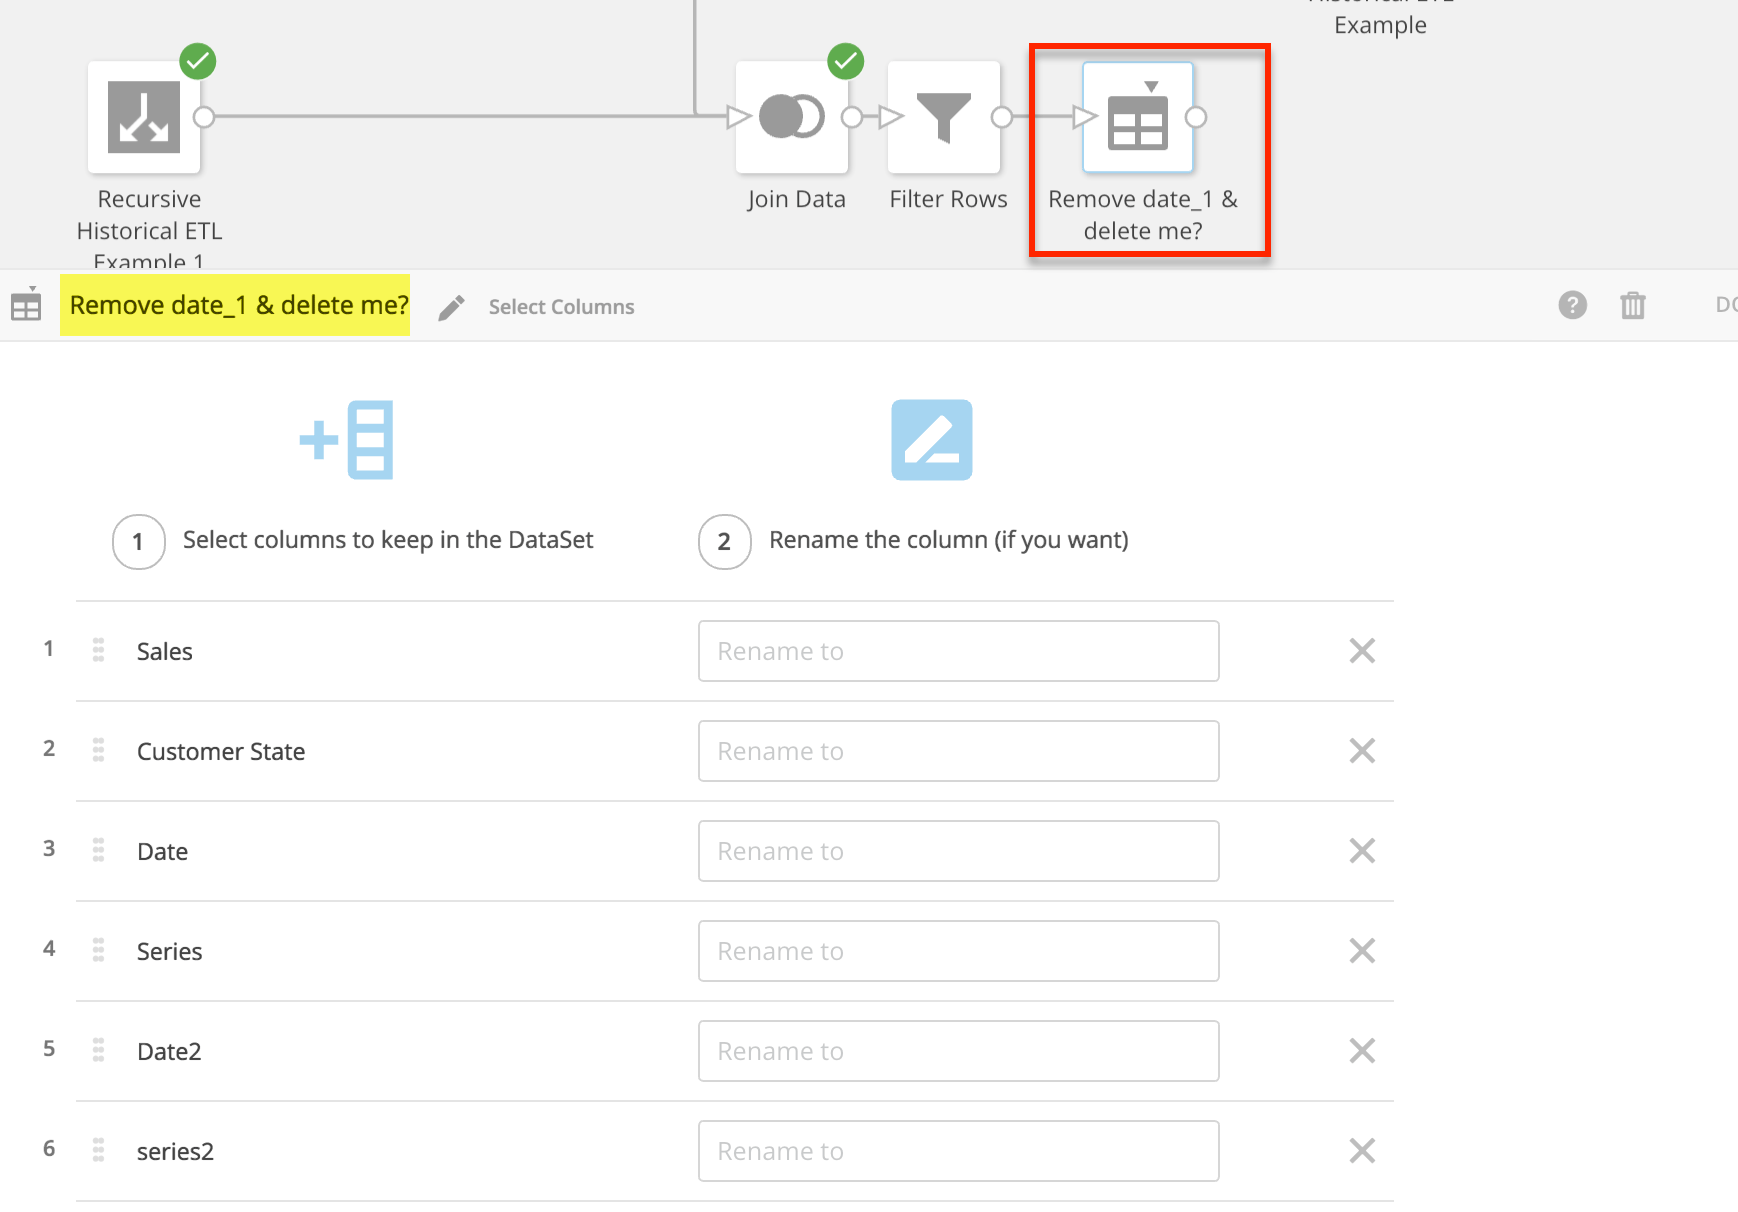
 8. Use **Select Columns** to remove the additional unique constraint column (`Date`) and the unique deletion-identifying column.
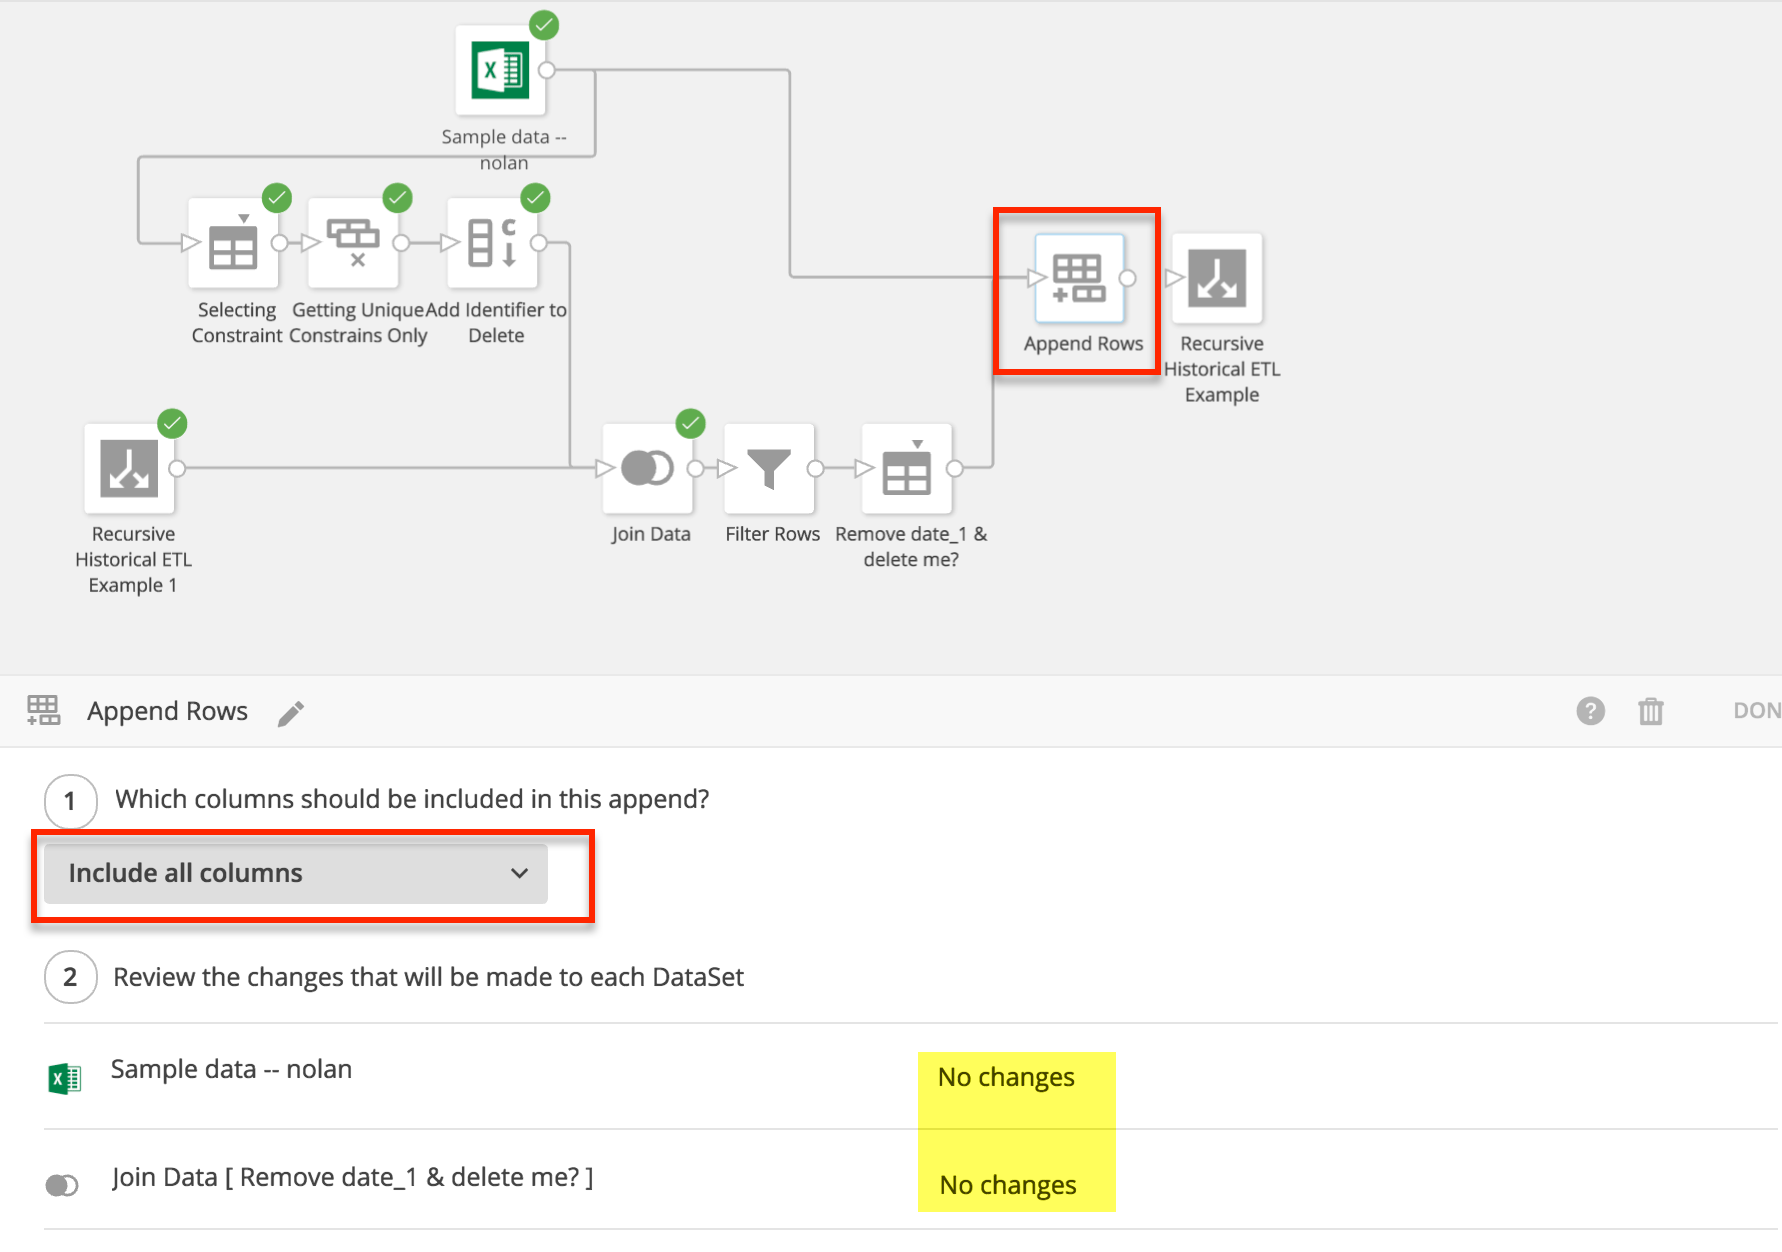
 9. Use **Append** to join the historical DataSet and new updating DataSet.
If all steps have been done correctly, both DataSets will show "No changes."
9. Use **Append** to join the historical DataSet and new updating DataSet.
If all steps have been done correctly, both DataSets will show "No changes."
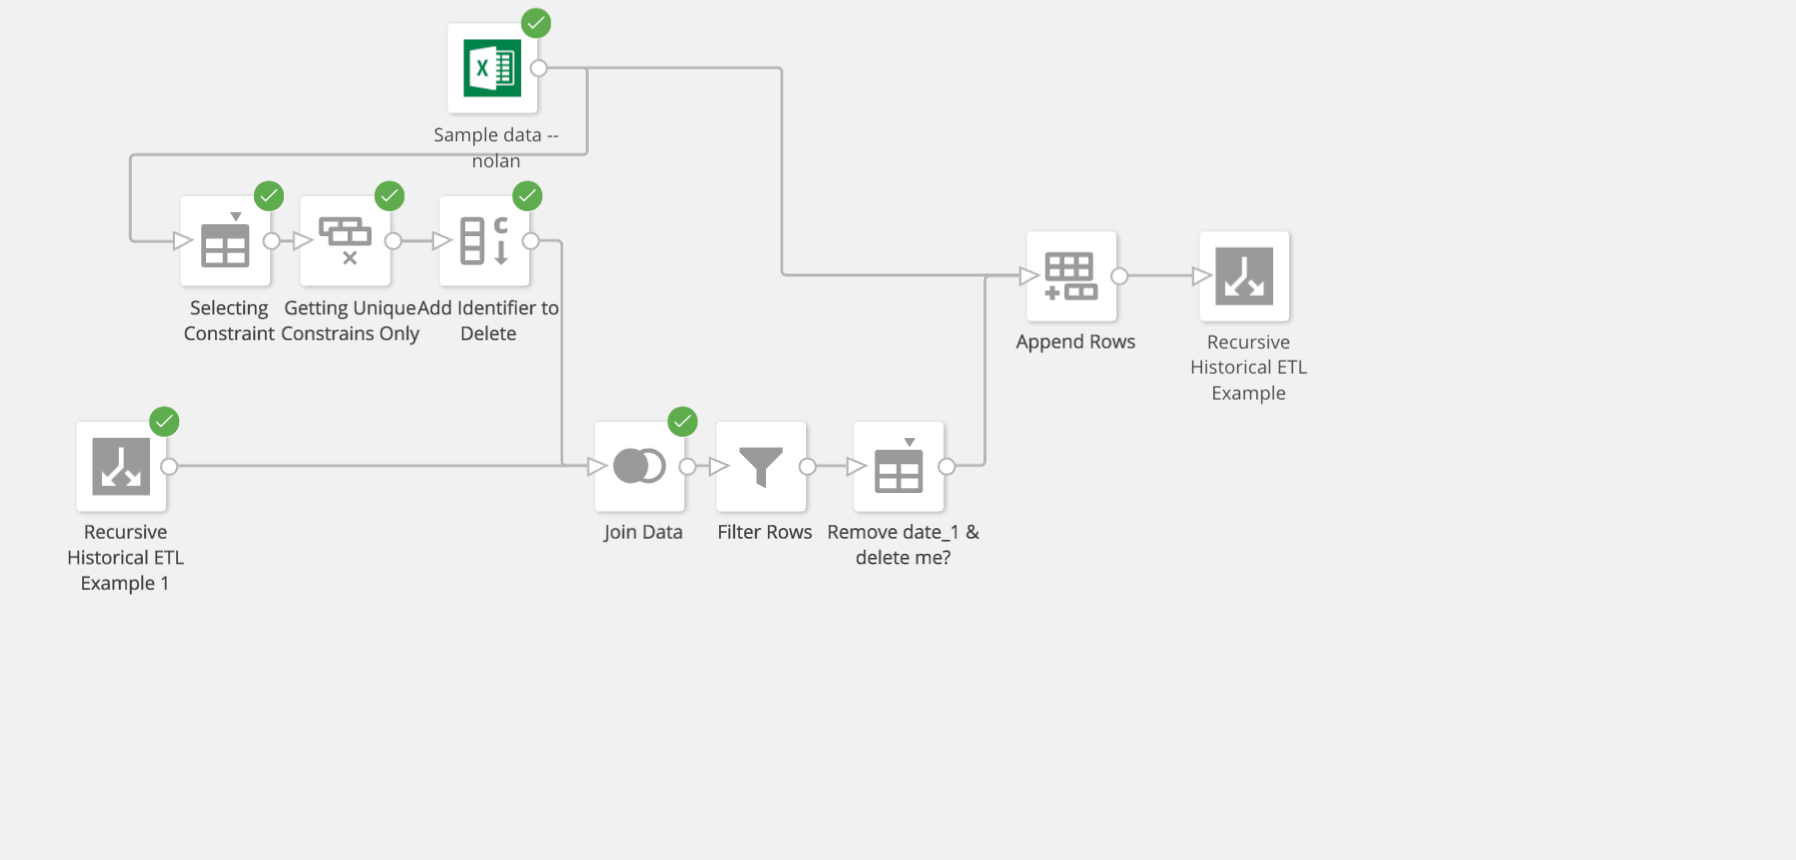
 10. Connect the **Append** tile to your output.
Once complete, your Magic ETL should look like the following:
10. Connect the **Append** tile to your output.
Once complete, your Magic ETL should look like the following:
 ### Troubleshooting/FAQ
See [DataFlow Troubleshooting](https://domo-support.domo.com/s/article/360043427953?language=en_US) for resolutions to common issues.
### Troubleshooting/FAQ
See [DataFlow Troubleshooting](https://domo-support.domo.com/s/article/360043427953?language=en_US) for resolutions to common issues.