Primary Use Cases | Compiling reports about aspects of social media and email marketing, such as campaigns, contacts, blogs, lead sources, pipeline management, etc. |
Primary Metrics |
|
Primary Company Roles | Marketing/sales roles |
Average Implementation Time | Less than 1 hour |
Ease of Use (on a 1-to-10 scale with 1 being easiest) | 2 |
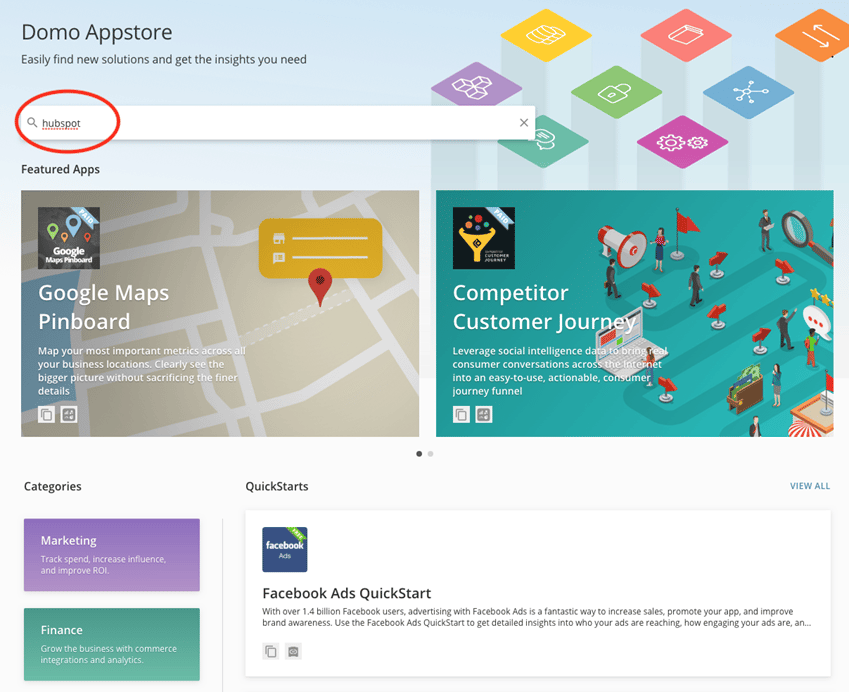 The search result will fetch the relevant connector(s) as shown below.
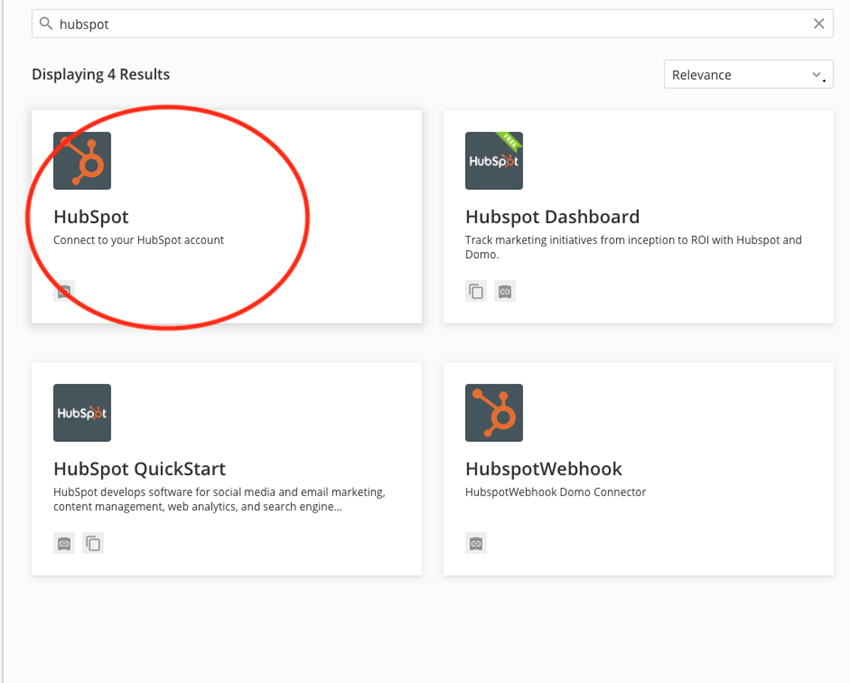 2. Click on the HubSpot tile.
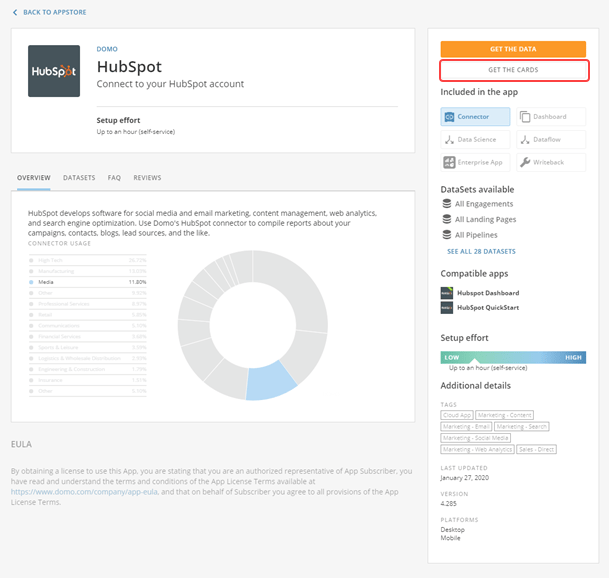
The HubSpot connector dashboard will open, displaying the details view for the connector.
3. Click
**Get the Cards** in the upper right corner.
2. Click on the HubSpot tile.
The HubSpot connector dashboard will open, displaying the details view for the connector.
3. Click
**Get the Cards** in the upper right corner.
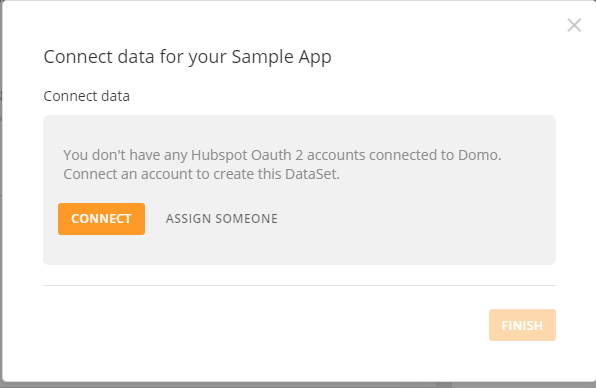
 The **Connect Data for your Sample App** window will pop up. To view your data, you need to connect your HubSpot account to Domo.
4. Click
**Connect**.
The **Connect Data for your Sample App** window will pop up. To view your data, you need to connect your HubSpot account to Domo.
4. Click
**Connect**.
 You are then taken to the HubSpot OAuth login window.
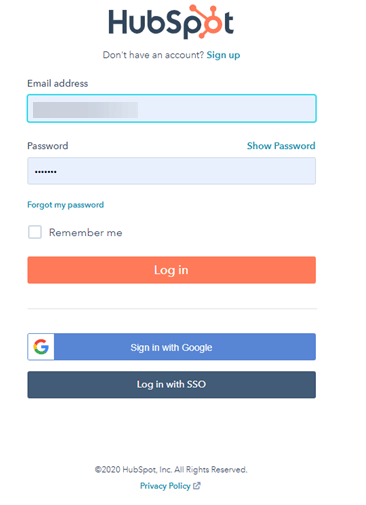 5. Enter your email address and password associated with your HubSpot account. Alternatively, you can use your Google account or Single sign-on for logging in.
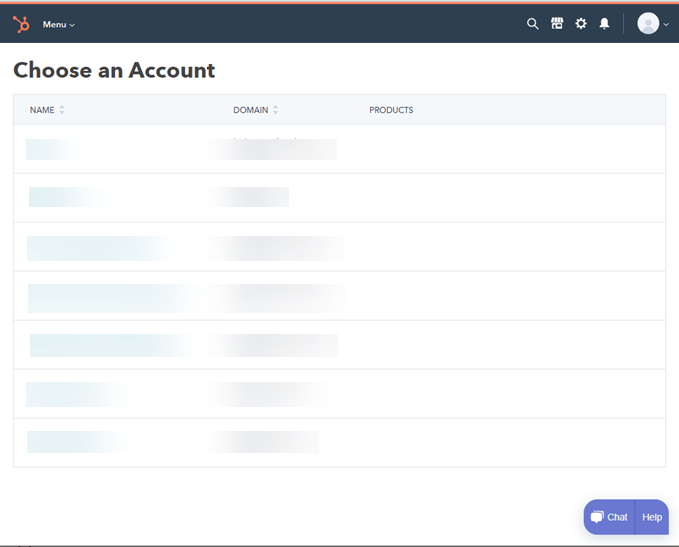
A list of existing accounts appears, including your own account.
6. Select an account that you want to connect to. In this case, select the account that you logged in with.
5. Enter your email address and password associated with your HubSpot account. Alternatively, you can use your Google account or Single sign-on for logging in.
A list of existing accounts appears, including your own account.
6. Select an account that you want to connect to. In this case, select the account that you logged in with.
 The **Connect data for your Sample App** window pops up. Your selected account appears in the **Connect data** field along with its Hub ID and App ID.
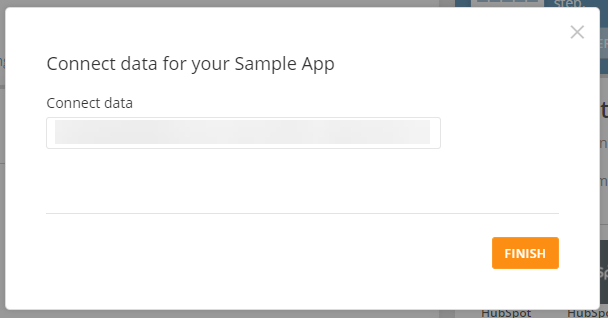 7. Click
**Finish**.
The data connecting process will start. It might take a minute to connect.
7. Click
**Finish**.
The data connecting process will start. It might take a minute to connect.
 Once your sample app data is connected, the visual and graphical presentation of the data associated with your account will appear in a dashboard.
The "Traffic Analytics" section displays collective data about the traffic.
Once your sample app data is connected, the visual and graphical presentation of the data associated with your account will appear in a dashboard.
The "Traffic Analytics" section displays collective data about the traffic.
 The "Deals" section displays the data related to different deals.
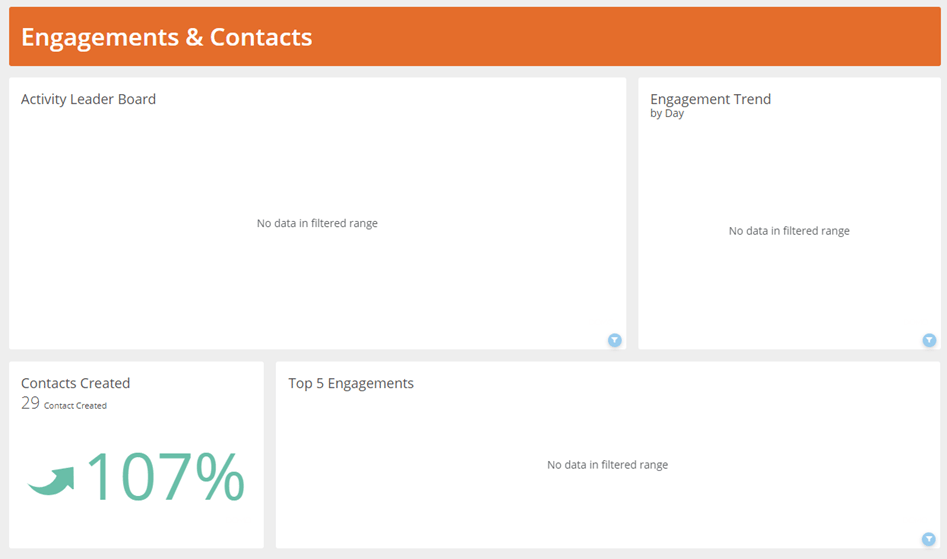
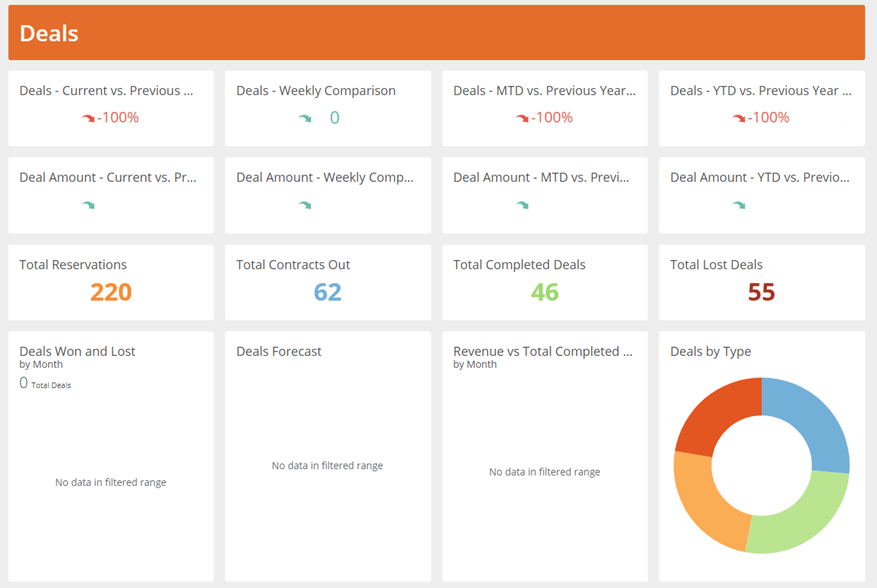 The "Engagements & Contacts" section displays the data about various engagements and contacts altogether.
 ## Best practices
* Your Hub ID is valid for one account in Domo. Creating an additional account in Domo will cause the original account to be disconnected.
* Some reports are marked as beta. Use at your own risk, as these reports do not currently have any documentation on Hubspot's site and may be removed by Hubspot at any time.
## Prerequisites
To connect to your HubSpot account and create a DataSet, you must have the following:
* Your Hub ID. This is located at the bottom of your HubSpot dashboard. For more information, see
[http://help.hubspot.com/articles/How\_To\_Doc/How-to-find-your-hub-id](http://help.hubspot.com/articles/How_To_Doc/How-to-find-your-hub-id "http://help.hubspot.com/articles/How_To_Doc/How-to-find-your-hub-id").
* The username and password you use to log into HubSpot.
## Connecting to Your HubSpot account
This section enumerates the options in the **Credentials** and **Details** panes on the HubSpot Connector page. The components of the other panes in this page, **Scheduling** and **Name & Describe Your DataSet**, are universal across most connector types and are discussed in greater length in [Adding a DataSet Using a Connector](https://domo-support.domo.com/s/article/360042926274?language=en_US "Adding a DataSet Using a Connector").
## Credentials pane
This pane contains a single field where you enter your HubSpot Hub ID (see "Prerequisites" above for more details). You are then taken to the HubSpot OAuth page where you are required to enter the email address and password for your HubSpot account. Once you have entered valid credentials, you can use the same account any time you go to create a new HubSpot DataSet. You can manage connector accounts in the **Accounts** tab in the Data Center. For more information about this tab, see [Manage Connector Accounts](https://domo-support.domo.com/s/article/360042926054?language=en_US "Manage Connector Accounts").
## Details pane
This pane contains a primary menu in which you select your HubSpot report. One other menu, **Contact Fields**, may appear depending on the report type you select.
## Best practices
* Your Hub ID is valid for one account in Domo. Creating an additional account in Domo will cause the original account to be disconnected.
* Some reports are marked as beta. Use at your own risk, as these reports do not currently have any documentation on Hubspot's site and may be removed by Hubspot at any time.
## Prerequisites
To connect to your HubSpot account and create a DataSet, you must have the following:
* Your Hub ID. This is located at the bottom of your HubSpot dashboard. For more information, see
[http://help.hubspot.com/articles/How\_To\_Doc/How-to-find-your-hub-id](http://help.hubspot.com/articles/How_To_Doc/How-to-find-your-hub-id "http://help.hubspot.com/articles/How_To_Doc/How-to-find-your-hub-id").
* The username and password you use to log into HubSpot.
## Connecting to Your HubSpot account
This section enumerates the options in the **Credentials** and **Details** panes on the HubSpot Connector page. The components of the other panes in this page, **Scheduling** and **Name & Describe Your DataSet**, are universal across most connector types and are discussed in greater length in [Adding a DataSet Using a Connector](https://domo-support.domo.com/s/article/360042926274?language=en_US "Adding a DataSet Using a Connector").
## Credentials pane
This pane contains a single field where you enter your HubSpot Hub ID (see "Prerequisites" above for more details). You are then taken to the HubSpot OAuth page where you are required to enter the email address and password for your HubSpot account. Once you have entered valid credentials, you can use the same account any time you go to create a new HubSpot DataSet. You can manage connector accounts in the **Accounts** tab in the Data Center. For more information about this tab, see [Manage Connector Accounts](https://domo-support.domo.com/s/article/360042926054?language=en_US "Manage Connector Accounts").
## Details pane
This pane contains a primary menu in which you select your HubSpot report. One other menu, **Contact Fields**, may appear depending on the report type you select.
Menu | Description | ||||||||||||||||||||||||||||||||||||||||||||||||||||||||
|---|---|---|---|---|---|---|---|---|---|---|---|---|---|---|---|---|---|---|---|---|---|---|---|---|---|---|---|---|---|---|---|---|---|---|---|---|---|---|---|---|---|---|---|---|---|---|---|---|---|---|---|---|---|---|---|---|---|
Report | Select a HubSpot report. The following reports are available:
| ||||||||||||||||||||||||||||||||||||||||||||||||||||||||
Contact Fields | Select all fields that you want to show in your report. You must select at least one field. | ||||||||||||||||||||||||||||||||||||||||||||||||||||||||
Expand Field | Select this checkbox to get memberships data. | ||||||||||||||||||||||||||||||||||||||||||||||||||||||||
| Form Submission Mode | Specify which form submissions should be fetched. | ||||||||||||||||||||||||||||||||||||||||||||||||||||||||
| Show List Memberships | Select this checkbox to indicate whether current list memberships should be fetched. | ||||||||||||||||||||||||||||||||||||||||||||||||||||||||
| Flatten List Memberships | Select this checkbox to indicate whether there should be a row for each contact's list membership. Note : This can make the dataset very large. | ||||||||||||||||||||||||||||||||||||||||||||||||||||||||
| Property Mode | Select this checkbox to retrieve historical data for the 'Lifecycle Stage' property. | ||||||||||||||||||||||||||||||||||||||||||||||||||||||||
| List ID | Select the list for which you want to get contact data. | ||||||||||||||||||||||||||||||||||||||||||||||||||||||||
| Object Type | Select the associated Object Type(Depending on the object you want to fetch engagements for). | ||||||||||||||||||||||||||||||||||||||||||||||||||||||||
| Breakdown By | Select the category to break down the analytics data. | ||||||||||||||||||||||||||||||||||||||||||||||||||||||||
| Select properties | Select whether to retrieve all or some properties. | ||||||||||||||||||||||||||||||||||||||||||||||||||||||||
| Deal Properties | Select the properties to retrieve. | ||||||||||||||||||||||||||||||||||||||||||||||||||||||||
| Retrieve deal stage property history | Select this checkbox to retrieve the deal stage's history instead of just the current value. | ||||||||||||||||||||||||||||||||||||||||||||||||||||||||
| Object ID | Select the associated Id. | ||||||||||||||||||||||||||||||||||||||||||||||||||||||||
| Time Period | Select the time period to group the analytics data. | ||||||||||||||||||||||||||||||||||||||||||||||||||||||||
| Filter | Filter the returned data to include only the specified breakdown. Provide single or multiple values for the filter. Example: hubspot or hubspot,social,direct. | ||||||||||||||||||||||||||||||||||||||||||||||||||||||||
| Data To Retrieve | Select whether you want to retrieve all data or only the data since the last successful run. | ||||||||||||||||||||||||||||||||||||||||||||||||||||||||
| Object Type | Select object type. | ||||||||||||||||||||||||||||||||||||||||||||||||||||||||
| Include Inactive | Select include inactive option. | ||||||||||||||||||||||||||||||||||||||||||||||||||||||||
| Inactive Owners Selection | Select whether to include inactive owners or not. | ||||||||||||||||||||||||||||||||||||||||||||||||||||||||
| Ticket Properties | Select the ticket properties to retrieve. | ||||||||||||||||||||||||||||||||||||||||||||||||||||||||
Report Date | Select whether the report data is for a specific date or for a relative number of days back from today. | ||||||||||||||||||||||||||||||||||||||||||||||||||||||||
Select Specific Date | Select the date for the report. | ||||||||||||||||||||||||||||||||||||||||||||||||||||||||
Days Back | Enter the number of past days that should appear in the report. | ||||||||||||||||||||||||||||||||||||||||||||||||||||||||
Start Date | Specify whether the first date in your date range is a specific or relative date. You select the last date in your range in End Date . | ||||||||||||||||||||||||||||||||||||||||||||||||||||||||
End Date | Specify whether the second date in your date range is a specific or relative date. You select the first date in your range in Start Date . | ||||||||||||||||||||||||||||||||||||||||||||||||||||||||
Select Specific Start Date | Select the first date in your date range. | ||||||||||||||||||||||||||||||||||||||||||||||||||||||||
Select Specific End Date | Select the second date in your date range. | ||||||||||||||||||||||||||||||||||||||||||||||||||||||||
Days Back to Start From | Enter the number of the farthest day back that should be represented in the report. Combine with Days Back to End At to create a range of represented days. For example, if you entered 10 for Days Back to Start From and 5 for Days Back to End At , the report would contain data for 10 days ago up until 5 days ago. | ||||||||||||||||||||||||||||||||||||||||||||||||||||||||
Days Back to End At | Enter the number of the most recent day back that should be represented in the report. Combine with Days Back to Start From to create a range of represented days. For example, if you entered 10 for Days Back to Start From and 5 for Days Back to End At , the report would contain data for 10 days ago up until 5 days ago. |