> ## Documentation Index
> Fetch the complete documentation index at: https://domoinc-openapi-sync-dataflows.mintlify.site/llms.txt
> Use this file to discover all available pages before exploring further.
# Manage Plugins in Workbench 5
export const InlineImage = ({src, alt = '', height = '1.6em'}) => {
return  ;
};
## Intro
In the Workbench 5 plugins manager you can view registered plugins and add new plugins. Plugins display with their publisher, version number, description (if available), and assembly name.
***
## Manage Plugins in Workbench 5.2
Follow these steps to add plugins to Workbench:
1. Open Workbench 5 as an administrator and select
**More**
>
**Plugins** in the left sidebar.
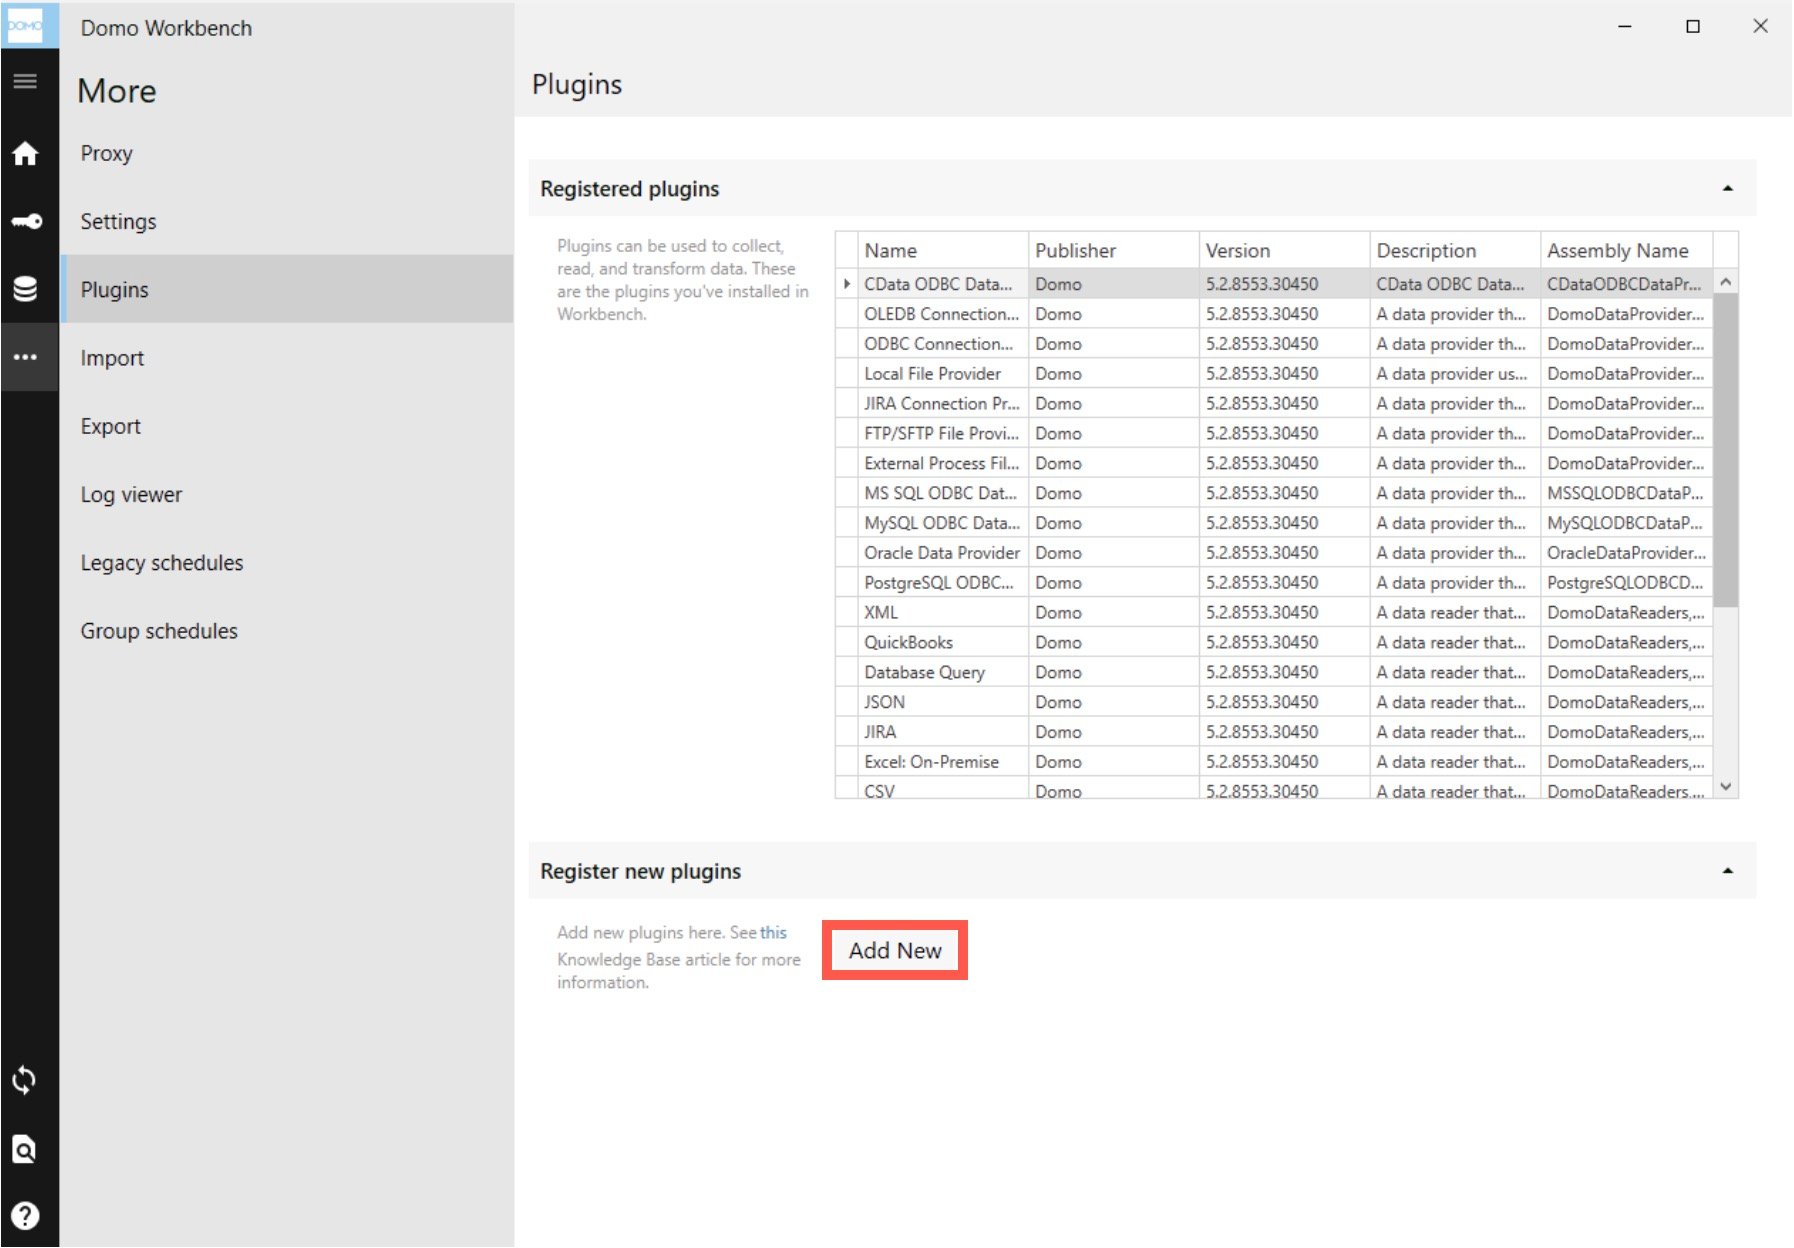
2. In the
**Plugins** section under **Register new plugins**, select **Add New**.
;
};
## Intro
In the Workbench 5 plugins manager you can view registered plugins and add new plugins. Plugins display with their publisher, version number, description (if available), and assembly name.
***
## Manage Plugins in Workbench 5.2
Follow these steps to add plugins to Workbench:
1. Open Workbench 5 as an administrator and select
**More**
>
**Plugins** in the left sidebar.
2. In the
**Plugins** section under **Register new plugins**, select **Add New**.
 3. Select the Domo Workbench plugin file and select
**Open**.
You can now validate the plugin.
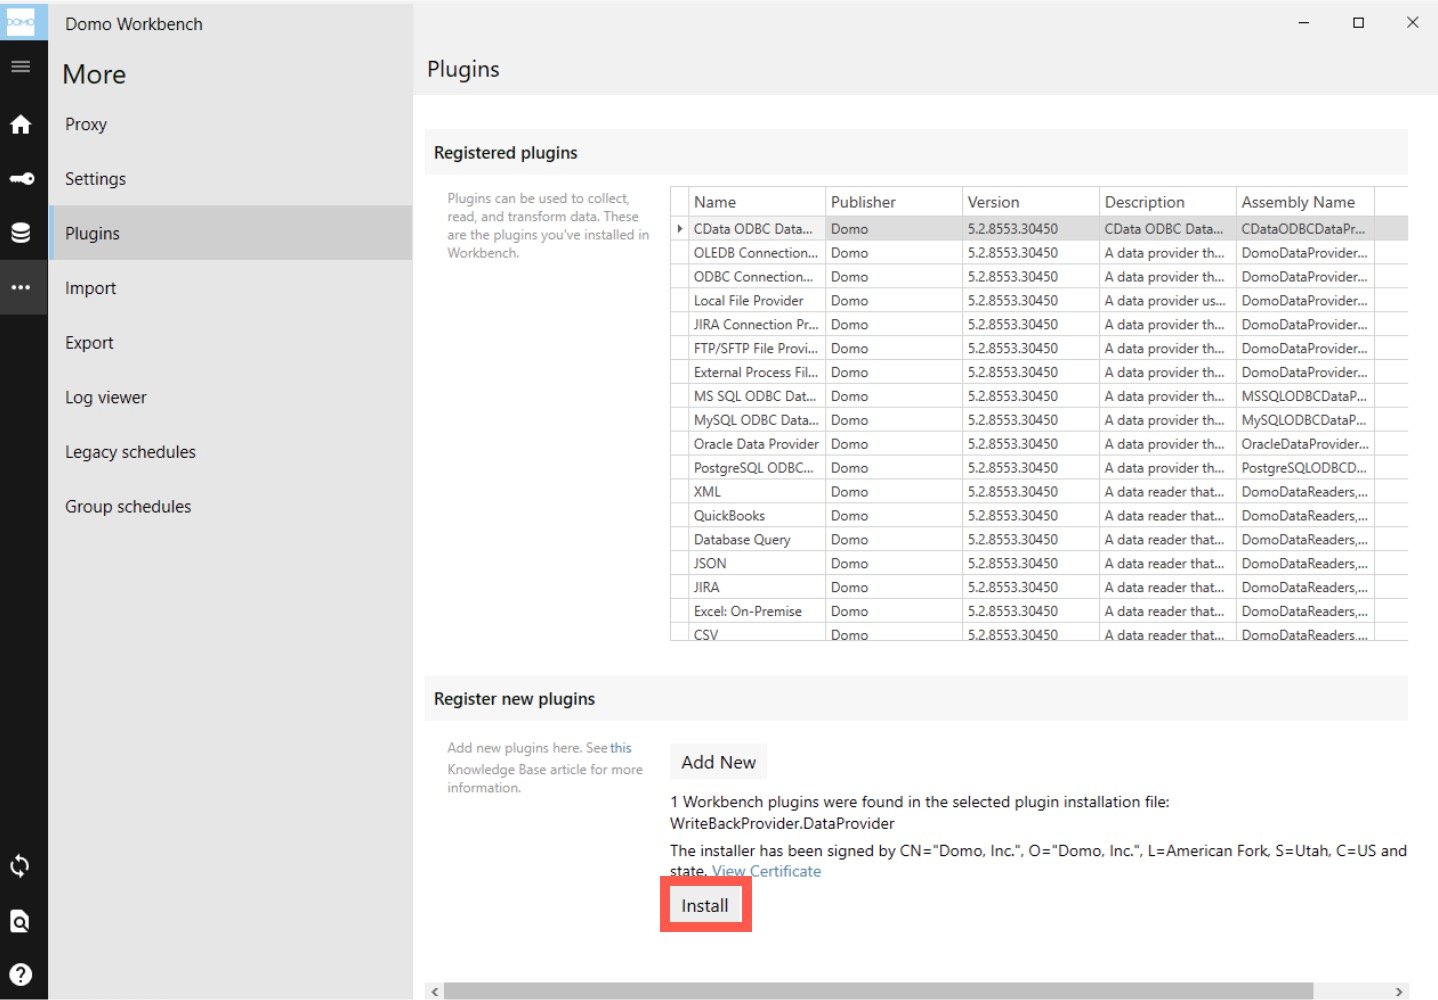
4. Select
**Install** after you have validated the plugin information.
3. Select the Domo Workbench plugin file and select
**Open**.
You can now validate the plugin.
4. Select
**Install** after you have validated the plugin information.
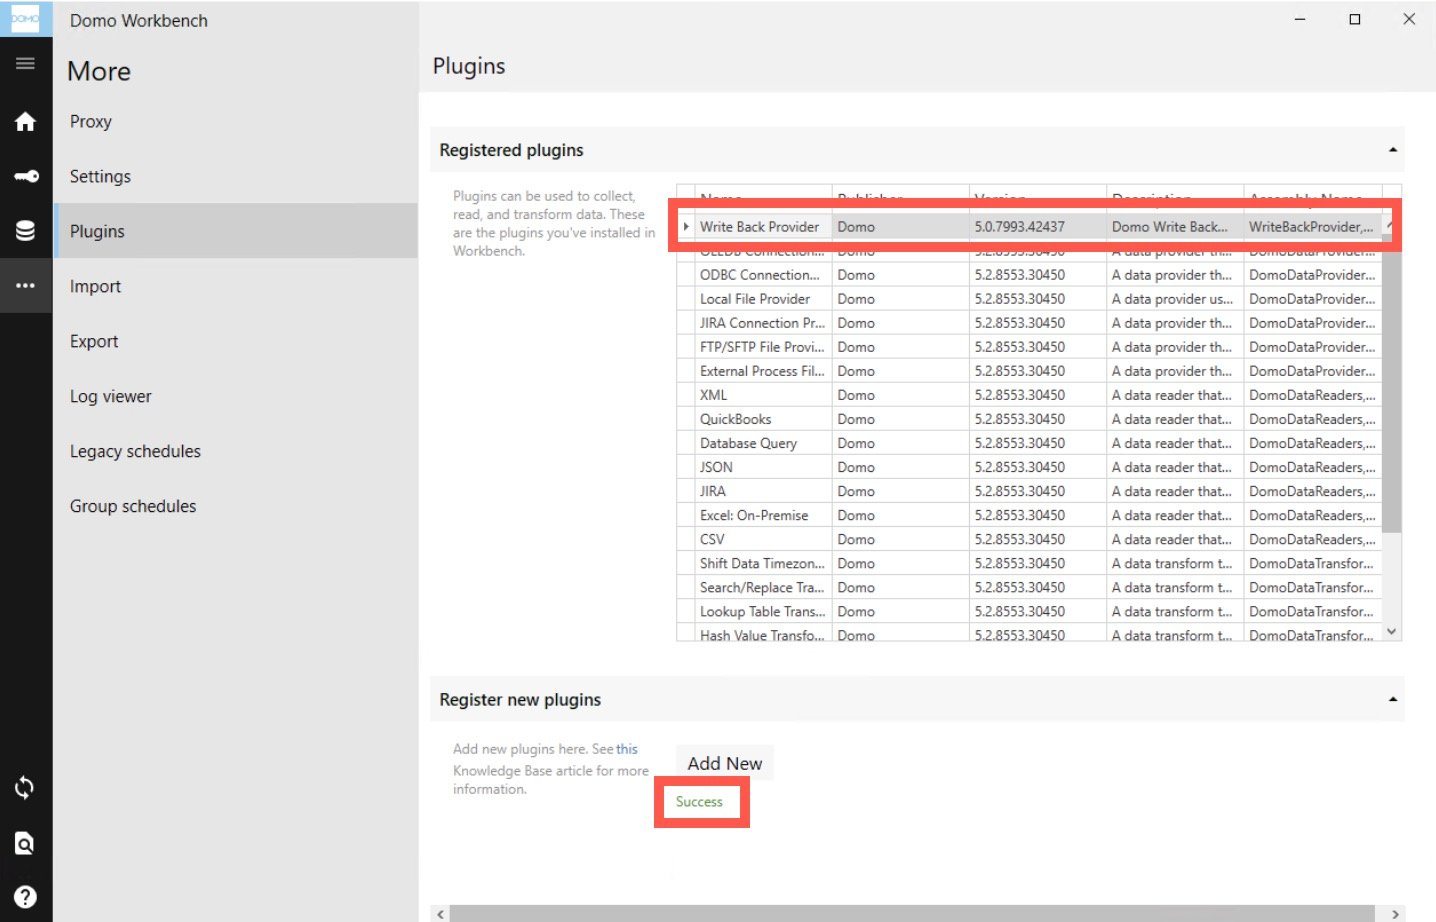
 5. When the plugin is imported, you receive a
Success message and the plugin displays in the list of Registered Plugins.
5. When the plugin is imported, you receive a
Success message and the plugin displays in the list of Registered Plugins.
 ## Manage Plugins in Workbench 5 and 5.1
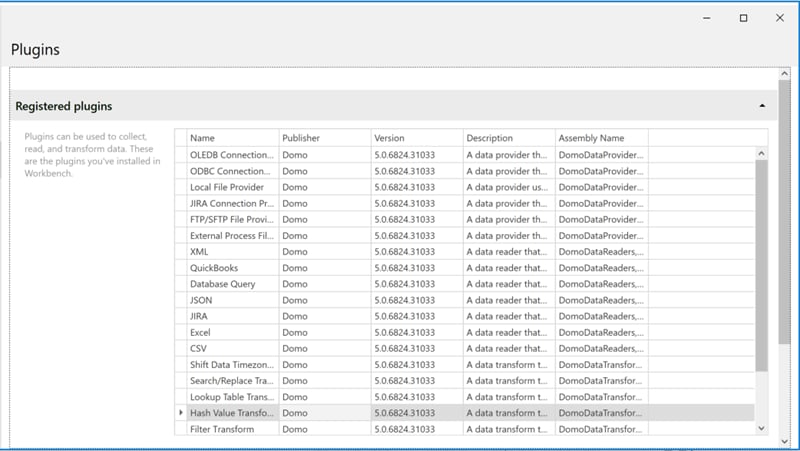 All Workbench plugins are contained within Dynamic Link Libraries (DLLs). You can add plugins to Workbench by selecting the desired DLL on your machine or network.
Follow these steps to add plugins to Workbench:
**Note:** Your desired plugin must be located in a subdirectory of the chosen directory.
1. Select
**More** in the left sidebar.
2. Select
**Plugins.** (If you do not see this option, select to expand it.)
The plugin manager opens.
3. Under
**Register new plugins**, select the ellipsis (...) next to the **Search path** field.
All Workbench plugins are contained within Dynamic Link Libraries (DLLs). You can add plugins to Workbench by selecting the desired DLL on your machine or network.
Follow these steps to add plugins to Workbench:
**Note:** Your desired plugin must be located in a subdirectory of the chosen directory.
1. Select
**More** in the left sidebar.
2. Select
**Plugins.** (If you do not see this option, select to expand it.)
The plugin manager opens.
3. Under
**Register new plugins**, select the ellipsis (...) next to the **Search path** field.
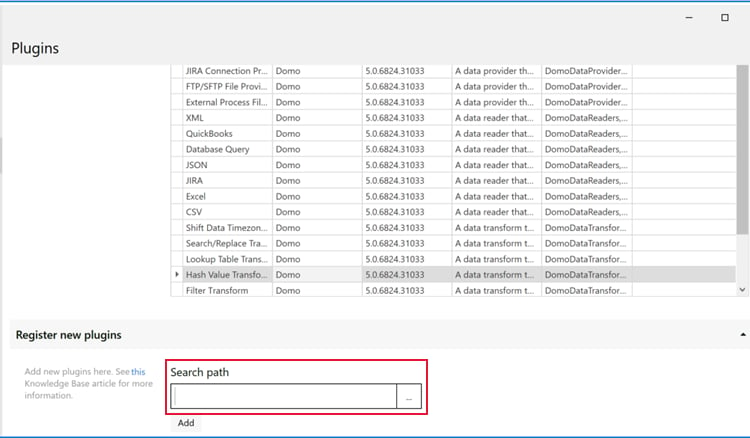 4. On your machine or network, locate and open the DLL containing the plugins you want to add.
5. Select
**Add** after you have chosen your directory.
4. On your machine or network, locate and open the DLL containing the plugins you want to add.
5. Select
**Add** after you have chosen your directory.