> ## Documentation Index
> Fetch the complete documentation index at: https://domoinc-openapi-sync-dataflows.mintlify.site/llms.txt
> Use this file to discover all available pages before exploring further.

# Using Smart Text

export const InlineImage = ({src, alt = '', height = '1.6em'}) => {
  return <img noZoom src={src} alt={alt} style={{
    display: 'inline',
    verticalAlign: 'start',
    height: height,
    margin: '0'
  }} />;
};

### Intro

You can add Smart Text to a card title or description while working in Analyzer or from a dashboard. Smart Text references certain data elements and updates in place whenever the underlying data changes. You can use more than one piece of Smart Text at a time, if needed.

Anyone with permission to edit a card or dashboard can add/modify associated Smart Text.

Personalized Data Permissions (PDP) do apply when adding Smart Text to a card title or description. For more information about PDP, see [Personalized Data Permissions (PDP)](/s/article/360042934614).

The Smart Text options are described below:

* **Date range —**
  Shows dates in text. Ex: this quarter, graphed by week
* **Filters —**
  Displays the filters applied. Ex: order status.
* **Variables —**
  When a variable is present, the selected value of the variable is listed.
* **Segments used —**
  Names the visible segments.
* **DataSet info —**
  Displays information about the DataSet such as the date last updated or owner.

  <Note>
    **Note:**
    You can also add Smart Text to Notebook Cards. See
    [Adding a Notebook Card](/s/article/360043430233)
    to learn more.
  </Note>

***

* [Add Smart Text in Analyzer](#add_smart_text_in_analyzer)
* [Add Smart Text on a dashboard](#add_smart_text_on_dashboard)
* [Configure Smart Text](#configure_smart_text)
* [Video — Smart Text Overview](#video)

***

### Add Smart Text in Analyzer

Inside Analyzer, follow these steps to add Smart Text to a card title or description:

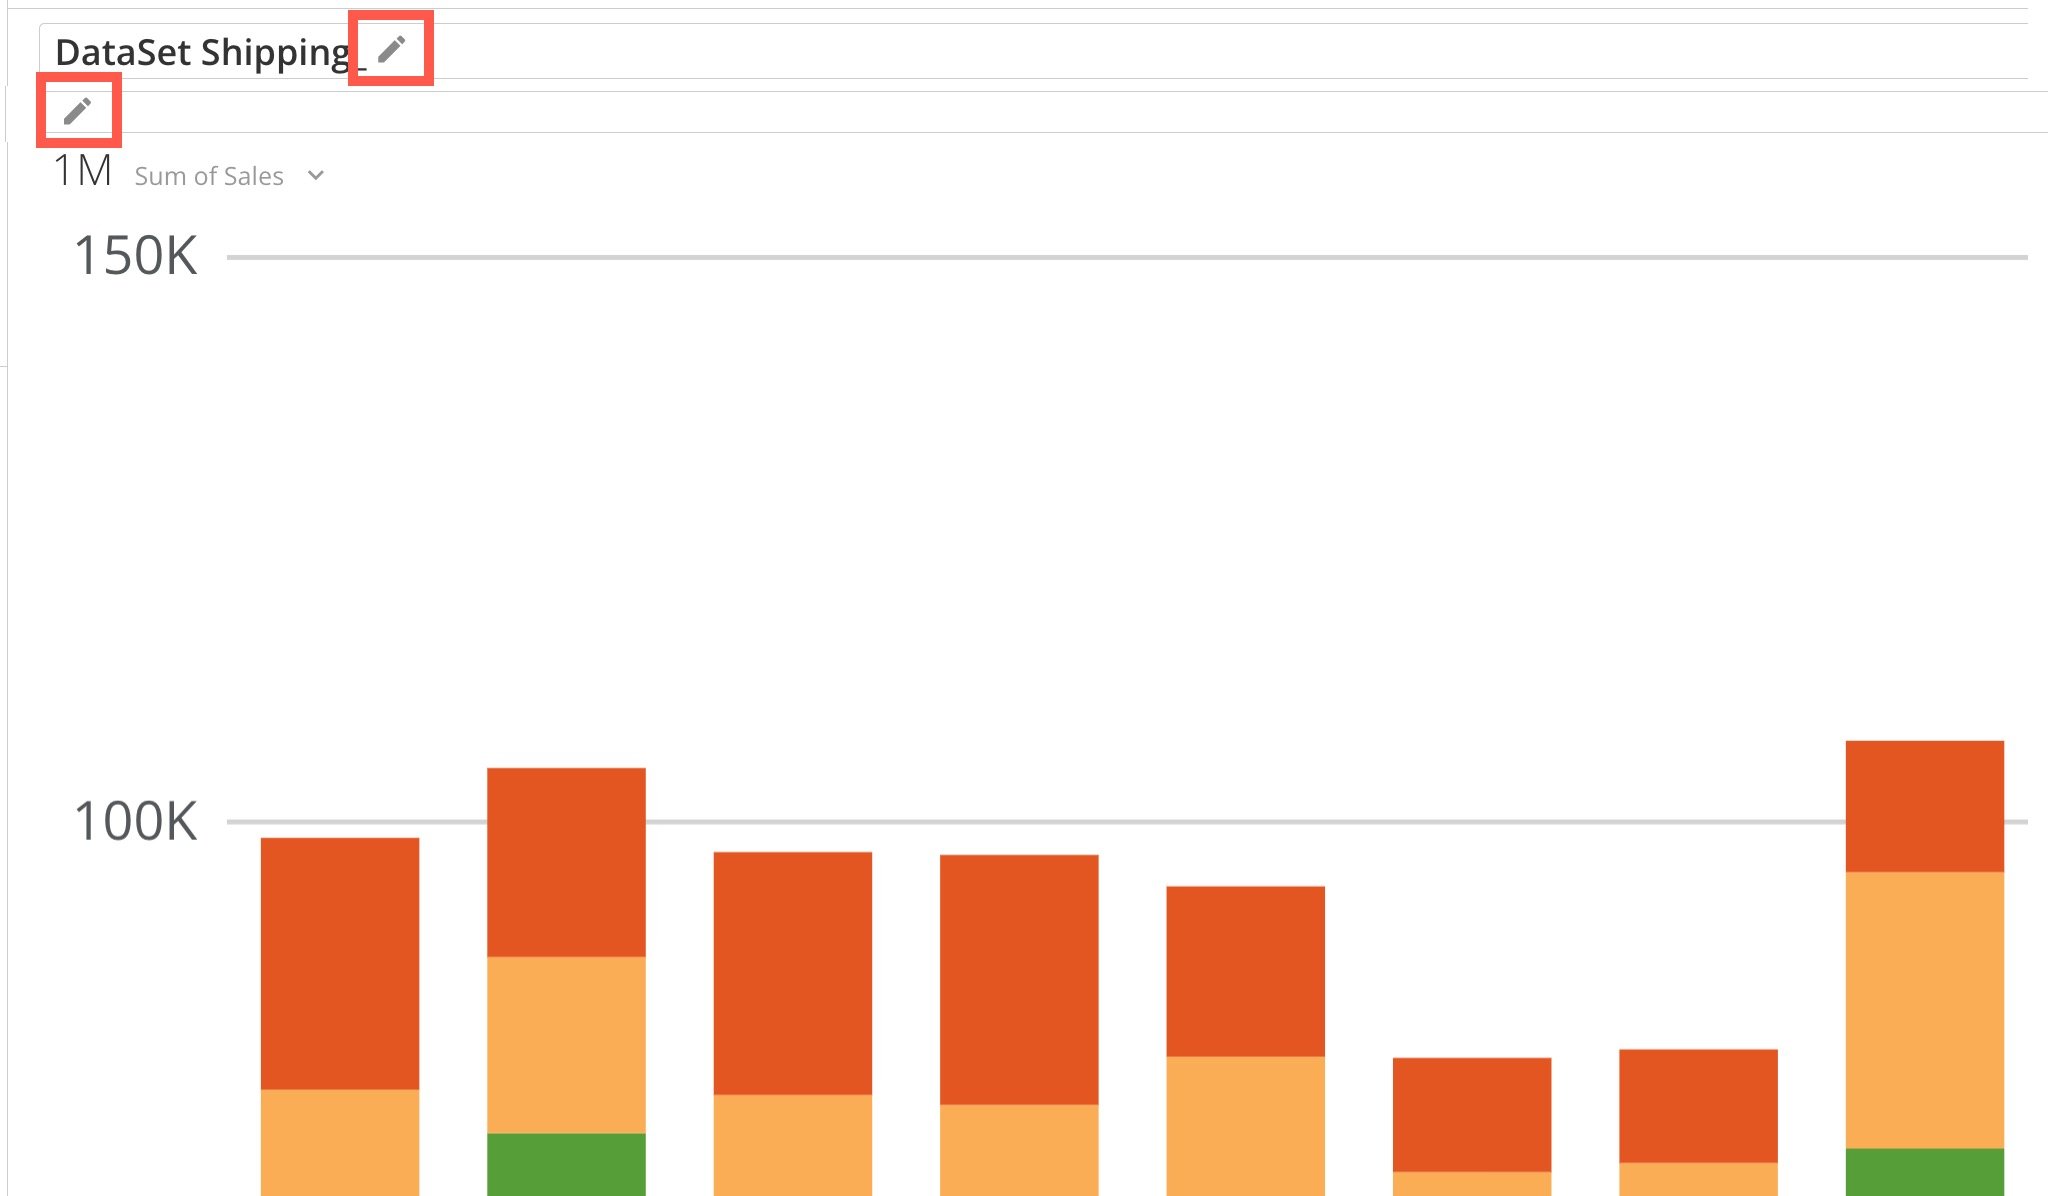
1. Hover over the card title or description to display the
   <InlineImage src="/images/kb/ka0Vq0000000Qyb-00N5w00000Ri7BU-0EMVq000000K309.jpg" /> **Edit** option.

   <Frame>
     <img alt="select card title or desc.jpg" src="https://mintcdn.com/domoinc-openapi-sync-dataflows/gDOtiCXH_3EtosfI/images/kb/ka0Vq0000000Qyb-00N5w00000Ri7BU-0EMVq000000K31l.jpg?fit=max&auto=format&n=gDOtiCXH_3EtosfI&q=85&s=ee31984c305a8b4270228d4e6db028a6" style={{width: 401, height: 234}} width="2048" height="1196" data-path="images/kb/ka0Vq0000000Qyb-00N5w00000Ri7BU-0EMVq000000K31l.jpg" />
   </Frame>
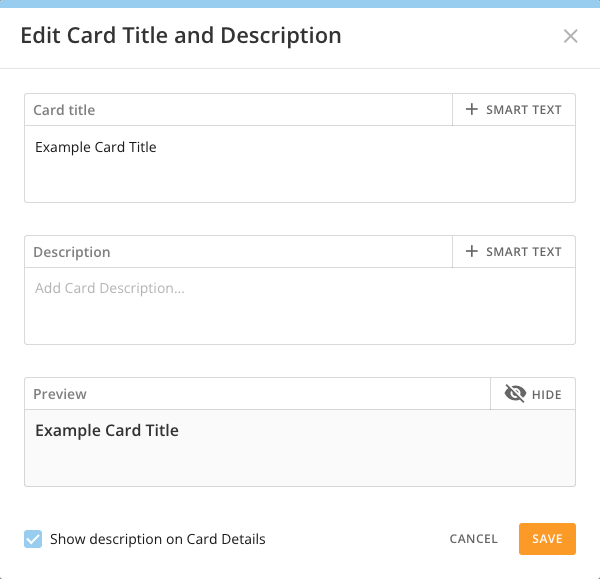
2. Select either option to open the
   **Edit Card Title and Description** modal.
   <Frame>
     <img alt="Card_Title_Modal.png" src="https://mintcdn.com/domoinc-openapi-sync-dataflows/STh97d86twEaUU5_/images/kb/ka05w00000125NC-00N5w00000Ri7BU-0EM5w000005vOEu.png?fit=max&auto=format&n=STh97d86twEaUU5_&q=85&s=d2317abf00ac1b7560255e8e0978aee7" style={{width: 350, height: 337}} width="600" height="579" data-path="images/kb/ka05w00000125NC-00N5w00000Ri7BU-0EM5w000005vOEu.png" />
   </Frame>

To continue, see [Configure Smart Text](#configure_smart_text).

### Add Smart Text on a Dashboard

1. Navigate to the dashboard where you want to add Smart Text and select
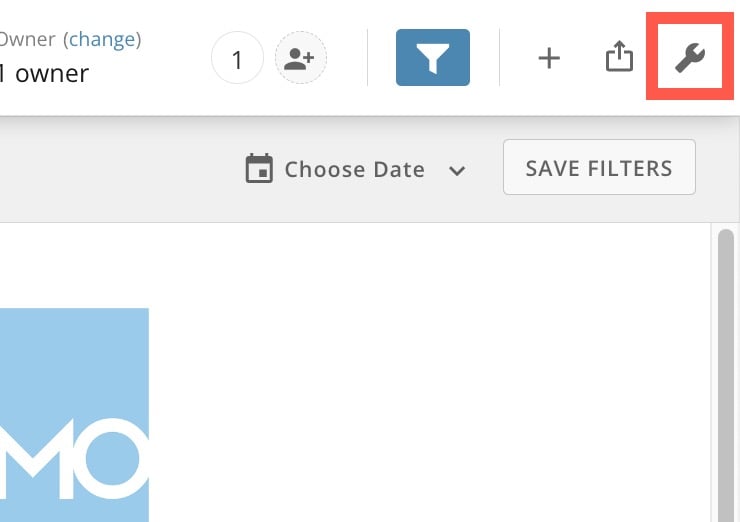
   <InlineImage src="/images/kb/ka0Vq0000000Qyb-00N5w00000Ri7BU-0EMVq000000K39p.jpg" /> **Settings menu** > <InlineImage src="/images/kb/ka0Vq0000000Qyb-00N5w00000Ri7BU-0EMVq000000K3Ht.jpg" /> **Edit Dashboard**.

   <Frame>
     <img alt="dashboard settings menu.jpg" src="https://mintcdn.com/domoinc-openapi-sync-dataflows/gDOtiCXH_3EtosfI/images/kb/ka0Vq0000000Qyb-00N5w00000Ri7BU-0EMVq000000K3GH.jpg?fit=max&auto=format&n=gDOtiCXH_3EtosfI&q=85&s=2e5f96c4aa01f083956bffad04747ad5" style={{width: 300, height: 212}} width="740" height="522" data-path="images/kb/ka0Vq0000000Qyb-00N5w00000Ri7BU-0EMVq000000K3GH.jpg" />
   </Frame>
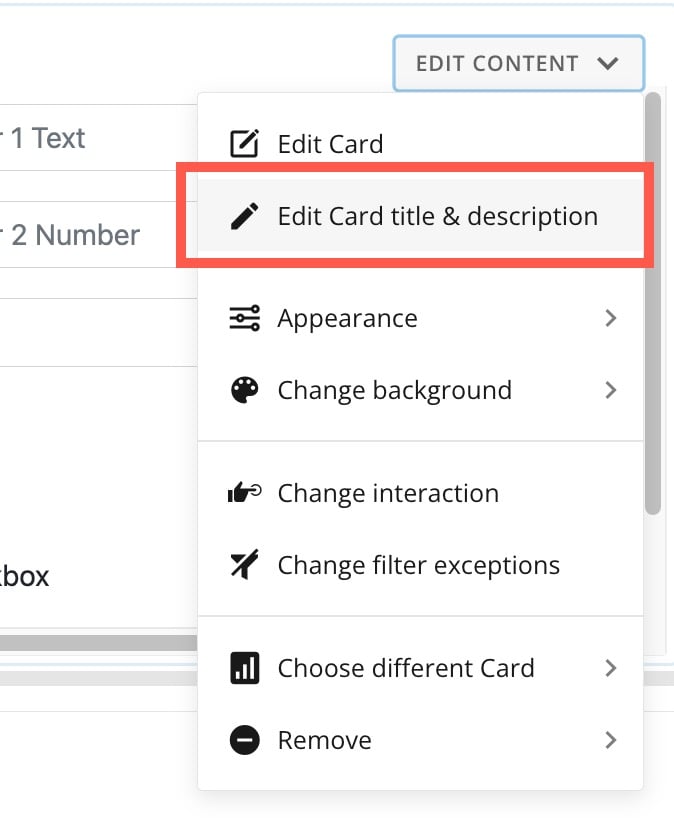
2. In edit mode, hover over the card where you want to add Smart Text and select
   **Edit Content** > **Edit card title & description**.
   <Frame>
     <img alt="edit content title.jpg" src="https://mintcdn.com/domoinc-openapi-sync-dataflows/gDOtiCXH_3EtosfI/images/kb/ka0Vq0000000Qyb-00N5w00000Ri7BU-0EMVq000000K3JV.jpg?fit=max&auto=format&n=gDOtiCXH_3EtosfI&q=85&s=d6f8b7daf51f9d894ad6c648a4e95f6c" style={{width: 301, height: 365}} width="674" height="818" data-path="images/kb/ka0Vq0000000Qyb-00N5w00000Ri7BU-0EMVq000000K3JV.jpg" />
   </Frame>

The **Edit Card Title and Description** modal displays. To continue, see [Configure Smart Text](#configure_smart_text).

### Configure Smart Text

1. In the modal, select
   **+ Smart Text** for either the **Card title** or **Description** fields to open the Smart Text menu.

   <Frame>
     <img alt="Screenshot 2024-02-07 at 3.18.29 PM.png" src="https://mintcdn.com/domoinc-openapi-sync-dataflows/gDOtiCXH_3EtosfI/images/kb/ka0Vq0000000Qyb-00N5w00000Ri7BU-0EMVq000000K33N.jpg?fit=max&auto=format&n=gDOtiCXH_3EtosfI&q=85&s=c6a6d6d9036b5a30e0cfbebfe64dff85" style={{width: 600, height: 464}} width="1378" height="1066" data-path="images/kb/ka0Vq0000000Qyb-00N5w00000Ri7BU-0EMVq000000K33N.jpg" />
   </Frame>

   <Note>
     **Note:**
     If the card does not have any variables, the
     **Variables**
     option is not available. Add a variable to the card to have the option for Variables Smart Text.
   </Note>

2. Select the type of Smart Text you want to add and follow the prompts to apply logic. The logic depends on the type of Smart Text. See the table below.

<Note>
  **Note:**
  Your Smart Text configuration can make your card title or description quite lengthy. We recommend being thoughtful about how you apply Smart Text for usability.
</Note>

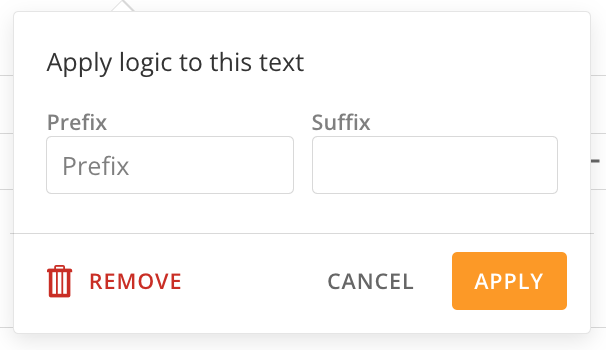
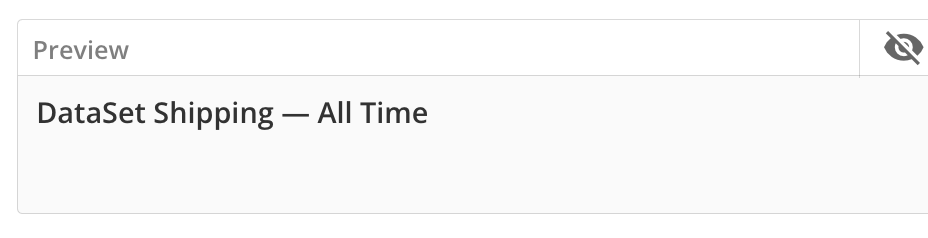
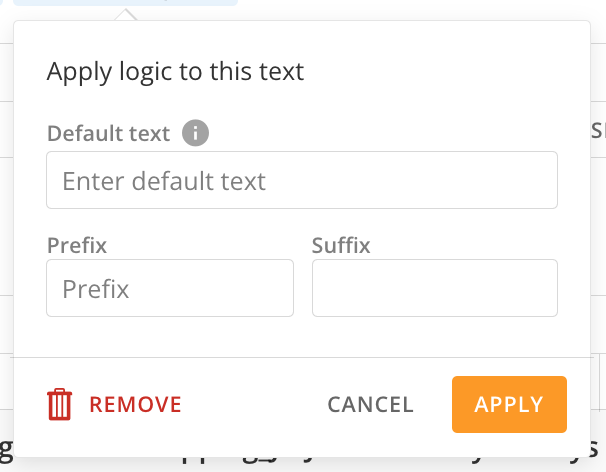
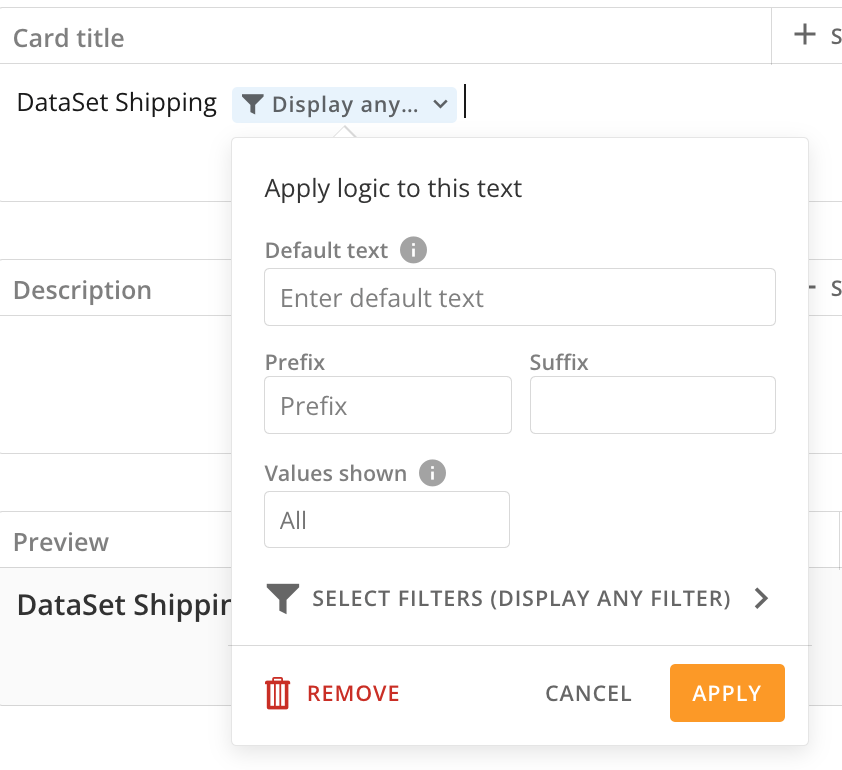
<table border="1" cellpadding="1" cellspacing="1"><thead><tr><th colspan="1" rowspan="1"><p> Smart Text Type </p></th><th colspan="1" rowspan="1"> Logic </th></tr></thead><tbody><tr><td colspan="1" rowspan="1"><p> Date range </p><ul><li> Date range </li><li> Graph by </li><li> Compare to </li><li> Date range field </li></ul><p /><p> Segments used </p><ul><li> Segment name </li><li> Segment description </li></ul><p> Learn more about <a href="/s/article/4403089503383" target="_self"> segments </a>. </p><p /><p> DataSet Info </p><ul><li> Name </li><li> Owner </li><li> Date last updated </li></ul><p /></td><td colspan="1" rowspan="1"><p><b> Prefix/Suffix — </b> A prefix or suffix is optional. It is a character or characters that come before or after the Smart Text in your card title or description. </p><p> For example, as a prefix for Date range, you may enter "— " (em dash and then a space). <br /><br /><img alt="Screenshot 2024-02-07 at 4.20.38 PM.png" src="https://mintcdn.com/domoinc-openapi-sync-dataflows/gDOtiCXH_3EtosfI/images/kb/ka0Vq0000000Qyb-00N5w00000Ri7BU-0EMVq000000K33O.jpg?fit=max&auto=format&n=gDOtiCXH_3EtosfI&q=85&s=da76f6f966a1df1b66c54205e29a692a" style={{width: 298, height: 172}} width="606" height="350" data-path="images/kb/ka0Vq0000000Qyb-00N5w00000Ri7BU-0EMVq000000K33O.jpg" /></p><p> Use the <b> Preview </b> field in the modal to see how your prefix/suffix will appear. </p><p><img alt="Screenshot 2024-02-07 at 4.22.07 PM.png" src="https://mintcdn.com/domoinc-openapi-sync-dataflows/gDOtiCXH_3EtosfI/images/kb/ka0Vq0000000Qyb-00N5w00000Ri7BU-0EMVq000000K3hh.jpg?fit=max&auto=format&n=gDOtiCXH_3EtosfI&q=85&s=147cf5d4a0d4a854ef68b7081dea569a" style={{width: 402, height: 103}} width="928" height="238" data-path="images/kb/ka0Vq0000000Qyb-00N5w00000Ri7BU-0EMVq000000K3hh.jpg" /></p></td></tr><tr><td colspan="1" rowspan="1"><p> Variables </p><p><em> (x) </em> — When the variable value updates, the Smart Text shows the current value. </p><p> Learn more about <a href="/s/article/7903767835031" target="_self"> variables </a>. </p></td><td colspan="1" rowspan="1"><p><b> Default text — </b> Text that displays in card search results and the Card Admin Settings. </p><p><img alt="Screenshot 2024-02-08 at 2.16.20 PM.png" src="https://mintcdn.com/domoinc-openapi-sync-dataflows/GZtBW7DeR7whzwbr/images/kb/ka0Vq0000000Qyb-00N5w00000Ri7BU-0EMVq000000KUl7.jpg?fit=max&auto=format&n=GZtBW7DeR7whzwbr&q=85&s=6159a15c53acfa8b9f1a7a8b9191eb62" style={{width: 299, height: 233}} width="606" height="472" data-path="images/kb/ka0Vq0000000Qyb-00N5w00000Ri7BU-0EMVq000000KUl7.jpg" /></p><p><b> Prefix/Suffix — </b> See above. </p></td></tr><tr><td colspan="1" rowspan="1"><p> Filters </p><p> When you select the <b> Filters </b> Smart Text, you can choose to display the filters applied or select the box labeled <b> Display any filter </b>. After making your choice, choose <b> Select </b> at the bottom of the filter list. </p><ul><li><b> Display any filter — </b> This is the default setting. Choosing to display any filter means that when your card is being viewed, any filters applied to the dashboard or card display in the card title or description (wherever you place your Smart Text). </li></ul><p /><ul><li><b> Filters applied — </b> Choosing a filter or filters means that when your card is being viewed and the filter or filters are applied, they are listed in the card title or description (wherever you place your Smart Text). The system default is to show the name of the filter if only one filter is selected or to display <b> Filters(<em> x </em> ) </b> where x is the number of filters you have selected. </li></ul><p /></td><td colspan="1" rowspan="1"><p><b> Default text — </b> This text displays when no filters are applied. Ex: `All` Default text also displays in card search results and in the Card Admin Settings. </p><p><b> Prefix/Suffix — </b> See above. </p><p><b> Values shown — </b> You can choose to display all the available values or a specific number. For example, if your Smart Text is configured to `Display any filter` and you choose to show only 1 value, only 1 filter will display in your card title or description, even if there are 5 filters applied to the card. </p><p> The default for Values shown is All. Values that exceed the threshold are shown in a tooltip. </p><p><img alt="Screenshot 2024-02-07 at 4.37.04 PM.png" src="https://mintcdn.com/domoinc-openapi-sync-dataflows/GZtBW7DeR7whzwbr/images/kb/ka0Vq0000000Qyb-00N5w00000Ri7BU-0EMVq000000K44H.jpg?fit=max&auto=format&n=GZtBW7DeR7whzwbr&q=85&s=a92457a41fd42b2bbbc5a1e01e02fac9" style={{width: 400, height: 366}} width="842" height="770" data-path="images/kb/ka0Vq0000000Qyb-00N5w00000Ri7BU-0EMVq000000K44H.jpg" /></p></td></tr></tbody></table>
3. Select
   **Apply** to keep the logic, **Cancel** to discard the logic, or **Remove** to delete that piece of Smart Text from the card title or description.
4. Select
   **Save** to keep your configured Smart Text and close the modal or **Cancel** to discard your changes.

### Video - Smart Text Overview

<iframe allowfullscreen="allowfullscreen" frameborder="0" height="315" src="https://www.youtube.com/embed/63NfWxnVVzg?si=NDqycrBHkhKOtvso" title="YouTube video player" width="560" />
