> ## Documentation Index
> Fetch the complete documentation index at: https://domoinc-openapi-sync-dataflows.mintlify.site/llms.txt
> Use this file to discover all available pages before exploring further.
# Drag-and-Drop Apps
export const InlineImage = ({src, alt = '', height = '1.6em'}) => {
return  ;
};
## Intro
Drag-and-Drop Apps bring the power of the Appstore to your Dashboard. You can now add Domo Bricks right from your dashboard editor, so you no longer have to go back and forth from the Appstore to your dashboard—you can stay in context with the rest of your dashboard content while adding cards from the Appstore.
For more information about Domo Bricks, see [Domo Bricks](/s/article/4423762260375).
## Adding a Drag-and-Drop App
You can add a Drag-and-Drop App by selecting the icon that appears on the right side of the dashboard view when the dashboard edit mode is open, then dragging it to the desired location on the dashboard. You can then select the desired Domo Brick. The Domo Brick you select will then be added to this location on the dashboard.
**To add a Drag-and-Drop App,**
1. On the dashboard where you want to add a Drag-and-Drop App, select
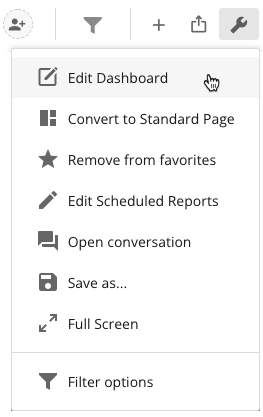
**Edit Dashboard** in the menu in the top right corner of the Page.
;
};
## Intro
Drag-and-Drop Apps bring the power of the Appstore to your Dashboard. You can now add Domo Bricks right from your dashboard editor, so you no longer have to go back and forth from the Appstore to your dashboard—you can stay in context with the rest of your dashboard content while adding cards from the Appstore.
For more information about Domo Bricks, see [Domo Bricks](/s/article/4423762260375).
## Adding a Drag-and-Drop App
You can add a Drag-and-Drop App by selecting the icon that appears on the right side of the dashboard view when the dashboard edit mode is open, then dragging it to the desired location on the dashboard. You can then select the desired Domo Brick. The Domo Brick you select will then be added to this location on the dashboard.
**To add a Drag-and-Drop App,**
1. On the dashboard where you want to add a Drag-and-Drop App, select
**Edit Dashboard** in the menu in the top right corner of the Page.
 2. Click and drag the
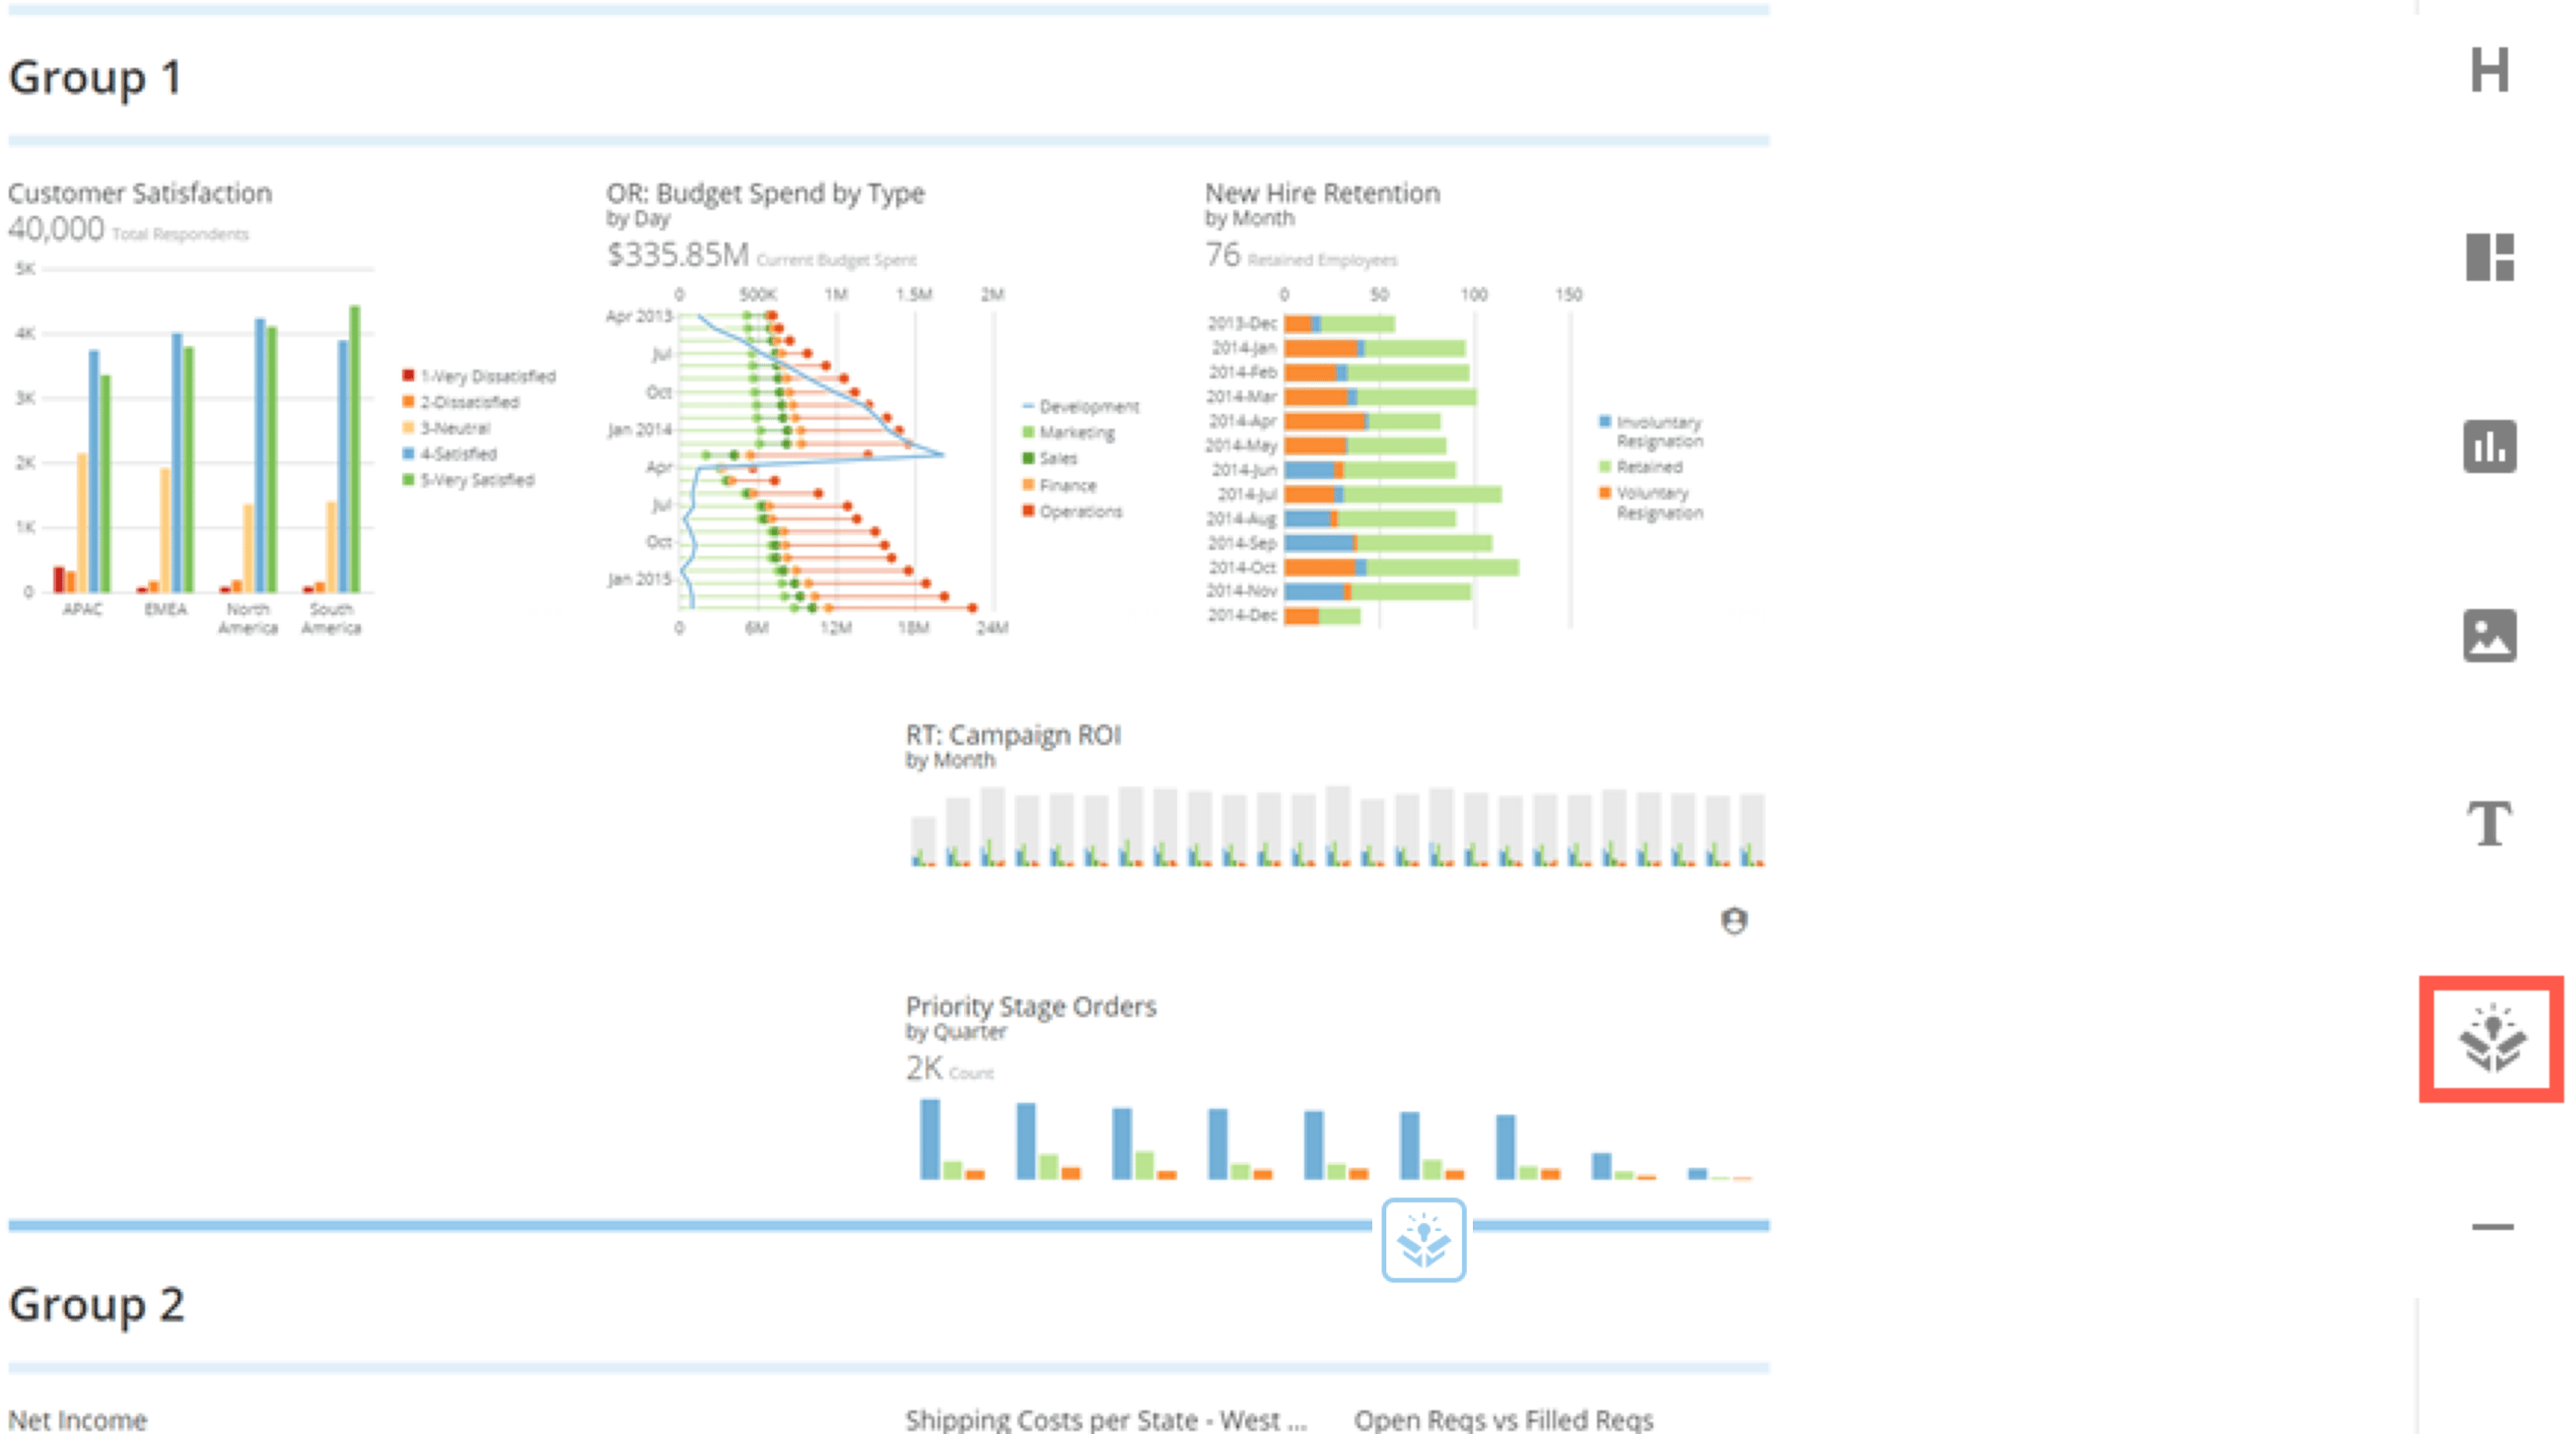
icon from the toolbar on the right side of the Page to the location on the Page where you want the new layout.
When you drag the App icon over a border, it highlights to indicate you can put the App there. In the example below, the user is dragging the icon over the line directly beneath the "Group 1" layout.
2. Click and drag the
icon from the toolbar on the right side of the Page to the location on the Page where you want the new layout.
When you drag the App icon over a border, it highlights to indicate you can put the App there. In the example below, the user is dragging the icon over the line directly beneath the "Group 1" layout.
 Once you drop the icon onto a border, the **Select an App** dialog opens.
3. Search for the Domo Brick you want to add to the Dashboard.
4. Select the App from the list and click
**Get**.
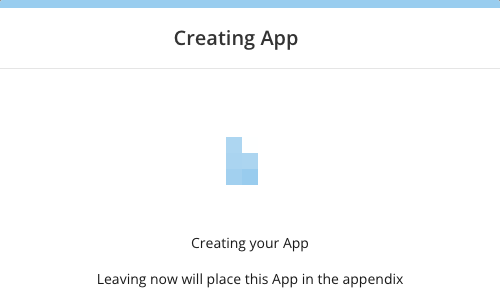
A pop-up window will display letting you know the app is being created.
Once you drop the icon onto a border, the **Select an App** dialog opens.
3. Search for the Domo Brick you want to add to the Dashboard.
4. Select the App from the list and click
**Get**.
A pop-up window will display letting you know the app is being created.
 5. The App is now inserted into your Dashboard.
6. Save your Dashboard by clicking the
**Save** button in the top right-hand corner.
7. You can now edit and customize the App by hovering over it and selecting
**Edit Card** from the drop-down menu.
For more information on editing Domo Bricks, see [Domo Bricks](/s/article/4423762260375).
5. The App is now inserted into your Dashboard.
6. Save your Dashboard by clicking the
**Save** button in the top right-hand corner.
7. You can now edit and customize the App by hovering over it and selecting
**Edit Card** from the drop-down menu.
For more information on editing Domo Bricks, see [Domo Bricks](/s/article/4423762260375).