> ## Documentation Index
> Fetch the complete documentation index at: https://domoinc-openapi-sync-dataflows.mintlify.site/llms.txt
> Use this file to discover all available pages before exploring further.
# Use Worksheets
## Intro
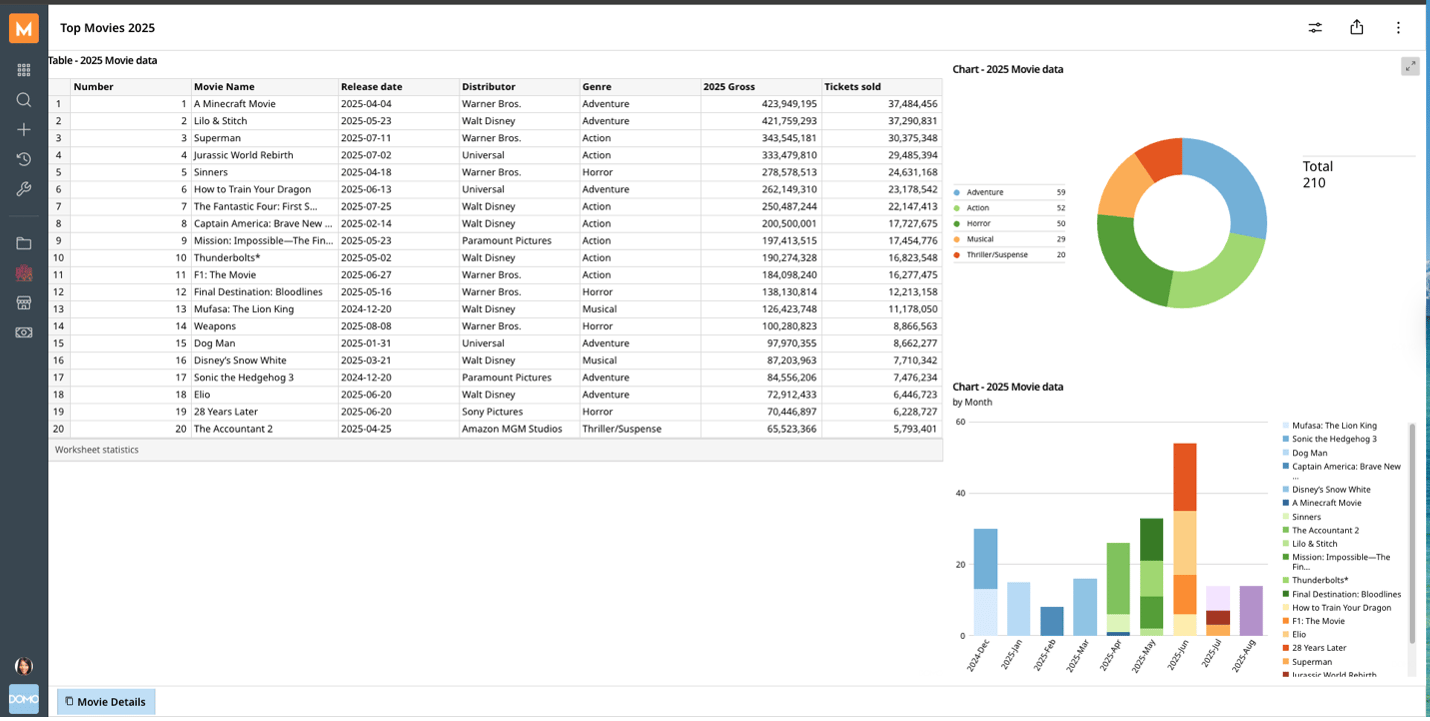
This article explains how to compose tables and visualizations with immediate feedback using Worksheets.
When your analysis is ready for a wider audience, or requires formal governance, you can save your Worksheet to an App Studio App. [Learn how to create an App Studio App](/s/article/000005295#create-an-app).
***
## Required Grants
To access Worksheets, the following grant must be enabled for your role:
* **Edit Worksheet**
Learn more about [grants](/s/article/360043438973).
## Navigate Your Worksheets Home Page
Follow these steps to navigate your Worksheets home page:
1. Go to your instance navigation bar.
2. Select **Features** (tab).
The Visualize menu opens.
3. Go to **Worksheets**.
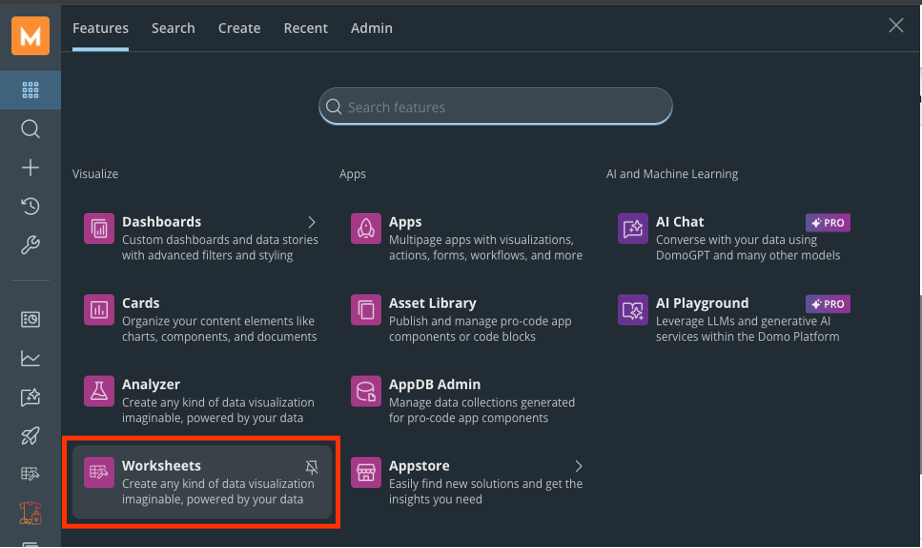 The Worksheets home page opens.
A list of your accessible or owned files appears, which you can search and filter using the following options:
* To search, enter the file name or a keyword
* The **All** section displays every file you've created or that has been shared with you
* **Owned by you** lists files that you have made yourself
* **Shared with you** includes all the files others have shared with you
* **Favorites** contains files you've marked as favorites.
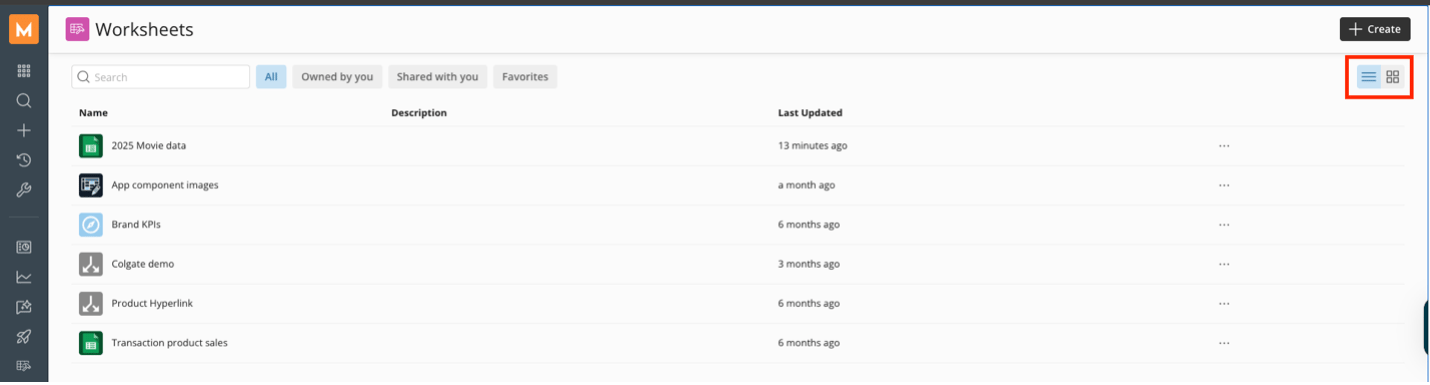
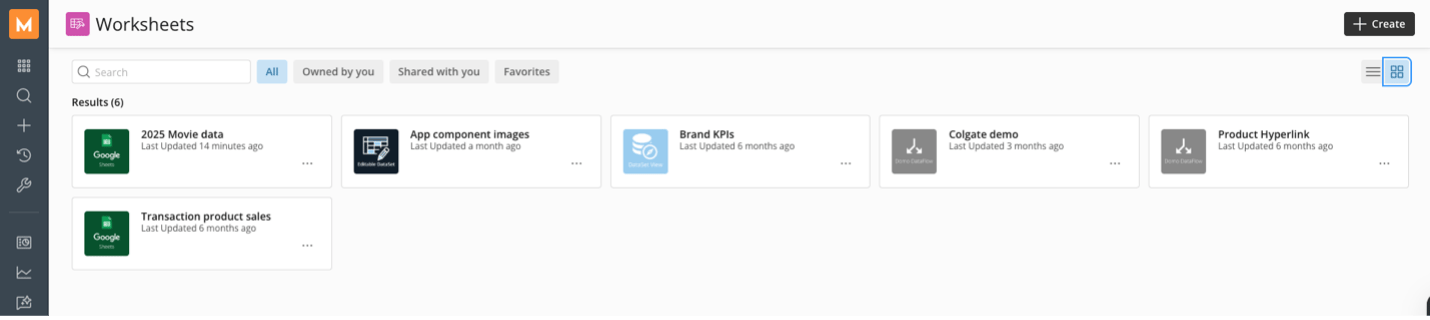
In the Worksheets home page, you can view your files in list or gallery view mode by selecting the list or gallery icon.
**List view mode**
The Worksheets home page opens.
A list of your accessible or owned files appears, which you can search and filter using the following options:
* To search, enter the file name or a keyword
* The **All** section displays every file you've created or that has been shared with you
* **Owned by you** lists files that you have made yourself
* **Shared with you** includes all the files others have shared with you
* **Favorites** contains files you've marked as favorites.
In the Worksheets home page, you can view your files in list or gallery view mode by selecting the list or gallery icon.
**List view mode**
 **Gallery view mode**
 You can access the following actions by selecting the more options icon on your Worksheet's home page:
* **View —** Permits access to a Worksheet in view mode.
* **Edit —** Grants access to a Worksheet's settings and the ability to make modifications as needed.
You can access the following actions by selecting the more options icon on your Worksheet's home page:
* **View —** Permits access to a Worksheet in view mode.
* **Edit —** Grants access to a Worksheet's settings and the ability to make modifications as needed.
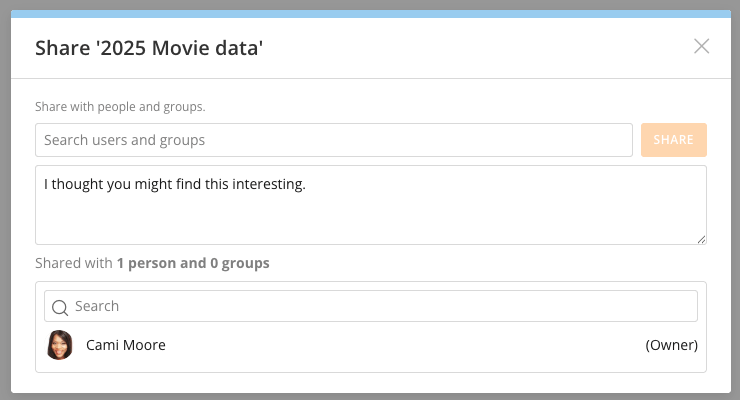
 * **Share —** Enables users to distribute content to other individuals and groups.
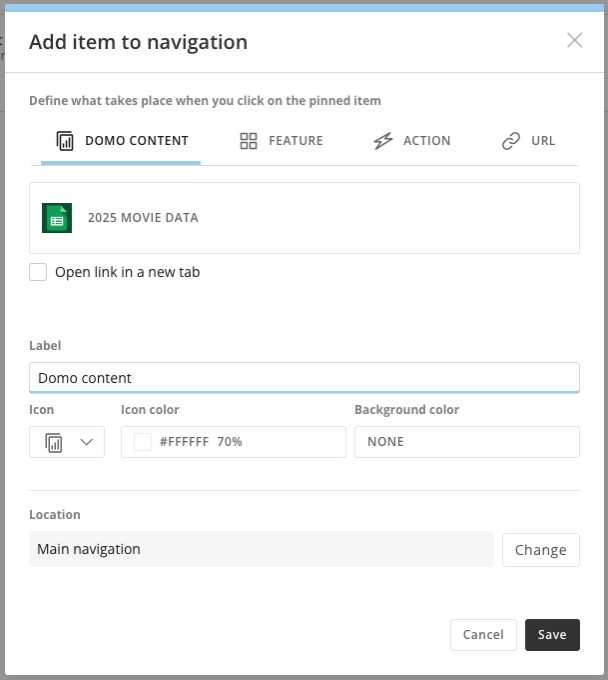
 * **Add to Navigation —** This feature lets you pin your Worksheet to the navigation bar in your instance.
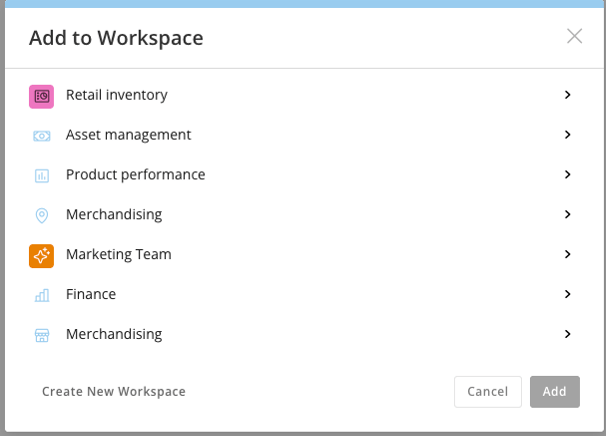
 * **Add to Workspace —** Lets you share the Worksheet and add it to any Workspace you own or can access.
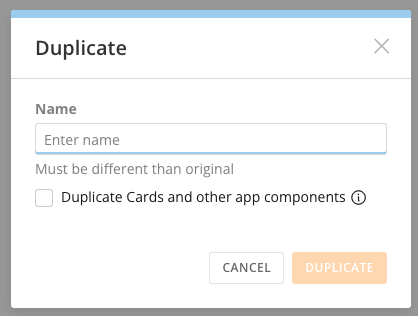
 * **Duplicate —** Makes a copy of your Worksheet.
 * **Favorite —** Marks your Worksheet as a favorite.
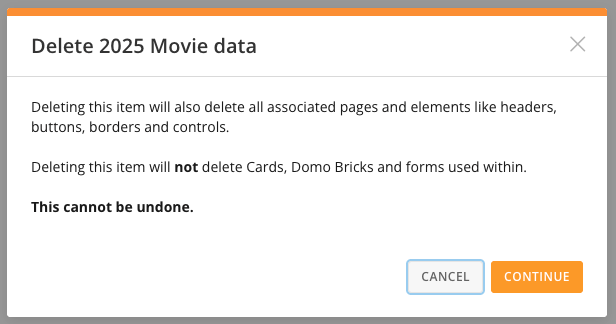
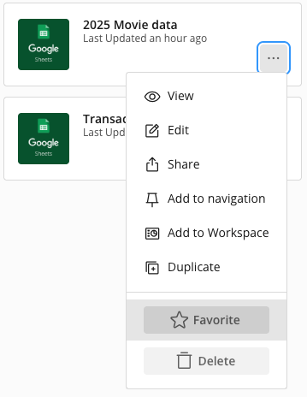 * **Delete —** Gives you the option to remove a Worksheet.
 ## Create a Worksheet
Follow these steps to create a Worksheet:
1. Select the **Create** option located on the Worksheets home page.
## Create a Worksheet
Follow these steps to create a Worksheet:
1. Select the **Create** option located on the Worksheets home page.
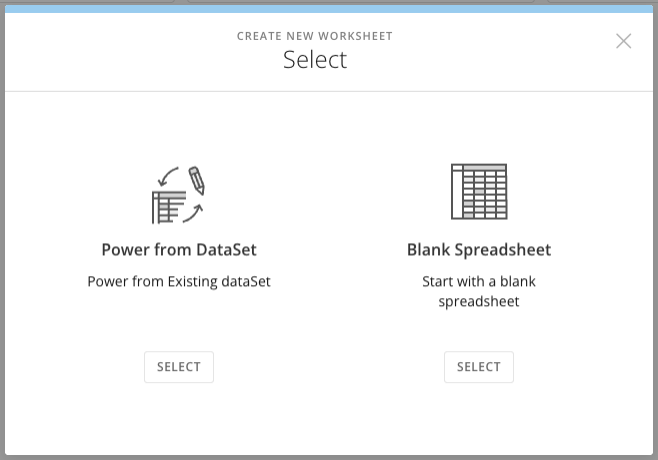
 2. To create a Worksheet from a DataSet, select **Power from DataSet**. To start fresh, select **Blank Spreadsheet**.
 ### Power from DataSet
After selecting Power from DataSet, edit mode opens.
Select a DataSet to bring into your Worksheet.
### Power from DataSet
After selecting Power from DataSet, edit mode opens.
Select a DataSet to bring into your Worksheet.
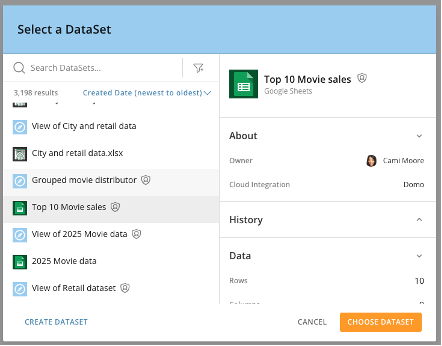 Find the DataSet you want, then select **Choose DataSet** to import it into a new spreadsheet.
Select **Cancel** to return to the Worksheets home page.
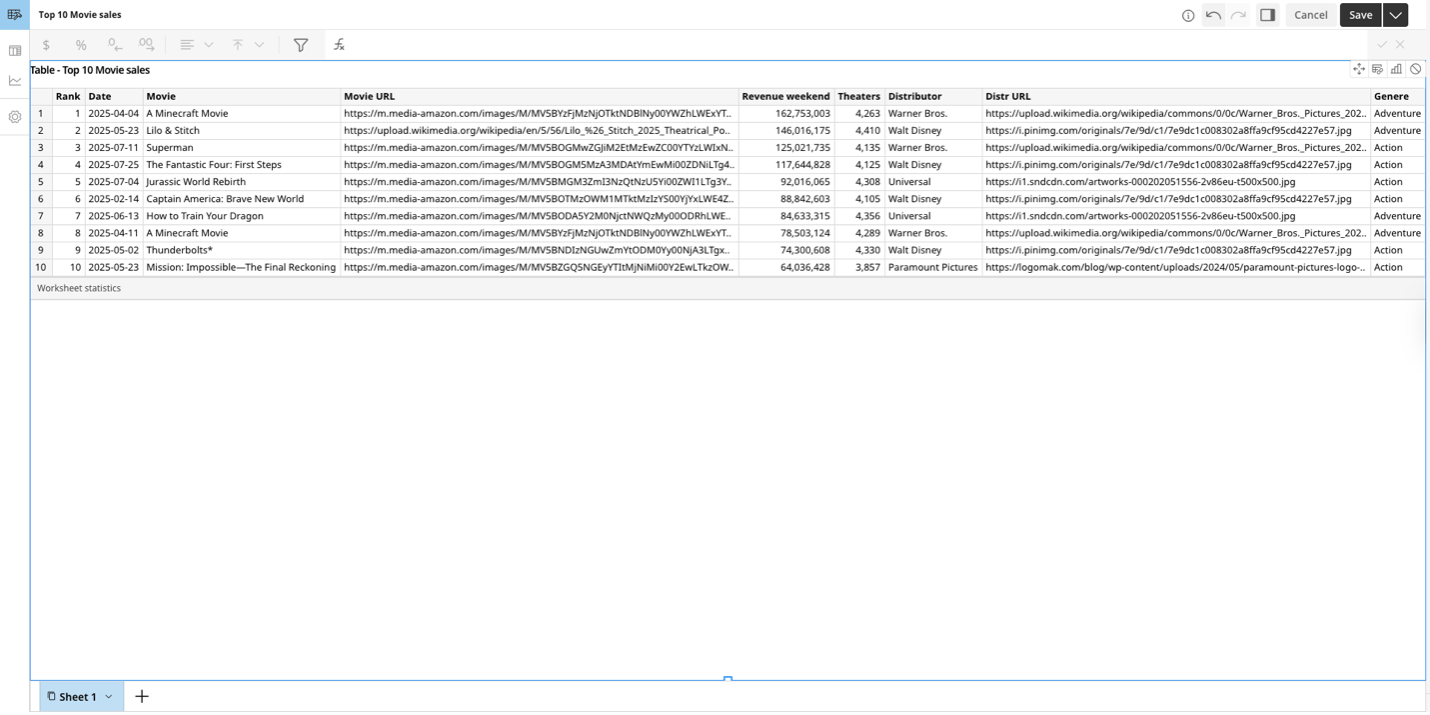
The imported data opens in edit mode.
Find the DataSet you want, then select **Choose DataSet** to import it into a new spreadsheet.
Select **Cancel** to return to the Worksheets home page.
The imported data opens in edit mode.
 ### Blank Spreadsheet
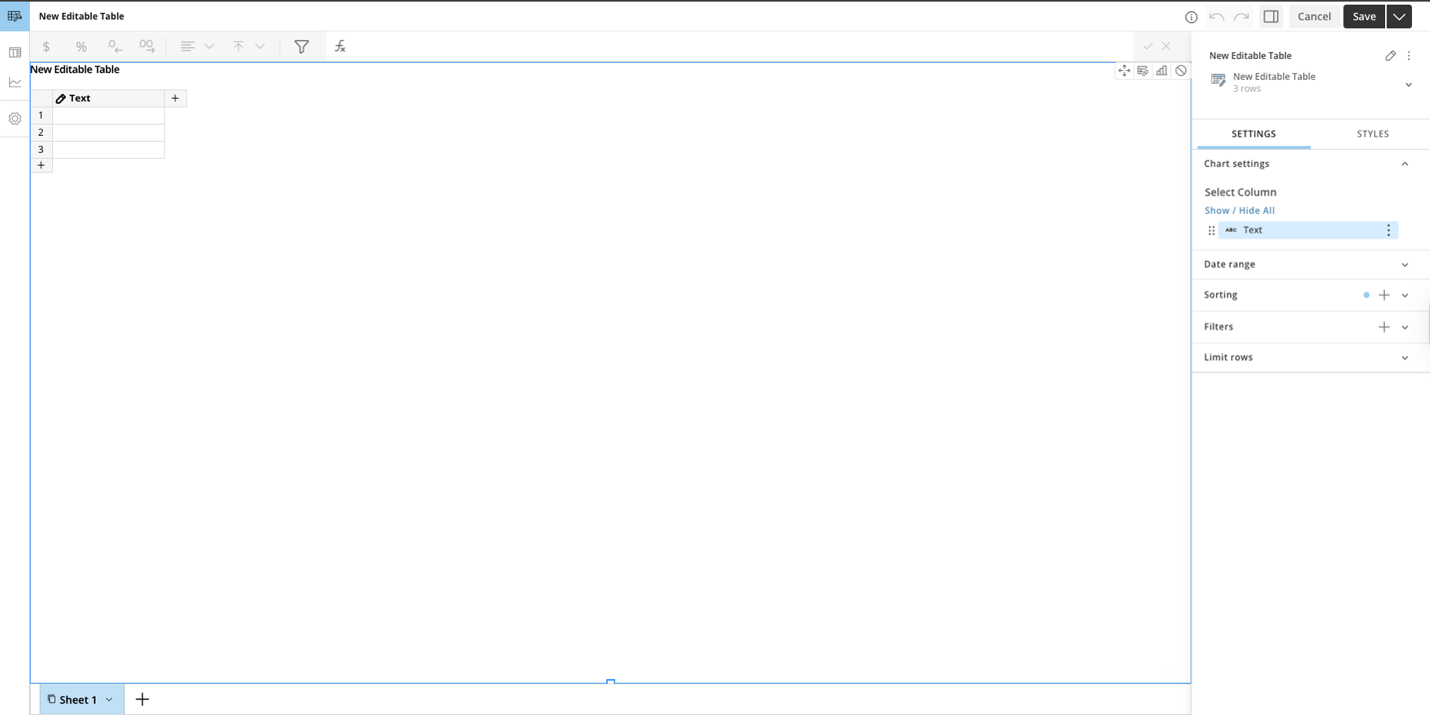
By selecting **Blank Spreadsheet**, a new editable Worksheet opens.
You can add your data for analysis.
### Blank Spreadsheet
By selecting **Blank Spreadsheet**, a new editable Worksheet opens.
You can add your data for analysis.
 ## Edit Your Worksheet in Edit Mode
When you're in edit mode, you can access the following features:
* Rename your Worksheet
* Add a table to the canvas
* Add a chart/graph to the canvas
* Edit Worksheet Settings
* Add a new Sheet
* Undo/Redo changes
* Save and Export
## Rename Your Worksheet
Keep your Worksheets organized by giving them clear, descriptive names.
To rename a Worksheet:
1. Select the edit icon in the title section of your Worksheet.
A text box is enabled.
## Edit Your Worksheet in Edit Mode
When you're in edit mode, you can access the following features:
* Rename your Worksheet
* Add a table to the canvas
* Add a chart/graph to the canvas
* Edit Worksheet Settings
* Add a new Sheet
* Undo/Redo changes
* Save and Export
## Rename Your Worksheet
Keep your Worksheets organized by giving them clear, descriptive names.
To rename a Worksheet:
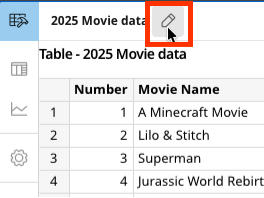
1. Select the edit icon in the title section of your Worksheet.
A text box is enabled.
 2. Select directly on the text of your Worksheet name to enter edit mode.
3. Create your new name.
4. Press **Enter** to save.
## Add a Table to the Canvas
Follow these steps to add a table to the canvas:
1. Go to the left navigation menu.
2. Select the **Tables** icon.
2. Select directly on the text of your Worksheet name to enter edit mode.
3. Create your new name.
4. Press **Enter** to save.
## Add a Table to the Canvas
Follow these steps to add a table to the canvas:
1. Go to the left navigation menu.
2. Select the **Tables** icon.
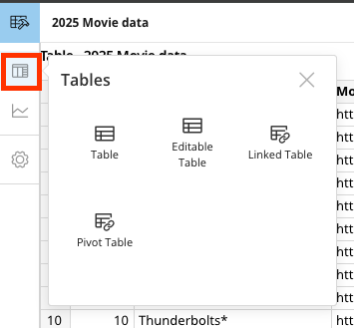
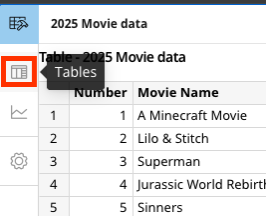 A pop-up menu opens.
3. Select one of the available table types.
A pop-up menu opens.
3. Select one of the available table types.
 4. Drag and drop your new table onto the canvas.
5. (Optional) You can add multiple tables on the canvas and arrange them as desired.
4. Drag and drop your new table onto the canvas.
5. (Optional) You can add multiple tables on the canvas and arrange them as desired.
 In the above example, the user has placed three distinct tables onto the canvas. Tables and charts may be organized as needed by selecting each item and moving it to the desired location, or by adjusting its dimensions using the square handles to modify both height and width.
## Configure and Format Your Table Data
Use the right panel, the toolbar, and filters to configure your table data.
You can format your table data using column formatting, as well as charts and graphs.
### Configure Your Table Data Using the Right Panel
The right panel is your command center for any selected object on the canvas.
1. Select a table or chart to activate the panel.
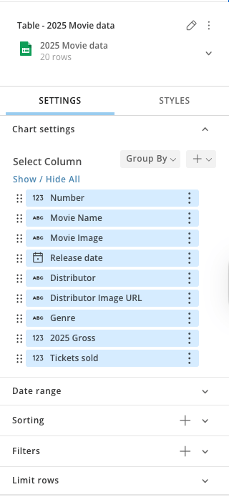
2. Use the **Settings** tab to change column order, hide/display columns, change column names, set column types, configure group by aggregation, copy columns, set vertical alignment, set date ranges, filters, sort tables, and limit rows.
In the above example, the user has placed three distinct tables onto the canvas. Tables and charts may be organized as needed by selecting each item and moving it to the desired location, or by adjusting its dimensions using the square handles to modify both height and width.
## Configure and Format Your Table Data
Use the right panel, the toolbar, and filters to configure your table data.
You can format your table data using column formatting, as well as charts and graphs.
### Configure Your Table Data Using the Right Panel
The right panel is your command center for any selected object on the canvas.
1. Select a table or chart to activate the panel.
2. Use the **Settings** tab to change column order, hide/display columns, change column names, set column types, configure group by aggregation, copy columns, set vertical alignment, set date ranges, filters, sort tables, and limit rows.
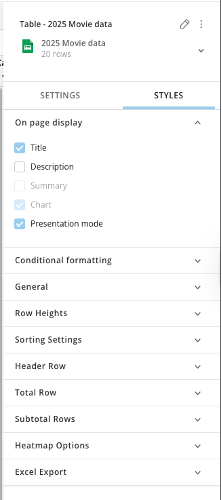
 3. Use the **Styles** tab to change/set colors, font types, font family, conditional formatting, general table formatting, sorting settings, row heights, add header, total and sub-total rows, and Excel export settings.
 ### Format Your Columns
Ensure your data is readable by applying specific formatting to table columns.
1. Start by selecting a table on the canvas. Then use the [right panel](#format-your-columns-in-the-right-panel) or [table header toolbar](#format-your-columns-in-the-table-header-toolbar) to edit and format your columns.
#### Format Your Columns in the Right Panel
2. In the right panel, select the specific field under the **Select Columns** list.
3. Select the more options menu.
4. Select desired formatting.
5. Set the Data Label and the Data Type in the **Display As** option (Number, Currency, Percentage) and decimal places.
#### Format Your Columns in the Table Header Toolbar
Use the table header toolbar to quickly edit and format columns.
### Format Your Columns
Ensure your data is readable by applying specific formatting to table columns.
1. Start by selecting a table on the canvas. Then use the [right panel](#format-your-columns-in-the-right-panel) or [table header toolbar](#format-your-columns-in-the-table-header-toolbar) to edit and format your columns.
#### Format Your Columns in the Right Panel
2. In the right panel, select the specific field under the **Select Columns** list.
3. Select the more options menu.
4. Select desired formatting.
5. Set the Data Label and the Data Type in the **Display As** option (Number, Currency, Percentage) and decimal places.
#### Format Your Columns in the Table Header Toolbar
Use the table header toolbar to quickly edit and format columns.
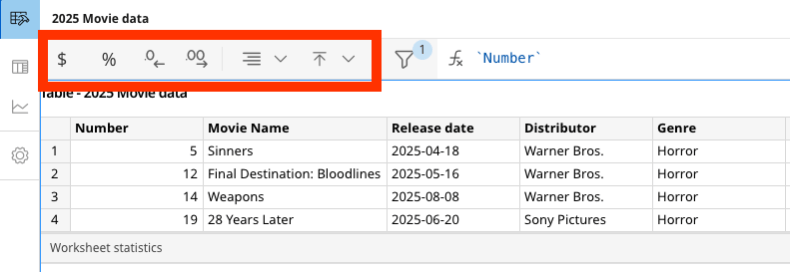 * Use the
  option to format values as currency.
* Use the
option to format values as currency.
* Use the  option to format column values as percentages.
* Use the
option to format column values as percentages.
* Use the  options to adjust the number of decimal points to increase or decrease precision.
* Use
options to adjust the number of decimal points to increase or decrease precision.
* Use  to align values to the left, center, or right.
* Use the
to align values to the left, center, or right.
* Use the  to align values to the top, center, or bottom.
### Filter Your Data
Narrow your focus by applying filters to your data.
to align values to the top, center, or bottom.
### Filter Your Data
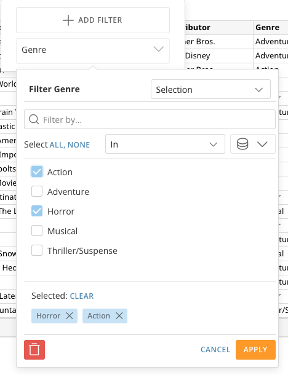
Narrow your focus by applying filters to your data.
 1. Select the **Filter**
  icon.
2. Select **+ Add Filter** to add a new filter.
3. Search and select the column by which you want to filter.
4. Select the values you want to include in your filter.
5. Select **Apply** to save the filter.
Or select **Cancel** to discard your changes.
Select the **Delete** icon to remove the filter.
icon.
2. Select **+ Add Filter** to add a new filter.
3. Search and select the column by which you want to filter.
4. Select the values you want to include in your filter.
5. Select **Apply** to save the filter.
Or select **Cancel** to discard your changes.
Select the **Delete** icon to remove the filter.
 ### Use Functions and Beast Mode
Apply logic to your data without leaving the canvas.
### Use Functions and Beast Mode
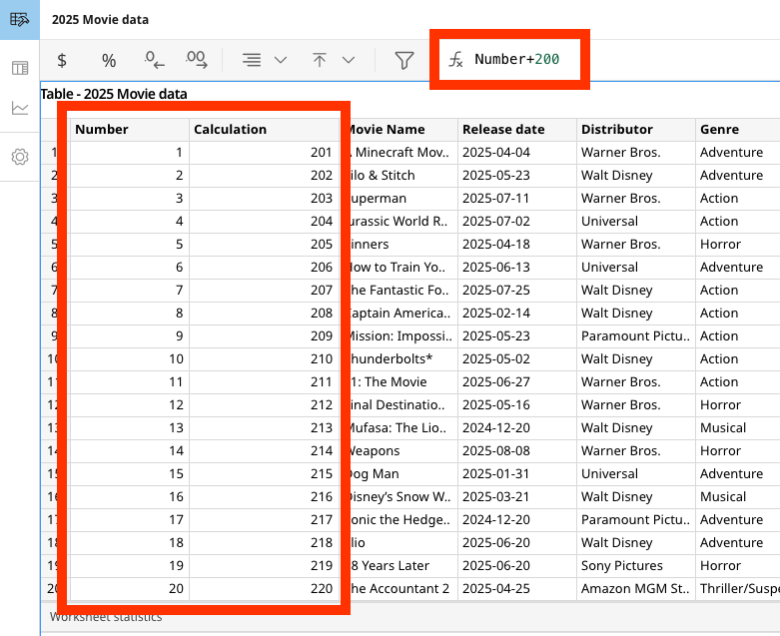
Apply logic to your data without leaving the canvas.
 1. In the toolbar, select the **Function**
  icon.
A text box is enabled.
2. Write your logic using standard **Beast Mode** (SQL-based) syntax.
Use familiar functions for quick aggregations, such as `SUM`, `AVG`, or `COUNT`.
3. Press **Enter** to validate your function.
Use the
icon.
A text box is enabled.
2. Write your logic using standard **Beast Mode** (SQL-based) syntax.
Use familiar functions for quick aggregations, such as `SUM`, `AVG`, or `COUNT`.
3. Press **Enter** to validate your function.
Use the  buttons to save or cancel your function.
A new column is added to the table containing the function's results.
buttons to save or cancel your function.
A new column is added to the table containing the function's results.
 ### Add Charts and Graphs
Worksheets allow you to add charts and graphs to your canvas.
To add a chart or graph, follow these steps:
1. Select the **Charts** icon from the left menu.
### Add Charts and Graphs
Worksheets allow you to add charts and graphs to your canvas.
To add a chart or graph, follow these steps:
1. Select the **Charts** icon from the left menu.
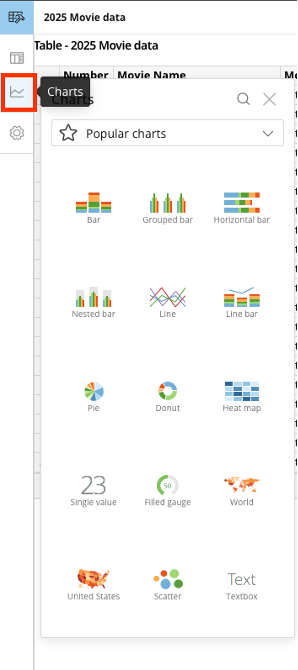 A pop-up menu appears.
2. Search for your desired chart or graph using the search button.
You can also select the drop-down menu to look at the list of chart types available.
A pop-up menu appears.
2. Search for your desired chart or graph using the search button.
You can also select the drop-down menu to look at the list of chart types available.
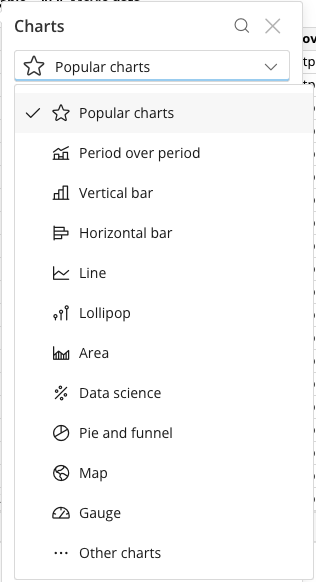 3. Select your desired chart.
4. Drag your desired chart onto the canvas.
3. Select your desired chart.
4. Drag your desired chart onto the canvas.
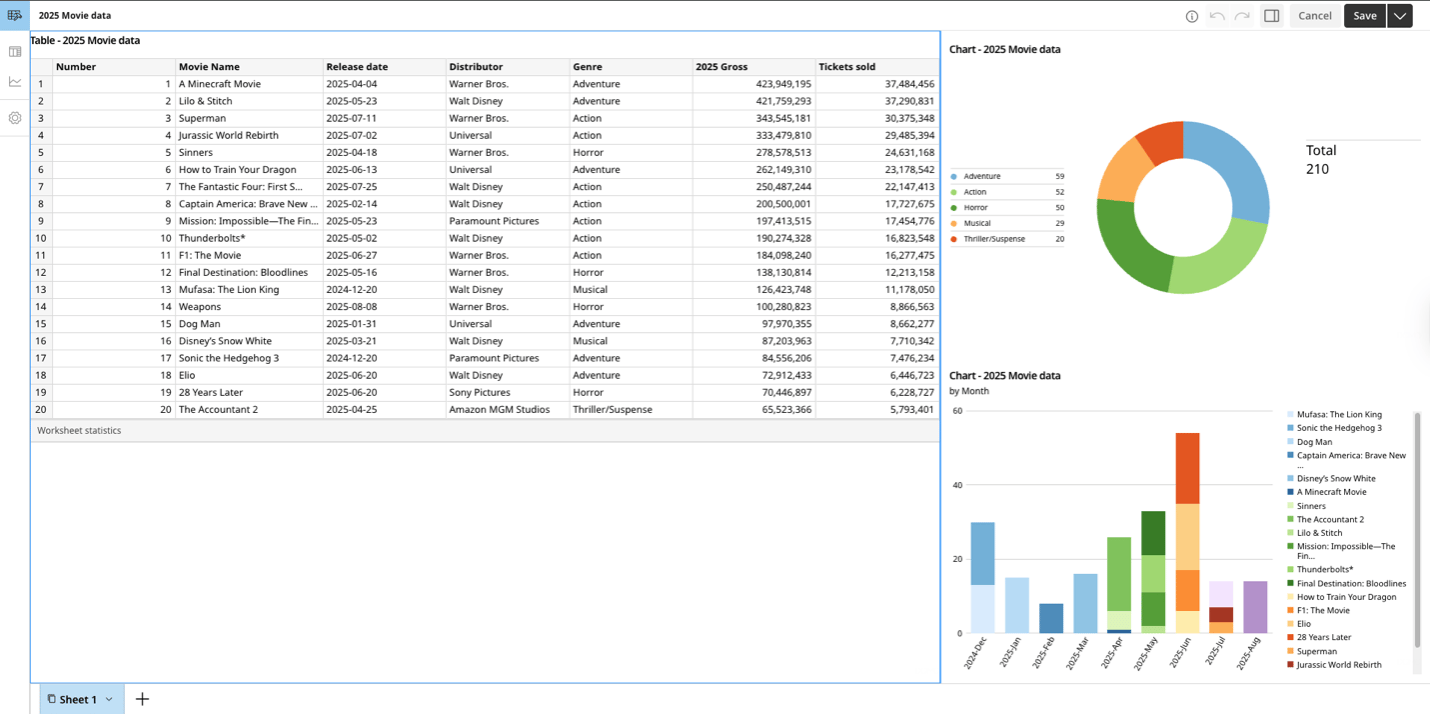 5. Select the chart to configure your chart settings and styles.
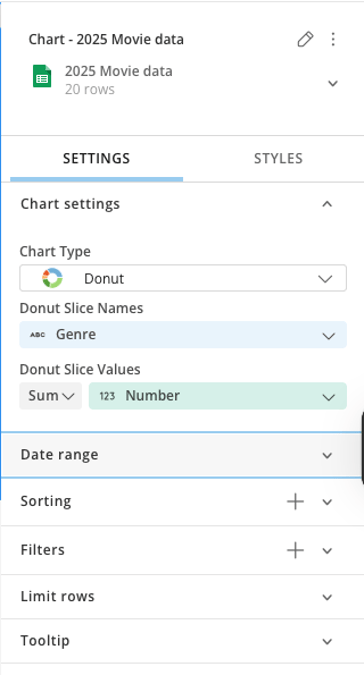
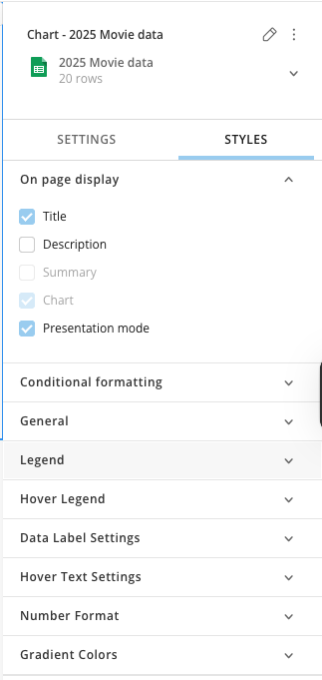
A right panel appears. You can edit, configure, sort, filter, and add styles to your charts and graphs.
5. Select the chart to configure your chart settings and styles.
A right panel appears. You can edit, configure, sort, filter, and add styles to your charts and graphs.
 ## Edit Worksheet Settings
Configure general worksheet settings using the Settings option in the left toolbar.
1. Select the **Settings** icon in the left toolbar.
## Edit Worksheet Settings
Configure general worksheet settings using the Settings option in the left toolbar.
1. Select the **Settings** icon in the left toolbar.
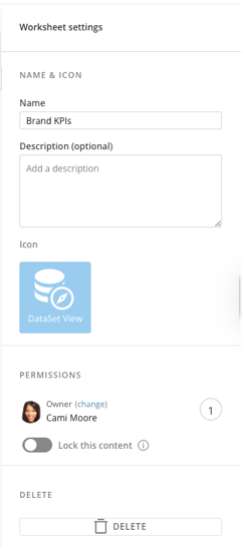
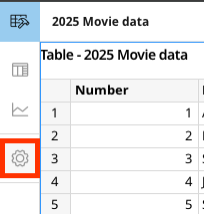 The Worksheet Settings panel opens in the right pane.
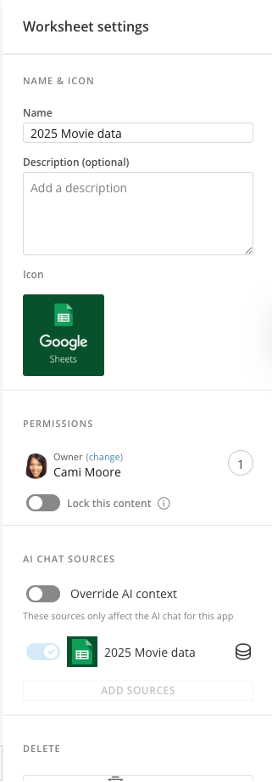 2. Select the setting you would like to configure.
Here are the settings you can configure:
* **Name —** Change or edit the name of your Worksheet
* **Description —** Add or edit your Worksheet's description
* **Icon —** Change your Worksheet's icon
* **Permissions**
* **Owner —** Add or remove owners
* **Lock this content —** Toggle to allow admins and owners to make changes to your Worksheet
* **AI Chat Sources —** Select the specific data sources the AI should use to inform its responses within the app
* **Delete —** Allows you to delete the Worksheet
Deleting a Worksheet also removes all associated pages and elements, such as headers, buttons, borders, and controls. However, it does not delete Cards, Domo Bricks, or Forms used within the Worksheet. **This action cannot be undone**.
## Add a New Sheet
Worksheets support multi-tabbed analysis, similar to traditional spreadsheet workbooks.
Follow these steps to add a new sheet to your Worksheet:
1. Look for the **+ (Plus)** icon at the bottom of the canvas.
2. Select the setting you would like to configure.
Here are the settings you can configure:
* **Name —** Change or edit the name of your Worksheet
* **Description —** Add or edit your Worksheet's description
* **Icon —** Change your Worksheet's icon
* **Permissions**
* **Owner —** Add or remove owners
* **Lock this content —** Toggle to allow admins and owners to make changes to your Worksheet
* **AI Chat Sources —** Select the specific data sources the AI should use to inform its responses within the app
* **Delete —** Allows you to delete the Worksheet
Deleting a Worksheet also removes all associated pages and elements, such as headers, buttons, borders, and controls. However, it does not delete Cards, Domo Bricks, or Forms used within the Worksheet. **This action cannot be undone**.
## Add a New Sheet
Worksheets support multi-tabbed analysis, similar to traditional spreadsheet workbooks.
Follow these steps to add a new sheet to your Worksheet:
1. Look for the **+ (Plus)** icon at the bottom of the canvas.
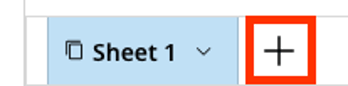 A new pop-up appears.
2. Type the name of your new sheet.
A new pop-up appears.
2. Type the name of your new sheet.
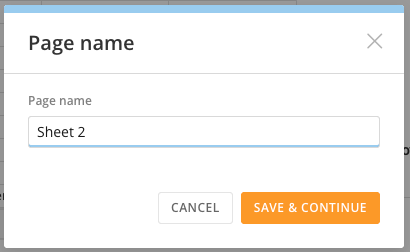 3. Select **Save & Continue** to add the new sheet to your canvas.
You can select **Cancel** to discard changes.
4. Select a DataSet for the new sheet—or create a new one.
Select **Choose DataSet** to import the data into the new sheet.
3. Select **Save & Continue** to add the new sheet to your canvas.
You can select **Cancel** to discard changes.
4. Select a DataSet for the new sheet—or create a new one.
Select **Choose DataSet** to import the data into the new sheet.
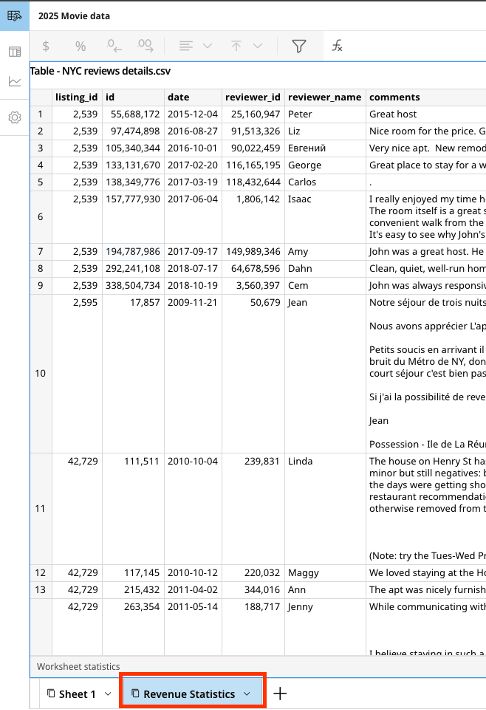
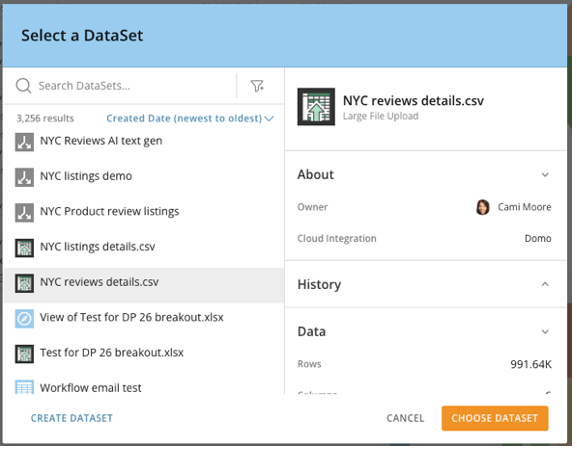 A new table is added to the canvas, and a new tab appears at the bottom.
 ## Navigate the Sheet Menu
You can select the arrow next to your sheet's name to open the sheet menu.
## Navigate the Sheet Menu
You can select the arrow next to your sheet's name to open the sheet menu.
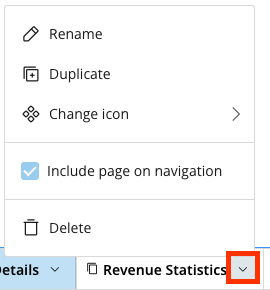 In the sheet menu, you can:
* **Rename** your sheet
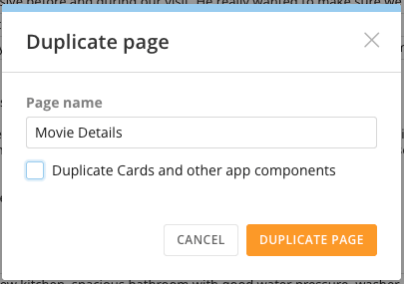
* **Duplicate** your sheet
* Add a name to your duplicate sheet
* Check the **Duplicate Cards and other app components** option to copy content to your new sheet
* Select **Duplicate Page** to save your changes.
You can select **Cancel** to discard them.
In the sheet menu, you can:
* **Rename** your sheet
* **Duplicate** your sheet
* Add a name to your duplicate sheet
* Check the **Duplicate Cards and other app components** option to copy content to your new sheet
* Select **Duplicate Page** to save your changes.
You can select **Cancel** to discard them.
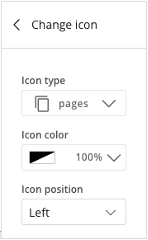
 * Select **Change icon** to modify the icon's color and position.
 * **Delete** a sheet from the canvas.
**This action cannot be undone**.
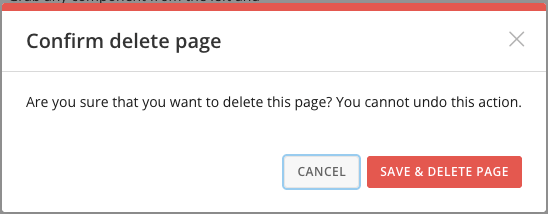
* **Delete** a sheet from the canvas.
**This action cannot be undone**.
 ## Undo and Redo Changes
You can use the **Left Arrow (Undo)** and **Right Arrow (Redo)** icons in the top header to undo or redo any changes made to the Worksheet.
## Undo and Redo Changes
You can use the **Left Arrow (Undo)** and **Right Arrow (Redo)** icons in the top header to undo or redo any changes made to the Worksheet.
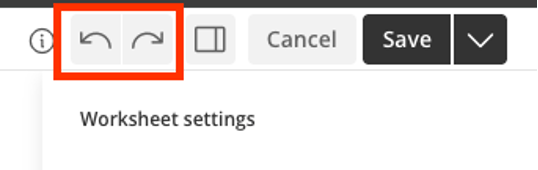 The undo and redo features only work on the page you are currently on. Any changes you make to other pages take effect after you save your progress.
## Expand and Collapse the Right Panel
While working in edit mode, you can use the
The undo and redo features only work on the page you are currently on. Any changes you make to other pages take effect after you save your progress.
## Expand and Collapse the Right Panel
While working in edit mode, you can use the  option to expand or collapse the settings and style configuration panel.
 By default, it displays the Worksheet's settings panel.
Selecting an element on the canvas displays its settings in the right panel.
## Save and Share a Worksheet
Follow these steps to save and share your Worksheet:
1. Save your Worksheet by selecting the **Save** button.
The save menu opens.
By default, it displays the Worksheet's settings panel.
Selecting an element on the canvas displays its settings in the right panel.
## Save and Share a Worksheet
Follow these steps to save and share your Worksheet:
1. Save your Worksheet by selecting the **Save** button.
The save menu opens.
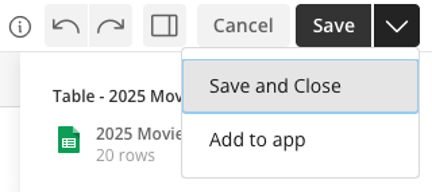 2. Select **Save and Close** to save your progress and exit edit mode.
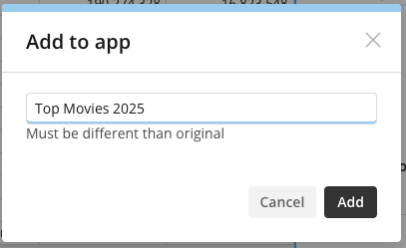
Select **Add to app** to move your Worksheet into an App Studio app for advanced layout and distribution.
2. Select **Save and Close** to save your progress and exit edit mode.
Select **Add to app** to move your Worksheet into an App Studio app for advanced layout and distribution.
 Type a name for your app and select **Add**.
Select **Cancel** to discard your changes.
Type a name for your app and select **Add**.
Select **Cancel** to discard your changes.
 Your new app is created.
You are redirected to the new App Studio App.
Your new app is created.
You are redirected to the new App Studio App.